Publicidad
Enlaces rápidos
ENGLISH
BEFORE USING THE DEVICE, PLEASE READ THE FOLLOWING INSTRUCTIONS
COMPLETELY AND CAREFULLY. CORRECT APPLICATION IS VITAL TO THE PROPER
FUNCTIONING OF THE DEVICE.
INTENDED USER PROFILE: The intended user should be a licensed medical
professional, the patient or the patient's caregiver. The user should be able
to read, understand and be physically capable of performing the directions,
warnings and cautions in the information for use.
INTENDED USE/INDICATIONS: Help reduce and minimize further injury to
an already existing shoulder injury.
WARNINGS AND PRECAUTIONS:
• If you have skin disorders/injuries in the relevant part of the body, the product
should be fitted and worn only after consultation with a medical professional.
• If pain, swelling, changes in sensation or other unusual reactions occur while
using this product, you should contact your doctor immediately.
• Do not use over open wounds.
• Do not use this device if it is damaged and/or the packaging has been opened.
NOTE: Contact manufacturer and competent authority in case of a serious
incident arising due to usage of this device.
BRACE APPLICATION
A) Apply the brace over the injured shoulder. Grasp one end of brace at bottom
and pull over hook and loop closure, making sure to close bottom tighter
than top. (Figure 1) The fit should be snug but should not restrict breathing.
B) Secure the hook and loop strap through the "D" ring to lock in side closure.
Attach the hook and loop closures at the biceps tying to get as tight a fit as
possible, this will minimize any rotation within the biceps cuff. (Figure 2)
ABDUCTION CONTROL
C) To achieve simple abduction control as in figure 3, after applying the brace,
attach the glenohumeral straps to the biceps cuff with the stitching (see
figure 6) attaching the front and back straps positioned as in figure 4a.
This positioning is very important.
IM PORTANT
The positioning of the stitching is critical to maximizing the allowable
forward flexion while at the same time minimizing external rotation. In
figure 4 as you move the positioning from A to C and shorten the front strap
you will minimize external rotation.
D) Simply tighten or loosen the straps through the "D" rings and hook and loop
to achieve the desired range of motion and abduction control. (Figure 5)
ADVANCE D FITTING
E) The shoulder brace is very effective in maximizing abduction in forward
flexion. (Figure 7) This is ideal for people who must reach over their head
but still require prevention of external rotation and backward extension in
abduction.
F) Loosen the back strap, if necessary take the back strap completely out of the
"D" ring. Position stitching in front of biceps as in figure 4. It is now important
to tighten the front strap to control backward extension. (Figure 8)
G) A/C Separations
The shoulder brace is also effective in supporting acromioclavicular
separations. If the joint is still tender, a donut or protective pad can be placed
under the brace. Tighten the A/C strap by adjusting the strap through the
front and back "D" rings. The long or medium auxiliary straps can also be
threaded through the loops over the A/C and attached to the hook and loop
at the front and back of the brace. (Figure 9)
USE AN D CARE
• Machine wash, cold water. AIR DRY.
WARRANTY: DJO, LLC will repair or replace all or part of the unit and its
accessories for material or workmanship defects for a period of six months from
the date of sale. To the extent the terms of this warranty are inconsistent with
local regulations, the provisions of such local regulations will apply.
FOR SINGLE PATIENT USE ONLY.
NOTICE: WHILE EVERY EFFORT HAS BEEN MADE IN STATE-OF-THE-ART TECHNIQUES TO OBTAIN THE
MAXIMUM COMPATIBILITY OF FUNCTION, STRENGTH, DURABILITY AND COMFORT, THERE IS NO
GUARANTEE THAT INJURY WILL BE PREVENTED THROUGH THE USE OF THIS PRODUCT.
ESPAÑOL
ANTES DE UTILIZAR ESTE DISPOSITIVO, LEA POR FAVOR ESTAS INSTRUCCIONES
COMPLETA Y DETENIDAMENTE. EL USO CORRECTO ES FUNDAMENTAL PARA EL
FUNCIONAMIENTO APROPIADO DE ESTE DISPOSITIVO.
PERFIL DEL USUARIO PREVISTO: El usuario previsto debe ser un profesional
médico autorizado, el paciente o el cuidador del paciente. El usuario debe poder
leer, comprender y ser físicamente capaz de seguir todas las instrucciones,
advertencias y precauciones proporcionadas en la información de uso.
USO PREVISTO/INDICACIONES: Ayuda a reducir y minimizar del riesgo de
agravamiento de las lesiones de hombro.
ADVERTENCIAS Y PRECAUCIONES:
• Si tiene trastornos o lesiones cutáneas en la parte relevante del cuerpo, el
producto debe colocarse y usarse solo después de consultar con un profesional
médico.
• Si se producen dolor, hinchazón, cambios en la sensación u otras reacciones
inusuales durante el uso de este producto, debe ponerse en contacto con su
médico inmediatamente.
• No debe aplicarse sobre heridas abiertas.
• No utilice el dispositivo si está dañado y/o si el empaque está abierto.
NOTA: Comuníquese con el fabricante y la autoridad competente en caso de un
incidente grave que surja debido al uso de este dispositivo.
APLICACIÓN DE LA ORTESIS
A) Coloque la ortesis sobre el hombro lesionado. Sujete un extremo de la ortesis
por la parte inferior y tire del cierre de velcro, asegurándose de cerrar la parte
inferior de manera más ajustada que la superior. (Figura 1) El ajuste debe ser
ceñido, pero no debe impedir la respiración.
B) Fije la correa de velcro a través del anillo en forma de "D" para bloquear el
cierre lateral. Fije los cierres de velcro en el bíceps para ajustarlo lo más
posible, lo que minimizará cualquier rotación dentro de la funda del bíceps.
(Figura 2)
CONTROL DE ABDUCCIÓN
C) Para lograr un sencillo control de abducción, como se muestra en la
figura 3, después de colocar el dispositivo ortopédico, acople las correas
glenohumerales a la funda del bíceps con la sutura (véase la figura 6)
acoplando las correas delantera y trasera, como en la figura 4a. Esta
colocación es muy importante.
IM PORTANTE
La colocación de la costura es crucial para maximizar la flexión hacia delante
permeable al mismo tiempo que se minimiza la rotación externa. En la figura 4,
a medida que mueve la posición de A a C y acorta la correa delantera,
minimizará la rotación externa.
D) Sólo tiene que apretar o aflojar las correas a través de los anillos en forma
de "D" y el velcro para lograr el rango de movimiento y control de abducción
deseados. (Figura 5)
AJUSTE AVANZADO
E) El dispositivo ortopédico para hombro es muy eficaz para maximizar la
abducción en la flexión hacia delante. (Figura 7) Esto es ideal para las
personas que deben alcanzar una altura por encima de la cabeza, pero
que todavía deben evitar la rotación externa y la extensión hacia atrás en
abducción.
F) Afloje la correa posterior; si es necesario, saque completamente la correa
posterior del anillo en "D". Coloque la costura delante del bíceps como se
muestra en la figura 4. Ahora es importante ajustar la correa delantera para
controlar la extensión hacia atrás. (Figura 8)
G) Separaciones A/C
La ortesis para hombro también es eficaz para ofrecer soporte en las
separaciones acromioclaviculares. Si la articulación sigue estando sensible,
puede colocarse un aro o una almohadilla protectora debajo de la ortesis.
Apriete la correa A/C ajustando la correa a través de los anillos en "D"
delantero y posterior. Las correas auxiliares largas o medianas también se
pueden pasar a través de los aros sobre el A/C y acoplarse al velcro de la
parte delantera y posterior de la ortesis. (Figura 9)
USO Y CUIDADO
• Lavar a máquina, agua fría. SECADO AL AIRE.
GARANTÍA: DJO, LLC reparará o sustituirá toda o parte de la unidad y sus
accesorios por defectos de material o mano de obra durante los seis meses
siguientes a la fecha de venta. Si los términos de esta garantía son incompatibles
con la normativa local, se aplicarán las disposiciones de la normativa local.
PARA USO EN UN SOLO PACIENTE
AVISO: SI BIEN SE HAN HECHO TODOS LOS ESFUERZOS POSIBLES CON LAS TÉCNICAS MÁS MODERNAS
PARA OBTENER LA COMPATIBILIDAD MÁXIMA DE LA FUNCIÓN, RESISTENCIA, DURABILIDAD Y
COMODIDAD, NO EXISTE GARANTÍA ALGUNA DE QUE SE EVITARÁN LESIONES DURANTE EL EMPLEO DE
ESTE PRODUCTO.
D
J
S
S
on
oy
houlder
tabilizer
D
D
. T
S
eveloped with
r
om
awa
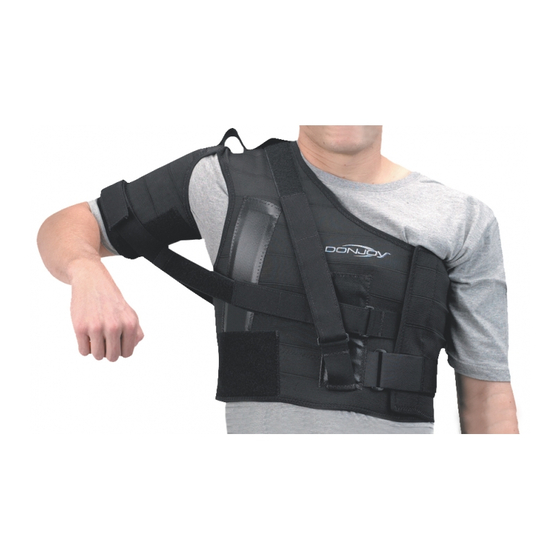
Desarrollada en colaboración con el Dr. Tom Sawa
Hombrera estabilizadora DonJoy
Desarrollada en colaboración con el Dr. Tom Sawa
Immobilisateur d'épaule DonJoy
Conçu en collaboration avec le docteur Tom Sawa
DonJoy Schulterstabilisierung
Entwickelt von Dr. Tom Sawa
DJO, LLC
MDSS GmbH
Schiffgraben 41
1430 Decision Street
30175 Hannover, Germany
Vista, CA 92081-8553 • USA
©2021 DJO, LLC
13-3110-0-00000 REV D 2021-02-23
Publicidad

Manuales relacionados para DJO DONJOY


Resumen de contenidos para DJO DONJOY
- Página 1 • Machine wash, cold water. AIR DRY. La ortesis para hombro también es eficaz para ofrecer soporte en las WARRANTY: DJO, LLC will repair or replace all or part of the unit and its separaciones acromioclaviculares. Si la articulación sigue estando sensible, puede colocarse un aro o una almohadilla protectora debajo de la ortesis.
- Página 2 UTILISATION ET ENTRETIEN Zusatzgurte können durch die Schlaufen über dem Schultereckgelenk geführt GARANZIA: DJO, LLC si impegna alla riparazione o alla sostituzione di tutti • Lavage en machine à l’eau froide. LAISSER SÉCHER À L’AIR LIBRE. werden und am Klettverschluss auf der Vorder- und Rückseite der Orthese i componenti del dispositivo e dei relativi accessori in caso di difetti nella befestigt werden.