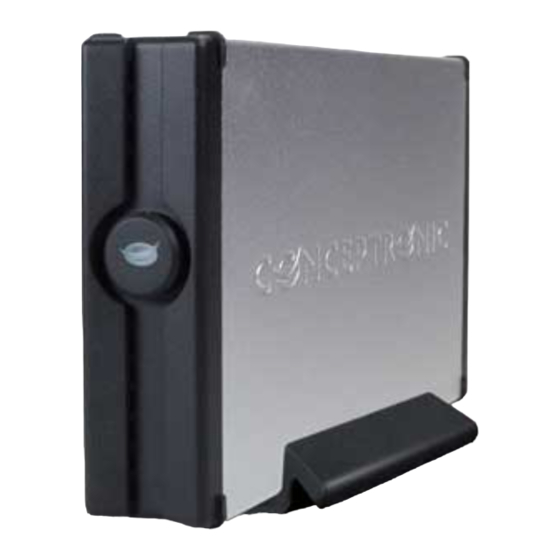
Conceptronic Grab'n'GO CHD3UL Guía De Instalación Rápida
Ocultar thumbs
Ver también para Grab'n'GO CHD3UL:
- Manual de usuario (29 páginas) ,
- Instrucciones para la recuperación (2 páginas)
Tabla de contenido
Publicidad
Idiomas disponibles
Idiomas disponibles
Enlaces rápidos
NEDERLANDS
Hartelijk gefeliciteerd met de aanschaf van uw
In de bijgaande Snelstart handleiding wordt stap voor stap uitgelegd hoe u de Conceptronic
USB 2.0 Harddiskbox installeert.
Ingeval van problemen adviseren wij u onze support-site te bezoeken (ga naar:
www.conceptronic.net en klik op 'Support'). Hier vindt u een database met veelgestelde
vragen waar u hoogstwaarschijnlijk de oplossing voor uw probleem kunt vinden.
Heeft u andere vragen over uw product die u niet op de website kunt vinden, neem dan
contact met ons op via e-mail: support@conceptronic.net.
Voor meer informatie over Conceptronic producten kunt u terecht op de Conceptronic
website: www.conceptronic.net.
Bij software/drivers installatie: Het is mogelijk dat onderstaande installatie iets afwijkt van
de installatie op uw computer. Dit is afhankelijk van de Windows versie die u gebruikt.
1. Introductie
Met dit product kunt u op een snelle en eenvoudige manier extra ruimte beschikbaar maken
op uw Desktop of Notebook computer. U kunt een IDE harde schijf in de CHD3UL monteren
om u te voorzien van draagbare opslagruimte.
De harde schijf box is ideaal voor het overzetten van data, het maken van back-ups of voor
gebruik als 2e harde schijf op uw computer.
2. Inhoud van de verpakking
De volgende onderdelen dienen aanwezig te zijn in de verpakking:
1x CHD3UL
1x CHD3UL Spanningsadapter
1x USB Kabel
1x Standaard voor CHD3UL
Conceptronic Grab'n'GO CHD3UL
Snelstart handleiding
Conceptronic USB 2.0 Harddiskbox.
1x Product CD-ROM
1x Snelstart Handleiding
1x Garantiekaart
1
Publicidad
Tabla de contenido

Manuales relacionados para Conceptronic Grab'n'GO CHD3UL


Resumen de contenidos para Conceptronic Grab'n'GO CHD3UL
- Página 1 Hartelijk gefeliciteerd met de aanschaf van uw Conceptronic USB 2.0 Harddiskbox. In de bijgaande Snelstart handleiding wordt stap voor stap uitgelegd hoe u de Conceptronic USB 2.0 Harddiskbox installeert. Ingeval van problemen adviseren wij u onze support-site te bezoeken (ga naar: www.conceptronic.net en klik op ‘Support’).
- Página 2 NEDERLANDS 3. Hardware Installatie CHD3UL 3.1 De CHD3UL monteren (Indien er geen harde schijf aanwezig is) Als u de CHD3UL heeft aangeschaft met een voorgemonteerde harde schijf kunt u deze stap overslaan en doorgaan bij stap 3.2. Verwijder de 2 schroeven aan de achterzijde van de CHD3UL en verwijder de achterplaat.
- Página 3 Gebruik de schakelaar op de achterzijde van de CHD3UL om het apparaat aan te zetten. Het Conceptronic Logo op de voorzijde zal blauw oplichten. Windows 2000 & XP zullen de schijf automatisch herkennen. Er is geen stuurprogramma installatie benodigd om de CHD3UL te gebruiken.
-
Página 4: Een Partitie Aanmaken En Formatteren Op De Chd3Ul
NEDERLANDS 5. Een partitie aanmaken en formatteren op de CHD3UL Het is mogelijk dat de schijf die u gebruikt nog niet gepartitioneerd/geformatteerd is. In deze situatie zal de CHD3UL geen schijf weergeven binnen uw besturingssysteem. Om een partitie te maken en/of te formatteren kunt u de standaard Windows applicatie gebruiken of het programma Swissknife, welke u kunt vinden op de CD-ROM die meegeleverd is met de CHD3UL. - Página 5 NEDERLANDS 5. Wijzig Partition Type in “Primary”, het File System in “FAT 32” of “NTFS” (afhankelijk van uw keuze) en het Volume Label in een naam van uw keuze. Notitie: Het advies is om te kiezen voor het NTFS bestandssysteem (geschikt voor XP/W2K) als u bestanden groter dan 4GB wilt opslaan.
-
Página 6: Package Contents
Conceptronic USB 2.0 Harddiskbox on your PC or notebook. When problems occur, we advise you to go to our support-site (go to www.conceptronic.net and click ‘support’). Here you will find a lot of possibilities to solve your problems. - Página 7 ENGLISH 3. Hardware Installation CHD3UL 3.1 Assembling the CHD3UL (When no hard disk is installed yet) If you bought the CHD3UL with a hard disk pre-installed, you can skip this step and continue to step 3.2 Remove the 2 screws at the back of the CHD3UL and remove the back plate. Gently slide the hard disk tray out of the housing.
-
Página 8: Cable Connections
Use the power switch on the back of the CHD3UL to turn on the device. The Conceptronic Logo on the front of the CHD3UL will light up blue. Windows 2000 & XP Automatically will recognize the hard disk. No driver installation is required to operate the CHD3UL. - Página 9 ENGLISH 5. Create and format a partition on the CHD3UL It is possible that the hard disk you are using is not partitioned/formatted yet. In this situation the CHD3UL will not show a replaceable hard disk with partitions in your operating system.
- Página 10 ENGLISH 5. Set the Partition Type to “Primary”, the File System to “FAT 32” or “NTFS” (depending on your preferred file system) and the Volume Label to a preferred Volume Name. Note: We advise you to use the NTFS file system (suitable for XP/W2K) when you use big files >4GB.
-
Página 11: Guía De Iniciación Rápida
La Guía de instalación del hardware incluida le ofrece una explicación paso a paso de cómo instalar la Caja de disco duro 2.0 de Conceptronic en su ordenador PC / portatíl. Caso de experimentar problemas, recomendamos acceda a nuestra página de soporte 2- Tech (acceda a www.conceptronic.net ‘Technical support’... -
Página 12: Instalación Del Hardware Del Chd3Ul
ESPAÑOL 3. Instalación del Hardware del CHD3UL 3.1 Montaje del CHD3UL (Cuando todavía no está instalado el disco duro) Si adquirió el CHD3UL con un disco duro preinstalado, puede saltarse este paso y seguir al 3.2 Retire los 2 tornillos de la parte trasera del CHD3UL y retire la tapa trasera. Deslice suavemente la bandeja del disco duro hacia fuera de la carcasa. -
Página 13: Conexión De Los Cables
Conecte el cable USB al CHD3UL y a un puerto USB libre de su ordenador. Use el interruptor de alimentación de la parte trasera del CHD3UL para encender el dispositivo. El logo Conceptronic del frontal del CHD3UL se iluminará con una luz azul. -
Página 14: Crear Y Formatear Una Partición En El Chd3Ul
ESPAÑOL 5. Crear y formatear una partición en el CHD3UL Es posible que el disco duro que esté usando no esté todavía particionado/formateado. En este caso, el CHD3UL no mostrará un disco duro extraíble con particiones en su sistema operativo. Para crear y/o formatear la partición en el CHD3UL, puede usar la utilidad predeterminada de formato de Windows o el programa Swissknife, que encontrará... - Página 15 ESPAÑOL 5. Configure Partition Type (Tipo de partición) como “Primary” (Primaria), File System (Sistema de archivos) como “FAT 32” o “NTFS” (dependiendo de su sistema de archivos preferido) y Volume Label (Etiqueta del volumen) con el nombre de volumen que prefiera.
- Página 16 Herzlichen Glückwunsch zum Erwerb des Conceptronic USB 2.0 Harddisk-Box. In der beigefügten Intallationsanweisung für die Hardware finden Sie schrittweise Erklärungen für die Installation des USB Conceptronic USB 2.0 Harddisk-Box in Ihrem PC oder notebook. Sollten irgendwelche Probleme auftreten, empfehlen wir ihnen, auf unsere Support-Seite im Internet zu gehen (www.conceptronic.net) und auf 'Support’...
- Página 17 DEUTSCH 3. Hardwareinstallation CHD3UL 3.1 Installation der CHD3UL (wenn noch keine Festplatte installiert ist) Wenn Sie die CHD3UL mit einer vorinstallierten Festplatte gekauft haben, können Sie diesen Schritt überspringen und bei Schritt 3.2 fortfahren. Entfernen Sie die 2 Schrauben auf der Rückseite der CHD3UL und danach die hintere Abdeckung.
- Página 18 Schließen Sie das USB-Kabel an der CHD3UL und an einen freien USB-Port Ihres Computers an. Betätigen Sie den Powerschalter auf der Rückseite des Geräts, um das Gerät einzuschalten. Das Conceptronic Logo auf der Rückseite der CHD3UL leuchtet blau. Windows 2000 und XP erkennen die Festplatte automatisch. Für den Betrieb der CHD3UL ist keine Treiberinstallation erforderlich.
- Página 19 DEUTSCH 5. Eine Partition auf der CHD3UL erstellen und formatieren Möglicherweise ist die Festplatte, die Sie verwenden, noch nicht partitioniert/formatiert. In diesem Fall zeigt die CHD3UL keinen Wechseldatenträger mit Partitionen in Ihrem Betriebssystem an. Sie können das Standard-Formatierungs-Hilfsprogramm von Windows oder das Programm Swissknife, das sich auf der mitgelieferten CD-ROM befindet, für das Erstellen und/oder Formatieren der Partition auf der CHD3UL verwenden.
- Página 20 DEUTSCH 5. Stellen Sie den Partition Type auf „Primary”, das File System auf „FAT 32” oder „NTFS” (je nach bevorzugtem Dateisystem) und den Volume Label auf einen bevorzugten Volumenamen. Hinweis: Wir empfehlen Ihnen, das NTFS-Dateisystem (geeignet für XP/W2000) zu verwenden, wenn Sie mit großen Dateien >4GB arbeiten. Die Dateigröße für FAT32 ist auf 4GB beschränkt.
-
Página 21: Contenu Du Coffret
USB 2.0 de Conceptronic sur votre ordinateur (portable). En cas de problèmes, nous vous recommandons de vous adresser à notre service technique (allez à www.conceptronic.net et cliquez sur « support »). Vous trouverez dans cette section la Base de Données des Foires Aux Questions. - Página 22 FRANÇAIS 3. Installation du Hardware CHD3UL 3.1 Montage du CHD3UL (Lorsque aucun disque dur n'a encore été installé). Si vous avez acheté le CHD3UL et que vous disposiez déjà d'un disque dur pré-installé, vous pouvez sauter cette étape et continuez au point 3.2 Dévissez les 2 vis à...
-
Página 23: Connexion Des Câbles
Branchez le câble USB sur le CHD3UL et sur un port USB libre de votre ordinateur. Utilisez l’interrupteur d'alimentation à l'arrière du CHD3UL pour allumer le dispositif. Le Logo Conceptronic à l'avant du CHD3UL s'allumera en bleu. Windows 2000 et XP reconnaissent automatiquement le disque dur. Il n'est pas nécessaire d'installer un driver pour faire fonctionner le CHD3UL. - Página 24 FRANÇAIS 5. Créer et formater une partition sur le CHD3UL Il est possible que le disque dur que vous utilisez ne soit pas encore partitionné ou formaté. Dans ce cas le CHD3UL n'affichera pas de disque dur de remplacement avec des partitions dans votre système d'exploitation.
- Página 25 FRANÇAIS 5. Configurez Type de Partition (Partition Type) comme "Primaire", le Système de Fichier (File System) comme"FAT 32" ou "NTFS" (selon votre système de fichier préféré) et le Label de Volume (Volume Label) avec le Nom de Volume que vous souhaitez. Remarque: Nous vous conseillons d’utiliser le système de fichiers NTFS (qui convient pour XP/W2K) lorsque vous utilisez de gros fichiers, supérieurs à...
-
Página 26: Contenuto Della Confezione
Se doveste avere altre domande riguardanti il prodotto che non trovate sul nostro sito Web vi preghiamo di contattarci attraverso l’e-mail: support@conceptronic.net. Per ulteriori informazioni dei prodotti Conceptronic, la preghiamo di visitare il sito Web della Conceptronic: www.conceptronic.net. La successiva descrizione relativa all’installazione del software potrebbe essere leggermente diversa dall’installazione sul vostro computer. - Página 27 ITALIANO 3. Installazione hardware CHD3UL 3.1 Assemblaggio del CHD3UL (nel caso in cui non sia già stato installato un disco rigido) Se il CHD3UL è stato acquistato con un disco rigido preinstallato, si può saltare questo passo e procedere direttamente al passo 3.2 Togliere le due viti poste sulla parte posteriore del CHD3UL ed estrarre la placca posteriore.
-
Página 28: Connessioni Cavi
Collegare il cavo USB al CHD3UL e a una porta USB disponibile del computer. Usare il pulsante di alimentazione nella parte posteriore del CHD3UL per accendere il dispositivo. Apparirà in blu il logo Conceptronic sulla parte frontale del CHD3UL. Windows 2000 & XP rileveranno automaticamente il disco rigido. Non è necessaria nessuna installazione di driver per far funzionare il CHD3UL. - Página 29 ITALIANO 5. Creare e dare formato a una partizione nel CHD3UL Potrebbe darsi il caso che il disco rigido in uso non sia ancora partizionato o formattato. In tal caso il CHD3UL non mostrerà un disco rigido sostituibile con partizioni nel sistema operativo in uso.
- Página 30 ITALIANO 5. Impostare il Partition Type (Tipo di Partizione) su “Primary” (Primario), il File System su “FAT 32” o “NTFS” (a seconda del sistema di file preferito) e la Volume Label (Etichetta di volume) sul Nome di Volume preferito. Nota: Si consiglia di utilizzare il sistema di file NTFS (adatto a XP/W2K) quando vengono usati file di grandi dimensioni (con più...
-
Página 31: Iniciação Rápida
Se tiver outras questões relativas ao nosso produto e não as conseguir encontrar no nosso webiste, pode-nos contactar através do e-mail: support@conceptronic.net. Para mais informações sobre produtos de Conceptronic, por favor visite o Web Site da Conceptronic: www.conceptronic.net. A instalação do Software conforme se encontra descrita abaixo pode ser ligeiramente diferente da instalação do seu computador. -
Página 32: Montar O Chd3Ul (Quando Ainda Não Está Instalado Nenhum Disco Rígido)
PORTUGUÊS 3. Instalação do Hardware do CHD3UL 3.1 Montar o CHD3UL (quando ainda não está instalado nenhum disco rígido) Se tiver comprado o CHD3UL com um disco rígido pré-instalado, pode avançar este passo e continuar no passo 3.2 Retire os 2 parafusos na parte de trás do CHD3UL e retire a placa traseira. Faça deslizar com cuidado o suporte do disco rígido para fora da caixa. - Página 33 Use o botão de alimentação na parte de trás do CHD3UL para ligar o aparelho. O logótipo da Conceptronic na parte da frente do CHD3UL acende em azul. O Windows 2000 e XP reconhecem automaticamente o disco rígido. Não é necessário instalar nenhum controlador para trabalhar com o CHD3UL.
- Página 34 PORTUGUÊS 5. Criar e formatar uma partição no CHD3UL É possível que o disco rígido que está a usar ainda não tenha nenhuma partição/não esteja formatado. Neste caso, o CHD3UL não vai mostrar um disco rígido substituível com partições no seu sistema operativo. Para criar e/ou formatar a partição no seu CHD3UL, pode usar a função de formatação predefinida do Windows, ou o programa Swissknife, que pode encontrar no CD-ROM incluído com o CHD3UL.
- Página 35 PORTUGUÊS 5. Defina o Partition Type (Tipo de partição) como “Primary” (Primária), o File System (Sistema de ficheiros) como “FAT 32” ou “NTFS” (dependendo do seu sistema de ficheiros preferido) e a Volume Label (Etiqueta de volume) com um Nome de Volume à sua escolha.
-
Página 36: A Csomag Tartalma
A mellékelt Hardver Installációs Kalauz részletes magyarázatot nyújt a Conceptronic CHD3UL installálásához. Probléma esetén javasoljuk, hogy vegye igénybe a Support-site-en nyújtott segítséget (menjen a www.conceptronic.net-re és kattintson a ‘Support’-ra. Itt megtalálja a Gyakran Ismételt Kérdések adatbázist. Ha termékünkkel kapcsolatban további kérdése lenne, és weboldalunkon nem talál rá... - Página 37 MAGYAR 3. Hardver installáció CHD3UL 3.1 A CHD3UL összeszerelése (Ha még egy merevlemez sincs installálva) Amennyiben a CHD3UL-t előre installált merev lemezzel együtt vásárolta meg, akkor ezt a lépést hagyja ki és folytassa a 3.2 lépéssel! Vegye ki a CHD3UL hátoldalán található 2 csavart, és vegye le a hátlapot. Óvatosan csúsztassa ki a merevlemezkeretet a helyéről.
- Página 38 Csatlakoztassa az USB kábelt a CHD3UL-hoz és a számítógép egy szabad USB portjához. Használja a CHD3UL hátoldalán található kapcsolót a készülék bekapcsolásához. A CHD3UL elülső oldalán található Conceptronic logó kéken világít. A Windows 2000 és XP automatikusan felismeri a merevlemezt. A CHD3UL működtetéséhez semmilyen meghajtót nem kell installálni.
- Página 39 MAGYAR 5. Partíció létrehozása és formázása a CHD3UL Előfordulhat, hogy az Ön által használt merevlemez még nincs formázva illetve azon partíció létrehozva. Ez esetben a CHD3UL az operációs rendszerben nem mutat helyettesíthető merevlemezt. A partíciónak a CHD3UL -n való létrehozásához és/vagy formázásához, használhatja a Windows formátum segédprogramot, vagy a Swissknife programot, amelyet megtalál a CHD3UL -hoz mellékelt CD-ROM-on.
- Página 40 MAGYAR 5. A Partíció típusnál válassza az “Elsődleges”-t, a Fájlrendszernél válassza a “FAT 32”-t vagy az “NTFS”-et (attól függően, hogy melyik fájlrendszert kedveli), a Kötetcímkénél pedig a kívánt kötetnevet. Megjegyzés: Ha 4GB-nál nagyobb fájlokat használ, javasoljuk, hogy használja a NTFS fájlrendszert (XP/W2K-hoz való) . A FAT32 esetében a maximális fájlméret 4GB-ra van korlátozva.
-
Página 41: Declaration Of Ce Conformity
Declaration of CE Conformity The manufacturer Conceptronic Address Databankweg 7 3821 AL Amersfoort, the Netherlands hereby declares that the product Type USB HARDDISK 3,5” Product CHD3UL complies with following directives: 89/336/EEC EMC directive: Electromagnetic Compatibility 73/23/EEC Low Voltage Directive: Electrical equipment designed for use within certain voltage...