Publicidad
Enlaces rápidos
Publicidad

Manuales relacionados para Bestway Hydrium 56369


Resumen de contenidos para Bestway Hydrium 56369
- Página 1 Visit Bestway YouTube channel S-S-005667...
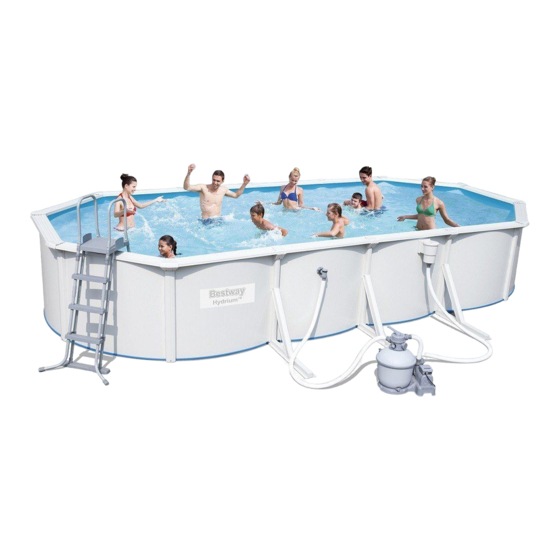
- Página 2 Attention! Atenção! ¡Atención! Before setting up your pool Antes de montar a sua piscina Antes de instalar la piscina ensure your selected location is certifique-se que a localização asegúrese de que la completely firm and level. que seleccionou está ubicación elegida esté Assemble the pool on the completamente firme e nivelada.
- Página 3 NOTE: The liner of the steel wall pool is designed to be smaller than the steel wall for technical reasons. If you find it difficult to assemble the liner, place the liner under the sun for one hour which will make it more pliable. You should then be able to assemble the liner step by step, stretching it by hand at the same time.
- Página 4 NOTA: Il rivestimento della piscina con pareti in acciaio è progettato per essere più piccolo delle pareti in acciaio per motivi tecnici. Se montare il rivestimento risulta difficile, posizionare il rivestimento sotto il sole per un'ora in modo che diventi più flessibile. Inoltre, montare il rivestimento passo dopo passo, tirandolo contemporaneamente con le mani.
- Página 5 Schwimmbeckens verwendeten Materialien. - Prüfen Sie regelmäßig Bolzen und Schrauben; entfernen Sie Späne, Spreißel sowie sämtliche scharfen Kanten, um Verletzungen zu Besuchen Sie den YouTube-Kanal von Bestway vermeiden. - ACHTUNG: Lassen Sie den entleerten Pool nicht im Freien. Der leere Artikel-Nr.
- Página 6 005 006 007 008 TEILELISTE DES Skimmers Anzahl Bezeichnung Ersatzteil-Nr. Schlauchanschluss P6774 Abdeckung P6991 Korb P6776 Skimmer P6777 Überlaufklappe P6992 Dichtung P6993 Planscheibe P6780 Schraube M5x22 O-Ring Stopfen P6813 Erforderliche Werkzeuge (nicht enthalten): Für die Installation werden etwa 3 Stunden und 2-3 Personen benötigt, exklusive ggf.
- Página 7 AUSWÄHLEN EINES GEEIGNETEN STANDORTS WARNUNG: Das Ebnen ist äußerst wichtig. Wählen Sie den Standort für Ihren neuen Pool sorgfältig aus. Dies ist die wichtigste Entscheidung, die Sie treffen müssen, um die Sicherheit und den Erfolg Ihrer Poolkonstruktion zu gewährleisten. Ein schlecht gewählter Standort kann zukünftige Probleme verursachen, die zu Verletzungen, Todesfällen oder finanziellen Schäden führen.
- Página 8 0° S-S-005667...
- Página 9 16.4’ x 12’ x 48” 20’ x 12’ x 48” 24’ x 12’ x 48” S-S-005667...
- Página 10 S-S-005667...
- Página 11 S-S-005667...
- Página 12 S-S-005667...
- Página 13 #30 #03 #30 #03 S-S-005667...
- Página 14 S-S-005667...
- Página 15 NOTE: Before connecting valve to the pool, fill the pool leaving 5 - 6cm of space between the position of the connection valve and water surface. WARNING! Never permanently install the connection valve before the water is within a few centimeters of them because the liner has to be properly taut from the pressure of the water.
-
Página 16: Importante
OPMERKING: Vooraleer de klep te verbinden met het zwembad, vul het zwembad en laat daarbij 5 - 6 cm ruimte tussen de positie van de aansluitingsklep en het wateroppervlak. WAARSCHUWING! Installeer nooit de aansluitingsklep permanent voor het water binnen enkele cm ervan staat omdat de bekleding strak genoeg moet zijn door de druk van het water. - Página 17 S-S-005667...
- Página 18 15cm 15cm 15cm S-S-005667...
- Página 19 Kundendienst (Bestway Aftersales Center) gesendet werden. Bevor Ihre Ansprüche akzeptiert werden können, wird das Bestway Aftersales Center Sie möglicherweise um die Zusendung defekter Teile (z. B. Ausschnitt der Seriennummer / Ablassventil) bitten. Bitte wenden Sie sich vor dem Absenden von Dokumenten an den lokalen Bestway Kundendienst.
- Página 20 S-S-005667...