Publicidad
sauder.com
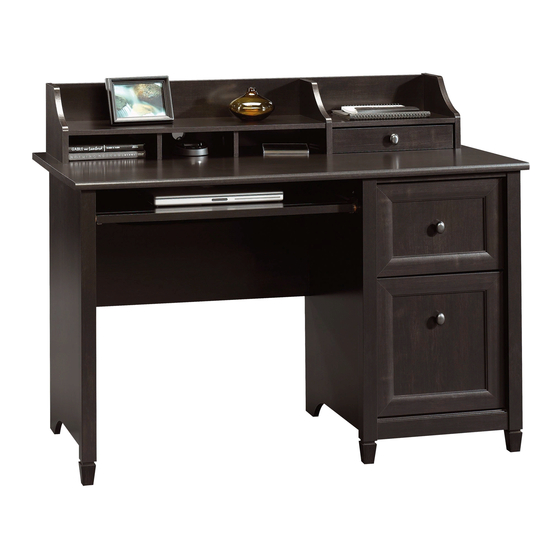
Computer Desk
Edge Water Collection | Model 409043
Need help? Visit Sauder.com to view video assembly tips or chat with a live rep.
Prefer the phone? Call 1-800-523-3987.
Share your journey!
Sit and surf.
NOTE: THIS INSTRUCTION
BOOKLET CONTAINS IMPORTANT
SAFETY INFORMATION.
PLEASE READ AND KEEP FOR
FUTURE REFERENCE.
English pg 1-28
Français pg 29-32
Español pg 33-36
Lot # 365461
10/08/14
Purchased: __________________
Be sure to give us a ring before
making any returns. 1-800-523-3987
Publicidad
Tabla de contenido

Manuales relacionados para Sauder 409043


Resumen de contenidos para Sauder 409043
- Página 1 Edge Water Collection | Model 409043 NOTE: THIS INSTRUCTION BOOKLET CONTAINS IMPORTANT SAFETY INFORMATION. Need help? Visit Sauder.com to view video assembly tips or chat with a live rep. PLEASE READ AND KEEP FOR FUTURE REFERENCE. Prefer the phone? Call 1-800-523-3987.
- Página 2 SMALL DRAWER FRONT (1) TOP MOLDING (1) LEG (3) D253 LARGE DRAWER SIDE (2) HUTCH DRAWER BOTTOM (1) HUTCH RIGHT SHELF (1) D717 DRAWER BOTTOM (2) FOOT (3) HUTCH LEFT SHELF (1) D242 SMALL DRAWER BOX FRONT (2) Page 2 409043 www.sauder.com/services...
-
Página 3: Part Identifi Cation
Now you know Part Identifi cation our ABCs. D270 D242 D717 D242 D270 D241 D253 D717 D253 D241 www.sauder.com/services 409043 Page 3... - Página 4 ANGLE BRACKET - 2 METAL PIN - 13 DRAWER FRONT KNOB - 3 TACK GLIDE - 4 METAL BRACKET- 2 BRACKET - 2 GROMMET - 1 CORD CLIP - 2 CAM COVER - 3 LAPTOP PAD - 1 Page 4 409043 www.sauder.com/services...
- Página 5 BLACK 7/8" LARGE HEAD SCREW - 6 BLACK 9/16" LARGE HEAD SCREW - 6 SILVER 3/4" MACHINE SCREW - 1 BLACK 1/2" FLAT HEAD SCREW - 4 GOLD 5/16" FLAT HEAD SCREW - 20 NAIL - 20 www.sauder.com/services 409043 Page 5...
- Página 6 fl oor. Scan this QR code or go to this address: http://qr.sauder.com/?ID=1770 To begin assembly, push a SAUDER TWIST-LOCK® å to watch a video on how to assemble your unit. FASTENER (RR) into the large holes in the RIGHT END (A) and LEFT END (B).
- Página 7 Push seventeen HIDDEN CAMS (1F) into the ENDS (A and B), å UPRIGHT (E), HUTCH BACK (N), and BRACES (P). Arrow Arrow (17 used) Arrow Hole The arrow in the HIDDEN CAM must point toward the hole in the edge of the board. www.sauder.com/services 409043 Page 7...
- Página 8 HEAD SCREWS (QQQ) through holes #1 and #3. Push the black lever in and pull the SLIDE from the RAIL. Roller end Open end GOLD 5/16" FLAT HEAD SCREW (8 used in this step) Roller end Hole Open end Page 8 409043 www.sauder.com/services...
- Página 9 RIGHT" and "CABINET LEFT" for easy identifi cation. (2 used for the EXTENSION BLOCK) Roller end GOLD 5/16" FLAT HEAD SCREW (4 used for the RAILS) These edges should be even. These edges should be even. Roller end www.sauder.com/services 409043 Page 9...
- Página 10 Step 5 Turn seventeen CAM SCREWS (8F) into the RIGHT END (A), å UPRIGHT (E), HUTCH ENDS (C and D), and LEGS (I). (17 used) These holes must be here. This hole must be here. Page 10 409043 www.sauder.com/services...
- Página 11 BLACK 1-5/8" PAN HEAD SCREWS (FFF). These edges should be even. These edges should be even. These edges should be even. This hole must be here. BLACK 1-5/8" PAN HEAD SCREW (3 used in this step) www.sauder.com/services 409043 Page 11...
- Página 12 Curved edge H I D D E N i t h o BLACK 1-7/8" FLAT HEAD SCREW (6 used in this step) Rounded edge Finished edge BROWN 1-1/2" FLAT HEAD SCREW (4 used in this step) Page 12 409043 www.sauder.com/services...
- Página 13 Step 8 Insert eight METAL PINS (VV) into the short edges of the å HUTCH SHELVES (J and K). Push the PINS (VV) into the holes of the HUTCH UPRIGHT (F). å Finished edge Finished edge www.sauder.com/services 409043 Page 13...
- Página 14 ENDS. Fasten the HUTCH ENDS (C and D) to the TOP (G). Use å two BLACK 1-7/8" FLAT HEAD SCREWS (EEE). Curved edge Curved edge BLACK 1-7/8" FLAT HEAD SCREW (2 used in this step) Page 14 409043 www.sauder.com/services...
- Página 15 BRACES (P). Fasten the BRACES (P) to the RIGHT END (A). Tighten ® å How to use the SAUDER TWIST-LOCK FASTENER two HIDDEN CAMS. 1. Insert the dowel end of the FASTENER into the hole of the adjoining part.
- Página 16 Fasten the UPRIGHT (E) to the BRACES (P). Tighten two å HIDDEN CAMS. NOTE: Be sure the METAL PINS in the BRACES insert into å the holes in the UPRIGHT. Turn a CORD CLIP (AAA) into the TOP (G). å Page 16 409043 www.sauder.com/services...
- Página 17 (2 used for the TOP MOLDING) Fasten the TOP MOLDING (DD) to the TOP (G). Use two å SILVER 1-1/8" FLAT HEAD SCREWS (JJJ). Finished surface Finished edge Rounded edge BLACK 9/16" LARGE HEAD SCREW (4 used for the ANGLE BRACKETS) www.sauder.com/services 409043 Page 17...
- Página 18 Insert a METAL PIN (VV) into the edge of the LEFT END (B). å S u r f a c i t h I S T - L O F A S T E N ® E R S Page 18 409043 www.sauder.com/services...
- Página 19 NOTE: Be sure the METAL PIN in the LEFT END inserts å into the hole in the TOP. Fasten the MODESTY PANEL (H) to the UPRIGHT (E). Use å two BLACK 1-7/8" FLAT HEAD SCREWS (EEE). BLACK 1-7/8" FLAT HEAD SCREW (2 used in this step) www.sauder.com/services 409043 Page 19...
- Página 20 BACK fastened. The unit may collapse. of your unit if needed to make it "square". Fasten the BACK (M) to your unit using the NAILS (RRR). å NAIL (14 used in this step) Edge with no holes Page 20 409043 www.sauder.com/services...
- Página 21 HUTCH DRAWER FRONT (X). Use two BLACK 9/16" LARGE HEAD SCREWS (OOO). Finished edge These holes must be here. Finished edge Finished edge BLACK 9/16" LARGE HEAD SCREW (2 used in this step) BLACK 1/2" FLAT HEAD SCREW (4 used in this step) www.sauder.com/services 409043 Page 21...
- Página 22 Turn a CORD CLIP (AAA) into the HUTCH å DRAWER BACK (Z). SILVER 3/4" MACHINE SCREW (1 used for the KNOB) (2 used) Finished edge fi n i s h r f a BLACK 1-1/4" FLAT HEAD SCREW (2 used in this step) Page 22 409043 www.sauder.com/services...
- Página 23 TACK GLIDES (YY) through the holes shown. Finish fastening the HUTCH DRAWER BOTTOM (EE) to the å HUTCH DRAWER SIDES (Y) and HUTCH DRAWER BACK (Z) using the NAILS (RRR). Notches NAIL (6 used in this step) www.sauder.com/services 409043 Page 23...
- Página 24 RIGHT" and "DRAWER LEFT" for easy identifi cation. Lay the LAPTOP SHELF (Q) with the LAPTOP å PAD (DDD) facing down in the notched edges of the SHELF MOLDINGS (BB). Notched edge BROWN 1" FLAT HEAD SCREW (4 used in this step) Page 24 409043 www.sauder.com/services...
- Página 25 Repeat this step for the other drawer. å Be sure the grooves in each part line up with each other on the inside of the drawer. BLACK 1-1/4" FLAT HEAD SCREW (16 used in this step) D241 D253 D253 D241 D717 www.sauder.com/services 409043 Page 25...
- Página 26 BLACK 7/8" LARGE HEAD SCREW (1 used for the KNOB) (2 used for the DRAWER FRONT) D270 D242 This hole must be here. D242 Roller end D270 Roller end GOLD 5/16" FLAT HEAD SCREW (4 used for the SLIDES) Page 26 409043 www.sauder.com/services...
- Página 27 BLACK 7/8" LARGE HEAD SCREW (4 used for the DRAWER FRONT) Open end D253 D241 Open end D253 BLACK 1-1/8" MACHINE SCREW (1 used for the KNOB) GOLD 5/16" FLAT HEAD SCREW (4 used for the SLIDES) www.sauder.com/services 409043 Page 27...
- Página 28 And to celebrate, why not share your success story? Pro Tip: Lift with your legs. And, you know, your arms. 30 lbs. 20 lbs. 70 lbs. total 5 lbs. 20 lbs. 10 lbs. 30 lbs. (3 used) To cover HIDDEN CAMS Page 28 409043 www.sauder.com/services...
-
Página 29: Liste De Pièces
Modèle 409043 Bureau d’Ordinateur Utilisez les instructions d’ a ssemblage en français avec les NOUS SOMMES LA POUR VOUS AIDER! schémas étape par étape du manuel d’instruction en anglais. Nous faisons de notre mieux pour nous assurer que votre meuble Chaque étape en français correspond à... - Página 30 ÉTAPE 6 Pour commencer l’ a ssemblage, enfoncer une FIXATION TWIST-LOCK® SAUDER (RR) dans les gros trous de l’EXTRÉMITÉ Fixer les PIEDS (I) aux EXTRÉMITÉS (A et B) et au MONTANT (E). DROITE (A) et l’EXTRÉMITÉ GAUCHE (B). Répéter cette étape Serrer neuf EXCENTRIQUES ESCAMOTABLES.
- Página 31 ÉTAPE 10 ÉTAPE 13 Utilisation de la FIXATION TWIST-LOCK® SAUDER (Consulter le Fixer le VOILE DE FOND (H) à l’EXTRÉMITÉ GAUCHE (B). Serrer schéma agrandi.) trois FIXATIONS TWIST-LOCK®. 1. Insérer l’extrémité fi letée de la FIXATION dans le trou de la Insérer une GOUPILLE EN MÉTAL (VV) dans le chant de...
- Página 32 fi gurent sur les pages arrière PLATE 32 mm (HHH). du manuel d’instructions. Répéter cette étape pour l’ a utre tiroir. Ceci complète l’ a ssemblage. Pour nettoyer, utiliser l’encaustique pour meubles préférée ou un chiff on humide. Essuyer. Page 32 409043 www.sauder.com/services...
-
Página 33: Escritorio De Computadora
Modelo 409043 Escritorio de Computadora Use estas instrucciones de ensamblaje en español junto con las ESTAMOS AQUI PARA AYUDAR! fi guras paso-a-paso provistas en el folleto inglés. Cada paso Tratamos de asegurar que su mueble llega en condición excelente. en español corresponde al mismo paso en inglés. Se destacan Nuestros representantes de Servicio al Cliente son amables y las fi... - Página 34 PASO 4 PASO 10 Con cuidado vire el PARAL (E) sobre la superfi cie del TWIST-LOCK®. Cómo utilizar el SUJETADOR TWIST-LOCK® SAUDER (Refi érase al Fije el BLOQUE DE EXTENSIÓN (AA) al PARAL (E). Utilice dos diagrama ampliado.) TORNILLOS NEGROS DE CABEZA PERDIDA de 32 mm (HHH).
- Página 35 IZQUIERDO se inserte dentro del agujero del PANEL SUPERIOR. DE ORGANIZADOR (Z) utilizando los CLAVOS (RRR). Fije el VELO DE FONDO (H) al PARAL (E). Utilice dos TORNILLOS NEGROS DE CABEZA PERDIDA de 48 mm (EEE). www.sauder.com/services 409043 Page 35...
- Página 36 Esto completa el ensamblaje. Limpie con su pulimento para muebles GRANDE de 22 mm (MMM). preferido o un paño húmedo. Seque con un paño. Fije el TIRADOR (XX) a la CARA DE CAJÓN PEQUEÑO (S). Utilice un TORNILLO NEGRO PARA METAL de 28 mm (III). Page 36 409043 www.sauder.com/services...
- Página 37 à Les téléviseurs peuvent être particulièrement un téléviseur. cet eff et. lourds. De plus, le poids et l’emplacement du tube image ont tendance à rendre les téléviseurs instables et enclins à tomber vers l’ a vant. www.sauder.com/services 409043 Page 37...
- Página 38 Además, el peso y la ubicación del tubo de imagen tienden a causar la inestabilidad de televisores y propensa a volcarse hacia adelante. Page 38 409043 www.sauder.com/services...
-
Página 39: Garantie Limitée De 5 Ans
à compter de la date d'achat la première fois et qui sont signalés à Sauder dans les limites de couverture de la contre tout défaut de matériaux ou de fabrication des composantes de mobilier Sauder. - Página 40 Dear Valued Customer: So, how did it go? Thanks so much for choosing Sauder® furniture. I hope the Set a world record for speed? purchase and assembly process was a positive experience Feeling good about yourself? and you feel good about the furniture you just built. If you Nice.