Tabla de contenido
Publicidad
Idiomas disponibles
Idiomas disponibles
Enlaces rápidos
INSTALLAZIONE USO E MANUTENZIONE
INSTALLATION, USE AND MAINTENANCE
INSTALLATION, UTILISATION ET ENTRETIEN
INSTALLATIONS-, GEBRAUCHS- UND WARTUNGSANLEITUNG
INSTALACIÓN, USO Y MANTENIMIENTO
INSTALLATIE, GEBRUIK EN ONDERHOUD
BESZERELÉS, HASZNÁLAT ÉS KARBANTARTÁS.
BESZERELÉS, HASZNÁLAT ÉS KARBANTARTÁS.
BESZERELÉS, HASZNÁLAT ÉS KARBANTARTÁS.
BESZERELÉS, HASZNÁLAT ÉS KARBANTARTÁS.
BESZERELÉS, HASZNÁLAT ÉS KARBANTARTÁS.
INSTALAÇÃO, USO E MANUTENÇÃO
I
GB
F
D
E
P
NL
H H H H H
Publicidad
Tabla de contenido

Manuales relacionados para Galletti FLAT


Resumen de contenidos para Galletti FLAT
- Página 1 INSTALLAZIONE USO E MANUTENZIONE INSTALLATION, USE AND MAINTENANCE INSTALLATION, UTILISATION ET ENTRETIEN INSTALLATIONS-, GEBRAUCHS- UND WARTUNGSANLEITUNG INSTALACIÓN, USO Y MANTENIMIENTO INSTALAÇÃO, USO E MANUTENÇÃO INSTALLATIE, GEBRUIK EN ONDERHOUD BESZERELÉS, HASZNÁLAT ÉS KARBANTARTÁS. BESZERELÉS, HASZNÁLAT ÉS KARBANTARTÁS. BESZERELÉS, HASZNÁLAT ÉS KARBANTARTÁS. H H H H H BESZERELÉS, HASZNÁLAT ÉS KARBANTARTÁS.
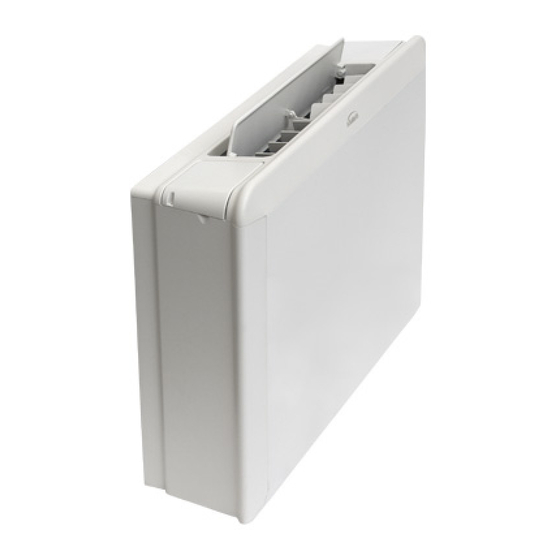
- Página 2 ATTENZIONE Utilizzare dispositivi attentamente di protezione nella figure 3 e 4 sono riportati i dati dimensiona li di FLAT L, FLAT U, in figura il manuale individuale 5 sono riportate le posizioni degli attacchi idraulici della batteria DF (accessorio per impianti a 4 tubi), dove: - Diametro attacchi idraulici per la batteria standard = 1/2"...
-
Página 3: Collegamenti Elettrici
- scollegare i cavi motore dalla morsettiera - smontare la morsettiera rimontandola sulla fiancata opposta Rimontare il mobile di copertura avendo cura di utilizzare, per la versione FLAT - sfilare il cavo motore orientandolo sul lato opposto; togliere il passacavo U, le 2 viti fornite a corredo per il fissaggio della parte frontale (figura 2) in plastica;... - Página 4 Per motivi di sicurezza, non introdurre mani o oggetti nella griglia di uscita CON IL VENTILATORE. dell'aria. Nei modelli FLAT U il filtro è inserito a cassetto nelle griglie di aspirazione aria e si estrae come indicato in figura 12. MANUTENZIONE Si consiglia la sostituzione annuale del filtro aria, utilizzando ricambi originali;...
-
Página 5: Ricerca Dei Guasti
FLAT RICERCA DEI GUASTI Se l’apparecchio non funziona correttamente, prima di richiedere l’intervento del servizio assistenza, eseguite i controlli riportati nella tabella sotto riportata. Se il problema non può essere risolto, rivolgetevi al rivenditore o al centro assistenza più vicino. -
Página 6: Safety Symbols
DECLARATION OF CONFORMITY Galletti S.p.A., whose main office is in via Romagnoli 12/a, 40010 Figures 1 and 2 show the exploded view of FLAT L and FLAT U units respectively, Bentivoglio (Bologna) - Italy, hereby declares, under its sole where:... -
Página 7: Electrical Connections
Replace the cabinet. As regards FLAT U model fasten the front panel by means - Turn the heat exchanger by 180°; of the 2 screws supplied (figure 2). As regards FLAT U model install the lower - Replace the partition on the bottom part;... - Página 8 WARNING: THE FILTER MUST ALWAYS BE SECURED IN PLACE WITH THE in the air outlet grilles. SCREW PROVIDED TO PREVENT ACCIDENTAL CONTACT WITH THE FAN. On models FLAT U the filter is slide fitted onto the air intake grilles. Take it out MAINTENANCE as shown in figure 12.
-
Página 9: Troubleshooting
FLAT TROUBLESHOOTING If the unit is not working properly, before calling a service engineer carry out the checks indicated in the table below. If the problem cannot be solved, contact your dealer or the nearest service centre. PROBLEM REMEDY CAUSE The unit fails to work 1. -
Página 10: Symboles De Sécurité
DÉCLARATION DE CONFORMITÉ Galletti S.p.A. dont le siège est à via Romagnoli 12/a, 40010 Sur les figures 1 et 2 sont reportées les vues éclatées des appareils FLAT L et Bentivoglio (BO) - Italie - certifie, en engageant sa seule responsabilité, FLAT U respectivement, où:... -
Página 11: Branchements Électriques
Remonter l'habillage, ayant soin d'utiliser, pour la version FLAT U, les 2 vis en plastique ; fournies pour fixer la partie frontale (figure 2). Sur la version FLAT U il est - démonter le tube d'écoulement des condensats et le remonter du côté... - Página 12 Pour des raisons de sécurité, ne pas introduire les doigts ou autres objets dans la grille de sortie d'air. Sur les modèles FLAT U le filtre est monté sur glissière dans les grilles d'aspiration d'air et peut être retiré comme indiqué sur la figure 12.
-
Página 13: Recherche Des Causes D'anomalie
FLAT RECHERCHE DES CAUSES D'ANOMALIE Si l'appareil ne fonctionnement pas correctement, avant de s'adresser au service d'assistance, effectuer les contrôles indiqués sur le tableau ci-dessous. Si le problème ne peut pas être résolu, s'adresser au distributeur ou au centre d'assistance le plus proche. - Página 14 Lesen Sie dieses ACHTUNG Individuelle Handbuch Schutzausrüstung In den Abbildungen 3 und 4 sind die Abmessungen von FLAT L, FLAT U, in aufmerksam tragen der Abbildung 5 die Positionen der Wasseranschlüsse des Wärmetauschers DF durch (Zubehör für Anlagen mit 4 Rohren) wie folgt angegeben: - Durchmesser Wasseranschlüsse für Standard-Wärmetauscher = 1/2"...
- Página 15 Schrauben zur Befestigung der Vorderwand zu verwenden sind - Die Anschlüsse in die entsprechenden Löcher an der rechten Wand (Abbildung 2). Für die Version FLAT U ist die Montage der Vorderwand aus verzinktem Blech so vorgesehen, dass die Luft von den Gittern mit Filter einsetzen und diese danach mit den entsprechenden Schrauben an das vollständig abgesaugt wird (Abbildung 2).
- Página 16 Aus Sicherheitsgründen nicht mit den Händen in das Luftausblasgitter LÜFTERS VERHINDERT WIRD. eingreifen oder Gegenstände hineinstecken. Bei den Modellen FLAT U ist der Filter in die Luftausblasgitter eingesetzt und wird wie in Abbildung 12 gezeigt herausgezogen. WARTUNG Es wird die jährliche Auswechslung des Luftfilters mit Originalersatzteilen empfohlen;...
-
Página 17: Störungssuche
FLAT STÖRUNGSSUCHE Funktioniert das Gerät nicht richtig, führen Sie die in der nachstehenden Tabelle aufgeführten Kontrollen durch, bevor Sie den Kundendienst rufen. Kann das Problem nicht gelöst werden, wenden Sie sich an Ihren Händler oder das Kundendienstcenter. STÖRUNG BEHEBUNG URSACHE Das Gerät funktioniert nicht... -
Página 18: Declaración De Conformidad
ATENCIÓN Utilizar dispositivos atentamente el de protección En las figuras 3 y 4 aparecen los datos dimensionales de FLAT L y FLAT U, presente individual mientras que en la figura 5 se ilustran las posiciones de los enlaces hidráulicos manual de la batería DF (accesorio para instalaciones de cuatro tubos), en los que:... -
Página 19: Conexiones Eléctricas
(figura 2). Para - reinstalar el panel en la parte inferior; la versión FLAT U se debe montar el cierre inferior en chapa galvanizada de manera que el aire sea totalmente aspirado a través las rejillas provistas de filtro - instalar las conexiones en las respectivas aberturas presentes en el costado (figura 2). -
Página 20: Limpieza Del Filtro Aire
MEDIANTE EL RESPECTIVO TORNILLO, A FIN DE IMPEDIR SU CONTACTO de la salida del aire. ACCIDENTAL CON EL VENTILADOR. En los modelos FLAT U el filtro está instalado como cajón en las rejillas de MANTENIMIENTO aspiración aire y se extrae de la manera ilustrada en figura 12. -
Página 21: Localización De Causas De Avería
FLAT LOCALIZACIÓN DE CAUSAS DE AVERÍA Si el aparato no funciona correctamente, antes de solicitar la intervención del servicio de asistencia, efectuar los controles indicados en la tabla que a continuación se expone. Si no se logra resolver el problema, contactarse con el distribuidor o con el centro de asistencia más próximo. -
Página 22: Dados Dimensionais
ATENÇÃO! Usar os atentamente o equipamentos de Nas figuras 3 e 4 são apresentados os dados das dimensões do FLAT L e FLAT manual protecção individual U, na figura 5 são apresentadas as posições das conexões hidráulicas da bateria DF (acessório para instalações com 4 tubos), nos quais: - Diâmetro conexões hidráulicas para a bateria standard = 1/2"... -
Página 23: Conexões Eléctricas
100 mm do pavimento para que haja estrangulamentos. uma aspiração correcta do ar e para facilitar a retirada do filtro na versão FLAT CONEXÕES ELÉCTRICAS Fazer as ligações eléctricas com a tensão desligada, de acordo com as Na instalação de tecto verificar se a altura da instalação não supera limite... -
Página 24: Limpeza Da Bateria De Troca Térmica
Por motivos de segurança, nunca introduzir objectos na grade de saída O VENTILADOR. do ar. Nos modelos FLAT U o filtro é introduzido como uma gaveta nas grades de aspiração do ar e é extraído como indicado na figura 12. MANUTENÇÃO Recomenda-se a substituição anual do filtro de ar, usando peças de reposição... - Página 25 FLAT PROCURA DOS PROBLEMAS Se o aparelho não funciona correctamente, antes de solicitar a intervenção do serviço de assistência, fazer os controlos apresentados na tabela abaixo. Se o problema não puder ser resolvido, dirija-se ao revendedor ou ao centro de assistência mais próximo.
-
Página 26: Beschrijving Van Het Apparaat
Gebruik persoonlijke handleiding beschermingsmiddele De afbeeldingen 3 en 4 tonen de afmetingen van de FLAT L en de FLAT U. met aandacht Afbeelding 5 toont de posities van de hydraulische aansluitingen van de DF- batterij (accessoires voor installaties met 4 leidingen) waar: - Diameter hydraulische aansluitingen voor standaardbatterij = 1/2"... -
Página 27: Elektrische Aansluitingen
FLAT L installatie aan de wand (100 mm van de vloer). FLAT U verticale installatie op de vloer of horizontale installatie aan het plafond. Zorg voor de ontluchting van de warmtewisselaar door aan de ontluchtingskleppen te draaien (zeskante sleutel van 10), die zich naast de hydraulische aansluitingen van de batterij bevinden. -
Página 28: Reiniging Van Het Luchtfilter
VASTGEZET WORDEN ZODAT HET NIET MOGELIJK IS DE VENTILATOR PER rooster van de luchtuitlaat te steken. ONGELUK AAN TE RAKEN. In de modellen FLAT U is het filter als een cassette in de roosters van de ONDERHOUD luchtaanzuiging geplaatst en kan naar buiten getrokken worden zoals afbeelding 12 toont. - Página 29 FLAT OPZOEKEN VAN DEFECTEN Indien het apparaat niet correct werkt, dienen de controles van onderstaande tabel uitgevoerd te worden alvorens contact op te nemen met de assistentiedienst. Indien het probleem niet verholpen kan worden, kunt u zich tot de dichtstbijzijnde verkoper of assistentiedienst wenden.
-
Página 30: Megfelelőségi Nyilatkozat
é l y e s A 3. és a 4. ábrán láthatók a FLAT L és a FLAT U méretei, az 5. ábrán láthatók h a s z n á l a t i védőfelszereléseket! -
Página 31: Elektromos Csatlakozások
- vegye le a kondenzvíz elvezető csövet és szerelje fel az ellenkező oldalra; fordítsa meg a csepptörő cső helyzetét, és a kondenzvíz Szerelje vissza a burkolatot, és ügyeljen arra, hogy a FLAT U változatnál gyűjtőtálca dugóját; a berendezéshez adott 2 csavart használja fel a frontális rész rögzítéséhez - forgassa el a telepet 180°-kal;... -
Página 32: Légszűrő Tisztítása
VÉLETLENSZERŰ ÉRINTKEZÉSÉT A VENTILÁTORRAL. VÉLETLENSZERŰ ÉRINTKEZÉSÉT A VENTILÁTORRAL. VÉLETLENSZERŰ ÉRINTKEZÉSÉT A VENTILÁTORRAL. VÉLETLENSZERŰ ÉRINTKEZÉSÉT A VENTILÁTORRAL. VÉLETLENSZERŰ ÉRINTKEZÉSÉT A VENTILÁTORRAL. A FLAT U típusoknél a szűrőt kazettaként csúsztatják be a légelszívó 8 8 8 8 8 KARBANTARTÁS KARBANTARTÁS KARBANTARTÁS KARBANTARTÁS KARBANTARTÁS... -
Página 33: Hibák Azonosítása
FLAT 9 9 9 9 9 HIBÁK AZONOSÍTÁSA HIBÁK AZONOSÍTÁSA HIBÁK AZONOSÍTÁSA HIBÁK AZONOSÍTÁSA HIBÁK AZONOSÍTÁSA Ha a berendezés nem működik megfelelően, mielőtt kéri a szervizszolgálat segítségét, végezze el az alábbi táblázatban felsorolt ellenőrzéseket. Ha a problémát nem tudja megoldani, akkor forduljon a viszonteladóhoz vagy a legközelebbi szervizszolgálathoz. - Página 34 FLAT FC66001820- 00 È severamente vietata la riproduzione anche parziale di questo manuale / All copying, even partial, of this manual is strictly forbidden...
- Página 35 FLAT FC66001820- 00 È severamente vietata la riproduzione anche parziale di questo manuale / All copying, even partial, of this manual is strictly forbidden...
- Página 36 FLAT FLAT 1160 1160 1160 FC66001820- 00 È severamente vietata la riproduzione anche parziale di questo manuale / All copying, even partial, of this manual is strictly forbidden...
- Página 37 FLAT 230V/1/50Hz FC66001820- 00 È severamente vietata la riproduzione anche parziale di questo manuale / All copying, even partial, of this manual is strictly forbidden...
- Página 38 FLAT FC66001820- 00 È severamente vietata la riproduzione anche parziale di questo manuale / All copying, even partial, of this manual is strictly forbidden...
- Página 39 FLAT FC66001820- 00 È severamente vietata la riproduzione anche parziale di questo manuale / All copying, even partial, of this manual is strictly forbidden...
- Página 40 CONDIZIONI GENERALI DI GARANZIA UNITÀ FLAT GALLETTI Le unità FLAT Galletti S.p.A., sono garantiti per 24 mesi dalla data di consegna all’utilizzatore. La garanzia è relativa alla riparazione e/o sostituzione in forma gratuita dei componenti con “vizi” o difetti di fabbricazione.