Publicidad
Enlaces rápidos
EBD MR -PR M, 2 C H , 2 C H -L V, L 3 , L V,
L V-OC , VFC , VFC -N C , VFC -L V, VFC -L V-
N C
This device should be installed by a
EN
qualified electrician in accordance with the
latest edition of the IEE wiring regulations.
Somente um eletricista qualificado
PT
deve instalar este dispositivo.
76 mm
76 mm
Walk towards | Caminar hacia | Andar
através | In Richtung gehen | Aller vers |
Avvicinamento
2.8m
6m
Este dispositivo foi concebido para ser
PT
montado no teto.
Não instale a unidade num local onde a
l
luz solar direta possa incidir no sensor.
Não coloque o sensor a menos de 1m
l
de qualquer iluminação, aquecimento
ou ventilação de ar forçado.
Não fixe o sensor em uma superfície
l
instável ou sujeito a vibrações.
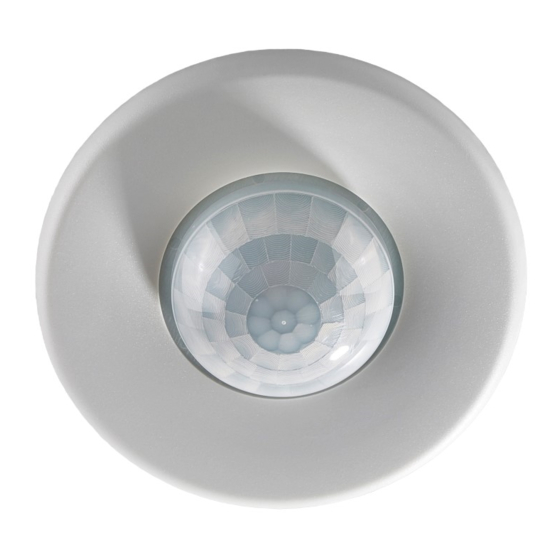
Ceiling presence detector
Deckenmontierter Präsenzmelder
Detector de presencia de techo
Detector de presença de teto
Détecteur de présence de plafond
Rilevatore di presenza da soffitto
DE
von qualifizierten Elektrofachkräften zu
installieren.
FR
installer ce dispositif.
12 mm
Walk across | Cruzar | Andar através |
Hindurch gehen | Traverser |
Ce dispositif est conçu pour un
FR
montage au plafond.
Ne pas placer l'unité dans une position
l
où la lumière directe du soleil pourrait
pénétrer dans le capteur.
Ne pas placer le capteur à moins
l
d'un mètre de tout dispositif d'éclairage,
de chauffage ou de ventilation à air
forcé.
Ne pas fixer le capteur sur une surface
l
instable ou vibrante.
Dieses Gerät ist ausschließlich
Seul un électricien qualifié peut
64.8 mm
64.8 mm
Attraversamento
2.8m
15m
Somente um eletricista
ES
qualificado deve instalar este
dispositivo.
Il dispositivo deve essere installato
IT
da un elettricista qualificato.
This device is designed to be ceiling-
EN
mounted.
Do not site the unit where direct sunlight
l
might enter the sensor.
Do not site the sensor within 1m of any
l
lighting, forced air heating or ventilation.
Do not fix the sensor to an unstable or
l
vibrating surface.
Dieses Gerät ist auf die Montage an
DE
einer Decke ausgelegt.
Einheit so anbringen, dass der Sensor
l
vor direkter Sonneneinstrahlung
geschützt ist.
Sensor mit Mindestabstand von 1m zu
l
Lichtquellen, Luftheizung oder
Ventilation anbringen.
Sensor nicht an einer instabilen oder
l
vibrierenden Oberfläche montieren.
Este dispositivo está diseñado para
ES
montarse en el techo.
Evite que la luz del sol incida
l
directamente sobre el sensor.
No coloque el sensor a menos de 1 m
l
de luces, salidas de calefacción por aire
forzado o ventilación.
No fije el sensor a superficies que
l
vibren o no sean estables.
Il dispositivo è adatto al montaggio a
IT
soffitto.
Non collocare l'unità in una posizione in
l
cui la luce diretta del sole possa entrare
nel sensore.
Non posizionare il sensore a meno di un
l
metro da un qualsiasi tipo di
illuminazione, sistema di riscaldamento
o ventilazione.
Non installare il sensore su superfici
l
instabili o soggette a vibrazioni.
Ref WD869 issue 2
Publicidad

Manuales relacionados para LEGRAND CP Electronics EBDMR-PRM


Resumen de contenidos para LEGRAND CP Electronics EBDMR-PRM
- Página 1 EBD MR -PR M, 2 C H , 2 C H -L V, L 3 , L V, L V-OC , VFC , VFC -N C , VFC -L V, VFC -L V- Ceiling presence detector Deckenmontierter Präsenzmelder Detector de presencia de techo Detector de presença de teto Détecteur de présence de plafond Rilevatore di presenza da soffitto...
- Página 2 INSTALLATION | INSTALACIÓN | INSTALLAZIONE | INSTALAÇÃO Be careful bending springs when Vorsicht beim Biegen von Federn Doble los muelles con cuidado al mounting unit. bei der Montage der Einheit. montar la unidad. Tenha cuidado para não dobrar as Faire attention à la compression Piegare le molle con cautela molas ao montar a unidade.
- Página 3 Surface mounting box: part code DBB, Surface fixing | sold separately Oberflächenmontage | Ajuste de superficie | Montagem aparente | Dose zur Oberflächenmontage: (Art.- Fixation apparente | Montaggio Nr. DBB, separat erhältlich superficiale Caja de montaje: código de pieza DBB; se vende por separado Caixa de montagem na superficie: DBB.
- Página 4 WIRING | CABLEADO | CHICOTE ELÉTRICO | VERKABELUNG | CÂBLAGE | CABLAGGIO EBDMR-PRM Key 1. Neutral 2. Live 3. Switched output 4. 10A circuit protection if required 5. Load 6. Momentary push-to-make switch, 230V Zeichenerklärung 1. Neutral 2. Netzspannungsführend 3. Geschalteter Ausgang 4.
- Página 5 EBDMR-PRM-2CH Use the L/In Ch1 connection to Zur Stromversorgung des Detektors Utilice la conexión L/In Ch1 para supply the detector with power. The CH1 den Anschluss L/In Ch1 verwenden. Die suministrar energía al detector. Las clavijas and CH2 plugs are coded. Insert the Stecker CH1 und CH2 sind kodiert.
- Página 6 EBDMR-PRM-2CH-LV Use the L/In Ch1 connection to supply Zur Stromversorgung des Detektors Utilice la conexión L/In Ch1 para the detector with power. The CH1 and CH2 den Anschluss L/In Ch1 verwenden. Die suministrar energía al detector. Las clavijas plugs are coded. Insert the plugs correctly Stecker CH1 und CH2 sind kodiert.
- Página 7 EBDMR-PRM-L3 EBDMR-PRM-LV & EBDMR-PRM-LV-OC Key 1. DC supply 11.5-35V or AC supply 10-26.5V 2. Common 3. Load 4. Switched output 5. Momentary push-to-make switch, 230V 6. Open collector output COM • Zeichenerklärung • OUT• • 1. DC-Versorgung 11,5 - 35 V oder AC- + •...
- Página 8 EBDMR-PRM-VFC, EBDMR-PRM-VFC-NC EBDMR-PRM-VFC EBDMR-PRM-VFC-NC For failsafe operation Für den ausfallsicheren Betrieb Para un funcionamiento a prueba de fallos Para uma operação à prova de falhas Fonctionnement de secours Per un funzionamento a prova di errore Key Zeichenerklärung Explicación 1. Neutral 1.
- Página 9 EBDMR-PRM-VFC-LV EBDMR-PRM-VFC-LV NC • • + COM• • - NO • • SW EBDMR-PRM-VFC-LV-NC For failsafe operation Für den ausfallsicheren Betrieb Para un funcionamiento a prueba de fallos NC • • + Para uma operação à prova de falhas Fonctionnement de secours COM•...
- Página 10 TESTING | PRÜFEN | PRUEBAS | TESTE | TEST | VERIFICHE SHIFT 1 SHIFT 2 SHIFT Standalone > Select Product > DD/PRM > Detector Params (Ch. 1 & 2) > Timeout (mins) > 0 Power up the sensor — the load should come on Set a time-out period of 10 seconds using a handset.