Publicidad
Idiomas disponibles
Idiomas disponibles
BEFORE YOU BEGIN:
If you have a completely installed garage door opener, the rail/opener
assembly must be taken down.
• The garage door opener support brackets will require repositioning and
the addition of an extra bracket for stability due to increased rail length.
• UP and DOWN travel limits must be readjusted after installation.
CARTON INVENTORY:
Front Rail Section
Additional Rail Section
Support Bracket and Fastening Hardware
Chain Extension Piece
Emergency Release Rope
Master Link
IF THIS IS A NEW INSTALLATION:
1.
Replace the emergency release rope packaged with your garage door
opener with the longer emergency release rope included in this kit.
2.
Use the front rail section and additional rail section included in this
kit in place of the front rail section and one of the center rail sections
packaged with your garage door opener (Figure 1).
3.
Connect the chain extension piece to the full chain packaged with
your garage door opener using the master links (Figure 2).
Figure 1
Front rail section included
in extension kit
Figure 2
Trolley threaded shaft packaged
with garage door opener
Master link
IF THIS IS AN EXISTING INSTALLATION:
1. Pull down on the emergency release handle, then disconnect the
trolley from the door arm.
2. Disconnect the rail/opener assembly from the header bracket and
support brackets, and place it on the floor.
3. Remove the outer nut from the trolley shaft and set aside (Figure 3).
4. Disconnect the chain from the trolley and trolley threaded shaft. Save
the master link assemblies for reinstallation.
NOTE: To disconnect the master link, press on the open end of the clip.
Figure 3
Master Link
Trolley
Master Link
Outer Nut
Additional rail section included
in extension kit
Chain extension piece
included in kit
Figure 4
Trolley
Threaded
Shaft
To prevent possible SERIOUS INJURY or DEATH:
• Disconnect ALL electric and battery power BEFORE performing ANY
service or maintenance.
The garage door MUST be in the fully closed position during
installation.
WARNING: This product can expose you to chemicals including
lead, which are known to the State of California to cause
cancer or birth defects or other reproductive harm. For more
information go to www.P65Warnings.ca.gov
4.
Refer to Assembly Step 1 in your owner's manual to complete the
assembly, installation and adjustment of your garage door opener.
When instructed, connect the trolley threaded shaft to the end of the
chain extension piece.
NOTE: After hanging the opener, add the additional support bracket for
stability. See Add An Additional Support Bracket on reverse side.
Master link
5. Set the chain aside as it will be used to complete the extension kit.
Make sure it does not get twisted.
6. Remove idler pulley assembly and set aside (Figure 4).
7. Disconnect the front rail section and the next rail section by using a
screwdriver tip to pry up the outer tabs on the sides of the rail
(Figure 5). Discard the rail sections.
8. Align the replacement front rail section and additional rail section with
the existing rail making sure the rail tab is facing up. Slide the front rail
and additional rail onto the existing rail; tabs along the side will lock
into place (Figure 6).
Figure 5
Existing Front Rail Section
Idler Pulley
Figure 6
Rail Tab
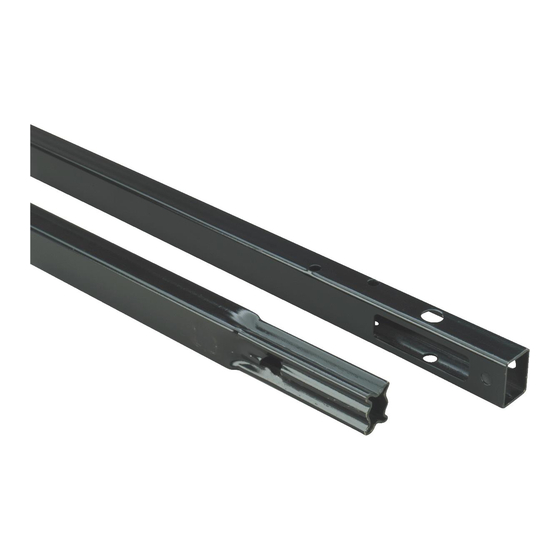
Ten-Foot Chain Rail Extension Kit
Rail sections packaged with garage door opener
Full chain packaged with
garage door opener
Next Rail
Section
Replacement
Additional Rail Section
Replacement
Front Rail Section
Model 6610CD
Existing rail
sections
Publicidad
Tabla de contenido

Manuales relacionados para Chamberlain 6610CD


Resumen de contenidos para Chamberlain 6610CD
- Página 1 Ten-Foot Chain Rail Extension Kit Model 6610CD BEFORE YOU BEGIN: If you have a completely installed garage door opener, the rail/opener assembly must be taken down. To prevent possible SERIOUS INJURY or DEATH: • The garage door opener support brackets will require repositioning and •...
-
Página 2: Replacement Parts
MUST be used if installing any brackets into masonry. Support Bracket REPLACEMENT PARTS Part No. Description Hex Bolt 5/16"-18x7/8" Lock Washer 5/16" 041B1986-10 Ten-Foot Chain 41A3021 Emergency Release Rope Nut 5/16"-18 4A1008 Master Links (2) Lock Washer 5/16" Nut 5/16"-18 www.chamberlain.com... -
Página 3: Trousse De Rallonge De Rail À Chaîne De 3,05 M (10 Pi)
Trousse de rallonge de rail à chaîne de 3,05 m (10 pi) Modèle 6610CD AVANT DE COMMENCER : Si l’ouvre-porte de garage est entièrement installé, l’ensemble de rail/ ouvre-porte doit être démonté. • o ’ l t ê o i t s é... - Página 4 Écrou de 5/16 de po-18 41A3021 Corde de déclenchement d’urgence 4A1008 Maillon de raccord (2) Rondelle-frein ATTENTIO de 5/16 de po Écrou de 5/16 de po-18 AVERTISSE © 2017, The Chamberlain Group Inc. All Rights Reserved www.chamberlain.com 114A5060 Tous droits réservés AVERTISS...
-
Página 5: Juego De Extensión Del Riel Con Cadena De 3.05 M (10 Pies)
Juego de extensión del riel con cadena de 3.05 m (10 pies) ANTES DE COMENZAR: Modelo 6610CD Si el abre-puertas de garaje ya está completamente instalado, deberá desmontar el conjunto de riel y abre-puertas. • Las ménsulas de soporte del abre-puertas de garaje requieren el Para evitar una LESIÓN GRAVE o INCLUSO LA MUERTE:... -
Página 6: Agregar Una Ménsula De Soporte Adicional
Descripción 041B1986-08 Cadena de 3.05 m (dies pies) 41A3021 Cuerda de desenganche de emergencia Arandela de 5/16 de pulg. 4A1008 Eslabón maestro (2) Tuerca de 5/16 de pulg.-18 © 2017, The Chamberlain Group Inc. www.chamberlain.com 114A5060SP Todos los Derechos Reservados...