Tabla de contenido
Publicidad
Idiomas disponibles
Idiomas disponibles
Enlaces rápidos
D
Dieses Produkt ist nur für gut isolierte Räume oder für den
gelegentlichen Gebrauch geeignet.
DK
Dette produkt er kun egnet til godt isolerede rum eller lejlighedsvis
brug.
ES
Este producto está indicado únicamente en lugares abrigados o para
una utilización puntual.
FIN
Tämä tuote soveltuu ainoastaan hyvin eristettyihin tiloihin tai
satunnaiseen käyttöön.
F
Ce produit ne peut être utilisé que dans des locaux bien isolés ou de
manière occasionnelle.
GB
This product is only suitable for well insulated spaces or occasional use.
I
Il presente prodotto è adatto solo a ambienti correttamente isolati o
ad un uso occasionale.
5
3
4
>
1
9
y
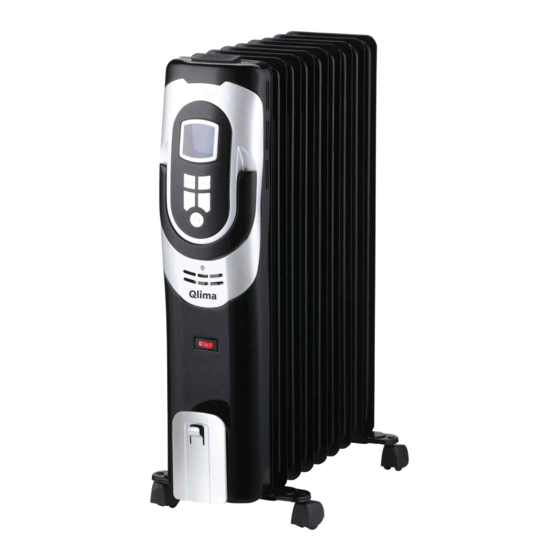
EOR 1515 LCD
N
NL
P
PL
S
SLO
MANUAL DE FUNCIONAMIENTO
MANUEL D'UTILISATION
OPERATING MANUAL
ISTRUZIONI D'USO
GEBRUIKSAANWIJZING
MANUAL DE INSTRUÇÕES
PRIROČNIK ZAUPORABO
Dette produktet er bare egnet for velisolerte rom eller sporadisk bruk.
Dit product is uitsluitend geschikt voor goed geïsoleerde plaatsen of
voor incidenteel gebruik.
Este produto é adequado apenas para espaços bem isolados espaços
ou utilização ocasional.
Ten produkt jest odpowiedni tylko do sporadycznego użytku lub do
stosowania w dobrze izolowanych pomieszczeniach.
Denna produkt är endast lämpad för välisolerade utrymmen eller
sporadisk användning.
Tento výrobok je určený iba do dobre izolovaných priestorov alebo na
príležitostné použitie
2
12
22
32
42
52
62
Publicidad
Tabla de contenido

Manuales relacionados para Qlima EOR 1515 LCD


Resumen de contenidos para Qlima EOR 1515 LCD
- Página 1 EOR 1515 LCD Dieses Produkt ist nur für gut isolierte Räume oder für den Dette produktet er bare egnet for velisolerte rom eller sporadisk bruk. gelegentlichen Gebrauch geeignet. Dit product is uitsluitend geschikt voor goed geïsoleerde plaatsen of Dette produkt er kun egnet til godt isolerede rum eller lejlighedsvis voor incidenteel gebruik.
- Página 2 Estimado Señor / Señora, Queremos felicitarle por la compra del calefactor doméstico portátil. Usted ha adquirido un producto de calidad que le será útil durante muchos años. Esto, por supuesto, siempre que lo use correctamente. Por favor, lea primero las instrucciones de uso, para garantizar la máxima vida útil de su calefactor.
- Página 3 BELANGRIJKE COMPONENTES ONDERDELEN PRINCIPALES Bedieningspaneel Ruedas giratorias (2) Botón de encendido Uitlaat van droge lucht Botones Pantalla LCD Uitneembaar waterreservoir Interruptor de alimentación Inlaat van vochtige Panel de control lucht Cubierta frontal Luchtfilter Aletas del radiador Afvoertuit Guardacable (ø...
-
Página 4: Instrucciones De Seguridad
INSTRUCCIONES DE SEGURIDAD Lea este manual de usuario cuidadosamente antes de usar el aparato y consérvelo para futuras consultas. Instale este aparato solo cuando cumpla con la legislación, ordenanzas y estándares regionales y nacionales. Este producto está diseñado para su uso como calefactor portátil en viviendas residenciales y solo es apto para usarlo en condiciones domésticas normales, dentro de la sala de estar, la cocina y el garaje. -
Página 5: Si El Cable De Corriente Se Daña, Deberá
Qlima o personas cualificadas similares para evitar riesgos. • Devuelva siempre el aparato al centro de servicio autorizado de Qlima para examinarlo o repararlo. • La reparación por parte de personal no cualificado puede causar un peligro extremo para el usuario. - Página 6 • Este calefactor se ha llenado con una cantidad concreta de aceite especial. La apertura y reparación del calefactor deberá realizarse en un centro autorizado de Qlima. En caso de fuga de aceite, contacte con el fabricante o con un centro de servicio autorizado.
-
Página 7: Instalación Del Calefactor
• Este dispositivo lo pueden utilizar nińos a partir de 8 ańos de edad y personas con capacidades reducidas, ya sean físicas, sensoriales o mentales, o sin experiencia ni especiales conocimientos, siempre que tengan supervisión o reciban instrucciones sobre el uso seguro del dispositivo y comprendan los riesgos que conlleva. -
Página 8: Funcionamiento
Gire el radiador en posición vertical después de ajustar el montaje de las ruedas giratorias. FUNCIONAMIENTO PRECAUCIÓN: Use el radiador solo en posición vertical con las ruedas giratorias provistas en la parte inferior de la unidad, cualquier otra posición puede entrañar peligro. Enchufe el cable en la toma de corriente. -
Página 9: Ajuste Del Temporizador
AJUSTE DEL TEMPORIZADOR APAGADO AUTOMÁTICO Asegúrese de ajustar la temperatura deseada antes de establecer el temporizador, de forma que el calefactor se apague al alcanzar dicha temperatura. Al ajustar el temporizador de APAGADO automático puede decidir el momento de apagado del calefactor. -
Página 10: Almacenamiento Y Mantenimiento
No use limpiadores abrasivos o disolventes ya que podrían dañar el aparato. • Conserve el producto en un lugar seco y limpio cuando no esté en uso. ESPECIFICACIONES TÉCNICAS Modelo EOR 1515 LCD Calefacción Máxima 1500 Capacidad Ajustes de calefacción 2 (Auto = 900 W / 1500 W) Gama termostática... - Página 11 2. Las reparaciones o el reemplazo de componentes dentro del periodo de garantía no impli- can una extensión de la misma. 3. La garantía queda sin efecto en el caso de modificaciones, colocación de piezas no originales o reparaciones efectuadas por terceras partes. 4.
- Página 12 à condition de l’utiliser de façon responsable et correcte. Pour assurer à votre produit de chauffage Qlima une durée de vie et une sécurité d’utilisation maximum, lisez attentivement ce manuel avant utilisation et conservez-le pour pouvoir le consulter ultérieurement.
- Página 13 BELANGRIJKE PRINCIPAUX ÉLÉMENTS ONDERDELEN Bedieningspaneel Roues pivotantes (2) Bouton Uitlaat van droge d'alimentation lucht Boutons Uitneembaar Écran d'affichage à waterreservoir cristaux liquides Inlaat van vochtige Bouton lucht d'alimentation Panneau de commande Luchtfilter Capot avant Afvoertuit (ø 13 mm) met dop Ailettes du radiateur Rangement du cordon ...
-
Página 14: Prescriptions De Sécurité
PRESCRIPTIONS DE SÉCURITÉ Lisez attentivement ce manuel d’utilisation avant d’utiliser l’appareil et conservez-le pour toute réfé- rence ultérieure. Installez cet appareil uniquement s’il est conforme à la législation, aux ordonnances et aux normes locales et nationales. Ce produit a été conçu pour être utilisé comme convecteur élec- trique dans des maisons résidentielles, et il doit être utilisé... - Página 15 Qlima ou un technicien aux qualifications com- parables. • Pour inspection ou réparation, adressez-vous toujours à un centre technique agréé par Qlima. • Toute réparation effectuée par une personne non qualifiée peut provoquer des situations extrêmement dangereuses pour l’utilisateur.
- Página 16 Cet appareil contient une quantité précise d’huile spécifique. La réparation et l’ouverture de cet appareil doit être fait par un centre auto- risé par Qlima. En cas de fuite d’huile, contac- ter votre revendeur ou un service après-vente agréé. • Merci de respecter la législation en vigueur pour le recyclage de l’huile si vous jetez votre...
-
Página 17: Installation De L'appareil
• Cet appareil peut être utilisé par des enfants de plus de 8 ans et des personnes aux capacités physiques, sensorielles ou mentales réduites, ou manquant d’expérience et de connaissances ; il faut pour cela leur avoir fourni un encadrement ou des consignes à... -
Página 18: Réglage De La Température
Mettre le radiateur en position verticale une fois les roulettes installées. L’UTILISATION ATTENTION: N'utiliser le radiateur qu'en position verticale droite, les roulettes installées en bas de l'appareil, car toute autre position pourrait être dangereuse Brancher la fiche dans la prise murale. Utiliser l'interrupteur d'alimentation E et appuyer sur le bouton d'alimentation pour allumer le chauffage. -
Página 19: Réglage De La Minuterie
RÉGLAGE DE LA MINUTERIE COUPURE AUTOMATIQUE (AUTO OFF) S'assurer de régler à la température souhaitée, avant de procéder au réglage de la minuterie, afin que le chauffage s'éteigne à la température souhaitée. Grâce à la minuterie d'arrêt automatique, vous pouvez décider du moment où le chauffage doit automatiquement se couper. -
Página 20: Maintenance Et Stockage
• Ranger l'appareil dans un endroit propre et sec, lorsqu'il n'est pas utilisé. SPÉCIFICATION TECHNIQUES Model EOR 1515 LCD Puissance de chauffage 1500 Nombre de niveaux de puissance 2 (Auto = 900 W / 1500 W) Température ambiente entre ºC... -
Página 21: Les Conditions De Garantie
LES CONDITIONS DE GARANTIE L’appareil bénéficie d’une garantie de 24 mois à partir de la date d’achat. Pendant cette période de garantie, les erreurs de matériel et de fabrication sont résolues gratuitement. Dans ce cadre, les règles suivantes s’appliquent: 1. Nous refusons expressément toute demande de responsabilité et d’indemnisation y compris pour des dégâts indirects. - Página 22 Dear Sir, Madam, Congratulations with your purchase of a portable domestic heater. You have purchased a quality product, which will serve you for many years to come. This, of course, provided you use the heater correctly. Please read these Directions for Use first, to ensure maximum lifetime for your heater.
- Página 23 BELANGRIJKE MAIN COMPONENTS ONDERDELEN Bedieningspaneel Castor wheels (2) Power button Uitlaat van droge lucht Buttons LCD display screen Uitneembaar waterreservoir Power switch Inlaat van vochtige Control panel lucht Front cover Luchtfilter Radiator fins Afvoertuit Cord storage (ø 13 mm) met dop Handle ...
-
Página 24: Safety Instructions
SAFETY INSTRUCTIONS Read this user manual carefully before using the appliance and keep it for future reference. Install this device only when it complies with local/ national legislation, ordinances and standards. This product is intended to be used as a mobile heater in residential houses and is only suitable for use in normal household conditions, indoors in living room, kitchen, and garage. - Página 25 Qlima or similarly qualified persons in order to avoid a hazard. • Always return the appliance to a service centre authorised by Qlima for examination or repair. • Repair by unqualified people could cause an extremely hazardous situation for the user.
- Página 26 • This heater is filled with a precise amount of special oil. Opening the heater and repairs to it should be carried out by a service centre authorised by Qlima. If the case of oil leakage, contact the manufacturer or an authorized service centre.
- Página 27 INSTALLING THE HEATER Carefully remove your heater from the box and check the contents. In addition to the heater, you also need to have: - castor wheels - wing nuts - arc-shaped brackets - these directions for use Keep the box and the packaging materials for storage and/or transportation. Unpack the Castor Wheels and Arc-shaped Brackets from the product packaging.
-
Página 28: Temperature Setting
Press the -button B to turn the heater into low power mode. The displays shows . The heater will continue operating in low power mode until the power is switched off manually or if the room temperature exceeds 30ºC. Press the -button B once again to switch the heater off. -
Página 29: Maintenance And Storage
NOTE! When both desired temperature and timer off function have been activated, the heater will switch on and off per the set temperature setting and will stop operating once the programmed timer setting has been reached. AUTO ON Make sure to set the desired temperature prior to setting the timer, so that the heater will shut off at the desired temperature setting. -
Página 30: Technical Specifications
TECHNICAL SPECIFICATIONS Model EOR 1515 LCD Max. heating 1500 capacity Heating settings 2 (Auto = 900 W / 1500 W) Thermostatic range ºC 13 - 30 Current Mains V / Hz / Ph 220-240/50/1 Weight Dimensions 380x140x650 (w x d x h) Room size m³... - Página 32 Egregio Signore, Gentile Signora, Ci congratuliamo con Lei per l'acquisto di una stufa portatile. Lei ha acquistato un prodotto di qualità, da cui trarrà grande soddisfazione per molti anni, naturalmente sempre a patto che Lei adoperi la stufa in modo corretto. Per tale motivo, al fine di garantire la massima durata delle stufe portatili, Le consigliamo di leggere con attenzione le istruzioni prima dell'uso.
- Página 33 BELANGRIJKE COMPONENTI PRINCIPALI ONDERDELEN Bedieningspaneel Ruote basculanti (2) Pulsante di accensione Uitlaat van droge lucht Pulsanti Schermo display LCD Uitneembaar waterreservoir Interruttore di alimentazione Inlaat van vochtige lucht Pannello di controllo Coperchio anteriore Luchtfilter Alette del radiatore Afvoertuit (ø...
-
Página 34: Struzioni Per La Sicurezza
STRUZIONI PER LA SICUREZZA Prima di usare l’apparecchiatura, leggere attentamente il presente manuale e conservarlo come riferimento futuro. Installare questo dispositivo soltanto quando è conforme con la legislazione, le ordinanze e gli standard locali/nazionali. Questo prodotto è destinato a essere usato come stufe nelle case ad uso residenziale ed è... - Página 35 • Nel caso in cui il cavetto elettrico risulti danneggiato e onde evitare qualsiasi rischio provvedere alla sua sostituzione rivolgendosi ad un centro di assistenza autorizzato Qlima o ad un riparatore qualificato. • Se l’apparecchio necessita di verifiche o riparazioni va sempre consegnato ad un centro di assistenza autorizzato Qlima.
- Página 36 In questi casi l’apparecchio deve essere consegnato ad un centro di assistenza autorizzato Qlima per i controlli del caso. • Prima di spostare o pulire l’apparecchio disattivarlo e staccare la spina dalla presa di alimentazione.
-
Página 37: Installazione Della Stufa
alte o basse ed evitare la luce solare diretta. • Non usare l’apparecchio negli esterni. • Non inclinare l’apparecchio e non muoverlo mentre e in funzione. • Non adottare cavi di prolunga o prese multiple. • La spina va sempre tolta dalla prese quando l’apparecchio non e in funzione. - Página 38 - Dadi ad alette - Staffe a forma di arco - Le istruzioni d'uso Conservare la scatola ed il materiale d'imballaggio per l'immagazzinaggio e/o il trasporto. Disimballare le ruote basculanti e le staffe a forma di arco dall'imballaggio del prodotto. Capovolgere il radiatore su una superficie priva di graffi e stabile al fine di evitare danni alle finiture della vernice o alla superficie del pavimento.
-
Página 39: Impostazione Della Temperatura
IMPOSTAZIONE DELLA TEMPERATURA Premere il pulsante Mode fino a che l'icona della temperatura non lampeggia. Sul display compare la temperatura desiderata e può essere modificato fintantoché la temperature icona lampeggia. Servirsi dei pulsanti + e - per impostare la temperatura desiderata, da 13 a 30ºC. L'icona della temperatura smetterà... -
Página 40: Manutenzione E Stoccaggio
ACCENSIONE AUTOMATICA Verificare di impostare la temperatura impostata prima di impostare il timer, di modo che il radiatore si spegna alla temperatura desiderata. Se viene impostata la temperatura desiderata, questa funzione avrà la priorità sulla funzione timer. Col timer di accensione automatica acceso sarà possibile decidere l'ora in cui il radiatore si dovrebbe accendere in automatico. -
Página 41: Specifiche Tecniche
SPECIFICHE TECNICHE Modello EOR 1515 LCD Capacita di riscaldamento max.) 1500 Livelli di potenza 2 (Auto = 900 W / 1500 W) Temperatura di esercizio ºC 13 - 30 Amperaggio Tensione di rete V / Hz / Ph 220-240/50/1 Peso netto... - Página 42 Geachte mevrouw / mijnheer, Van harte gefeliciteerd met de aankoop van uw elektrische kachel. U heeft een kwaliteitsproduct aangeschaft waar u nog vele jaren plezier van zult hebben, mits u het apparaat verantwoord gebruikt. Lees daarom eerst deze gebruiksaanwijzing voor een optimale levensduur van uw kachel.
- Página 43 BELANGRIJKE KERNCOMPONENTEN ONDERDELEN Bedieningspaneel Zwenkwielen Aan- en uit knop Uitlaat van droge lucht Knoppen LCD display Uitneembaar waterreservoir Aan/uit schakelaar Inlaat van vochtige lucht Bedienings-paneel Voorpaneel Luchtfilter Radiator- Afvoertuit ribben (ø 13 mm) met dop Opbergvak voor snoer ...
-
Página 44: Veiligheidsvoorschriften
VEILIGHEIDSVOORSCHRIFTEN Lees deze gebruikershandleiding aandachtig alvo- rens het toestel te gebruiken en bewaar het voor later. Installeer dit toestel enkel wanneer het vol- doet aan de lokale/nationale wetgeving, regel- geving en normen. Dit product is bedoeld om gebruikt te worden als een verplaatsbare kachel in woningen en is alleen geschikt voor gebruik bin- nenshuis in woonkamers, keukens en garages, in normale huishoudelijke omstandigheden. - Página 45 220 V tot 240 V. • Als het netsnoer is beschadigd, moet u het om gevaar te voorkomen laten vervangen door een door Qlima erkend servicecentrum of door ver- gelijkbaar bevoegde personen. • Breng het apparaat ter inspectie of reparatie altijd bij een door Qlima erkend servicecentrum.
- Página 46 • Zet het apparaat onmiddellijk uit en sluit het af van het elektriciteitsnet als het een vreemde geur of abnormaal geluid voortbrengt. Breng het apparaat naar een erkend Qlima servicecen- trum. • Zet het apparaat uit en trek de stekker uit het stopcontact volgens de gebruiksinstructies voor- dat u het verplaatst of schoonmaakt.
- Página 47 ren vanaf 8 jaar en mensen met een lichame- lijke, zintuiglijke of verstandelijke beperking en door mensen die geen ervaring met of ken- nis over het apparaat hebben als er toezicht op hen wordt gehouden of ze instructies hebben gekregen over veilig gebruik van het apparaat en op de hoogte zijn van de risico’s.
-
Página 48: Ingebruikname
Indien de automatische oververhittingsbeveiliging niet functioneert beschikt het apparaat over een tweede veiligheidssysteem. Wanneer deze niet-herstelbare schakelaar zijn werk heeft gedaan dient het apparaat geretourneerd worden naar een door Qlima geautori- seerde dealer. Indien oververhitting of storingen zich blijven voordoen, breng het apparaat retour bij een door... - Página 49 TIMER-INSTELLING AUTO OFF Zorg ervoor dat de gewenste temperatuur ingesteld is voorafgaand aan het instellen van de timer, zodat de kachel uitschakelt op de gewenste temperatuur instelling. Met de Auto OFF timer-instelling kan de tijd bepaald worden waarop de verwarming automa- tisch uitschakelt.
-
Página 50: Onderhoud En Opslag
Gebruik geen schuur- of oplosmiddelen, omdat dan schade aan het product kan optreden. • Bewaar het product, wanneer het niet in gebruik is op een schone, droge plaats. TECHNISCHE SPECIFICATIES Model EOR 1515 LCD Verwarmings- 1500 capaciteit (max.) Aantal verwarmingsniveaus... - Página 51 2. Reparatie of vervanging van onderdelen binnen de garantieperiode leidt niet tot een ver- lenging van de garantieduur. 3. De garantie vervalt wanneer het apparaat is aangepast, niet-originele onderdelen zijn gebruikt, of wanneer reparaties door derden zijn uitgevoerd. 4. De garantie is niet van toepassing op onderdelen die onderhevig zijn aan normale slijtage, zoals filters, batterijen, lampjes en verwarmingselementen.
- Página 52 Caro utilizador, Parabéns pela compra de um aquecedor doméstico portátil. Comprou um produto de qualidade do qual usufruirá durante muitos anos. Isto se utilizar o aquecedor corretamente. Leia as instruções de utilização primeiro para garantir uma vida útil máxima do aquecedor. O aquecedor é...
- Página 53 BELANGRIJKE COMPONENTES PRINCIPAIS ONDERDELEN Bedieningspaneel Rodízios (2) Botão de alimentação Uitlaat van droge lucht Botões Ecrã do visor LCD Uitneembaar waterreservoir Interruptor de alimentação Inlaat van vochtige lucht Painel de controlo Tampa frontal Luchtfilter Aletas do radiador Afvoertuit (ø...
-
Página 54: Instruções De Segurança
INSTRUÇÕES DE SEGURANÇA Leia atentamente este manual do utilizador antes de utilizar o aparelho e guarde-o para referência futura. Instale este dispositivo apenas quando estiver em conformidade com a legislação, normas e normas locais/nacionais. Este produto destina- se a ser utilizado como um aquecedor móvel em casas residenciais e adequado apenas para ser utilizado em condições domésticas normais, no interior na sala de estar, cozinha e garagem. - Página 55 220 e 240 V. • Se o cabo de alimentação estiver danificado, deve ser substituído por um centro de assistência autorizado pela Qlima ou por um equipa igualmente qualificadas para evitar situações de perigo. • Devolva sempre o aparelho a um centro de assistência autorizado pela Qlima para análise...
- Página 56 • Este aquecedor está cheio com uma quantidade precisa de óleo especial. A abertura do aquecedor e as reparações devem ser feitas por um centro de assistência autorizado da Qlima. No caso de fuga de óleo, entre em contacto com o fabricante ou um centro de assistência autorizado.
- Página 57 com idade igual ou superior a 8 anos e pessoas com capacidades físicas, sensoriais ou mentais reduzidas ou falta de experiência e conhecimento se forem supervisionadas ou instruídas sobre a utilização do aparelho de forma segura e compreendendo os perigos envolvidos.
-
Página 58: Ajuste Do Temporizador
OPERAÇÃO CUIDADO: Utilize o radiador apenas na vertical com os rodízios fixados na parte inferior da unidade. Qualquer outra posição pode criar uma situação de perigo. Insira a ficha na tomada. Utilize o interruptor de alimentação E e prima o botão B para ligar o aquecedor. - Página 59 Com a definição de desligamento automático, pode decidir as horas a que o aquecedor deve desligar automaticamente. Prima o botão Mode até o ícone do temporizador piscar. O ícone de desligamento automático também é apresentado. Utilize os botões + e - para definir o tempo de funcionamento do aquecedor entre 1 e 24 horas (a predefinição é...
-
Página 60: Manutenção E Armazenamento
Não utilize produtos ou solventes abrasivos pois irá danificar o produto. • Quando não estiver a ser utilizado, armazene o produto num local limpo e seco. ESPECIFICAÇÕES TÉCNICAS Modelo EOR 1515 LCD Capacidade 1500 máx. aquecimento Definições de aquecimento 2 (Auto = 900 W/1500 W) Intervalo termostático... -
Página 61: Condições Da Garantia
CONDIÇÕES DA GARANTIA O aparelho é fornecido com uma garantia de 24 meses, a partir da data de compra. Todos os defeitos de material e fabrico serão reparados ou substituídos gratuitamente dentro deste período. Aplicam-se as seguintes regras: 1. Recusamos expressamente todas as reclamações de danos adicionais, incluindo reclamações de danos colaterais. - Página 62 Spoštovana gospa, spoštovani gospod, Čestitamo vam ob nakupu prenosnega hišnega grelca. Kupili ste kakovosten izdelek, ki vam bo služil mnoga leta. Seveda to velja samo, če boste izdelek uporabljali pravilno. Da bi zagotovili čim daljšo življenjsko dobo vašega grelca, najprej preberite navodila za uporabo Vaš...
- Página 63 BELANGRIJKE GLAVNI SESTAVNI DELI ONDERDELEN Bedieningspaneel Kolesca (2) Gumb za napajanje Uitlaat van droge lucht Gumbi Zaslon LCD Uitneembaar waterreservoir Napajalno stikalo Inlaat van vochtige Nadzorna plošča lucht Sprednja maska Luchtfilter Rebra radiatorja Afvoertuit Predal za kabel (ø 13 mm) met dop Ročaj ...
-
Página 64: Varnostna Navodila
VARNOSTNA NAVODILA P r e d u p o r a b o t e g a p r i p o m o č k a p o z o r n o preberite ta navodila in jih shranite za uporabo v prihodnosti. - Página 65 Qlima, ali podobno usposobljene osebe, da se prepreči tveganje. • Napravo vedno pošljite na pregled ali popravilo v servisni center, ki ga pooblasti družba Qlima. • Če napravo popravljajo neusposobljeni ljudje, se lahko uporabnika izpostavi izjemno nevarnim razmeram.
- Página 66 • Ta grelnik je napolnjen z ustrezno količino posebnega olja. Odpiranje in popravila grelnika lahko izvajajo samo v servisnem centru, ki ga pooblasti družba Qlima. Če pride do puščanja olja, stopite v stik s proizvajalcem ali pooblaščenim servisnim centrom. • Kadar pečico odvržete, upoštevajte obstoječa pravila recikliranja olja.
- Página 67 NAMESTITEV GRELNIKA Grelnik previdno odstranite iz škatle in preglejte vsebino. Poleg grelnika morajo biti vključeni tudi: - kolesca - krilate matice - lokasti nosilci - ta navodila za uporabo Škatlo in embalažni material shranite za ponovno shranjevanje in/ali prevažanje naprave. Iz embalaže izdelka vzemite kolesca in lokaste nosilce.
-
Página 68: Zaščita Pred Pregrevanjem
NASTAVLJANJE TEMPERATURE Gumb Mode pritiskajte, dokler ne začne utripati ikona za temperaturo . Prikaže se nastavljena temperatura, ki se jo lahko spreminja, ker ikona temperature utripa. Temperaturo lahko z gumboma + in - nastavite na želeno v razponu od 13 do 30 ºC. Ko nastavite želeno temperaturo, ikona temperature preneha utripati in se prikaže trenutna temperatura prostora. -
Página 69: Vzdrževanje In Shranjevanje
SAMODEJNI VKLOP Poskrbite, da boste pred nastavljanjem časovnika nastavili želeno temperaturo, tako da se bo grelnik izklopil, ko doseže nastavljeno želeno temperaturo. Če je želena temperatura nastavljena, ta funkcija preglasi funkcijo časovnika. S časovnikom samodejnega VKLOPA lahko določite čas, ko naj se grelnik samodejno vklopi. Na gumb Način pritiskajte, dokler se ne prikaže ikona samodejnega VKLOPA. -
Página 70: Tehnični Podatki
TEHNIČNI PODATKI Model EOR 1515 LCD Maks. kapaciteta 1500 ogrevanja Nastavitve gretja 2 (Auto = 900 W / 1500 W) Razpon termostata ºC 13 - 30 Omrežno napajanje V / Hz / PH 220-240 / 50 / 1 Teža Mere 380x140x650 (š... - Página 71 Information requirement for the electric local space heaters Model identifier(s): EOR 1515 LCD Item Symbol Value Unit Item Unit Heat output Type of heat input, for electric storage local space heaters only (select one) Nominal heat output Pnom 1,50 manual heat charge control, with integrated thermostat...
- Página 72 Jos haluat huoltoapua, lisätietoja tai laitteen kanssa tulee ongelmia, tutustu verkkosivustoon osoitteessa www.qlima.com tai kysy neuvoa PVG kuluttajapalvelukeskuksesta (T: +45 77 34 33 30). If you need information or if you have a problem, please visit the our website (www.qlima.com) or contact our sales support (T: +31 412 694 694).