
Manuales relacionados para Teac MC-DX10MKII


Resumen de contenidos para Teac MC-DX10MKII
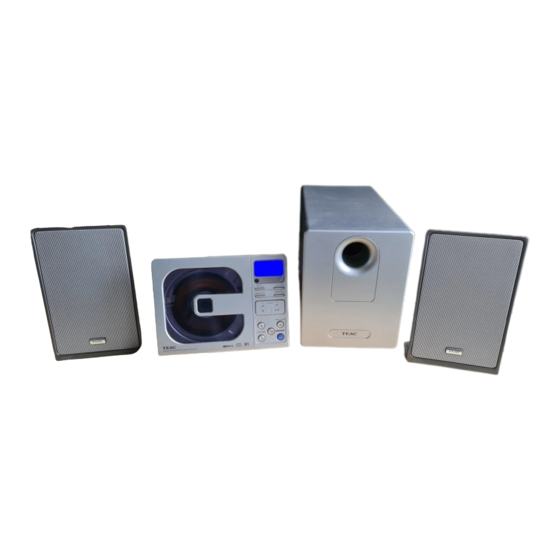
- Página 1 9A10353700 MC-DX10 Micro Hi-Fi System OWNER’S MANUAL MANUEL DU PROPRIÉTAIRE MANUAL DEL USUARIO...
-
Página 2: Tabla De Contenido
Contents Before Use Thank you for choosing TEAC. Read this manual carefully Read this before operation to get the best performance from this unit. < As the unit may become warm during operation, always leave sufficient space around the unit for ventilation. -
Página 3: Discs
CD standard may not play back correctly in this player. If you use such discs in this unit, TEAC Corporation and its < Never use a stabilizer. Using commercially available CD... -
Página 4: Connection
Connection CAUTION < Turn off the power of all the equipment before making connections. < Read instructions of each component you intend to use with this unit. < Be sure to insert each plug securely. To prevent hum and noise, do not bundle the connection cords with the power cord. -
Página 5: Wall Mounting
SPEAKER AC Power Cord Connect the left and right speakers using the supplied RCA Be sure to connect the power cord to an AC outlet which cables. supplies the correct voltage. Make sure to connect: Hold the power plug when plugging or unplugging the white plug q white jack (L: left channel) power cord. -
Página 6: Unit Functions
Unit Functions CD door PLAY/PAUSE (y/J) Use this button to start or pause playback of CD/MP3. Display STOP (H) Use this button to stop playback of CD/MP3. Remote Sensor When operating the remote control unit, point it towards OPEN/CLOSE here. Use this button to open and close the CD door. -
Página 7: Remote Control Unit
Remote Control Unit The provided Remote Control Unit allows the unit to be operated INTRO from a distance. In CD mode, use this button to start the Intro Check. When operating the remote control unit, point it towards the remote sensor on the front panel of the unit. TIMER Use this button together with the SKIP buttons to set the timer. -
Página 8: Basic Operation
Basic Operation EEPS (Electronic Equalizer Preset System) When the EEPS button is pressed once, the current mode is displayed. Press the EEPS button repeatedly to select any other mode. Turn on the subwoofer. CLASSIC: A balanced sound; suitable for classical music. ROCK: Provides a heavy powerful sound;... -
Página 9: Listening To Cd/Mp3
Listening to CD/MP3 (1) Press the OPEN/CLOSE button to close the CD door. < It takes a few seconds for the unit to load the disc. No buttons will work during loading. Wait until the total number of the tracks and the total play time of the disc are displayed. Press the FUNCTION button to select “CD”. - Página 10 Listening to CD/MP3 (2) To suspend playback temporarily To skip to the next or a previous track (pause mode) Press the Play/Pause button (G/J) during playback. Playback During playback, press the skip button (. or / ) stops at the current position. To resume playback, press the repeatedly until the desired track is found.
-
Página 11: Repeat Playback
Repeat Playback ESP (Electronic Shock Protection) The ESP stores the music in the buffer to prevent sound from skipping. During playback of a CD, press the MP3 button to turn the Every time the REPEAT button is pressed, the mode is ESP on or off. -
Página 12: Programmed Playback
Programmed Playback FUNCTION MEMORY Press the Skip button (. or /) repeatedly to select Up to 64 tracks can be programmed in the desired order. a track, then press the MEMORY button. Shuffle function doesn’t work during programmed playback. Press the FUNCTION button to select “CD”. Press the MEMORY button in the stop mode. -
Página 13: Shuffle Playback
Shuffle Playback MEMORY The tracks can be played randomly. Press the SHUFFLE button during playback or when in the stop mode. “RNDM” will then light up in the display. To check the programmed order < If you press the / button during shuffle playback, next track will be randomly selected and played. -
Página 14: Search Mode (Mp3 Only)
Search Mode (MP3 only) Search for a name of track Search for a track in a folder You can select the track by searching for its name. Press the MP3 button twice. Press the MP3 button once. An alphabet (initial letter of a track name) and a track name are displayed. -
Página 15: Listening To The Radio
Listening to the Radio If the reception is poor If the AM reception is poor Turn the unit around to find the best position for AM stations. The AM antenna is built in within the cabinet so rotating the cabinet may improve the reception. If the FM reception is poor For the best reception, reposition the antenna until you get stations clearly. -
Página 16: Preset Tuning
Preset Tuning You can store FM and AM stations into preset channels 1 to 10 How to select preset stations respectively. Press the FM/AM button to select a band. If the power switch of the subwoofer turned off, the settings kept in memory (clock, preset stations, timer setting) will be erased. -
Página 17: Rds
The Radio Data System (RDS) is a broadcasting service which Programme Type allows stations to send additional information along with the regular radio programme signal. NEWS : brief announcements, events, public opinion, reports, actual situations. RDS works on the FM waveband in Europe only. AFFAIRS : a kind of suggestion including practical announcements other than news, documents,... -
Página 18: Rds (Pty Search)
RDS (PTY Search) A station can be searched by this function. Press the PTY button. Select FM by pressing the FM/AM button. Searching will start. < When the programme that you have selected is found, searching will stop and the programme type will be displayed. Press the PTY button. -
Página 19: Setting The Clock
Setting the Clock Press the SKIP button (.//) to set the current hour. CLOCK SET STANDBY/ON If the power switch of the subwoofer turned off, the settings kept in memory (clock, preset stations, timer setting) will be erased. Press the CLOCK SET button. The “minute”... -
Página 20: Setting The Timer
Setting the Timer Press the SKIP button (.//) to set the start time (minute), and then press the TIMER button. TIMER Adjust the clock before setting the timer. If the power switch of the subwoofer turned off, the indicator and “OFF” settings kept in memory (clock, preset stations, timer appear on the display and the setting) will be erased. - Página 21 To turn on or off the timer Press the SKIP button (.//) to select a source (CD or TUNER), and then press the TIMER button. When you don’t use the timer, press the TIMER button to turn it off. (The indicator disappears from the display.) Press the TIMER button again to turn it on.
-
Página 22: Troubleshooting
TEAC service center. If the power switch of the subwoofer turned off, the settings kept in memory (clock, preset stations, timer General setting) will be erased. -
Página 23: Specifications
Specifications Standard Accessories AMPLIFIER section Remote Control Unit (RC-1047) x 1 Output Power (L+R) ..... 10 W + 10 W Subwoofer Cable x 2 Output Power (Subwoofer) . -
Página 24: Avant L'utilisation
Sommaire Avant l’utilisation Nous vous remercions pour l’achat d’un appareil TEAC. Lire Lire ce qui suit avant d’utiliser l’appareil ce manuel avec attention pour obtenir les meilleures performances possibles de cet appareil. < L’appareil pouvant dégager de la chaleur lorsqu’il fonctionne, laissez un espace suffisant autour de l’appareil afin de... -
Página 25: Disque Compact
Disque Compact Disques pouvant être lus avec ce lecteur : < Les disques CD-R et CD-RW sont plus sensibles aux effets de la chaleur et aux rayons ultraviolets que les disques compacts • CD audio classiques, portant le logo CD-DA sur l’étiquette: ordinaires. -
Página 26: Raccordement
Raccordement ATTENTION < Éteignez tous les appareils avant d’effectuer les raccordements. < Lisez les instructions qui accompagnent chacun des appareils que vous prévoyez utiliser avec cet appareil. < Assurez-vous que chacune des fiches est insérée à fond. Pour éviter tout bourdonnement ou bruit, n’attachez pas les cordons de raccordement avec le cordon d’alimentation. - Página 27 SPEAKER Cordon d’alimentation (AC) Connectez les enceintes gauche et droite en utilisant les Bien brancher le cordon d’alimentation sur une prise de câbles RCA fournis. courant qui fournit la tension correcte. Veillez à brancher: < Tenir la fiche d’alimentation en branchant ou débranchant le la fiche blanche q la prise blanche (L: voie gauche) cordon d’alimentation.
-
Página 28: Nom Des Commandes Respectives
Nom des commandes respectives Porte du logement à CD Lecture/Pause (y/J) Utilisez cette touche pour lancer ou mettre en pause la lecture du CD/MP3. Afficheur Arrêt (H) Capteur de télécommande Utilisez cette touche pour arrêter la lecture du CD/MP3. Pointez la télécommande vers ce capteur lorsque vous l’utilisez. -
Página 29: Télécommande
Télécommande La télécommande fournie avec cet appareil permet de le INTRO commander à distance. En mode CD, utilisez cette touche pour démarrer le mode de Lorsque vous utilisez la télécommande, pointez-la vers le capteur balayage des introductions. de signal de télécommande situé sur le panneau avant de l’appareil. -
Página 30: Opération De Base
Opération de base EEPS (Système de préréglages d’égaliseur électronique) Quand vous appuyez une fois sur la touche EEPS, le mode actuel est affiché. Appuyez répétitivement sur la touche EEPS, pour choisir un des autres modes. Allumez le subwoofer. CLASSIC: Un son équilibré qui convient à la musique classique. ROCK: Offre un son lourd et puissant qui convient à... -
Página 31: Écoute Des Cd/Mp3
Écoute des CD/MP3 (1) Appuyez sur la touche OPEN/CLOSE pour fermer la porte du logement à CD. < L’appareil met quelques secondes à charger le disque. Pendant le chargement, aucune touche n’est opérante. Patientez jusqu’à ce que le nombre total de plages et le temps Appuyez sur la touche FUNCTION pour sélectionner total de lecture du disque s’affichent. -
Página 32: Pour Arrêter La Lecture
Écoute des CD/MP3 (2) Pour interrompre la lecture temporairement Pour sauter à la plage suivante ou précédente (mode de pause) Pendant la lecture, appuyez sur la touche de saut Appuyez sur la touche de lecture/pause (G/J) pendant la (. ou/ ) de manière répétée jusqu’à ce que vous lecture. -
Página 33: Lecture Répétée
Lecture répétée ESP (Protection électronique contre les chocs) La fonction ESP stocke musique dans une mémoire tampon de manière qu’il n’y ait pas de coupure dans le son. Pendant la lecture d’un CD, appuyez sur la touche MP3 pour À chaque pression sur la touche REPEAT, le mode change mettre la fonction ESP en ou hors service. -
Página 34: Lecture Programmée
Lecture programmée FUNCTION MEMORY Appuyez de manière répétée sur la touche de saut Vous pouvez programmer jusqu’à 64 plages dans l’ordre désiré. (. ou / ) pour sélectionner une plage, puis appuyez sur la touche MEMORY. La lecture aléatoire ne fonctionne pas durant la lecture programmée. -
Página 35: Lecture Aléatoire
Lecture aléatoire MEMORY Il est possible de faire une lecture aléatoire des plages. Appuyez sur la touche SHUFFLE pendant la lecture ou en mode d’arrêt. “RNDM” s’allume alors sur l’afficheur. Pour vérifier l’ordre de programmation < Si vous appuyez sur la touche / pendant la lecture aléatoire, la plage suivante est sélectionnée de manière aléatoire et lue. -
Página 36: Mode De Recherche (Mp3 Seulement)
Mode de recherche (MP3 seulement) Recherche d’un nom de plage Recherche d’une plage dans un dossier Vous pouvez sélectionner une plage en cherchant son nom. Appuyez deux fois sur la touche MP3. Appuyez une fois sur la touche MP3. Une lettre (la première lettre d’un nom de plage) et un nom de plage s’affichent. -
Página 37: Écoute De La Radio
Écoute de la radio Si la réception est mauvaise Transmission AM Tournez l’appareil pour trouver la position vous donnant la meilleure réception pour les postes AM Transmission FM Étendre et tourner l’antenne FM afin d’obtenir une bonne réception des postes. Appuyez sur la touche FUNCTION pour sélectionner “TUNER”. -
Página 38: Accord Préréglé
Accord préréglé Vous pouvez mettre en mémoire jusqu’à 10 stations FM et AM Pour sélectionner les stations mémorisées respectivement sur les canaux préréglés 1 à 10. sur un canal préréglé Si vous éteignez le subwoofer, les réglages mis en Appuyez sur la touche FM/AM pour sélectionner une mémoire (horloge, stations mémorisées sur des canaux bande. -
Página 39: Rds
Le système RDS (Radio Data System) est un service de diffusion Programmes PTY qui permet aux stations d’envoyer des informations supplémentaires en même temps que le programme radio NEWS (nouvelles) : communiqués, événements, sondages, normal. reportages, situations vécues. AFFAIRS (informations générales) : suggestions diverses, telles Le mode RDS fonctionne sur la bande FM en Europe que des annonces pratiques, à... -
Página 40: Rds (Recherche Pty)
RDS (Recherche PTY) Il est possible de rechercher une station grâce à cette fonction. Appuyez sur la touche PTY. Sélectionnez le mode FM en appuyant sur la touche FM/AM. La recherche commence. < Lorsque le programme que vous avez choisi est trouvé, la recherché... -
Página 41: Réglage De L'horloge
Réglage de l’horloge Appuyez sur la touche . ou / pour spécifier l’heure actuelle. CLOCK SET STANDBY/ON Si vous éteignez le subwoofer, les réglages mis en mémoire (horloge, stations mémorisées sur un canal préréglé, réglage de minuterie) seront effacés. Appuyez sur la touche CLOCK SET. La valeur des minutes “minute”... -
Página 42: Réglage De La Minuterie
Réglage de la minuterie Appuyez sur la touche . ou / pour spécifier le moment du début (minutes), puis appuyez sur la touche TIMER. TIMER Réglez l’horloge avant de régler la minuterie. Si vous éteignez le subwoofer, les réglages mis en Les indicateurs et “OFF”... - Página 43 Pour mettre la minuterie en ou hors service Appuyez sur la touche . ou / pour sélectionner une source (CD ou TUNER), puis appuyez sur la touche TIMER. Si vous n’utilisez pas la minuterie, appuyez sur la touche TIMER pour la mettre hors service. (L’indicateur disparaît de l’affichage.) Press the TIMER button again to turn it on.
-
Página 44: Dépannage
Aucune station n’est captée ou le signal est trop faible. avant de consulter votre dépositaire un centre de service TEAC. e Faites l’accord correctement sur la station. e Faites pivoter l’antenne AM ou FM pour trouver la position Généralités... -
Página 45: Spécifications
Spécifications Accessoires fournis Section AMPLIFICATEUR Télécommande (RC-1047) x 1 Puissance de sortie (G+D) ....10 W + 10 W Câble de subwoofer x 2 Puissance de sortie (Subwoofer) . -
Página 46: Antes De Usarse
Contenido Antes de usarse Gracias por elegir TEAC. Lea este manual con cuidado para Lea esto antes de poner el aparado en operación obtener el mejor desempeño de esta unidad. < La unidad puede calentarse durante su funcionamiento, por lo que habrá que dejar espacio suficiente alrededor para su ventilación. -
Página 47: Discos
ésta puede causar daños sobre el lado grabado. Si usa dichos discos en esta unidad, TEAC Corporation y sus subsidiarias no pueden ser responsables de ninguna consecuencia o garantizar la calidad de reproducción. Si <... -
Página 48: Conexión
Conexión PRECAUCIÓN < Apague la energía de todos los equipos antes de hacer las conexiones. < Lea las instrucciones de cada componente que pretenda usar con esta unidad. < Asegúrese de insertar el conector de manera segura. Para evitar los ruidos y vibraciones, no junte los cables de conexión con el cable de energía. - Página 49 SPEAKER Cable de alimentación (c.a.) Conecte las bocinas izquierda y derecha usando los cables Una vez realizadas todas las conexiones restantes, conecte el RCA suministrados. cable de alimentación a la toma mural. Asegúrese de conectar: Asegúrese de conectar el cable de alimentación a una toma Enchufe blanco q Enchufe blanco (L: canal izquierdo) de red que suministre la tensión adecuada.
-
Página 50: Nombres De Cada Control
Nombres de cada control Puerta del CD PLAY/PAUSE (Reproducir/pausa) (y/J) Use este botón para iniciar o dejar en pausa la reproducción del CD/MP3. Pantalla STOP (Detener) (H) Sensor remoto Use este botón para detener la reproducción del CD/MP3. Cuando se opera la unidad de control remoto, apúntela hacia allá. -
Página 51: Unidad De Control Remoto
Unidad de control remoto La unidad de control remoto suministrada permite que la INTRO unidad se opere a distancia. En el modo CD, use este botón para iniciar la exploración de Cuando se opera la unidad de control remoto, apúntela hacia introducción. -
Página 52: Operación Básica
Operación básica EEPS (Electronic Equalizer Preset System) (Sistema preajustado de ecualizador electrónico) Cuando se pulsa una vez el botón EEPS, se visualiza el modo actual. Pulse el botón EEPS repetidamente para seleccionar cualquier otro modo. Enciende el subwoofer. CLASSIC: Un sonido balanceado; adecuado para música clásica. -
Página 53: Cómo Escuchar Los Cd/ Mp3
Cómo escuchar los CD/ MP3 (1) Oprima el botón OPEN/CLOSE para cerrar la puerta del < Toma algunos segundos para que la unidad cargue el disco. Ningún botón funcionará durante la carga. Espere hasta que se desplieguen el número total de pistas y el tiempo total de reproducción del disco. -
Página 54: Para Suspender La Reproducción Temporalmente (Modo De Pausa)
Cómo escuchar los CD/ MP3 (2) Para suspender la reproducción Para saltar a la pista siguiente o a la anterior temporalmente (modo de pausa) Oprima el botón Play/Pause (G/J) durante la reproducción. Durante la reproducción, oprima el botón Skip (.o/) La reproducción se detiene en la posición actual. -
Página 55: Reproducción Repetida
Reproducción repetida ESP (Protección electrónica contra golpes) La ESP almacena la música en una memoria intermedia para evitar el salto de sonido. Durante la reproducción de un disco CD, presione el botón Cada vez que se oprime el botón REPEAT, el modo cambia de MP3 para activar o desactivar la ESP. -
Página 56: Reproducción Programada
Reproducción programada FUNCTION MEMORY Oprima el botón Skip (. o /) de manera repetida Se pueden programar hasta 64 pistas en el orden deseado. para seleccionar una pista, y después oprima el botón MEMORY. La reproducción aleatoria no funciona durante la reproducción programada. -
Página 57: Reproducción Aleatoria
Reproducción aleatoria MEMORY Las pistas se pueden reproducir de manera aleatoria. Oprima el botón SHUFFLE durante la reproducción o cuando esté en el modo de paro. Después se encenderá “RNDM” en la pantalla. Verificación del orden programado < Si oprime el botón / durante la reproducción aleatoria, la siguiente pista se seleccionará... -
Página 58: Modo De Búsqueda (Mp3 Solamente)
Modo de búsqueda (MP3 solamente) Busque un nombre de pista Búsqueda de una pista en una carpeta Puede seleccionar una pista buscando su nombre. Oprima dos veces el botón MP3. Oprima una vez el botón MP3. Aparecen en la pantalla una letra (la letra inicial de un nombre de pista) y un nombre de pista. -
Página 59: Cómo Escuchar El Radio
Cómo escuchar el radio Si la recepción es deficiente Quando la receptión de una emisora AM es pobre, gire la unidad alrededor para encontrar la mejor posición para las emisoras AM. La antena AM está incorporada en dentro de la cubierta, por lo tanto al girar la unidad puede mejorar la recepción. -
Página 60: Sintonización Preestablecida
Sintonización preestablecida Usted puede almacenar las estaciones FM y AM en los canales 1 Cómo seleccionar las estaciones a 10 preestablecidos, respectivamente. preestablecidas Si el interruptor de energía del subwoofer está apagado, Oprima el botón FM/AM para seleccionar una banda. los ajustes mantenidos en memoria (reloj, estaciones preestablecidas, ajuste de temporizador) se borrarán. -
Página 61: Rds
El sistema de datos de radio (RDS) es un servicio de radiodifusión Programas PTY que permite a las emisoras enviar información adicional junto con la señal de radio normal. NEWS : mensajes, convocatorias, opinión pública, informes. Este sistema funciona únicamente con la banda de FM AFFAIRS : temas de actualidad, documentos, debates, europea. -
Página 62: Rds (Búsqueda Pty)
RDS (Búsqueda PTY) Esta función permite buscar emisoras por tipo de programa. Oprima el botón PTY. Seleccione FM con el botón FM/AM. Se inicia la búsqueda. < Cuando se localiza el programa seleccionado, la búsqueda se interrumpe y el tipo de programa se visualiza en la pantalla. Oprima el botón PTY. -
Página 63: Ajuste Del Reloj
Ajuste del reloj Oprima el botón . o / para ajustar la hora actual. CLOCK SET STANDBY/ON Si el interruptor de energía del subwoofer está apagado, los ajustes mantenidos en memoria (reloj, estaciones preestablecidas, ajuste de temporizador) se borrarán. Oprima el botón CLOCK SET. Parpadea el valor de “minuto”. -
Página 64: Ajuste Del Temporizador
Ajuste del temporizador Oprima el botón . o / para ajustar la hora de inicio (minuto), y después oprima el botón TIMER. TIMER Ajuste el reloj antes de ajustar el temporizador. Si el interruptor de energía del subwoofer está apagado, Los indicadores y “OFF”... -
Página 65: Para Activar O Desactivar El Temporizador
Para activar o desactivar el temporizador Oprima el botón . o / para seleccionar una fuente (CD o TUNER), y después oprima el botón TIMER. Cuando no use el temporizador, pulse el botón TIMER para apagarlo. (El indicador desaparece de la pantalla.) Pulse nuevamente el botón TIMER para encender el temporizador. -
Página 66: Solución De Problemas
Aunque la transmisión es estéreo, suena monaural. verá si puede resolver el problema usted mismo antes de llamar a e Oprima el botón STEREO/MONO. su distribuidor o al centro de servicio de TEAC. Si no se puede recuperar la operación normal, desconecte En general el cable de energía de la salida y conéctelo otra vez. -
Página 67: Especificaciones
Especificaciones Accesorios estándar Sección del AMPLIFICADOR Unidad de control remoto (RC-1047) x 1 Energía de salida (I+ D) ....10 W + 10 W Cable del subwoofer x 2 Energía de salida (subwoofer) . - Página 68 7733 Telegraph Road, Montebello, California 90640 Phone: (323) 726-0303 TEAC CANADA LTD. 5939 Wallace Street, Mississauga, Ontario L4Z 1Z8, Canada Phone: (905) 890-8008 TEAC MEXICO, S.A. De C.V Campesinos N°184, Colonia Granjas Esmeralda, Delegacion Iztapalapa, CP 09810, México DF Phone: (525) 581-5500 TEAC UK LIMITED Unit 19 &...