Publicidad
Idiomas disponibles
Idiomas disponibles
Publicidad
Tabla de contenido

Manuales relacionados para SOMFY Axovia 160 S NS


Resumen de contenidos para SOMFY Axovia 160 S NS
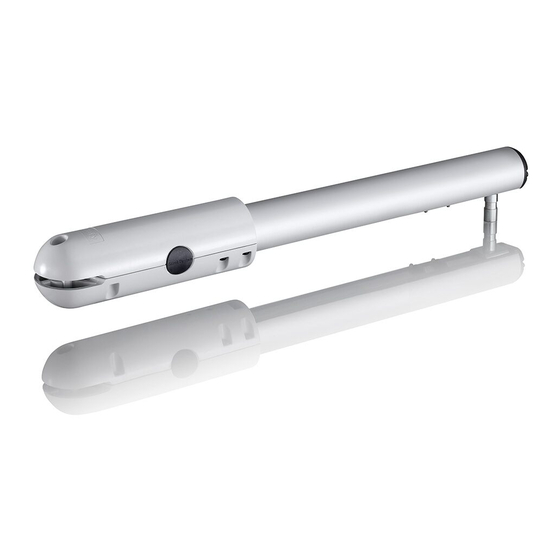
- Página 1 S.A.V 200-500-600 201-501-601 160 S NS 170 S NS 9 013 309 -V3...
-
Página 2: Raccordements Électriques
Raccordements électriques Raccordements électriques I Les étapes : J Raccordement des deux vérins. J Position du boîtier électrique sur le pilier. La liaison entre les vérins et le boîtier électrique doit être effectuée avant le raccordement du J Fixation du boîtier électrique sur le pilier. boîtier électrique au secteur. -
Página 3: Paramétrage De Votre Sgs/Axovia
PROG AUTO Raccordements électriques Paramétrage de votre SGS/AXOVIA ON/OFF I Les étapes : J Connection de l’antenne. J Présentation des symboles. J Paramétrage de votre SGS /AXOVIA. Pour un fonctionnement optimal, il est J Précautions d’emploi du mode automatique. recommandé de sortir le fil d’antenne du J Sécurisation du paramétrage. - Página 4 • Mémorisation des télécommandes en ouverture totale seule : L’électronique Somfy mémorise automatiquement : Choisissez la touche de la télécommande que vous souhaitez utiliser pour commander votre • La force des vérins nécessaire à la commande des portails, en fonctionnement normal.
- Página 5 Une fois le portail complètement ouvert : - Attendez le temps de la temporisation souhaitée. Votre SGS /AXOVIA SOMFY permet une installation conforme à la norme NF EN 12 - Lancez un ordre de fermeture par un nouvel appui (bref ou long) sur la 453 de votre portail en mode automatique avec l'utilisation OBLIGATOIRE : télécommande.
- Página 6 Utilisation de votre SGS/AXOVIA Utilisation de votre SGS /AXOVIA J Sécurisation du paramétrage I Fonctionnement en mode automatique En fonctionnement automatique, une impulsion sur la touche de la télécommande provoque Effectuez un appui long sur la télécommande. l’ouverture du portail. Sa fermeture intervient automatiquement après la durée de temporisation préalablement réglée par vos soins.
- Página 7 Accessoires Accessoires Descriptif et branchements Descriptif et branchements 2400477 Cellules 2400599 Cellules Avant de brancher les cellules, enlevez le fil (shunt), placé entre les bornes 3 et 4 du boîtier électronique. Avant de brancher les cellules, enlevez (shunt), placé entre les bornes 3 et 4 du boîtier Schéma de câblage pour un jeu de cellules électronique.
-
Página 8: Elektrische Verbindingen
Elektrische verbindingen Elektrische verbindingen I De stappen: J Verbinding van de twee cilinders. J Plaatsing van het elektra-kastje op de pilaar. De verbinding tussen de cilinders en het elektrakastje moet tot stand komen voor J Bevestiging van het elektra-kastje op de pilaar. de aansluiting van het elektrakastje op het lichtnet. - Página 9 PROG Instelling parameters van uw SGS/AXOVIA Elektrische verbindingen AUTO ON/OFF I De stappen: J Aansluiting van de antenne. J Presentatie van de symbolen. J Instelling parameters van uw SGA/AXOVIA. Voor een optimale werking wordt J Voorzorgsmaatregelen gebruik van de automatische modus. geadviseerd de antennedraad uit J Beveiliging van de instelling parameters.
- Página 10 Inlezen van de afstandsbedieningen voor alleen volledige opening: Kies de toets van de afstandsbediening die u wilt gebruiken om uw toegangshek te besturen. De Somfy elektronica importeert automatisch de volgende gegevens: Plaats de afstandsbediening op het doelwit dat op de beschermkap gegraveerd is: •...
- Página 11 Als het hek helemaal open is: - Moet u wachten tot de gewenste vertragingstijd verstreken is. Uw Sgs van Somfy maakt een installatie van uw toegangshek in de automatische modus - Geeft u een sluitcommando door nog een keer (kort of lang) op de afstandsbe- mogelijk conform de norm NF EN 12 453 met VERPLICHT gebruik: diening te drukken.
- Página 12 Gebruik van uw SGS / AXOVIA Gebruik van uw SGS / AXOVIA J Beveiliging van de instelling parameters I Werking in automatische modus Als er in automatische modus op de toets van de afstandsbediening wordt gedrukt gaat het hek open. Het hek sluit automatisch na het aflopen van de van tevoren door u Druk op de toets voor volledig openen geprogrammeerde vertragingstijd.
- Página 13 Accessoires Accessoires Beschrijving en aansluitingen Beschrijving en aansluitingen 2400477 Cellen 2400599 Cellen Alvorens de cellen aan te sluiten de draad (shunt) geplaatst tussen Alvorens de cellen aan te sluiten de draad aansluitklemmen 3 en 4 van het elektronica-kastje verwijder en. (shunt) geplaatst tussen aansluitklemmen 3 en 4 van het elektronica-kastje verwijder en.
- Página 14 Po∏àczenia elektryczne Po∏àczenia elektryczne Kolejne etapy: • Przy∏àczenie dwóch prowadnic. • Zainstalowanie skrzyni elektrycznej na s∏upie. Po∏àczenie mi´dzy prowadnicami a skrzynià elektrycznà musi byç wykonane przed • Przytwierdzenie skrzyni elektrycznej na s∏upie. przy∏àczeniem skrzyni do zasilania. • Pod∏àczenie anteny. • Przy∏àczenie dwóch prowadnic. •...
-
Página 15: Ustawianie Parametrów
Ustawianie parametrów PROG Po∏àczenia elektryczne Parametryzacja SGS / AXOVIA AUTO ON/OFF I Etapy: • Pod∏àczenie anteny. Kolejne etapy: J Objaśnienia symboli. • Przedstawienie symboli. J Programowanie pilotów zdalnego sterowania. Dla optymalnego funkcjonowania • Parametryzacja SGS / AXOVIA. J Programowanie przesuwu skrzydeł. urzàdzenia, przez specjalny otwór •... - Página 16 Programowanie pilotów zdalnego sterowania do otwierania całkowitego: J Programowanie przesuwu skrzydeł. Wybrać przycisk pilota, który ma sterować bramą. Układ elektroniczny SOMFY programuje automatycznie: Umieścić pilota w punkcie oznaczonym na obudowie odbiornika: • Momenty napędów konieczne do sterowania bramą, w trybie normalnym.
- Página 17 A i B w napędzie M 1 . zamykać. ciwnym kierunku zamienić przewody A i B w napędzie M1. SGS SOMFY pozwala na zaprogramowanie bramy w trybie automatycznym, zgodnà • Skrzydło, które uruchamia się jako drugie (sterowane przez M 2 ) przesuwa się w przeciw •...
- Página 18 Ponowne naciśnięcie (krótsze lub dłuższe) spowoduje zamknięcie skrzydła. U˝ytkowanie SGS / AXOVIA U˝ytkowanie SGS / AXOVIA I Działanie w trybie automatycznym • Zabezpieczenie zaprogramowanych funkcji. W trybie automatycznym, jedno naciśnięcie przycisku pilota powoduje otwieranie bramy. Jej zamykanie odbywa się automatycznie po wstępnie zdefiniowanym okresie czasu. Nale˝y nacisnàç...
- Página 19 Akcesoria Akcesoria Opis i podłączenia Opis i podłączenia 2400477 Fotokomórki 2400599 Fotokomórki ł UWAGA! Przed pod ączeniem fotokomórek należy zdjąć przewód, który znajduje się miedzy zaciskiem 3 i 4 w skrzyni elektronicznej. UWAGA! Przed podłączeniem fotokomórek należy zdjąć przewód, który znajduje się miedzy zaciskiem •...
-
Página 20: Electric Connections
Electric connections Electric connections I The steps : J Connecting the two cylinders J Place the switch box on the pillar. The connection between the cylinders and the switch box must be made before connecting J Attach the switch box on the pillar. the switch box to the power supply. - Página 21 PROG AUTO Electric connections Parametering your SGS/AXOVIA ON/OFF I The steps: J Connect the antena. J Presentation of the symbols. J Parametering your SGA/AXOVIA. optimal functioning, J Using precautions for the automatic mode. recommended to exit the box antenna J Securization of parametering. wire through a grommet : Never cut the antena wire.
- Página 22 Memorising the remote controls in total opening only : Choose key of remote control which you wish to use to order your gate. The Somfy electronics automatically memorizes : Place remote control against the target engraved on the hood: • The force of the cylinders necessary for gate control in normal operation. This memorization then makes it possible to detect any abnormal force on the motorization.
- Página 23 J Using precautions in automatic mode. • Once the gate is completely open : Your Somfy SGS/AXOVIA enables installing your gate in automatic mode in - Wait for the desired time delay. compliance with the standard NF EN 12 453 with the MANDATORY use of : - Launch a closing order by pushing again on the same button.
- Página 24 Using your SGS/AXOVIA Using your SGS/AXOVIA J Securization of parametering I Functionning in automatic mode I n a u t o m a t i c f u n c t i o n i n g , p u s h i n g o n t h e re m o t e c o n t ro l b u t t o n p ro v o k e s Push on the complete opening button o p e n i n g o f t h e g a t e .
- Página 25 Accessories Accessories Description and connections Description and connections 2400477 Cells 2400599 Cells Before plugging in the cells, remove the shunt wire placed Before plugging in the cells, between the terminals 3 and 4 of the electronic box. remove the shunt wire placed between the terminals 3 and 4 of the Wiring diagram for a set of cells : electronic box.
- Página 26 Conexión eléctric Conexión eléctric I Etapas : J Conexión de los cilindros. J Colocación de la caja eléctrica en el pilar. La conexión entre los cilindros y la caja eléctrica debe realizarse antes de conectar la caja J Sujeción de la caja eléctrica en el pilar. eléctrica a la red.
-
Página 27: Parametrización Del Sgs / Axovia
PROG AUTO Conexión eléctric Parametrización del SGS / AXOVIA ON/OFF I Etapas : J Conexión de la antena. J Presentación de los símbolos. J Parametrización el SGA / AXOVIA. Para lograr un functionamiento óptimo, se J Regulación del modo automático. recomienda sacar el cable de la antena de la J Validación de la regulación. - Página 28 Aprendizaje del recorrido de los batientes. Elija la tecla del mando a distancia que va a emplear para mandar la cancela. La electrónica de Somfy memoriza automáticamente: Coloque el mando a distancia en la diana grabada en la tapa: • Los pares que necesitan los motores para mandar la cancela, en funcionamiento normal.
- Página 29 Parametrización del SGS / AXOVIA Parametrización del SGS / AXOVIA J Precauciones de uso del modo automático. Una vez abierta completamente la cancela: - Espere el tiempo de temporización deseado. Para usar la canela en modo automático, la norma EN 12 453 exige instalar los - Ejecute una orden de cierre pulsando de nuevo (pulsación breve o larga) el siguientes accesorios, cuya conexión al Sgs / Axovia ya se ha previsto: mando a distancia.
- Página 30 Utilisación del SGS/AXOVIA Utilisación del SGS/AXOVIA J Comprobación de la parametrización correcta I Funcionamiento en modo automático En funcionamiento automático, la pulsación del mando a distancia provoca la apertura de la Realice una pulsación en el mando a distancia. cancela. Su cierre se produce automáticamente pasada la temporización realizada con anterioridad.
- Página 31 Accesorios Accesorios Descripción y conexiones Descripción y conexiones 2400477 Células 2400599 Células Antes de conectar las ceulas, quite el cable (puente), que está Antes de conectar las ceulas, colocado entre los bornes 3 y 4 del armario electrónico. quite el cable (puente), que está colocado entre los bornes 3 y 4 del Esquema de cableado para un juego de células armario electrónico.
- Página 32 Accessoires Accessoires Accessories Accesorios Akcesoria Descriptif et branchements Beschrijving en aansluitingen Description and connections Descripción y conexiones Opis i pod∏àczenia 2400479 De noodbatterij zorgt er bij spanningsuitval voor Akumulator zapewnia ruch bramy, w zwolnionym dat het hek toch (met lage snelheid) functioneert. tempie, w przypadku czasowej przerwy w dostawie pràdu (EDF).
- Página 33 Accessoires Accessoires Accessories Accesorios Akcesoria Descriptif et branchements Beschrijving en aansluitingen Description and connections Descripción y conexiones Opis i pod∏àczenia 2400581 Akcesoria - Opis i podłączenia 2400472 – H P2 M P1 T3 C3 R3 T2 C2 R2 T1 C1 R1 V Une antenne déportée, de plus longue portée peut...
- Página 34 baterii powyżej źródła zasilania elektrycznego. Accessoires Accessoires Accessories Accesorios Akcesoria • Czas działania:10 cykli nieprzerwanie lub 24 godziny dla bramy w dobrym stanie. Descriptif et branchements Beschrijving en aansluitingen Description and connections Descripción y conexiones Opis i pod∏àczenia • Czas ładowania przy maksymalnym użytkowaniu baterii: 48 godziny.
- Página 35 ________________________________________________________________________________________________________________________________________________________________________________ ______________________________________________________________________________________________________________________________________________________________ ________________________________________________________________________________________________________________________________________________________________________________ ________________________________________________________________________________________________________________________________________________________________________________ ________________________________________________________________________________________________________________________________________________________________________________ ________________________________________________________________________________________________________________________________________________________________________________ ________________________________________________________________________________________________________________________________________________________________________________ ________________________________________________________________________________________________________________________________________________________________________________ ________________________________________________________________________________________________________________________________________________________________________________ ________________________________________________________________________________________________________________________________________________________________________________ ________________________________________________________________________________________________________________________________________________________________________________ ________________________________________________________________________________________________________________________________________________________________________________ ________________________________________________________________________________________________________________________________________________________________________________ ________________________________________________________________________________________________________________________________________________________________________________ ________________________________________________________________________________________________________________________________________________________________________________ ________________________________________________________________________________________________________________________________________________________________________________ ________________________________________________________________________________________________________________________________________________________________________________ ________________________________________________________________________________________________________________________________________________________________________________ ________________________________________________________________________________________________________________________________________________________________________________ ________________________________________________________________________________________________________________________________________________________________________________ ________________________________________________________________________________________________________________________________________________________________________________ ________________________________________________________________________________________________________________________________________________________________________________...
- Página 36 74307 CLUSES CEDEX Hot-line: 0 810 12 12 37 prix d’u n appel local Assistance technique France : Fax :04.50.96.71.20 E-mail: consommateur@somfy.fr Hot-Line Belgique: 02/788.28.68* prix d’un appel local Hot-Line Luxemburg: 261.02.140* tarief van een lokaal gesprek SOMFYBELUX Mercuriusstraat 19 Technical assistance U.K.: (44)113 391 3030...