Tabla de contenido
Publicidad
Idiomas disponibles
Idiomas disponibles
Enlaces rápidos
MyTime Pro
Art. No. 80-10030 / 80-10031
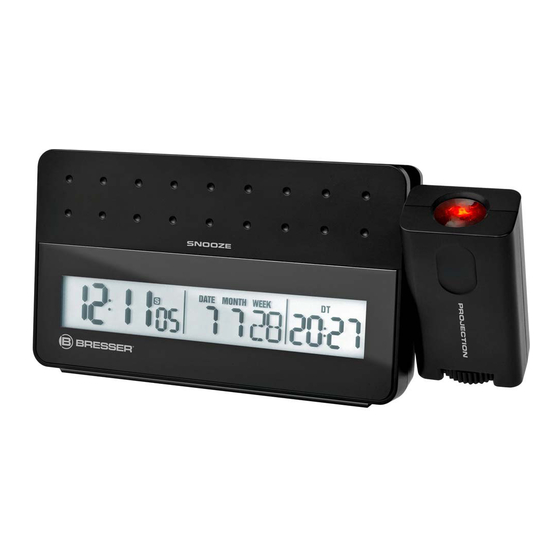
Funk-Wecker mit Projektor und USB-Ladestation
Radio Controlled Alarm Clock with Projector and USB Charger
Radio-réveil avec projecteur et chargeur USB
Sveglia radiocontrollata con proiettore e stazione di ricarica USB
Reloj despertador radiocontrolado con cargador USB
BEDIENUNGSANLEITUNG
DE
INSTRUCTION MANUAL
GB
MODE D'EMPLOI
FR
ISTRUZIONI PER L'USO
IT
INSTRUCCIONES DE USO
ES
Publicidad
Tabla de contenido

Manuales relacionados para Bresser MyTime Pro


Resumen de contenidos para Bresser MyTime Pro
- Página 1 MyTime Pro Art. No. 80-10030 / 80-10031 Funk-Wecker mit Projektor und USB-Ladestation Radio Controlled Alarm Clock with Projector and USB Charger Radio-réveil avec projecteur et chargeur USB Sveglia radiocontrollata con proiettore e stazione di ricarica USB Reloj despertador radiocontrolado con cargador USB...
-
Página 2: Tabla De Contenido
Fig. 1 BEDIENUNGSANLEITUNG ........4 Fig. 2 INSTRUCTION MANUAL ........12 MODE D’EMPLOI ..........20 ISTRUZIONI PER L’USO........29 INSTRUCCIONES DE USO........37 GARANTIE & SERVICE / WARRANTY & SERVICE GARANTIE ET SERVICE / GARANTÍA Y SERVICIO GARANZIA E ASSISTENZA ......... 46... - Página 3 Fig. 3 Fig. 4 f g h i j SIZE AA 1.5V SIZE AA 1.5V Fig. 5 SIZE AA 1.5V SIZE AA 1.5V...
-
Página 4: Zu Dieser Anleitung
Zu dieser Anleitung GEFAHR EINES STROMSCHLAGS! Diese Bedienungsanleitung ist als Teil des Gerätes zu Dieses Gerät beinhaltet Elektronikteile, die über eine Strom- betrachten. Lesen Sie vor der Benutzung des Geräts quelle (Batterien und Netzteil) betrieben werden. Lassen Sie aufmerksam die Sicherheitshinweise und die Bedienungsan- Kinder beim Umgang mit dem Gerät nie unbeaufsichtigt! Die leitung. - Página 5 Strom- und Verbindungskabel sowie Verlängerungen und Gefahr einer dauerhaften Schädigung der Augen! Anschlussstücke niemals knicken, quetschen oder zerren. Schützen sie Kabel vor scharfen Kanten und Hitze. HINWEIS! Überprüfen Sie das Gerät, die Kabel und Anschlüsse vor In- Bauen Sie das Gerät nicht auseinander! Wenden Sie sich im betriebnahme auf Beschädigungen.
-
Página 6: Bedienungsanleitung
LIEFERUMFANG SPANNUNGSVERSORGUNG (Fig. 1) Wecker (A), Netzadapter mit USB-Stromkabel (B), Bedie- Batterien einsetzen nungsanleitung 1. Entfernen Sie die Abdeckung vom Batteriefach. 2 Batterien, Typ AA erforderlich (nicht enthalten) 2. Setzen Sie 2 Batterien vom Typ AA entsprechend der An- gabe zur Polarität im Batteriefach ein. TEILEÜBERSICHT (Fig. - Página 7 SYMBOLERKLÄRUNG HINWEIS! Darüber hinaus können Sie jederzeit eine neuerlichen Symbol Beschreibung Symbol Beschreibung Empfang des Funksignals intiieren indem Sie die Taste WA- Funksignal Funksignal schwach VE/°C/°F 3 Sekunden gedrückt halten. Nach etwa 3-5 Minu- Datum Weckruf wird wiederholt ten wird das Signal empfangen. Auslandszeitanzeige Monat PM (nur im 12-Std-Modus)
-
Página 8: Manuelle Zeiteinstellung
DATUM UND UHRZEIT EINSTELLEN HINWEIS! 1. MODE erneut drücken: Der Wert für die Jahreszahl blinkt und Der Netzadapter ist erforderlich für das Aufladen eines Smart- kann durch drücken der + oder - Taste verändert werden. phones. 2. MODE erneut drücken: Der Wert für den Monat blinkt und kann durch drücken der + oder - Taste verändert werden. - Página 9 rück zur normalen Zeit-/Temperatur-Anzeige und speichert rend des Einstellmodus für die Auslandszeit gedrückt. Die die bis dahin vorgenommenen Einstellung. Zeitanzeige blinkt und die Auslandszeit kann wie oben be- 2. Halten Sie in einem beliebigen Einstellmodus die + oder - schrieben über die + oder - Taste eingestellt werden. Taste für etwa 3 Sekunden um den Schnelllauf zu aktivieren.
- Página 10 1. Halten Sie die MODE Taste für etwa 5 Sekunden gedrückt: 1. Drücken Sie die Taste um den Weckruf auszuschalten. Der Wert für die Stunden blinkt und kann durch drücken 2. Berühren Sie das Touchfeld SNOOZE/LIGHT, so wird der der + oder - Taste verändert werden. Weckruf unterbrochen und die Hintergrundbeleuchtung 2.
- Página 11 Position zurück bewegen oder das Netzteil entfernen. Reinigen Sie das Gerät nur äußerlich mit einem trockenen 3. Drücken Sie die Taste FLIP um die Projektion in Tuch. Benutzen Sie keine Reinigungsflüssigkeit, um Schäden 180°-Schritten im Uhrzeigersinn zu drehen. an der Elektronik zu vermeiden. 4.
-
Página 12: Eg-Konformitätserklärung
About this manual Hiermit erklärt die Bresser GmbH, dass sich dieses These operating instructions are to be considered a Gerät (MyTime Pro / Art.Nr.: 80-10030 und 80- component of the device. 10031) in Übereinstimmung mit den grundlegenden Anforde- Please read the safety instructions and the operating rungen und den anderen relevanten Vorschriften der Richtli- instructions carefully before use. - Página 13 extensions and adapters. Protect the cables from sharp RISK of ELECTRIC SHOCK! edges and heat. This device contains electronic components that operate via Before operating, check the device, cables and connections a power source (power supply and batteries). Children should for damage.
-
Página 14: Scope Of Delivery
PARTS OVERVIEW (Fig. 2-5) please contact your dealer. The dealer will contact the Service Centre and can send the device in to be repaired, (1) Projector Lens if necessary. (2) SNOOZE/Backlight (3) Focus wheel Protect the device from severe shocks! (4) FLIP key (5) + key Always replace weak or empty batteries with a new, complete... -
Página 15: Symbol Explanation
indicated in the battery compartment. Foreign time indication Month 3. Close the compartment with the cover. PM (12 hr display only) Summer time indication AM (12 hr display only)) Degree Celsiuss AC Adapter installation Alarm 1 Degree Fahrenheit Alarm 2 Dual time NOTE! Please make sure your household voltage match with the... -
Página 16: Manual Time Setting
MANUAL TIME SETTING signal icon turns off. Then user has to set the time manually. The system date and time can be set by pressing MODE for approx. 5 seconds in Time/Temperature display with the ** Radio controlled signal will be scheduled to receive every turns off. - Página 17 2. Press and hold MODE for approx. 5 seconds in Foreign time NOTE! /Temperature. The digits for time are blinking and foreign 1. If no key is pressed for 30 seconds, it will exit the Manual time can be set as described above by pressing + or - key. Time Setting Mode and go back to Time/Temperature 3.
-
Página 18: Light Function
2. Press MODE again: the minute digits are blinking and can 3. If the alarm is not turned off, it will stop automatically after be set by pressing + or - key. 4 minutes. 3. Press MODE again: the alarm time is set and icon will LIGHT FUNCTION turn on. -
Página 19: Resetting The Unit
EC DECLARATION OF CONFORMITY Only use a dry cloth to clean the exterior of the device. To Bresser GmbH declares that the device (MyTime avoid damaging the electronics, do not use any cleaning fluid. Pro/Art.No.: 80-10030 and 80-10031) is in Protect the device from dust and moisture. -
Página 20: A Propos De Ce Manuel
A propos de ce manuel RISQUE D’ELECTROCUTION ! Le présent mode d‘emploi doit être considéré comme Cet appareil contient des pièces électroniques raccordées à faisant partie intégrante de l’appareil. Avant d’utiliser une source d’alimentation électrique (par bloc d’alimentation l’appareil, veuillez lire attentivement les consignes de sécurité et/ou batteries). - Página 21 Les câbles électriques sous tensions ainsi que les rallonges RISQUE D’ÉBLOUISSEMENT ! et les cosses ne doivent pas subir de forces de torsions ou Ne regardez jamais dans l'éclairage (LED) ! Il existe le danger de traction, être coincés ou écrasés. Protégez les câbles des d'une lésion durable des yeux ! objets tranchants et de la chaleur.
-
Página 22: Volume De Livraison (Fig. 1)
inappropriée due à des batteries mal insérées ou l’utilisation (12) Raccord électrique USB d’un bloc d’alimentation non adapté ! (13) Raccord USB Volume de livraison (Fig. 1) ALIMENTATION EN COURANT Réveil (A), adaptateur secteur avec câble électrique USB (B), Insérer les piles mode d’emploi 1. -
Página 23: Explication Des Symboles
2. Branchez le connecteur USB-Micro-B du câble électrique La montre commence automatiquement à rechercher dans le raccord électrique USB du réveil. le signal radio**. On peut compter environ 3-5 minutes 3. Branchez la fiche dans la prise de courant. jusqu’à ce que ce processus soit terminé. Pendant la recherche, le symbole de signal radio clignote. -
Página 24: Fonction De Recharge Usb
FONCTION DE RECHARGE USB 4. Appuyez à nouveau sur MODE afin d’afficher la température (°C/°F) 1. Insérez le connecteur USB de votre smartphone dans le raccord USB sur le côté du réveil afin de le recharger RÉGLAGE MANUEL DE L’HEURE (câble de recharge USB non inclus), 5 V d’alimentation en Il est possible de régler la date et l’heure en appuyant pendant tension pour un courant électrique de 1 000 mA). -
Página 25: Réglage De L'heure De L'alarme
AFFICHAGE DE L’HEURE EN MODE 12/24 HEURES parcourt les langues suivantes : (1) “GE” pour l’allemand (2) “FR” pour le français (3) “IT” pour l’italien (4) “ES” pour Appuyez sur la touche + afin d’alterner entre l’affichage de l’heure au format 12 heures et 24 heures. l’espagnol (5) “EN”... - Página 26 ACTIVATION DE L’HEURE D’ALARME 1 ET/OU 2 1. Appuyez sur la touche MODE pendant environ 5 secondes: La valeur des heures clignote et on peut la modifier en 1. Appuyez sur la touche afin d’activer l’heure d’alarme 1. appuyant sur la touche + ou -. Le symbole s’affiche.
-
Página 27: Rétroéclairage
RÉTROÉCLAIRAGE AFFICHAGE DE LA TEMPÉRATURE Touchez l’écran tactile SNOOZE/ LIGHT afin d’activer Appuyez sur la touche WAVE/°C/°F afin d’alterner entre le rétroéclairage. Il s’éteindra automatiquement après 5 l’affichage de la température en Celsius et Fahrenheit. secondes. RÉINITIALISATION PROJECTION ET AJUSTEMENT En cas d’un dysfonctionnement ou d’un affichage anormal, 1. -
Página 28: Déclaration De Conformité Ce
Protégez l’appareil de la poussière et de l’humidité ! Les batteries doivent être retirées de l’appareil lorsque celui-ci est Bresser GmbH déclare que l’appareil (MyTime Pro / destiné à ne pas être utilisé un certain temps. Art.No.: 80-10030 et 80-10031) répond aux directives applicables et correspond aux standards de la ÉLIMINATION... - Página 29 Informazioni sul presente manuale RISCHIO DI FOLGORAZIONE! Questo manuale d’uso va considerato parte integrante Questo apparecchio contiene componenti elettronici azionati dell’apparecchio. Prima di usare l’apparecchio, leggere da una sorgente di corrente (alimentatore e batterie). Non con attenzione le indicazioni di sicurezza e il manuale d’uso. consentire ai bambini di utilizzare l‘apparecchio senza Conservare il manuale d’uso per poterlo utilizzare di nuovo in supervisione! L’utilizzo deve avvenire soltanto conformemente...
- Página 30 Non piegare, schiacciare o tirare i cavi di alimentazione e di NOTA! collegamento, le prolunghe e i connettori. Proteggere i cavi Non smontare l’apparecchio! In caso di guasto, rivolgersi al dagli spigoli appuntiti e dal calore. proprio rivenditore specializzato. Egli provvederà a contattare Prima dell’uso accertarsi che l’apparecchio, i cavi e i il centro di assistenza e se necessario a spedire l’apparecchio connettori non siano danneggiati.
-
Página 31: Istruzioni Per L'uso
DOTAZIONE ALIMENTAZIONE (Fig. 1) Sveglia (A), alimentatore con cavo di corrente USB (B), Inserimento delle batterie istruzioni per l‘uso 1. Togliere il coperchio dal vano batterie. 2 batterie, tipo AA necessarie (non in dotazione) 2. Inserire 2 batterie di tipo AA rispettando la polarità nel vano batterie. -
Página 32: Spiegazione Dei Simboli
SPIEGAZIONE DEI SIMBOLI NOTA! È possibile avviare in qualsiasi momento una nuova ricezione Symbolo Descrizione Symbolo Descrizione del segnale radio tenendo premuto per 3 secondi il tasto Segnale radio Segnale radio debole WAVE/°C/°F. Il segnale viene ricevuto dopo 3-5 minuti. Data Ripetizione sveglia Visualizzazione ora estera... -
Página 33: Impostazione Manuale Dell'ora
IMPOSTAZIONE DI DATA E ORA NOTA! 1. Premere nuovamente MODE: Il numero corrispondente per ricaricare uno smartphone è necessario un alimentatore all'anno lampeggia e si può modificare premendo + oppure -. di rete. 2. Premere nuovamente MODE: Il numero corrispondente al mese lampeggia e si può... -
Página 34: Calendario
IMPOSTAZIONE DELL'ORA ESTERA contenuto visualizzato passa nuovamente dalla modalità di impostazione manuale dell'ora alla normale visualizzazione 1. Tenere premuto il tasto +per circa 5 secondi fino a quando di ora e temperatura salvando l'impostazione eseguita fino compare il simbolo a quel momento. 2. - Página 35 salvato e viene visualizzato il simbolo ARRESTO/INTERRUZIONE DELLA SVEGLIA Non appena suona la sveglia 1/sveglia 2, i rispettivi simboli IMPOSTAZIONE DELL'ORARIO DI SVEGLIA 2 lampeggiano. Nella modalità di visualizzazione per l'orario di sveglia 2 [AL 2] ... 1. Premere il tasto per disattivare la sveglia.
-
Página 36: Indicazione Della Temperatura
interrompe soltanto riportando l'interruttore alla posizione dalla sorgente di corrente (staccare il connettore oppure originaria oppure scollegando l'alimentatore. rimuovere le batterie)! 3. Premere il tasto FLIP per ruotare la proiezione di 180° in senso orario. Pulire l’apparecchio soltanto con un panno asciutto. Non 4. -
Página 37: Dichiarazione Di Conformità Ce
Per la presente Bresser GmbH, afferma che questa o entrega a terceros del aparato, se debe entregar el manual unità (MyTime Pro / Art.No.: 80-10030 e 80- de instrucciones al siguiente propietario/usuario del 10031), è coerente e conforme ai requisiti essenziali ed alle producto. - Página 38 alimentación. Nunca tirar del cable. ¡PELIGRO DE DESCARGA ELÉCTRICA! Este aparato contiene componentes electrónicos que No doblar, aplastar, estirar ni pasar por encima de cables funcionan mediante una fuente de electricidad (equipo de de alimentación o conexión ni de alargadores o piezas de alimentación y pilas).
-
Página 39: Contenido De La Entrega
de una fuente de alimentación inadecuada. PELIGRO DE DESLUMBRAMIENTO! ¡No mire nunca directamente a la iluminación (LED)! ¡Hay CONTENIDO DE LA ENTREGA (Fig. 1) peligro de provocar un daño permanente para la vista! Despertador (A), Adaptador con cable USB (B), instrucciones de uso ¡NOTA! Se precisan 2 pilas del tipo AA (no incluidas) -
Página 40: Alimentación De Los Dispositivos
2. Introduzca el conector USB-Micro-B del cable en la toma (13) Conexión USB de corriente USB del despertador. 3. Introduzca el enchufe en la caja del enchufe. ALIMENTACIÓN DE LOS DISPOSITIVOS SIGNIFICADO DE LOS SÍMBOLOS Colocar las pilas Símbolo Descripción Símbolo Descripción 1. -
Página 41: Función De Carga Usb
USB situado al lado del despertador para cargarlo (cable señal radiocontrolad parpadea. USB no incluido) (Subministro de corriente de 5V para 2. Si recibe de manera satisfactoria la señal radiocontrolada, 1000mA de intensidad de corriente). la fecha y la hora se mostrarán automáticamente y el 2. -
Página 42: Configuración De La Fecha Y La Hora
se muestra la fecha y la temperatura podrá configurar la fecha !NOTA! y la hora manualmente. El símbolo no se muestra más. 1. Si durante 30 segundos no se pulsa botón alguno, el modo para introducir manualmente la hora cambiará al CONFIGURACIÓN DE LA FECHA Y LA HORA modo de visualización normal de hora y temperatura. -
Página 43: Configurar La Alarma
CONFIGURAR LA HORA EXTRANJERA y se mostrará el símbolo 1. Pulse el botón + durante unos 5 hasta que aparezca el CONFIGURAR LA ALARMA 2 símbolo En modo de visualización para la alarma 2 [AL 2] ... 2. Mantenga presionado el botón MODE durante unos 1. -
Página 44: Iluminación De Fondo
PARAR/ INTERRUMPIR LA ALARMA 2. Cuando el dispositivo esté conectado, mueva el interruptor CONTINUE PROJECTION en el sentido de la flecha para Cuando suena la alarma 1/ alarma 2, el correspondiente activar la proyección continuada. La proyección se termina símbolo parpadea. -
Página 45: Mantenimiento / Limpieza
¡Proteja el aparato del polvo y la humedad! Se deben retirar las pilas del aparato si no se va a usar durante un periodo unidad (MyTime Pro / Art.No.: 80-10030 y 80- 10031), se encuentra acorde y de conformidad con los prolongado. -
Página 46: Warranty & Service
(QR code) for available versions. Alternatively you can erforderlich. Die vollständigen Garantiebedingungen sowie Informationen also send an email to manuals@bresser.de or leave a message on zu Garantiezeitverlängerung und Serviceleistungen können Sie unter www. +49 (0) 28 72 – 80 74-220*. Please always state your name, precise bresser.de/garantiebedingungen einsehen. -
Página 47: Garantía Y Servicio
Entonces visite nuestra página web utilizando el siguiente enlace (código QR) para ver las versiones disponibles. O envíenos un mensaje a la dirección de correo manuals@bresser.de o www.bresser.de/download/801003X déjenos un mensaje telefónico en el siguiente número +49 (0) 28 72 –... - Página 48 Bresser GmbH Gutenbergstr. 2 · DE-46414 Rhede Germany www.bresser.de · service@bresser.de...