Tabla de contenido
Publicidad
Enlaces rápidos
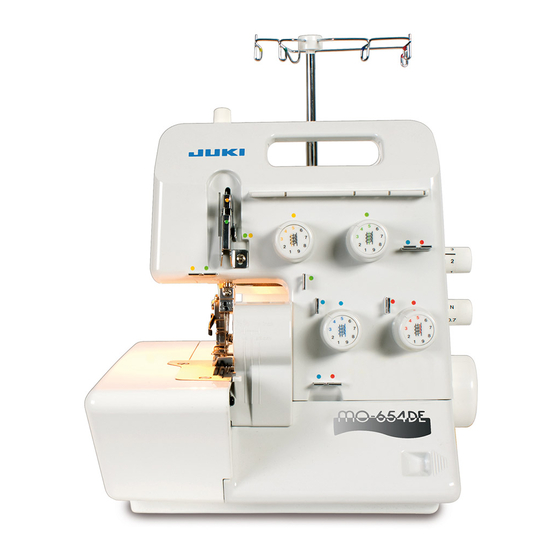
2-Needle, 2/3/4-Thread Overlock Sewing Machine
Maquina de coser Sobreorilladora de 2 Agujas, 2/3/4 Hilos
Surjeteuse-Raseuse 2 Aiguilles, 2/3/4 Fils
Macchina per cucire surfilatrice 2 aghi, 2/3/4 fili
MO-654DE/654
Instruction Manual
Manual de instrucciones
Manuel d'instructions
Manuale d'istruzioni
IMPORTANT:
Read all safety regulations carefully and under-
stand them before using your sewing machine.
Retain this instruction manual for future reference.
IMPORTANTE:
Lea cuidadosamente todas las recomendaciones
con respecto a la seguridad y comprendalas
perfectamente antes de usar su maquina.
Guarde este libro de instrucciones para referencias
futuras.
IMPORTANT:
Avant de mettre la machine en marche, lire
attentivement et assimiler les regles de securite
de ce manuel.
Conserver le manuel afin de pouvoir le consulter
ul terieurement.
IMPORTANTE:
Prima della messa in servizio, leggere e seguire
con attenzione tutte le regole per la sicurezza.
Conservare e consultare questo manuale per ogni
riferimento futuro.
Publicidad
Tabla de contenido

Manuales relacionados para JUKI MO-654DE


Resumen de contenidos para JUKI MO-654DE
- Página 1 2-Needle, 2/3/4-Thread Overlock Sewing Machine Maquina de coser Sobreorilladora de 2 Agujas, 2/3/4 Hilos Surjeteuse-Raseuse 2 Aiguilles, 2/3/4 Fils Macchina per cucire surfilatrice 2 aghi, 2/3/4 fili MO-654DE/654 Instruction Manual Manual de instrucciones Manuel d’instructions Manuale d'istruzioni IMPORTANT: Read all safety regulations carefully and under- stand them before using your sewing machine.
- Página 2 “IMPORTANT SAFETY INSTRUCTIONS” When using an electrical appliance, basic safety precautions should always be followed, including the following: Read all instruc- tions before using this overlock sewing machine. “DANGER _____To reduce the risk of electric shock:” 1. The appliance should never be left unattended when plugged in. 2.
- Página 3 “NORMAS DE SEGURIDAD IMPORTANTES” Cuando se usa un aparato eléctrico deben respetarse las siguientes normas de seguridad: “PELIGRO _____para reducir el riesgo de electrochoque:” 1. No dejar nunca la máquina de punto cadeneta y cobertura sin vigilancia si ella está enchufada. 2.
- Página 4 “PRESCRIPTIONS DE SECURITE IMPORTANTES” L’emploi d’un appareil électrique exige d’observer les mesures de sécurité suivantes: “DANGER _____Pour la protection contre tout choc électrique:” 1. Ne pas laisser la surjeteuse sans surveillance tant qu’elle est raccordée au réseau. 2. Après usage et avant un nettoyage, séparer toujours la machine du réseau. 3.
- Página 5 16. Se la macchina non viene usata, staccarla sempre dalla rete elettrica, estraendo la spina dalla presa elettrica. 17. Se il cavo elettrico è difettoso, deve essere sostituito con un cavo originale, che è disponibile dal vostro rivenditore JUKI. 18. Questa macchina è provvista di un doppio isolamento. Sostituire le parti solamente con uguali ricambi originali.
-
Página 6: Tabla De Contenido
échantillonnage de couture d’essai....19 • Sélecteur de position du couteau inférieur ..8 qu’elles ne concernent que le modèle MO-654DE. Réglage de la tension du fil ....20,21 • Sélecteur de mécanisme d’entraînement ..9 • Sélecteur du mécanisme d’entraînement à... -
Página 7: Details Of The Machine
Details of the machine / Detalles de la máquina Piéces principales de la machine / Dettagli della macchina 1. Looper cover 15. Power/light switch 2. Looper cover opening handle 16. Handwheel (pulley) 3. Chip guard cover 17. Machine socket 4. Cloth plate 18. -
Página 8: Accessories
Details of the machine / Detalles de la máquina Piéces principales de la machine / Dettagli della macchina View with looper cover open Vue intérieure de la machine, 1. Upper looper couvercle du boucleur ouvert 2. Upper knife 1. Boucleur supérieur 3. -
Página 9: Assembling Thread Stand
Assembling thread stand / Ensamble del soporte del hilo Mise en place du support de guide-fil / Posizionamento dell'asta guidafilo Raise the support rod fully Turn the thread stand until it engages the positioning stopper (A) with a click. Levante completamente la varilla de soporte Gire el estante del hilo hasta que se enganche en el retentor (A) de posicionamiento con un clic. - Página 10 Assembling thread stand / Ensamble del soporte del hilo Mise en place du support de guide-fil / Posizionamento dell'asta guidafilo For overlock spools Para carretes de sobreorillado Pour bobines de surjetage-rasage (overlock) Spoline per surfilatrice For large spools For spools of large inside diameter, position the anti-vibration come upside down. Para carretes grandes Para carretes de diámetro interior grande, posicione al revés el amortiguador de vibraciones.
-
Página 11: Preparing Machine
Preparing machine / Preparación de la máquina Installation de la machine / Preparazione della macchina Attaching the foot controller 1. Plug foot controller into machine socket. 2. Plug foot controller into power supply socket. 3. Lay your foot on the foot controller. Step on the foot controller strongly (deeply), and the sewing speed increases. -
Página 12: Handwheel (Pulley)
Operation and function / Operación y función Opération et fonction / Messa in servizio della macchina Handwheel (Pulley) The handwheel turns toward you. * Upon completion of threading, at sewing start or sewing end, be sure to turn the handwheel toward you. Volante de mano (Polea) El volante de mano gira en dirección hacia usted. -
Página 13: Presser Foot Lifter
Operation and function / Operación y función Opération et fonction / Messa in servizio della macchina Presser foot lifter (To raise the presser foot by the presser foot lifter) A For regular sewing operation (sewing a medium-weight material), raise the presser foot to position (A) illustrated in the figure. -
Página 14: Raising The Upper Knife
Operation and function / Operación y función Opération et fonction / Messa in servizio della macchina Raising the upper knife Be sure to turn the power switch OFF. 1. Turn the handwheel until the upper knife is fully raised. Open the looper cover. 2. -
Página 15: Stitch Length Adjusting Knob
Per regolare la lunghezza del punto, ruotare la manopola di regolazione della lunghezza punto, girandola avanti o indietro. • Per cuciture di normale sopraggitto regolare la manopola lunghezza punto da 2 a 3. MO-654DE Differential feed adjusting knob (to adjust the feeding for gathering or... -
Página 16: Overlocking Width Selection Knob
Operation and function / Operación y función Opération et fonction / Messa in servizio della macchina Overlocking width selection knob (for overlocking or roll hemming) * Turn the handweel until the needles are fully raised. • For overlocking Push the overlocking width selection knob back so that it aligns with the rear red marking on the throat plate. -
Página 17: Changing The Needles
Operation and function / Operación y función Opération et fonction / Messa in servizio della macchina Changing the needles Be sure to turn the power switch OFF. • Applying the needle attaching hole (A) of the cleaning brush will help replace the needle ease. 1. -
Página 18: Preparation
Threading / Enhebrado Enfilage / Infilatura Thread the machine carefully and in the correct sequence. Enfiler la machine avec le plus grand soin en veillant à respecter This is important for marking beautiful seams. l’ordre des opérations qui est indiqué, car cas conditions sont Preparation essentielles pour obtenir des points réguliers. -
Página 19: Upper Looper Thread (Blue)
Threading (1) / Enhebrado (1) Enfilage (1) / Infilatura (1) 1. Upper looper thread (Blue) Place the spool on the spool holder pin right under blue marking on the retractable support rod thread guide. (1) Bring thread up from the rear of the retractable support rod thread guide with blue marking. -
Página 20: Lower Looper Thread (Red)
Threading (2) / Enhebrado (2) Enfilage (2) / Infilatura (2) 2. Lower looper thread (Red) Place the spool on the spool holder pin right under red marking on the retractable support rod thread guide. (1,2) Bring thread up from the rear of the retractable support rod thread guide to the front of it. -
Página 21: Right-Hand Needle Thread (Green)
Threading (3) / Enhebrado (3) Enfilage (3) / Infilatura (3) 3. Right-hand needle thread (Green) Place the spool on the spool holder pin right under the green marking on the retractable support rod thread guide. (1,2) Bring thread up from the rear of the retractable support rod thread guide with the green markings to the front of it. -
Página 22: Left-Hand Needle Thread (Yellow)
Threading (4) / Enhebrado (4) Enfilage (4) / Infilatura (4) 4. Left-hand needle thread (Yellow) Place the spool on the spool holder pin right under the yellow marking on the retractable support rod thread guide. (1) Bring thread up from the spool to the thread guide and take it through the yellow thread guide. -
Página 23: 3-Thread Overlocking
3-thread overlocking / Sobreorillado de 3 hilos Overlock à 3 fils / Overlock (sopraggitto) a 3 fili 4 mm wide 3-thread Overlocking (Right-hand needle) (Blue, red and green) * Remove the left-hand needle. Thread in the following order. (1) Upper looper thread (Blue) (2) Lower looper thread (Red) (3) Right-hand needle thread (Green) * If the machine is already threaded with the left-hand needle thread, cut off and remove... -
Página 24: How To Use The 2/3 Thread Converter
2/3-thread converter / Convertidor de 2/3 hilos Convertisseur 2/3 fils / Convertitore per 2/3 fili 2-thread flatlock How to use the 2/3 thread converter Costura plana de 2 hilos * This attachment enable the 1-needle type machine to perform overedging or Couture plate à... -
Página 25: After Threading, Make A Trial Sewing
Trial sewing / Cosido de prueba Couture d’essai / Prova di cucitura After threading, make a trial sewing Be sure to use a double layer of fabric in order to check whether the seam and thread tension are adequate. 1. Set the lower/upper looper, left-hand/right-hand needle thread tension dial “4”. 2. -
Página 26: Adjusting The Thread Tension
Thread tension dial / Disco de tensión del hilo Bouton de réglage de la tension du fil / Manopola di regolazione della tensione del filo Adjusting the thread tension Imperfect stitch formation can be corrected by adjusting the set value (1 to 9) on the thread tension dial. - Página 27 Adjusting the thread tension / Mode de ajustar la tensión del hilo Réglage de la tension du fil / Regolazione della tensione del filo Adjusting the thread tension Turn the thread tension dial in the direction of the arrow, and make a trial sewing. A - If the upper looper thread meet on the underside of the fabric: B - If the lower looper thread meet on the upper side of the fabric: C - If the right-hand needle thread forms loops on the underside of the fabric:...
-
Página 28: Roll Hemming
Roll hemming / Dobladillado de rollo Roulottage / Orlo arrotolato Roll hemmer The roll hemmer is built-in to the sewing machine. The fabric edge is automatically rolled and oversewn. The result is a very fine and narrow edge finishing. Preparation for roll hemming 1. -
Página 29: Lista De Tensiones De Hilo Estándar Para Dobladillador En Rollo
Standard thread tension list for roll hemming (rolled hem, narrow overlock sitich) Thread tension slightly differs depending on the types of the fabric and thread. Use the woolly nylon thread or thinner thread for roll hemming to attain the beautiful finish. Use the thin spun thread thinner than #80. -
Página 30: Sewing In Tape
Sewing in tape / Cosido en cinta Pose de bande de renfort / Applicazione di un nastro Sewing in tape The standard presser foot is equipped with a tape guide. When sewing shoulders or side seams of stretchy fabrics as a knitted fabric, a tape works effectively to prevent undesirable stretch of the fabric. -
Página 31: Differential Feed
Differential feed (MO-654DE) / Transporte diferencial (MO-654DE) Mécanisme d’avance à différentiel (MO-654DE) / Trasporto differenziale (MO-654DE) Differential feed Gathering and stretching of the fabric can be adjusted by adjusting the differential feed adjusting knob (differentiate the feeding amount of front feed dog (A) or rear feed dog (B)). -
Página 32: Gathering
Gathering (MO-654DE) / Fruncidos (MO-654DE) Fronces (MO-654DE) / Arricciatura (MO-654DE) Gathering 1. A single layer of light-weight fabric can be gathered. 2. Set the stitch length adjusting knob at max. “4”. 3. Set the differential feed adjusting knob at “1.5 - 2”. -
Página 33: Thread Breakage During Sewing
Thread breakage during sewing / Rotura del hilo durante el cosido Fil cassé en cours de travail / Rottura del filo durante la cucitura Thread breakage during sewing 1. Turn the workpiece at a right angle direction and stop sewing immediately. The remove the workpiece. -
Página 34: Securing Seams
Securing seams / Modo de asegurar las costuras Renforcement des fins de couture / Come assicurare la cucitura Securing seams 1. Sew about 3 to 4 cm of the thread chain at the beginning of seams. 2. Sew 2 to 3 stitches on the fabric. 3. -
Página 35: Changing The Knife
Il coltello superiore (coltello mobile) è di acciaio temperato e normalmente non è necessario cambiarlo. Se la lama dovesse essere danneggiata, per la sostituzione rivolgersi sempre al vostro rivenditore JUKI di fiducia. Sostituzione del coltello inferiore Spegnere la macchina, interruttore principale su "O". Staccare la macchina dalla presa di corrente. -
Página 36: Replacing The Bulb
Durante la costura y el corte se va acumulando polvo, hilos y pelusilla en la máquina. Quitar estos residuos regularmente. La máquina overlock JUKI requiere muy poco engrase porque la mayoría de las piezas son de un material especial. Después de haberla utilizado bastante tiempo engrasar solamente los puntos marcados. -
Página 37: Trouble And Corrective Measures
Before you call for help: Trouble and corrective measures The followingproblems should not be regarded as the machine trouble. Check the following table before you call for help from us. Trouble Cause (reason) Corrective measures Page Fabric does not • Presser foot pressure is too low. Increase the presser foot pressure by turning the feed presser foot pressure adjusting screw to the right. -
Página 38: Avant D'appeler Le Mécanecien
Dépistage des pannes et remèdas: avant d’appeler le mécanecien Les problèmes ci-dessous ne sont pas de défaut mécanique, vérifier le tableau ci-après avant appeler le mécanicien. Défaut Cause Remède Page L’étoffe n’est pas • La pression du pied presseur est insuffisante. Tourner la vis de réglage de pression du pied entraînée presseur vers la droite pour augmenter la pression. -
Página 39: Specifications
Specifications / Especificaciones Caractérsteques techniques / Dati tecnici Specifications Caractérsteques techniques Item Specifications Item Specifications Number of threads 4 threads, 3 threads, 2 threads Nombre de fils 4 fils, 3 fils, 2 fils Needles Right-hand needle 130/705H Aiguilles aiguille droite 130/705H Left-hand needle 130/705H (JLx2) aiguille gauche 130/705H (JLx2) Overlocking width... -
Página 40: Optional Accessories
Contact your local dealer. / Póngase en contacto con el distribuidor local. Contacter le distributeur de vorte région. / Contattare il distributore della vostra zona. 8-2-1, KOKURYO-CHO, CHOFU-SHI, TOKYO 182-8655, JAPAN PHONE : (81)3-3480-5034 FAX : (81)3-3480-5037 Copyright © 2005 JUKI CORPORATION. All rights reserved throughout the world. A915065400D 2005.7...