Tabla de contenido
Publicidad
Idiomas disponibles
Idiomas disponibles
Enlaces rápidos
VDP
PL303B
KOMBO
O – DMX LE
KOMBO
O – DMX LE
KOMBO
O – EFFET L
KOMBO
O - EFECTO
KOMBO
O - DMX LE
USER M
MANUAL
GEBRU
IKERSHAND
NOTICE
E D'EMPLOI
MANUA
AL DEL USUA
BEDIEN
NUNGSANLE
BS
ED EFFECT W
WITH 6 LEN
EDEFFECT M
MET 6 LENS
LED DMX À
À 6 LENTILL
O LED DMX C
CON 6 LENT
ED-EFFEKT
MIT 6 LINS
DLEIDING
ARIO
ITUNG
NSES
SEN
LES
TES
SEN
3
8
1
3
1
8
2
3
Publicidad
Tabla de contenido

Manuales relacionados para HQ-Power VDPL303BS


Resumen de contenidos para HQ-Power VDPL303BS
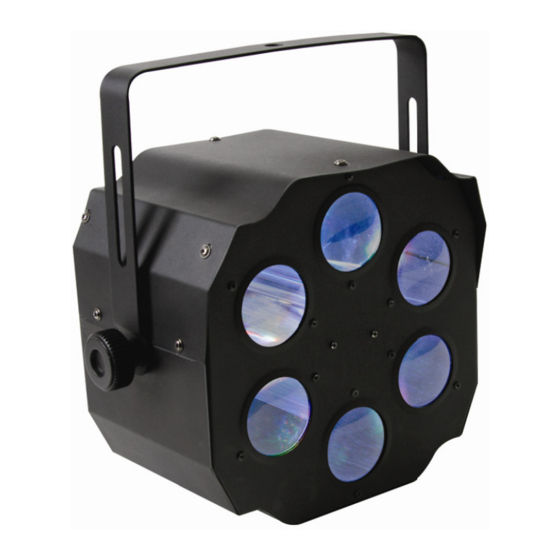
- Página 1 PL303B KOMBO O – DMX LE ED EFFECT W WITH 6 LEN NSES KOMBO O – DMX LE EDEFFECT M MET 6 LENS KOMBO O – EFFET L LED DMX À À 6 LENTILL KOMBO O - EFECTO O LED DMX C CON 6 LENT KOMBO O - DMX LE...
- Página 2 VDPL303BS Rev. 01 12.08.2010 ©Velleman nv...
- Página 3 VDPL30 03BS v. 01 USER MA ANUAL 1. Int troduction To all re esidents of the e European Un Importa ant environme ntal informati on about this product This symbol o on the device or r the package in ndicates that dis sposal of the de vice after its life ecycle...
- Página 4 -pin XLR output t of your contro ller and the oth side to o the male 3-pin n XLR input of th he VDPL303BS S. Multiple VDP L303BSs can b be linked throug serial l linking. The link king cable shoul...
-
Página 5: Control Panel Navigation
VDPL303BS Rev. 01 7. Mounting the Fixture • Have the device installed by a qualified person, respecting EN 60598-2-17 and all other applicable norms. • The carrying construction must be able to support 10 times the weight of the device for 1 hour without deforming. - Página 6 VDPL30 03BS v. 01 • Pres ss <ENTER> to confirm your se election. Master/ Slave Mode (M Master Sound, Master Auto) This m mode allows you to link up to 32 2 units together r without a cont troller. • Use standard DMX cables to daisy- -chain your unit...
-
Página 7: General Maintenance
VDPL303BS Rev. 01 9. Troubleshooting problem possible solution fuse keeps blowing check total load placed on fixture chase is too slow check user manual for speed adjustment check for power on mains fixture has no power check fixture’s fuse check DMX settings for correct addressing... - Página 8 VDPL30 03BS v. 01 GEBRU UIKERSHA ANDLEID DING 1. Inl eiding Aan alle e ingezetenen v van de Europe ese Unie Belangr ijke milieu-inf formatie betre effende dit pro oduct Dit symbool o op het toestel of f de verpakking geeft aan dat, als het na zijn levenscyclus wo...
- Página 9 3-pin XL LR-ingang van d VDPL3 303BS. U kunt verscheidene V VDPL303BS’s a an elkaar koppe elen met behulp p van een seriël koppel ling. Gebruik da aarvoor een 2-a derige afgesche...
-
Página 10: Het Toestel Monteren
VDPL303BS Rev. 01 7. Het toestel monteren • Laat een geschoolde technicus dit toestel installeren conform EN 60598-2-17 en andere toepasselijke normen. • De constructie waaraan het toestel wordt bevestigd, moet gedurende 1 uur 10 x het gewicht van dit toestel kunnen dragen zonder te vervormen. - Página 11 VDPL30 03BS v. 01 Autom matische sturin auto • Dru k op <MODE> t op de lc cd-display versc chijnt. • Bev vestig uw keuze met <ENTER>. • Stel l de snelheid in vanaf de lcd-dis splay. Gebruik d de toetsen <UP >...
-
Página 12: Problemen En Oplossingen
VDPL303BS Rev. 01 het eerste toestel op 1 moeten instellen, van het tweede toestel op 5 (1 + 4), van het derde op 9 (5 + 4), enz. 9. Problemen en oplossingen probleem mogelijke oplossing zekering slaat door controleer de voedingsspanning... - Página 13 VDPL30 03BS v. 01 OTICE D ’EMPLOI 1. Int troduction Aux rési idents de l'Uni ion européenn Des info ormations envi ironnementale es importantes s concernant c ce produit Ce symbole s sur l'appareil ou u l'emballage ind dique que l’élim ination d’un app pareil en fin de peut polluer...
-
Página 14: Mis Se En Place
XLR mâle à à 3 broches à l’e entrée du VDPL L303BS. Il est p possible de relie plusieu urs VDPL303BS S à partir d’une e connexion séri elle. Utiliser un câble de conne exion blindé à 2 conduc cteurs avec des s connecteurs d’... -
Página 15: Montage Du Projecteur
VDPL303BS Rev. 01 7. Montage du projecteur • Un technicien qualifié doit installer l’appareil en respectant EN 60598-2-17 et toute autre norme applicable. • La construction portante de l’appareil doit être capable de supporter 10 x le poids de l’appareil pendant une heure, sans qu’une déformation de la construction en résulte. - Página 16 Pour le V VDPL303BS à 4 4 canaux, l’adre sse de départ d du premier appa areil est 1, du de euxième 5 (1 + du troisiè...
-
Página 17: Problèmes Et Solutions
VDPL303BS Rev. 01 9. Problèmes et solutions problèmes solution fusible grillé vérifier la tension utilisée sur le projecteur poursuite trop lente consulter la notice au chapitre du réglage de la vitesse vérifier la tension utilisée sur le projecteur projecteur non alimenté... -
Página 18: Int Troducción
VDPL30 03BS v. 01 NUAL DEL L USUAR 1. Int troducción A los ciu udadanos de la a Unión Europe Importa antes informac ciones sobre e el medio ambie ente concernie ente a este pro oducto Este símbolo en este aparato o o el embalaje indica que, si t ira las muestras... -
Página 19: Ins Stalación
XLR mach ho de 3 polos a entrad da del VDPL303 3BS. Es posible conectar varios s VDPL303BS e en serie. Use un n cable blindado o de doble hilo conductor c con conectores X XLR de entrada y de salida. -
Página 20: Control Automático
VDPL303BS Rev. 01 • Evite ponerse debajo del aparato durante el montaje, la limpieza, etc. Un técnico especializado debe revisar el aparato antes de la puesta en marcha. Después, debe revisarlo una vez al año. • Instale el aparato fuera del alcance de personas no autorizadas y en un lugar con poca gente. - Página 21 VDPL30 03BS v. 01 Modo m aestro/esclav vo (control por r la música, co ontrol automát tico) Este m modo permite in terconectar y co ontrolar hasta 3 32 focos sin con trolador DMX. • Utili ice cables DMX estándar e inte rconecte sus foc cos.
-
Página 22: Solución De Problemas
VDPL303BS Rev. 01 9. Solución de problemas problemas solución fusible se funde controle la tensión utilizada para el foco chase demasiado lento consulte el manual del usuario, véase el ajuste de la velocidad controle la tensión utilizada para el foco foco no está... - Página 23 VDPL30 03BS v. 01 BEDIE ENUNGS ANLEITU 1. Ein nführung An alle E Einwohner der r Europäischen n Union Wichtige e Umweltinfor rmationen übe er dieses Produ Dieses Symb bol auf dem Prod dukt oder der V erpackung zeigt t an, dass die E ntsorgung diese Produktes na ach seinem Lebe...
- Página 24 Seite mit d em 3-pol. XLR- Eingang des VDPL3 303BS. Sie kön nnen verschiede ene VDPL303BS S in Serie schal ten. Verwenden n Sie dafür ein zweipo oliges abgeschir rmtes Kabel mit XLR Ein- und A Ausgangsanschlü...
-
Página 25: Das Gerät Montieren
VDPL303BS Rev. 01 Abschlusswiderstand • Ein DMX-Abschlusswiderstand ist empfehlenswert für Installationen, bei denen das DMX-Kabel lang ist oder in einer Umgebung mit vielem elektrischem Rauschen (z.B. Discos). Der Abschlusswiderstand verhindert Störung des digitalen Steuersignals durch elektrisches Rauschen. Der DMX-Abschlusswiderstand ist nur eine XLR-Buchse mit einem 120Ω... - Página 26 VDPL30 03BS v. 01 Stand-A Alone (Musikst euerung, auto omatische Steu uerung) Musik ksteuerung Steuer rung eines einzi gen Gerätes je nach Beat der M Musik. • Drü cken Sie auf <M MODE> bis im LCD-Display y erscheint. • Best tätigen Sie Ihre e Auswahl mit <...
-
Página 27: Problemlösung
VDPL303BS Rev. 01 Die DMX-Startadresse einstellen Alle DMX-gesteuerten Geräte brauchen eine digitale Startadresse, sodass das richtige Gerät auf die Signale reagieren kann. Diese digitale Startadresse ist die Kanalnummer, von der das Gerät die Befehle der DMX-Steuerung empfängt und ausführt. Geben Sie die korrekte Nummer ein und lesen Sie es im Display auf der Unterseite des Gerätes. -
Página 28: Technische Daten
VDPL303BS Rev. 01 11. Technische Daten Stromversorgung 230 VAC ~ 50 Hz Stromverbrauch 14 W LEDs 3 x 3 W DMX512 4 Kanäle Abmessungen 194 x 302 x 319 mm Gewicht 3,7 kg Verwenden Sie dieses Gerät nur mit originellen Zubehörteilen. Velleman NV übernimmt keine Haftung für Schaden oder Verletzungen bei (falscher) Anwendung dieses Gerätes. - Página 29 de aankoopsom bij ontdekking van een gebrek tot één jaar na aankoop en levering, of een vervangend product tegen 50% van de kostprijs of terugbetaling van 50 % bij ontdekking na één jaar tot 2 Velleman® Service and Quality Warranty jaar.
- Página 30 - tout dommage à l’appareil qui résulte d’une utilisation incorrecte ou Die oben stehende Aufzählung kann eventuell angepasst différente que celle pour laquelle il a été initialement prévu comme werden gemäß der Art des Produktes (siehe décrit dans la notice ; Bedienungsanleitung des Gerätes).