Tabla de contenido
Publicidad
Idiomas disponibles
Idiomas disponibles
Enlaces rápidos
VDP250MHS18FL2
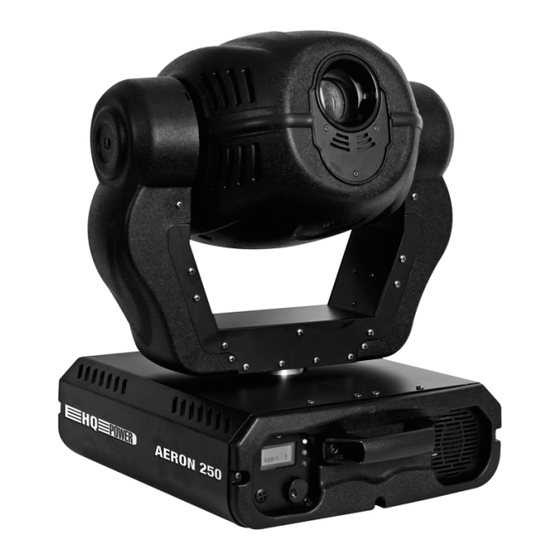
AERON 250S MOVING HEAD - SPOT 250W - 16 CHANNELS
AERON 250S MOVING HEAD - SPOT 250W - 16 KANALEN
PROJECTEUR LYRE AERON 250S - SPOT 250W - 16 CANAUX
CABEZA MÓVIL AERON 250S - SPOT 250W - 16 CANALES
AERON 250S 'MOVING HEAD'-SCHEINWERFER - SPOT 250W - 16 KANÄLE
USER MANUAL
GEBRUIKERSHANDLEIDING
NOTICE D'EMPLOI
MANUAL DEL USUARIO
BEDIENUNGSANLEITUNG
Publicidad
Tabla de contenido

Manuales relacionados para HQ-Power VDP250MHS18FL2


Resumen de contenidos para HQ-Power VDP250MHS18FL2
- Página 1 VDP250MHS18FL2 AERON 250S MOVING HEAD - SPOT 250W - 16 CHANNELS AERON 250S MOVING HEAD - SPOT 250W - 16 KANALEN PROJECTEUR LYRE AERON 250S - SPOT 250W - 16 CANAUX CABEZA MÓVIL AERON 250S - SPOT 250W - 16 CANALES AERON 250S 'MOVING HEAD'-SCHEINWERFER - SPOT 250W - 16 KANÄLE...
- Página 2 VDP250MHS18FL2_v2 HQPOWER...
-
Página 3: Safety Instructions
Thank you for choosing HQPOWER! Please read the manual thoroughly before bringing this device into service. If the device was damaged in transit, don't install or use it and contact your dealer. The VDP250MHS18FL2 flight case should come with 2 x AERON 250S moving heads, 2 x 250/2 Sylvania lamps, an XLR connection cable, a safety cable with ®... - Página 4 • Use an appropriate safety cable to fix the device (e.g. VDLSC8). • Familiarise yourself with the functions of the device before actually using it. Do not allow operation by unqualified people. Any damage that may occur will most probably be due to unprofessional use of the device. •...
- Página 5 • Overhead mounting requires extensive experience: calculating workload limits, determining the installation material to be used… Have the material and the device itself checked regularly. Do not attempt to install the device yourself if you lack these qualifications as improper installation may result in injuries. •...
- Página 6 Exit Exit main menu Power ON LED indication Yellow DMX out Green DMX in b. Detailed DMX Values per Channel Channel Function From Description Shutter closed Shutter open Strobe from slow to fast Shutter open Shutter Open pulse from slow to fast Shutter open Random strobe Shutter open...
- Página 7 Connect the provided XLR cable to the female 3-pin XLR output of your controller and the other side to the male 3- pin XLR input of the VDP250MHS18FL2. Multiple VDP250MHS18FL2s can be linked through serial linking. The linking cable should be a two-core screened cable with XLR input and output connectors.
-
Página 8: Cleaning And Maintenance
In the case of the 16-channel VDP250MHS18FL2, you will have to set the start address of the first VDP250MHS18FL2 to 1, the second VDP250MHS18FL2 to 17 (1 + 16), the third to 33 (17 + 16) and so on. 6. Cleaning and Maintenance 1. -
Página 9: Technical Specifications
Dank u voor uw aankoop! Lees deze handleiding grondig voor u het toestel in gebruik neemt. Werd het toestel beschadigd tijdens het transport, installeer het dan niet en raadpleeg uw dealer. De VDP250MHS18FL2-flightcase wordt geleverd met 2 x AERON 250S moving heads, 2 x 250/2 Sylvania -lampen, een XLR-aansluitingeskabel, een ®... -
Página 10: Algemene Richtlijnen
• De beschikbare netspanning mag niet hoger zijn dan de spanning in de specificaties achteraan de handleiding. • De voedingskabel mag niet omgeplooid of beschadigd zijn. Laat uw dealer zo nodig een nieuwe kabel plaatsen. • Trek de stekker uit het stopcontact (trek niet aan de kabel!) voordat u het toestel reinigt en als u het niet gebruikt. •... -
Página 11: Menu-Instellingen
c) Gobo’s plaatsen / verwisselen Schakel de lamp uit en laat deze gedurende minstens 10 minuten afkoelen. Ontkoppel het toestel van het lichtnet. Open de dekplaat door de 3 schroeven lost te schroeven en plaats de gobo’s zoals beschreven. Draaiend gobowiel Druk met een geschikt hulpstuk op de uiteinden van de bevestigingsring en verwijder deze. - Página 12 Kleurenmenging Mix colour Geen kleurenmenging Lamp UIT Lamp pow Lamp AAN 0 – 255 Test panbeweging Tilt 0 – 255 Test tiltbeweging Shutter 0 – 255 Test sluiter Dimmer 0 – 255 Test dimmer Colour 0 – 255 Test kleuren Zoom 0 –...
- Página 13 Open Gobo 1 Gobo 2 Gobo 3 Gobo 4 Gobo 5 Gobo 6 Roterend gobowiel Gobo 1 shaking Gobo 2 shaking Gobo 3 shaking Gobo 4 shaking Gobo 5 shaking Gobo 6 shaking Achterwaartse rotatie van snel naar traag Positie Goborotatie Achterwaartse rotatie van snel naar traag Voorwaartse rotatie van traag naar snel...
- Página 14 Dit digitale startadres is het kanaalnummer van waarop het toestel “luistert” naar het signaal van de DMX controller. Geef het correcte nummer in en lees het af op de display onderaan uw VDP250MHS18FL2. U kunt één enkel startadres gebruiken voor een groep toestellen of u kunt per toestel een nieuw startadres ingeven.
-
Página 15: Reiniging En Onderhoud
In het geval van de 16-kanaals VDP250MHS18FL2, zult u het startadres van het eerste toestel op 1 moeten instellen, van het tweede toestel op 17 (1 + 16), van het derde op 33 (17 + 16) enz. -
Página 16: Prescriptions De Sécurité
• Les dommages occasionnés par des modifications à l’appareil par le client, ne tombent pas sous la garantie. • L’usure mécanique et les ampoules ne tombent pas sous la garantie. • Garder votre VDP250MHS18FL2 hors de la portée de personnes non qualifiées et de jeunes enfants. 3. Directives générales •... - Página 17 • Fixer votre VDP250MHS18FL2 à l’aide d’un câble de sécurité (sécurité supplémentaire). • Éviter de vous positionner en dessous de l’appareil pour l’enlever ou lors du montage ou du nettoyage. Un technicien qualifié...
- Página 18 e) Attaches 5. Emploi a. Menu Settings Menu Item Fonction DMX address 1 – 512 Adressage Mouvement pan en arrière Pan rev Mouvement pan en avant Mouvement tilt en arrière Tilt rev Mouvement tilt en avant 16-bit Résolution 16 bits (16 canaux) RSLTN 8-bit Résolution 8 bits (14 canaux, pas de réglage fin)
- Página 19 b. Valeurs DMX détaillées par canal Canal Fonction À Description Obturateur fermé Obturateur ouvert Stroboscope de lent à rapide Obturateur ouvert Obturateur Pulsation ouverte de lent à rapide Obturateur ouvert Stroboscope arbitraire Obturateur ouvert Fermé Graduateur Gradation 0 – 100% Blanc Rouge Jaune...
- Página 20 Connecter le câble à fiche XLR inclus à la sortie XLR femelle à 3 broches de votre contrôleur et l’autre fiche XLR mâle à 3 broches à l’entrée du VDP250MHS18FL2. Il est possible de relier plusieurs VDP250MHS18FL2 à partir d’une connexion sérielle. Utiliser un câble de connexion blindé à 2 conducteurs avec des connecteurs d’entrée et de sortie XLR.
-
Página 21: Nettoyage Et Entretien
« écoutera » son propre canal. Par conséquent, un ajustement des réglages d’un canal n’influence que l'appareil sur ce canal. Pour le VDP250MHS18FL2 à 16 canaux, l’adresse de départ du premier appareil est 1, du deuxième 17 (1 + 16), du troisième 33 (17 + 16), etc. -
Página 22: Spécifications Techniques
Si tiene dudas, contacte con las autoridades locales para residuos. ¡Gracias por haber comprado la VDP250MHS18FL2! Lea atentamente las instrucciones del manual antes de usar el aparato. Si el aparato ha sufrido algún daño en el transporte no lo instale y póngase en contacto con su distribuidor. -
Página 23: Normas Generales
• Por razones de seguridad, las modificaciones no autorizadas del aparato están prohibidas. • Utilice sólo la VDP250MHS18FL2 para aplicaciones descritas en este manual a fin de evitar p.ej. cortocircuitos, quemaduras, descargas eléctricas, etc. Un uso desautorizado puede causar daños y anula la garantía completamente. - Página 24 • El soporte donde irá el aparato, debe ser capaz de sostener 10 veces el peso de éste durante una hora, sin que se produzca una deformación de dicho soporte. • Fije siempre la VDP250MHS18FL2 con un cable de seguridad (seguridad adicional). • Evite ponerse debajo del aparato durante el montaje, la limpieza, etc. Un técnico especializado debe revisar el aparato antes de la puesta en marcha.
- Página 25 5. Uso a. Menú de ajustes Menú Ítem Función DMX address 1 – 512 Introducir la dirección DMX Movimiento pan hacia atrás Pan rev Movimiento pan hacia adelante Movimiento tilt hacia atrás Tilt rev Movimiento tilt hacia adelante 16-bit Resolución 16 bits (16 canales) RSLTN 8-bit Resolución 8 bits (14 canales, sin ajuste fino)
- Página 26 Cerrado Dimmer Dimmer 0 – 100% Blanco Rojo Amarillo Azul Verde claro Disco de colores 1 Naranja Rosa Amarillo intenso Rotación hacia adelante de lento a rápido Rotación hacia atrás de rápido a lento Abierto Gobo 1 Gobo 2 Gobo 3 Gobo 4 Gobo 5 Disco de gobo...
- Página 27 Conecte el cable con conector XLR (incl.) a la salida XLR hembra de 3 polos del controlador y el otro conector XLR macho de 3 polos a la entrada de la VDP250MHS18FL2. Es posible conectar varias VDP250MHS18FL2 en serie. Use un cable blindado de doble hilo conductor con conectores XLR de entrada y de salida.
-
Página 28: Limpieza Y Mantenimiento
En el caso de la VDP250MHS18FL2 de 16 canales, la dirección inicial del primer aparato es 1. Introduzca 17 (1 + 16) para el segundo aparato, 33 (17 + 16) para el tercer aparato, etc. -
Página 29: Sicherheitshinweise
Wir bedanken uns für den Kauf des VDP250MHS18FL2! Lesen Sie diese Bedienungsanleitung vor Inbetriebnahme sorgfältig durch. Überprüfen Sie, ob Transportschäden vorliegen. Sollte dies der Fall sein, verwenden Sie das Gerät nicht und wenden Sie sich an Ihren Händler. Der VDP250MHS18FL2-Flightcase wird mit 2 x AERON 250S Moving Head-Scheinwerfer, 2 x 250/2 Sylvania -Lampe, einem XLR-Anschlusskabel, einem Sicherheitskabel mit Quick-Lock- ®... - Página 30 • Das Gerät eignet sich nicht für permanenten Betrieb: eine regelmäßige Pause verlängert die Lebensdauer. • Vermeiden Sie Erschütterungen. Vermeiden Sie rohe Gewalt während der Installation und Bedienung des Gerätes. • Achten Sie bei der Wahl des Installationsortes darauf, dass das Gerät keinem Staub, keiner Feuchtigkeit und extremen Temperaturen (siehe “Technische Daten”) ausgesetzt wird.
-
Página 31: Menü-Einstellungen
d) Das Gerät montieren • Lassen Sie das Gerät von einem Fachmann und gemäß den EN 60598-2-17 und allen anderen zutreffenden Normen installieren. • Die Konstruktion muss während einer Stunde eine Punktlast von maximal 10 x dem Gewicht des Geräts tragen können, ohne dass Verformung verursacht wird. - Página 32 Gobo 2 0 – 255 Test Gobo 2 Prism 0 – 255 Test Prisma R-prism 0 – 255 Test R-Prisma Focus 0 – 255 Test Fokus Exit – Testmenü verlassen Time – – Info Version Softwareversion Zu den Standardeinstellungen zurückkehren Default Die aktuelle Einstellungen behalten Reset...
- Página 33 Position Goborotation Rückwärtse Rotation von schnell bis langsam Vorwärtse Rotation von langsam bis schnell Fokus Fokusregelung von fern bis dicht Keine Funktion Lampe nach 3 Sekunden ausgeschaltet Resetten & Lampe Lampe nach 3 Sekunden eingeschaltet ein/aus Keine Funktion RESET nach 15 Sekunden Keine Funktion Geschwindigkeit Von schnell bis langsam...
- Página 34 Sie die Einstellungen für 1 Kanal verändern, werden nur die Einstellungen von diesem Kanal geändert. Im Fall des 16-Kanal VDP250MHS18FL2, werden Sie die Startadresse der ersten Einheit auf 1, der zweiten Einheit auf 17 (1 + 16), der dritten Einheit auf 33 (17 + 16) usw., einstellen müssen.
-
Página 35: Reinigung Und Wartung
6. Reinigung und Wartung 1. Alle verwendeten Schrauben müssen fest angespannt werden und dürfen keine Rostspuren zeigen. 2. Das Gehäuse, die Linsen, die Montagebügel und der Montageort (z.B. Decke oder Gebinde) dürfen nicht angepasst werden, z.B. bohren Sie keine zusätzlichen Löcher in Montagebügel, verändern Sie die Anschlüsse nicht, usw.