Tabla de contenido
Publicidad
Idiomas disponibles
Idiomas disponibles
Enlaces rápidos
Publicidad
Capítulos
Tabla de contenido

Manuales relacionados para Lorex L200 Serie


Resumen de contenidos para Lorex L200 Serie
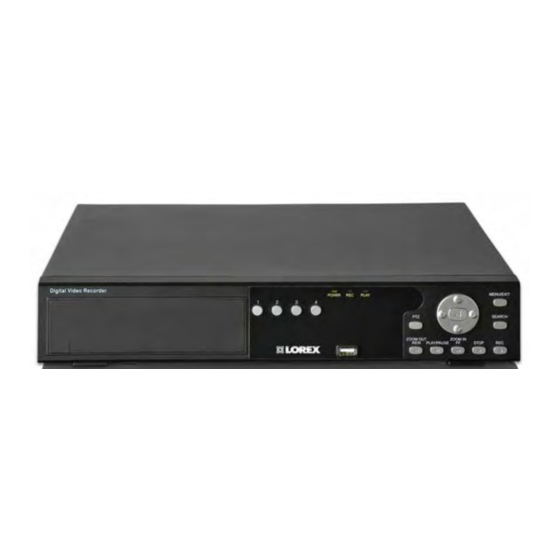
- Página 1 DIGITAL VIDEO SURVEILLANCE RECORDER WITH MOTION DETECTION AND AUDIO RECORDING Instruction Manual English Version 4.0 Version française 2.0 Versión en español 2.0 MODELS: L200 Series Includes L204, L208. L214, L218 www.lorexcctv.com Copyright © 2009 Lorex Technology Inc.
- Página 2 Thank you for purchasing the L200 Series Surveillance DVR. Lorex is committed to providing our customers with a high quality, reliable security product. This manual refers to the following models: • L204 8-CHANNEL 4-CHANNEL • L208 L208 L204 L208D L204D •...
-
Página 3: Before You Start
B E F O R E Y O U S T A R T THIS PRODUCT MAY REQUIRE PROFESSIONAL INSTALLATION LOREX IS COMMITTED TO FULFILLING YOUR SECURITY NEEDS • We have developed user friendly products and documentation. Please read the Quick Start Guide and User Manual before you install this product. -
Página 4: Avant De Commencer
ESTE PRODUCTO PUEDE EXIGIR UNA CE PRODUIT POURRAIT EXIGER UNE INSTALACIÓN PROFESIONAL INSTALLATION PROFESSIONNELLE LOREX S’ENGAGE À SATISFAIRE LOREX SE COMPROMETE A SATISFACER VOS BESOINS SÉCURITAIRES SUS NECESIDADES EN SEGURIDAD • Veuillez lire le guide de démarrage rapide et le •... -
Página 5: Need Help
NEED HELP? CONTACT US FIRST DO NOT RETURN THIS PRODUCT TO THE STORE Please make sure to register your product at www.lorexcctv.com to receive product updates and information EASy WAyS TO CONTACT US: Online: Pr oduc t Suppo r t i s a v a i l a b l e 24/ 7 i n c l u di ng p r o du ct in for m a ti o n, us e r m a nu a l s , qu i c k s ta r t u p gu i de s a n d F A Q ’... -
Página 6: Necesita Ayuda
Commentaires des clients info@lorexcorp.com info@lorexcorp.com Por Teléfono: Par Téléphone: L’AméRiqUE dU NORd: 1-888-425-6739 (1-888-42-lorex) NORTE AméRiCA: 1-888-425-6739 (1-888-42-lorex) mEXiCO: 1-800-514-6739 mEXiCO: 1-800-514-6739 iNTERNACiONAL: +800-425-6739-0 iNTERNATiONAL: +800-425-6739-0 (Ejemplo: desde el Reino Unido, marque el 00 en lugar del +) (Exemple: À... -
Página 7: Important Safeguards
Important Safeguards Important Safeguards In addition to the careful attention devoted to quality standards in the manufacture process of your video product, safety is a major factor in the design of every instrument. However, safety is your responsibility too. This sheet lists important information that will help to assure your enjoyment and proper use of the video product and accessory equipment. - Página 8 Important Safeguards Service Servicing - Do not attempt to service this 19. Cleaning - Unplug the video product from the video equipment yourself as opening or wall outlet before cleaning. Do not use liquid removing covers expose cleaners or aerosol cleaners. Use a damp dangerous voltage or other hazards.
-
Página 9: General Precautions
General Precautions General Precautions 1. All warnings and instructions in this manual should be followed 2. Remove the plug from the outlet before cleaning. Do not use liquid aerosol detergents. Use a water dampened cloth for cleaning 3. Do not use this unit in humid or wet places 4. - Página 10 L200 Series Features L200 Series Features • 4 or 8 Channel Triplex DVR: Simultaneously View, Record and Playback • Network ready: LAN support with remote client software* • Efficient file transfer (MPEG4 network transmission) • Excellent original image recording (MJPEG recording to disk) •...
-
Página 11: Tabla De Contenido
SEARCH TYPES ............................37 VIDEO PLAYBACK............................38 BACK-UP VIA CD-R/W* (OPTIONAL) ......................39 FIRMWARE UPGRADE..........................40 PTZ (PAN/TILT/ZOOM)..........................41 Lorex Client Application ..........................42 PLAYER MODE ............................43 General Options ............................48 VIEWER MODE ............................52 CONNECTING TO A LOCAL NETWORK: ....................53 VIEWER MENU............................ - Página 12 Getting Started RTC (Real Time Clock) Chip........................67 Appendix D: Troubleshooting ........................68 Appendix E: Network Connectivity Overview ....................70 IP & MAC Address (Step #2) ........................71 Finding Your External IP Address......................71 Setting Up Your DDNS Account (Step #3) ....................71 Router Port Forwarding (Step #4) ......................
-
Página 13: Getting Started
Getting Started Getting Started The system comes with the following components: 1 x DIGITAL VIDEO RECORDER (4 CHANNEL MODEL SHOWN) 1 x REMOTE 1 x POWER SUPPLY 1 x HARDWARE MANUAL CONTROL 1 x QUICK START GUIDE 1 x SOFTWARE CD HARD DRIVE SIZE, NUMBER OF CHANNELS, AND CAMERA CONFIGURATION MAY VARY BY MODEL. -
Página 14: Front Panel
Front Panel Front Panel 8-channel model shown CD-DVD-RW* IR Receiver USB Port Playback Controls Channel Buttons Navigation Control PTZ Button Search Button LED Indicators Menu/Exit Button OPTIONAL 1. CD-DVD-RW DRIVE - * : CD-DVD-RW drive optional depending on model. 2. CHANNEL DISPLAY – The channel buttons will display channels: •... - Página 15 NOTE: The PTZ option will only work with PTZ type cameras (not provided with this unit). Visit the Lorex website at www.lorexcctv.com for a full range of Pan/Tilt/Zoom Cameras. 9. PLAYBACK CONTROLS - The Playback Controls have two sets of functions: Live View Functions and Menu Functions: •...
-
Página 16: Rear Panel
Rear Panel Rear Panel LAN Port Audio IN/OUT Alarm Block Power Input VGA Port Video IN RS-485/PTZ Block Power Switch Video OUT PS/2 Port 1. ETHERNET CONNECTION – Connects the system to a router for connection to the Local Network and Internet. -
Página 17: Remote Control
Remote Control Remote Control Listed below is a quick reference for the Remote Control. All Buttons described above function the same as the Front Panel buttons. 1. REC BUTTON – Starts manual recording on the DVR. 2. ONE FRM BUTTON – Not Used. 3. -
Página 18: Mouse Control
Mouse Control Mouse Control A mouse can be used with this system for playback and menu controls. With system OFF, connect a mouse to the PS/2 port on the rear panel of the system. Once the unit has loaded, the mouse will be recognized by the system. -
Página 19: Camera Installation
Camera Installation Camera Installation Before you install the camera*, carefully plan where and how it will be positioned, and where you will route the cable that connects the camera to the system. Installation Warnings: • Select a location for the camera that provides a clear view of the area you want to monitor, which is free from dust, and is not in line-of-sight to a strong light source or direct sunlight. -
Página 20: Connecting Bnc Cameras
Connecting BNC Cameras Connecting BNC Cameras 1. Connect the 60 ft Extension cable to the Camera and DVR: A. Connect the Barrel Power connector to a power adaptor. B. Connect the BNC connector to an available BNC Port (CAM 1~4) on the DVR. C. -
Página 21: Display Modes
DVR, and the ON/OFF button on the back of the unit is switched to ON. 1. The DVR will perform a Firmware check. 8CH STANDALONE DVR LOREX During the loading sequence, the following (FW:2.50.85 UCODE:86) information will be displayed: •... -
Página 22: General Display Overview
Display Modes General Display Overview 1. CAMERA TITLE & RECORDING STATUS - Displays the Camera Name (Up to eight characters) and displays the current Recording Status (if the □ system is recording the symbol appears). 2. VIDEO LOSS ICON - Appears when the Camera is not sending a Video Image. -
Página 23: Onscreen Symbols - Channel Symbols
Display Modes 100% 07/01/01 01:02:03 100% 07/01/01 01:02:03 QUAD2 (CH 5~8) – Press the CH5 button to 9-CHANNEL VIEW – Press the ENTER Button display the Quad View (L208/L218 only) to display all cameras (L208/L218 only) Onscreen Symbols – Channel Symbols The following symbols appear on a channel to indicate the status of the channel: Indicates that the channel is currently recording video. -
Página 24: System Setup Controls
System Setup Controls System Setup Controls • Enter the SYSTEM MENU screen by pressing the Setup Camera MENU/EXIT button. Enter the password to display the Record Menu Selection Screen. Sensor • Scroll through the 11 options by pressing the UP & DOWN Motion Detection Screen ▲▼... -
Página 25: System Menu Tree
System Setup Controls System Menu Tree SETUP CAMERA CHANNEL DISPLAY BRIGHTNESS CONTRAST SATURATION RECORD RECORD SPEED RECORD QUALITY EVENT REC DURATION RECORD SCHEDULE REC SCHED ENABLE SENSOR ALARM DURATION SENSOR 1 SENSOR 2 SENSOR 3 SENSOR 4 MOTION DETECT CHANNEL SENSITIVITY ALARM DURATION MOTION AREA... - Página 26 System Setup Controls MAIN MENU AUDIO RECORD MUTE INPUT VOLUME OUTPUT VOLUME SYSTEM HARD DISK SETUP PASSWORD CHANGE PASSWORD ENABLE TIME SET SYSTEM EVENT LIST NETWORK RS-485 PAN \ TILT DEVICE F/W UPGRADE SEARCH TIME SEARCH NORMAL RECORD TIME RECORD MOTION RECORD SENSOR RECORD TOTAL RECORD EVENTS...
-
Página 27: Camera Setup
System Setup Controls Using the Virtual Keyboard The Virtual Keyboard control becomes CHANNEL available when keyboard input is needed for entering information such as Names, Network Switch between CH1~CH4 CH1~CH8 Information, etc. (L208/L218) to change the settings for the individual channel. •... -
Página 28: Record Setup
System Setup Controls RECORD SETUP RECORD QUALITY The Record Setup controls the settings for Recording for the DVR. ▲▼ Set the RECORD QUALITY to LOW, NORMAL or Use the arrows to navigate through the HIGH. This setting is the same for all channels. ◄►... -
Página 29: Record Schedule
System Setup Controls RECORD SCHEDULE RECORD SCHEDULE ENABLE Sets the Recording Schedule to ON or OFF. NOTE: It is important to leave this setting to ON. If this setting is turned OFF, the DVR will NOT record any data (Manual Recording (when the REC Button is pressed) will override the Record Settings, and immediately begin recording.) - Página 30 System Setup Controls MOTION DETECTION SETUP MOTION AREA SUBMENU The Motion Detection Setup controls the behavior of the DVR when Motion is detected. Use the Motion Detection area to determine which areas of the image will detect motion. ▲▼ Use the arrows to navigate through the Areas shaded with a darker color indicate that ◄►...
-
Página 31: Screen Setup
System Setup Controls AUDIO SETUP SCREEN SETUP Audio Setup adjusts Audio The Screen Setup controls the onscreen input/output of the DVR system. display of the DVR. Use the ▲▼ arrows to navigate through the ▲▼ Use the arrows to navigate through the settings, and the ◄►... -
Página 32: System Menu
System Setup Controls SYSTEM MENU OVERWRITE – If the Overwrite option is set to Yes, when the Hard Drive becomes full the system will begin overwriting the older The System Setup controls many aspects of the information. If Overwrite is set to No, then the functionality in the DVR, including the DVR will stop recording when the Hard Drive Password, Time and Date, Network and PTZ... - Página 33 System Setup Controls SYSTEM EVENT LIST SUBMENU PASSWORD ENABLE The Event List provides a detailed listing of the The Password Enable feature turns the use of a events that have occurred in the system. SYSTEM MENU system password ON or OFF. If the option is set to YES, the password is required when entering >...
- Página 34 System Setup Controls NETWORK SUBMENU The information in the Network submenu DHCP SETUP allows users to remotely access the DVR. NOTE: The Local Network will lease the ENABLE – Set Enable to YES to remotely information to the DVR. The user is not connect to the DVR over a network connection.
- Página 35 System Setup Controls STATIC SETUP Use the arrow buttons to change the Network Settings:...
-
Página 36: Mac Address
DDNS SETUP MENU – The DDNS Setup menu contains the configuration settings for remote • DDNS PASSWORD: Enter the access via the Lorex DDNS Service password from the DDNS Registration (http://lorexddns.net). using the virtual keypad. Press ENTER once complete. - Página 37 System Setup Controls RS-485 SUBMENU PAN/TILT DEVICE SUBMENU The information in the RS-485 submenu allows NOTE: The configuration settings for this users to configure the settings for an RS-485 section would be provided with the Device. documentation included with the PTZ Camera. •...
-
Página 38: Status Menu
System Setup Controls SEARCH MENU STATUS MENU The Search Menu contains a list of submenus The Status Menu Displays the System to search through previously recorded video. Information. Pressing the REV button will also ▲▼ display the Status Window. Use the arrows to navigate through the ◄►... -
Página 39: Recording
System Setup Controls RECORDING Recording Schedule Symbols: When a Channel is displaying a symbol, it White (No Recording) indicates that the channel is in record mode. Red (Continuous Recording): The DVR is constantly recording, and does not detect Motion or Sensor events. Green (Motion Detection Recording): Begins recording when Motion is detected, and does not record continuously or when a sensor... -
Página 40: Search Function
SEARCH FUNCTION SEARCH FUNCTION Time Search There are several ways to access the Search Function: • From the Main Menu / Search Menu • Pressing the PLAY Button • Pressing the SEARCH Button However, each Search menu contains different search options: Main Menu / SEARCH Button Menu •... -
Página 41: Search Types
SEARCH TYPES SEARCH TYPES RECORD EVENT LISTS The Record Event Lists display all Events of a • TIME SEARCH: Searches for video specific type (as described in the Search Types based on Time and Date. section): • NORMAL RECORD EVENT: Searches for video that was recorded manually •... -
Página 42: Video Playback
VIDEO PLAYBACK VIDEO PLAYBACK BACKUP FUNCTION There are two methods to backup video data: • To a USB flash drive • To a blank CD* The system can play previously recorded video onscreen, while still recording live video images. NOTE: This system does not support video BUTTON DESCRIPTION backup when live recording is occurring. -
Página 43: Back-Up Via Cd-R/W* (Optional)
BACK-UP VIA CD-R/W* (OPTIONAL) BACK-UP VIA CD-R/W* (OPTIONAL) Use the ▲▼◄► Arrow keys and Enter Button To save video to a CD-RW drive, set the start and end times for the selection: to change the Starting and Ending Date and •... -
Página 44: Firmware Upgrade
Live Monitoring screen. Version and the New Firmware Version: To confirm that the Firmware has been upgraded successfully, check the new version on the loading screen. 8CH STANDALONE DVR LOREX (FW:2.50.85 UCODE:86) VIDEO: NTSC DISK0: 78533MB HD7280PLAT20 NEW DISK Press the PLAY Button to update the firmware, or press the STOP Button to cancel. -
Página 45: Ptz (Pan/Tilt/Zoom)
PTZ (PAN/TILT/ZOOM) PTZ (PAN/TILT/ZOOM) This DVR supports a PTZ Camera via the RS485 Serial Interface (see Appendix F for details). Press the PTZ button in Live Monitoring mode to enter PTZ control mode. PTZ control buttons include: Button Description Enter / Exit PTZ mode. Moves the camera UP. -
Página 46: Lorex Client Application
Lorex Client Application Lorex Client Application The system comes with the Lorex Client for remote monitoring, recording, DVR control, and playback of video data on a PC. The Lorex Client Application has two components: • Player Mode: Used to view video data from a backup device such as a USB flash drive or CD-RW*. -
Página 47: Player Mode
To view video data, first connect the USB flash drive to the PC or place the CD into CD/DVD Drive*. Once the backup data is connected to the PC, start the Lorex Client program. Click the Player icon on the top of the Lorex Client program to switch to Player mode. Click the icon on the lower left side of the player. - Página 48 Lorex Client Application PLAYER MENU PLAYBACK The playback menu includes buttons for: • Play • Reverse • Pause • Fast Forward • Fast Rewind • Next Frame • Previous Frame • Speed Normal • Speed Up • Speed Down These function buttons are arranged along the...
- Página 49 Lorex Client Application Capture The Capture function can be used to save parts of the video to the local hard drive. Click the Export link to save the selected video to a *.VVF file. Click the Mark In link at the starting point and Mark Out at the end point.
-
Página 50: Audio Function
Lorex Client Application AUDIO FUNCTION The Audio Function controls the Audio Volume, and turns the MUTE ON/OFF. Full Screen Select Full Screen to view a single camera in Full Screen mode, or Press Alt+Enter. Double click the upper part of the window to magnify the screen. -
Página 51: Aspect Ratio
Lorex Client Application Aspect Ratio The screen size can be set to 640x448 or 640x544. Split Mode The Split mode (QUAD) can be set to 1ch full screen, 4ch Quad screen, 9ch split screen. -
Página 52: Option Menu
Lorex Client Application Option Menu The Option Menu includes settings for: • Playback • Date and time format • Save Folder General Options • Always on top: Highest level on window • Use DirectDraw: Use the applied program interface (API) included in Direct X. - Página 53 Lorex Client Application Export Save video data backup as an AVI format on the computer. • Select the video data to backup (select Input File). • Select a location and a name for the saved file (select Output File). •...
-
Página 54: Button Function
Lorex Client Application Close Viewer To close the Viewer, click the EXIT button, or click the X button on the top-right side of program to close. BUTTON FUNCTION You can click the buttons shown below on the program to perform the matching function, or use the shortcut keys listed. - Página 55 Lorex Client Application Playback. Fast Forward. When you click this button, it will take a single frame of video image while playback and then it will automatically save the image. (BMP format) into the local PC directory (Initial folder setup : “C:\VxCapture”)
-
Página 56: Viewer Mode
PC can be established. The Viewer program can be used to connect to the DVR on the Local Area Network (LAN), or remotely through the Internet (WAN). Launch the Lorex Client program, and Click the Viewer icon on the top of client program. Click on the button on the bottom-left side of VIEWER program (or press the L key). -
Página 57: Connecting To A Local Network
Lorex Client Application CONNECTING TO A LOCAL NETWORK: To connect to the DVR to a local area network (LAN), press the REW button on the DVR to get the local IP address (i.e. 192.168.0.104). Enter the following information on the connection window: •... -
Página 58: Viewer Menu
Lorex Client Application VIEWER MENU DVR Control The DVR can be controlled through the Viewer portion of the Lorex Client application. The DVR control panel has the following buttons located on the bottom panel: • Pause • Rewind • Play •... - Página 59 Lorex Client Application Audio The Audio option controls the Volume, and setting the mute to ON or OFF during playback. Local Recording The live video stream can be saved to the connected PC using the viewer program. Click the Local Recording ->...
- Página 60 Lorex Client Application Full Screen To change the screen to Full Screen mode, select the FULL SCREEN option or press ALT+F4. Double click on the upper port of program to maximize the screen. Aspect Ratio The screen size can be set to 640 X 448 or 640 X 544.
-
Página 61: Option Function
Lorex Client Application OPTION FUNCTION The option menu includes: • Repeat playback • Connection Attempts • Auto Reconnection • The save folder for video GENERAL OPTIONS • Always on top: Places the window at the top of the screen. •... - Página 62 Lorex Client Application Close Viewer To close the Viewer, click the EXIT button, or click the X button on the top-right side of program to close. BUTTON FUNCTION You can click the buttons shown below on the program to perform the matching function, or use the shortcut keys listed.
- Página 63 Lorex Client Application • • Up, Down, Left, Right. • • Enter key Enter / Select Menu / Exit Time Search.
-
Página 64: Appendix A: Dvr Specifications
Appendix A: DVR Specifications Appendix A: DVR Specifications L204 / L208 Series Specifications are shared among all models unless otherwise noted. Description Requirement L204 L208 Operating system Realtime (RTOS) Video input 4-channel (BNC) 8-channel (BNC) Video output 2 composite, 1 VGA Video input NTSC / PAL standard... - Página 65 Appendix A: DVR Specifications L214 / L218 Series Specifications are shared among all models unless otherwise noted. Description Requirement L214 L218 Operating system Realtime (RTOS) Video input 4-channel (BNC) 8-channel (BNC) 2 composite, 1 VGA Video output Video input NTSC / PAL standard Viewing 720x480 NTSC...
-
Página 66: Dimensions
Dimensions All models... -
Página 67: Appendix B: Full Connectivity Diagram
Appendix B: Full Connectivity Diagram Appendix B: Full Connectivity Diagram The following diagram outlines a general set of connections available with the system. MOUSE SENSOR BNC CAMERAS PC MONITOR SLAVE MONITOR, TV OR OBSERVATION SYSTEM... -
Página 68: Appendix C: Replacing The Hard Drive
Appendix C: Replacing the Hard Drive Appendix C: Replacing the Hard Drive SATA Hard Drive (L218/L214) The system comes with a pre-installed SATA hard drive; however the unit will work with a replacement single SATA hard drive (up to 1 TB). The hard drive storage capacity and model name are shown on the loading screen when the system loads. -
Página 69: Formatting A New Hard Drive
SATA Hard Drive (cont’d.) Formatting a New Hard Drive The new hard drive MUST be formatted. 8CH STANDALONE DVR LOREX If a new hard drive is detected, the system will (FW:2.50.85 UCODE:86) prompt you to FORMAT the drive. If you do not... -
Página 70: Pata (Ide) Hard Drive
Appendix C: Replacing the Hard Drive PATA (IDE) Hard Drive (L204/L208) The system comes with a pre-installed hard drive; however the unit will work with a replacement single IDE Hard Drive (up to 500GB). A maximum of two (2) hard drives can be installed into the DVR; however the CD-RW must first be disconnected. -
Página 71: Pata Hard Drive (Cont'd.)
Replace the drive cover on the top of the DVR, and reattach with the screws. Formatting the New Hard Drive The New Hard Drive MUST be formatted. 8CH STANDALONE DVR LOREX If a new hard drive is detected, the system will (FW:2.50.85 UCODE:86) prompt you to FORMAT the drive. -
Página 72: Appendix D: Troubleshooting
Appendix D: Troubleshooting Appendix D: Troubleshooting When a malfunction occurs, it may not be serious and can be corrected easily. The following describes the most common problems and solutions. Please refer to the following before calling Lorex Technical Support: Problem:... - Página 73 Appendix D: Troubleshooting (cont’d.) Appendix D: Troubleshooting (cont’d.) Problem: The picture from the system is poor, shrinks, or flickers Check: • Check the camera video cable and connections • Disconnect and reconnect the cable at the DVR and at the Camera •...
-
Página 74: Appendix E: Network Connectivity Overview
Appendix E: Network Connectivity Overview Appendix E: Network Connectivity Overview The system can be remotely controlled using your existing network and the provided software. 1. Connect the DVR to the Router using an Ethernet Cable. Power on the system. NOTE: The DVR must be connected to the router prior to powering on the system. This allows the DVR to communicate on your network 2. -
Página 75: Ip & Mac Address (Step #2)
Setting Up Your DDNS Account (Step #3) Lorex offers a free DDNS service for use with your System. A DDNS account allows you to set up a web site address that points back to your Local Network. The following outlines how to set up your free DDNS account. - Página 76 Appendix E: Network Connectivity Overview Setting up Your DDNS Account (cont’d.) 3. Complete the Account Information fields with your personal information. Complete the Warranty Information optional with your purchase details ( 4. Complete the System Information fields: • Product License: Select your product model from the Product License drop down menu •...
-
Página 77: Router Port Forwarding (Step #4)
Appendix E: Network Connectivity Overview Router Port Forwarding (Step #4) You will need to enable port forwarding on your router to allow for external communications with your Observation System for ports: • PORT 8841 Computers, DVRs, and other devices inside your network can only communicate directly with each other within the internal network. -
Página 78: Ddns Setup On The Dvr (Step #5)
Appendix E: Network Connectivity Overview DDNS Setup on the DVR (Step #5) Once the DDNS settings have been configured online, the information must be entered on the DVR to allow for remote connection via the Software: 1. Access the Setup screen by pressing the MENU button on the front of the DVR. -
Página 79: Appendix F: Ptz Control
Appendix F: PTZ Control Appendix F: PTZ Control One PTZ Camera (not included) can be connected to the PTZ Control Block on the rear panel of the DVR, and are enabled through the Menu system. Additional PTZ Cameras are available at http://www.lorexcctv.com Installing a PTZ (RS-485 Type) PTZ Camera: 1. -
Página 80: Appendix G: Connecting Motion / Alarm Device
Appendix G: Connecting Motion / Alarm Device Appendix G: Connecting Motion / Alarm Device Motion detection and Alarm controls are enabled through the Menu system on the DVR. Additional motion sensor devices can be connected to the system (Motion Sensors, Door/Window Sensors). A motion detection or sensor unit can be used to send a signal to the DVR to begin camera viewing and recording on the matching Video Channel (when enabled in the Menu) •... -
Página 81: Appendix I: Hdd Usage Table
Appendix H: HDD Usage Table The following table is provided as an approximation of hard drive usage. Variables in image quality and frame rates may alter the hard drive usage. HDD Usage Table Time Size Per Frame Quality Frame Rate (KB) 1 Sec 1 Min... - Página 83 ENREGISTREUR VIDÉO NUMÉRIQUE POUR LA SURVEILLANCE AVEC DÉTECTION DE MOUVEMENT ET ENREGISTREMENT SONORE Guide d'instruction Version française 2.0 MODÈLES: Séries de L200 www.lorexcctv.com Inclut L204, L208, L214, L218 Droits d’auteur © 2009 Lorex Technology Inc.
- Página 84 Nous vous remercions pour votre achat de la série L200 enregistreur vidéo numérique. Lorex est commis à fournir à nos clients une haute qualité, produit de sécurité fiable. This manual refers to the following models: • L204 4-chaîne chaîne • L208...
-
Página 85: Sauvegardes Importantes
Sauvegardes Importantes Sauvegardes Importantes En plus de l'attention soigneuse consacrée pour obtenir des normes de qualité dans le processus de fabrication de votre produit vidéo, la sécurité est un facteur principal dans la conception de tout instrument. Cependant, la sécurité est aussi votre responsabilité. Cette fiche énumère l'information importante qui vous aidera à... - Página 86 Sauvegardes Importantes Entretien Utilisation Entretien N'essayez d'entretenir 18. Nettoyage - Débranchez le produit vidéo de la prise équipement vidéo vous-même, car ouvrir ou retirer du mur avant le nettoyage. N'utilisez pas des les couvercles pourrait vous exposer à une tension nettoyants liquides ou des nettoyants de bombe dangereuse ou à...
-
Página 87: Précautions Générales
Caractéristiques Précautions générales Tous les avis et toutes les instructions de ce guide doivent être suivis. Retirez la prise de la prise du mur avant le nettoyage. N'utilisez pas les détersifs liquides à bombe aérosol. Utilisez un tissu humide pour le nettoyage. N'utilisez pas cette unité... - Página 88 Caractéristiques Caractéristiques • 4 ou 8 chaîne Triplex DVR (simultanément visualise, enregistre, et reproduit) • Réseau prêt (support de réseau local avec l'application de client à distance*) • Transfert de fichier efficace (transmission de réseau MPEG4) • enregistrant au disque) •...
- Página 89 REPRODUCTION VIDÉO........................... 37 REPRODUCTION VIA CD-R/W* (OPTIONNEL) ..................38 AMELIORATION DE MICROLOGICIELS....................39 PTZ (PANORAMIQUE/INCLINAISON/ ZOOM) ..................40 Application de client Lorex .......................... 41 MODE POUR JOUER ..........................41 MODE DE VISUALISATEUR ........................51 Annexe A: Spécifications de DVR....................... 59 Annexe B: Diagramme de Connectivité...
-
Página 90: Commencer
Commencer Commencer Le DVR vient avec les composants suivants: 1 x ENREGISTREUR VIDEO NUMERIQUE COMPACT (MODÈLES DE 4 CHAINE AFFICHÉS) 1X ADAPTATEUR 1 x TÉLÉCOMMANDE D'ALIMENTATION 1X MANUEL D'UTILISATEURS 1 X CÂBLE D'ADAPTATEUR 1 X GUIDE DE DÉBUT RAPIDE D'ALIMENTATION 1 X CD DE LOGICIEL TAILLE DE DISQUE DUR, LE NOMBRE DE CHAINES, ET CONFIGURATION DE CAMERA PEUVENT VARIER SELON LE MODELE.VÉRIFIEZ VOTRE PAQUET POUR... -
Página 91: Panneau Avant
Panneau Avant Panneau Avant MODÈLES DE 8 CHAINE AFFICHÉS CD/DVD-RW* Récepteur IR Port d'USB Commandes de reproduction Boutons de Commande de Bouton de PTZ Bouton de chaînes navigation recherche Indicateurs LED Bouton de menu/sortie 1. LECTEUR DE DVD-RW - *OPTIONELLE: Le CD/DVD-RW est optionnel selon le modèle. 2. -
Página 92: Commandes De Reproduction
F. NOTE: L'option de PTZ fonctionnera seulement avec le type de Caméra PTZ (non équipés de cette unité). Visitez le site Web de Lorex chez www.lorexcctv.com pour une gamme complète des Caméras de panoramique/inclinaison/zoom. 9. COMMANDES DE REPRODUCTION - Les commandes de reproduction ont deux ensembles de fonctions : Fonctions de visualisation en temps réel et fonctions de menu:... -
Página 93: Panneau Arrière
Panneau Arrière Panneau Arrière Port réseau SORTIE/ENTREE Bloc d'alarme Entrée local AUDIO d'alimentation Port VGA Entrée Vidéo Bloc Commutateur 485/PTZ d'alimentation SORTIE Vidéo Port PS/2 Bloc d'alarme 1. CONNEXION d'ETHERNET - connecte le DVR à un routeur pour la connexion au réseau local et à l'Internet. -
Página 94: Télécommande
Télécommande Télécommande Énumérée ci-dessous est une référence rapide pour la télécommande. Tous les boutons ont décrit au- dessus de la fonction les mêmes que les boutons du panneau avant. 1. BOUTON DE REC - Commence enregistrement manuel sur le DVR. 2. -
Página 95: Commandes De Souris
Contrôle de Souris Une souris peut être utilisée avec ce DVR pour des commandes de reproduction et de menu. Connectez une souris au port PS/2 situé sa l'arrière de l'unité avant d'alimenter l'unité. Une fois que l'unité a chargé, la souris sera identifiée par le système. Commandes de Souris Installation de DVR •... -
Página 96: Installation De La Caméra
Installation de la Caméra Installation de la Caméra Avant que vous installez la caméra*, planifiez soigneusement où et comment elle sera placé et où vous allez passer le câble qui raccorde la caméra au DVR. Avertissements d'installation: • Choisissez un endroit pour la caméra qui fournit une vue claire de la région que vous voulez contrôler, qui est libre de la poussière et n'est pas en ligne d'une forte source de lumière ou de soleil directe. -
Página 97: Connexions Des Caméras Bnc
Connexions des Caméras BNC Connexions des Caméras BNC 1. Connectez le câble d'extension à la Caméra et au DVR: A Connectez le connecteur d'alimentation Barrique à un adaptateur d'alimentation. B. Connectez le connecteur BNC à un Port BNC disponible (CAM 1~4) sur le DVR. C. -
Página 98: Modes D'affichage
Modes d'affichage Modes d'affichage Sequence de chargement initial L'unité commencera automatiquement à charger quand 8CH STANDALONE DVR LOREX l'alimentation est connectée au DVR, et le bouton (FW:2.50.85 UCODE:86) "ON/OFF" a l'arrière de l'unité est ALLUMER. VIDEO: NTSC 1. Le DVR exécutera un contrôle de micro logiciel. -
Página 99: Aperçue D'affichage Générale
Modes d'affichage Aperçue d'affichage générale 1. TITRE DE CAMÉRA &MODE D'ENREGISTREMENT - affichages le nom de Caméra (jusqu'à 8 caractères) et affichages le mode actuel d'enregistrement (si le système □ enregistre le symbole apparaîtra). 2. ICONE DE PERTE VIDEO- apparaît quand le Caméra n'envoie pas une image vidéo. -
Página 100: Symboles Sur Écran - Symboles De Chaîne
Modes d'affichage 100% 07/01/01 01:02:03 100% 07/01/01 01:02:03 QUAD2 (ch 5~8) - appuyez sur le bouton VISUALISATION DE 9-CHAINE - appuyez CH5 pour afficher la vue de Quade (séries sur le bouton ENTER pour afficher tout le L208/L218) Caméras (séries L208/L218) Symboles sur écran - symboles de chaîne Les symboles suivants apparaissent sur une chaîne pour indiquer le statut du chaîne: Indique que le chaîne enregistre actuellement le vidéo. -
Página 101: Commandes De Configuration De Système
Modes d'affichage Commandes de Configuration de système Setup Caméra Record Sensor Motion Detection Screen Audio System Search Status Factory Default Exit 100% 07/01/01 01:02:03 Commandes de navigation de menU • Bouton de MENU/EXIT - accès le menu de Setup configuration, et retournes aux options précédentes de menu. -
Página 102: Échelle De Menu De Système
Modes d'affichage Échelle de menu de système CONFIGURATION CAMÉRA CHAINE AFFICHAGE ÉCLAT CONTRASTE SATURATION VITESSE D'ENREGISTREMENT ENREGISTREMENT QUALITÉ D'ENREGISTREMENT DURÉE DE REC d'ÉVÉNEMENT SCHEDULE D’ENREGISTREMENT REC SCHED RENDU CAPABLE SENSEUR DURÉE D'ALARME SENSEUR 1 SENSEUR 2 SENSEUR 3 SENSEUR 4 DÉTECTEUR DE CHAINE MOUVEMENT... - Página 103 Modes d'affichage MENU AUDIO ENREGISTREMENT PRINCIPAL MUET ENREEE DE VOLUME SYSTEME HARD DISK SETUP SORTIE DE VOLUME PASSWORD CHANGE ACTIVATION DE MOT DE PASSE CONFIGURATION HORAIRE LISTE D’EVENEMENT DE SYSTEME RESEAU RS-485 APPAREIL DE PAN/TITT AMELIORATION DEF/W RECHERCHE RECHERCHE HORAIRE ENREGISTREMENT NORMAL ENREGISTREMENT HORAIRE ENREGISTREMENT DE...
-
Página 104: Configuration De Caméra
Modes d'affichage Utilisant le clavier virtuel La commande virtuelle de clavier devient disponible quand l'entrée de clavier est CHAINE nécessaire pour l'information entrante telle que des noms, l'information de réseau, etc. Échangez entre CH1~CH4 ou CH1~CH8 (série de L208/L218) pour changer les •... -
Página 105: Configuration D'enregistrement
Modes d'affichage CONFIGURATION D'ENREGISTREMENT QUALITÉ D'ENREGISTREMENT La configuration d'enregistrement commande Placez la QUALITÉ D'ENREGISTREMENT à BAS, les configurations pour enregistrer pour le NORMAL ou à HAUT. Cette configuration est la DVR. même pour tous les chaînes. Utilisez les flèches de •• pour naviguer par les configurations, et les flèches de ••... - Página 106 Modes d'affichage • Pour configurer tous les jours au même type SCHEDULE D’ENREGISTREMENT d'enregistrement, employez la souris pour placer le coin gauche supérieur (soleil 0hr) au type d'enregistrement désiré, et cliquez sur la flèche diagonale rouge (au haut à gauche de la carrée). ACTIVATION DU SCHEDULE D'ENREGISTREMENT Configurer le Schedule d'enregistrement à...
-
Página 107: Configuration De Détection De Mouvement
Modes d'affichage SOUS-MENU DE RÉGION DE CONFIGURATION DE DÉTECTION MOUVEMENT DE MOUVEMENT Utilisez la région de détection de mouvement La Configuration de détection de mouvement pour déterminer quelles zones d'image commande le comportement du DVR quand le détecteront le mouvement. Les zones mouvement est détecté. -
Página 108: Configuration D'écran
Modes d'affichage CONFIGURATION D'ÉCRAN CONFIGURATION D'AUDIO La configuration d'écran commande l'affichage sur écran du DVR. La configuration d'audio ajuste l'entrée-sortie Utilisez les flèches de •• pour diriger à travers d'audio du système de DVR. les configurations, et les flèches de •• pour changer les valeurs. -
Página 109: Menu De Système
Modes d'affichage MENU DE SYSTÈME REMPLACEMENT - si l'option de REMPLACEMENT est configurée à l'oui, quand l'unité de disque dur est remplie le La configuration de système commande système commencera à remplacer l'information beaucoup d'aspects de la fonctionnalité dans le plus ancienne. -
Página 110: Activation De Mot De Passe
Modes d'affichage ACTIVATION DE MOT DE PASSE SOUS-MENU DE LISTE D'ÉVÉNEMENT DE SYSTÈME La caractéristique d'activation de mot de passe change l'utilisation d'un mot de passe de La liste d'événement fournit une liste détaillée SYSTEM MENU système a ON ou OFF. Si l'option est placée à des événements qui se sont produits dans le OUI, le mot de passe est exigé... - Página 111 Modes d'affichage SOUS-MENU DE RÉSEAU CONFIGURATION D'DHCP L'information dans le sous-menu de réseau permet à des utilisateurs d'accéder à distance au DVR. NOTE: Le réseau local louera l'information au DVR. L'utilisateur n'est pas requis de terminer ces zones. ACTIVATION - Configurez l'activation à OUI pour connecter à...
- Página 112 Modes d'affichage CONFIGURATION STATIQUE Utilisez les boutons de flèche pour changer les configurations de réseau:...
-
Página 113: Configuration Ddns
DDNS contient les réglages de mot de passe de l'enregistrement de configuration pour l'accès à distance par DDNS en utilisant le clavier numérique l'intermédiaire du service de Lorex DDNS virtuel. Appuyez sur ENTER une fois (http://lorexddns.net). complet •... - Página 114 Modes d'affichage SOUS-MENU RS-485 SOUS-MENU D'APPAREIL DE PAN/TILT L'information dans le sous-menu RS-485 permet à des utilisateurs de configurer les NOTE: Les réglages de configuration pour configurations pour un dispositif RS-485. cette section seraient équipés de documentation incluse avec la Caméra PTZ. •...
-
Página 115: Menu De Recherche
Modes d'affichage MENU DE RECHERCHE MENU DE STATUT Le menu de recherche contient une liste de Le menu de statut s'affiche l'information de sous-menus pour rechercher par la vidéo système. Appuyant sur la touche de tour précédemment enregistrée. affichera également le fichet de statut. Utilisez les flèches de ••... -
Página 116: Enregistrement
Modes d'affichage Symboles de Schedule d'enregistrement: ENREGISTREMENT Quand une chaîne affiche un symbole Blanc (aucun enregistrement) d'enregistrement. , elle indique que la Rouge (enregistrement continu): Le DVR chaîne est en mode. enregistre constamment, et ne détecte pas des événements de mouvement ou de senseur. Vert (enregistrement de détection de mouvement): Commence à... -
Página 117: Fonction De Recherche
FONCTION DE RECHERCHE FONCTION DE RECHERCHE Recherche Horaire Il y a plusieurs voies d'accéder à la fonction de recherche : Du menu principal/de menu de recherche Appuyez sur le bouton de PLAY Appuyez sur le bouton de RECHERCHE Cependant, chaque menu de recherche contient différentes options de recherche: Menu menu/bouton principal de RECHERCHE... -
Página 118: Types De Recherche
TYPES DE RECHERCHE TYPES DE RECHERCHE LISTES D'ENREGISTREMENT D'ÉVÉNEMENT • RECHERCHE D'HEURE : Recherches de vidéo basé sur l'heure et la date. Les listes d'enregistrement d'événement affichent tous les événements d'un type de • détail (comme décrit dans la recherche tape la ÉVÉNEMENT D'ENREGISTREMENT section): NORMAL: Recherche le vidéo qui a... -
Página 119: Reproduction Vidéo
REPRODUCTION VIDÉO FONCTION DE REPRODUCTION VIDÉO SAUVEGARDE Il y a deux méthodes pour reproduire les données vidéo: À un bâton de mémoire d'USB À un CD vierge* è Le syst m peut jouer des vidéo précédemment enregistré le sur écran, alors que des images vidéo réel sont encore en train d'être enregistrer. -
Página 120: Reproduction Via Cd-R/W* (Optionnel)
REPRODUCTION VIA CD-R/W* (OPTIONNEL) REPRODUCTION VIA CD-R/W* (OPTIONNEL) Utilisez les touches •••• et le bouton "enter" Pour enregistrer la vidéo sur le CD-R/CD-RW, pour changer la date de commencement et configurer les temps de début et de fin pour la finition et l'heure. -
Página 121: Amelioration De Micrologiciels
Pour confirmer que le micro logiciel a été amélioré avec succès, vérifiez la nouvelle version sur l’écran chargeant. 8CH STANDALONE DVR LOREX (FW:2.50.85 UCODE:86) VIDEO: NTSC DISK0: 78533MB HD7280PLAT20 NEW DISK... -
Página 122: Ptz (Panoramique/Inclinaison/ Zoom)
PTZ (PANORAMIQUE/INCLINAISON/ ZOOM) PTZ (PANORAMIQUE/INCLINAISON/ ZOOM) Ce DVR supporte une Caméra de PTZ via l'interface de série RS485 (Referez a l'annexe F pour les détails). Appuyez sur le bouton de PTZ en mode de surveillance réel pour entrer le mode de commande de PTZ. Les boutons de commande de PTZ incluant: Bouton Description... -
Página 123: Application De Client Lorex
Application de client Lorex Application de client Lorex La série DVR L200 vient avec l'application de client Lorex pour le contrôle à distance, enregistrement, commande de DVR ou la reproduction des données vidéo sur un PC. L'application de client Lorex a deux composants: •... -
Página 124: Mode Pour Jouer
CD/DVD*. Une fois que les données de sauvegarde sont connectées au PC, commencez le programme de client de Lorex. Cliquez sur l'icône de jouer sur le dessus du programme de client de Lorex pour échanger au mode de jouer. - Página 125 Application de client Lorex MENU POUR JOUER REPRODUCTION Le menu de reproduction inclut des boutons pour: • • Inverse • Pause • Avant rapide • Retour • Cadre prochaine • Cadre précédent • Vitesse Normale • Accélération • Décélération Ces boutons de fonction sont arrangés le long...
- Página 126 Application de client Lorex Capturer La fonction de Capture peut être employée pour sauvegarder des pièces de la vidéo à l'unité de disque dur locale. Cliquez sur le lien d'exportation pour sauvegarder le vidéo choisi à un fichier de *.VVF. Cliquez sur la marque dans le lien au point de départ et marquez dehors le point final.
-
Página 127: Fonction Audio
Application de client Lorex FONCTION AUDIO La fonction d'audio contrôle le volume sonore, et tourne le MUET "ON/OFF". Ecran Plein Choisissez l'écran plein pour visualiser un Caméra simple en mode d'écran pleine, ou appuyez sur Alt+Enter. Cliquez deux fois sur la partie supérieure du fichet pour magnifier l'écran. - Página 128 Application de client Lorex Proportion D’image La taille d'écran peut être configurée à 640x448 ou à 640x544. Mode de division Le mode de division (QUADRUPLEE) peut être configuré à 1ch d'écran pleine, écran Quadruple 4ch, l'écran divisé de 9ch.
- Página 129 Application de client Lorex Menu d'option Le menu d'option inclut des configurations pour : Reproduction Format de date et d'heure Sauvegarder le dossier Options générales • Toujours sur Haut: Le plus haut niveau sur la l'écran • Utilisation de DirectDraw: Utilisez l'interface appliquée de programme (api) incluse dans le X.
- Página 130 Application de client Lorex Exportation Epargnez la copie de sauvegarde de signaux vidéo comme format d'AVI sur l'ordinateur. • Choisissez les signaux vidéo à la copie de sauvegarde (Choisissez le fichier d’entrée). • Choisissez un emplacement et un nom pour le fichier sauvegardé (Choisissez le fichier de sortie).
-
Página 131: Bouton De Fonction
Application de client Lorex Visualisation étroit Pour fermer la visualisation, cliquez sur le bouton d’EXIT, ou cliquez sur le bouton de X du côté dessus droit du programme pour se fermer. BOUTON DE FONCTION Vous pouvez cliquer les boutons montrés ci-dessous sur le programme pour exécuter la fonction assortie, ou utilisez les boutons de raccourci énuméré. - Página 132 Application de client Lorex Allez un cadre en avant et faites une PAUSE. Reproduction Avant Rapide. Quand vous cliquez sur ce bouton, il prendra une cadre simple des images vidéo en temps de reproduction et alors il sauvegardera automatiquement l'image. (Format de BMP) dans le répertoire local de PC (le dossier initial a installé...
-
Página 133: Mode De Visualisateur
DVR et le PC peut être établie. Le programme de visualisation peut être employé pour se connecter au DVR sur le réseau local (réseau local), ou à distance par l'Internet (WAN) Lancez le programme de client de Lorex, et cliquez sur l'icône de visualisation sur le haut du programme de client. - Página 134 Application de client Lorex CONNECTER SUR LE RÉSEAU LOCAL: • Pour se connecter au DVR sur le réseau local, appuyez sur le bouton de REW sur le DVR pour obtenir l'IP adresse local (c.-à-d. 192.168.0.104). Entrez l'information suivante sur l'écran de connexion •...
- Página 135 Application de client Lorex MENU DE VISUALISATEUR Commande de DVR Le DVR peut être commandé par la partie de visualisation de l'application de client de Lorex. Le panneau de commande de DVR a les boutons suivants situés sur le panneau de bas: •...
- Página 136 Application de client Lorex Audio L'option d'acoustique contrôle le volume, et la configuration de faire muet à "ON/OFF" pendant la reproduction. Enregistrement local Le flot de vidéo en temps réel peut être sauvegardé au PC connecté en utilisant le programme de visualisation.
- Página 137 Application de client Lorex Écran Complet Pour changer l'écran au mode d'Écran Complet, choisissez l'option d'ÉCRAN COMPLÈTE ou appuyez sur ALT F4. Le double-clic sur le port supérieur de programme maximise l'écran. Proportion d'image La grandeur d'écran peut être configurée à 640 X 448 ou 640 X 544.
- Página 138 Application de client Lorex FONCTION D'OPTION Le menu d'option inclut : • Reproduction Répété • Essais de Connexion • Reconnexion D'auto • Le fichet épargné pour la vidéo OPTIONS GENERALE • Toujours en haut : Place le fichet sur le haut de l'écran.
- Página 139 Application de client Lorex Visualisation de près Pour fermer la visualisation, cliquez le bouton d'EXIT, ou cliquez le bouton X sur le côté droit supérieur de programme pour fermer. BOUTON DE FONCTION Vous pouvez cliquer les boutons montrés ci-dessous sur le programme pour exécuter la fonction s'accordant, ou utiliser les touches rapides énumérées.
- Página 140 Application de client Lorex Enregistrer Haut, bas, Gauche, Droite. • • • • Entrez / Sélectez Touche d’entrer Menu / Sortie Recherche d'heure.
-
Página 141: Annexe A: Spécifications De Dvr
Annexe A: Spécifications de DVR Annexe A: Spécifications de DVR Serie L204 / L208 Les spécifications sont partagées entre tous les modèles, sauf indication contraire. Caractéristique Spécification L204 L208 Système Temps réel (RTOS) d'opération Entrée Vidéo 4 Chaîne (BNC) 8 Chaîne (BNC) Sortie Vidéo 2 composite, 1 VGA Norme de... - Página 142 Annexe A: Spécifications de DVR Serie L214 / L218 Les spécifications sont partagées entre tous les modèles, sauf indication contraire. Caractéristique Spécification L214 L218 Système Temps réel (RTOS) d'opération Entrée Vidéo 4 Chaîne (BNC) 8 Chaîne (BNC) Sortie Vidéo 2 composite, 1 VGA Norme de NTSC / PAL Contribution Vidéo...
-
Página 143: Tous Les Modèles
Annexe A: Spécifications de DVR Dimensions Tous les modèles... -
Página 144: Annexe B: Diagramme De Connectivité Complet
Annexe B: Diagramme de Connectivité Complet Annexe B: Diagramme de Connectivité Complet Le diagramme suivant expose un ensemble général des connexions disponibles avec le DVR. SOURIS SENSEUR CAMÉRAS BNC MONITEUR PC MONITEUR SUBSIDIAIRE, TV OU SYSTÈME D'OBSERVATION... - Página 145 Annexe C: Remplacement du disque dur Annexe C: Remplacement du disque dur Disque dur SATA (L218/L214) Le système vient avec un disque dur SATA pré installé; pourtant l'unité travaillera avec un disque dur de remplacement SATA (jusqu'à 1 TB). La capacité de d'enregistrement de disque dur et le nom de modèle sont montrés sur l'écran de chargement quand le système DVR charge.
- Página 146 Annexe C: Remplacement du disque dur Disque dur SATA (cont’.) Formatage du disque dur Le nouveau disque dur doit être formaté. 8CH STANDALONE DVR LOREX Si un nouveau disque dur est détecté, le système (FW:2.50.85 UCODE:86) vous incitera à formater le disque. Si vous ne...
- Página 147 Annexe C: Remplacement du disque dur Disque dur PATA (IDE) (L204/L208) Le DVR vient avec un Disque dur pré installé; pourtant l'unité travaillera avec un Disque dur de remplacement IDE simple (jusqu'à 500 gigaoctets). Un maximum de deux (2) Disques durs peut être installé...
- Página 148 • Remplacez la couverture de disque dure sur le haut du DVR et révisez avec les vis. Formatage de l'unité dure Le Nouveau Disque dur DOIT être formaté. 8CH STANDALONE DVR LOREX Si un nouveau DISQUE DUR est détecté, le (FW:2.50.85 UCODE:86) système vous incitera à...
-
Página 149: Annexe D: Dépannage
Quand un mauvais fonctionnement se produit, cela peut ne pas être sérieux et peut être corrigé facilement. La chose suivante décrit les problèmes les plus communs et les solutions. Veuillez referez au suivant avant d'appeler le soutien technique de Lorex: Problème: L'Unité... - Página 150 Dépannage (cont.) Dépannage (cont.) Problème: L'image sur le DVR est pauvre, rétrécit ou vacille Vérifiez: • Vérifiez le câble de vidéo de la Caméra et les connexions • Débranchez et reconnectez le câble au DVR et à la Caméra • Nettoyez la lentille de la Caméra •...
-
Página 151: Annexe E: Aperçu De Connectivité De Réseau
Annexe E: Aperçu de Connectivité de Réseau Annexe E: Aperçu de Connectivité de Réseau Le DVR peut être contrôlée a distance en utilisant votre réseau existant et le logiciel fourni. 1. Connectez le DVR au routeur en utilisant un Câble d'Ethernet. Alimentez le DVR. NOTE: Le DVR doit être connecté... - Página 152 Configurer votre Compte de DDNS (Etape #3) Lorex offre un service DDNS gratuit pour l'utilisation avec votre Système. Un compte de DDNS vous permet de configurer une adresse de site Internet qui montre en arrière à votre Réseau Local. Les suivants illustre comment configurer votre compte de DNS gratuit.
- Página 153 Annexe E: Aperçu de Connectivité de Réseau Configurer Votre Compte de DDNS (cont.) 3. Complétez les fichets d'information de compte avec vos informations personnels 4. Complétez les fichets d'Information e système : • Licence de Produit : Choisissez votre modèle du menu de produit licenciée descendant •...
- Página 154 Annexe E: Aperçu de Connectivité de Réseau Expédition du Port de routeur (Etape #4) Vous aurez besoin de rendre capable l'expédition de port sur votre routeur en tenant compte les communications externes avec votre Système d'Observation pour les ports: • PORT 8841 Les ordinateurs, DVRs et d'autres appareils à...
- Página 155 Annexe E: Aperçu de Connectivité de Réseau Configuration de DDNS sur le DVR (Etape #5) Dès que les configurations de DDNS ont été configurées en ligne, l'information doit être entrée sur le DVR pour rendre capable la connexion lointaine via le Logiciel: 1.
-
Página 156: Annexe F: Contrôle De Ptz
Annexe F: Contrôle de PTZ Annexe F: Contrôle de PTZ Une Caméra PTZ (non inclus avec ce système) peut être raccordée au Bloc de contrôle PTZ sur le panneau arrière du DVR et est rendu capable par le système de Menu. Les Caméras PTZ Supplémentaires sont disponibles à... -
Página 157: Annexe G: Connectant L'appareil De Mouvement /Alarme
Annexe G: Connectant l'appareil de Mouvement /Alarme Annexe G: Connectant l'appareil de Mouvement /Alarme La détection de mouvement et les commandes D'alarme sont activées par le système de Menu sur le DVR. Les appareils supplémentaires peuvent être raccordés au système (les senseurs de Mouvement, les Détecteurs de Porte/Fenêtre). - Página 158 Annexe H: Tableau d'usage du disque dur Annexe H: Tableau d'usage du disque dur Le tableau suivant est fourni comme une approximation d'usage de disque dur. Les variables sur la qualité d'image et taux de bauds peuvent changer l'usage de disque dur. Tableau d'usage d'HDD Temps Grandeur Par...
- Página 159 GRABADORA DE VIDEO DIGITAL PARA VIGILANCIA CON DETECCION DE MOVIMIENTO Y GRABACION DE AUDIO Manual de instrucciones Versión en español 2.0 MODELOS: Serie L200 www.lorexcctv.com Derechos reservados © 2009 Lorex Technology Inc.
-
Página 160: Riesgo De Electrocución No Abrir
Le agradecemos por su compra de la grabadora de video digital para vigilancia serie L200. Lorex se compromete a brindar un producto de seguridad fiable y de alta calidad para nuestros clientes. Este manual se refiere a los siguientes modelos:... -
Página 161: Salvaguardias Importantes
Salvaguardias importantes Salvaguardias importantes Además del cuidado meticuloso usado para obtener normas de calidad en el procedimiento de fabricación de su producto video, la seguridad es un factor principal en el diseño de todo aparato. Sin embargo, la seguridad también es su responsabilidad. Esta página enumera información importante que le ayudará... -
Página 162: Mantenimiento
Salvaguardias importantes Mantenimiento 12. Mantenimiento - No trate de mantener este equipo 18. Limpieza - Desconecte el producto video del video sólo, porque abrir o quitar las tapas puede enchufe de la pared antes de limpiarlo. No use exponerlo a un voltaje peligroso o a otros peligros. productos de limpieza líquidos o en aerosol. -
Página 163: Precauciones Generales
Características Precauciones generales 1. Debe de seguir todas las advertencias e instrucciones de esta guía. 2. Quite el enchufe del enchufe de la pared antes de limpiar el producto. No use detergentes líquidos en aerosol. Use un trapo húmedo para la limpieza. 3. -
Página 164: Características
Características Características • DVR Tripex de 4 o 8 canales (simultáneamente ver, grabar y reproducir) • Lista para conectar a la red (soporte de LAN con aplicación de cliente remota*) • Transferencia de archivos eficiente (transmisión MPEG4 en la red) •... - Página 165 REPRODUCCION DE VIDEO ........................37 RESPALDO VIA CD-R/W (OPCION)* ......................38 ACTUALIZACION DEL FIRMWARE......................39 PTZ (PAN/TILT/ZOOM) ..........................40 Aplicación de Cliente de Lorex ........................41 MODO DE REPRODUCCIÓN......................... 42 MODO VIEWER ............................51 Anexo A: Especificaciones de la DVR ......................59 Anexo B: Diagrama total de conexiones.....................
-
Página 166: Comenzando
Comenzando Comenzando La sistema viene con los siguientes componentes: 1 x GRABADORA DE VIDEO DIGITAL COMPACTA (SE MUESTRA EL MODELO DE 8 CANALES)* 1 x CONTROL REMOTO 1 X FUENTE DE 1 x MANUAL DEL EQUIPO ALIMENTACION 1 x GUIA INSTALACION RÁ PIDA 1 X CABLE FUENTE DE 1 X CD CON SOFTWARE ALIMENTACION... -
Página 167: Panel Frontal
Panel frontal Panel frontal SE MUESTRA EL MODELO DE 8 CANALES CD/DVD-RW* Receptor IR Puerto USB Controles reproducción Control navegación Botones Botón PTZ Botón canales búsqueda Indicadores LED Botón de menú/Salir 1. DISCO CD/DVD-RW - *OPCIONAL: El disco DVD-RW es opcional dependiendo del modelo. 2. -
Página 168: Botón Ptz
NOTA: La opción de PTZ trabajará solamente con cámaras tipo PTZ (no provistas con esta unidad). Visite el sitio web de Lorex en www.lorexcctv.com para un rango completo de cámaras Pan/Tilt/Zoom 9. CONTROLES DE REPRODUCCION – Los controles de reproducción tienen dos modos de función: Función de modo en vivo y funciones de menú:... -
Página 169: Panel Trasero
Panel trasero Panel trasero Puerto LAN Entrada/salida Regleta de alarma Entrada Audio alimentación Puerto VGA Entrada de Video Regleta Interruptor 485/PTZ encendido Salida Video Puerto PS/2 1. CONEXION ETHERNET – Conecta la DVR al enrutador para una conexión a la red local y al internet. -
Página 170: Control Remoto
Control remoto Control remoto Se lista a continuación una referencia rápida del control remoto. Todos los botones descritos abajo son los mismos de los botones del panel frontal. BOTON DE REC – Empieza la grabación manual en la DVR. BOTON ONE FRM – sin uso. BOTON CH4 ◄... -
Página 171: Control De Ratón
Control de ratón Control de ratón Un ratón puede usarse con esta DVR para el control de reproducción y el menú. Conecte un ratón al puerto PS/2 localizado en la parte trasera de la unidad antes de encender la unidad. Una vez que la unidad haya cargado, el ratón será... -
Página 172: Instalación De La Cámara
Instalación de la cámara Instalación de la cámara Antes de que usted instale la cámara *, planee cuidadosamente donde y como a ser ubicada y por donde será la ruta del cable que conecta la cámara a la DVR. Advertencias en la instalación •... -
Página 173: Conectando Las Cámaras Bnc
Conectando las cámaras BNC Conectando las cámaras BNC 1. Conecte el cable de extensión de 60ft a la cámara y a la DVR: A. Conecte el conector de energía de barril a un adaptador de alimentación B. Conecte el conector BNC a un puerto BNC disponible (CAM 1~4) en la DVR. -
Página 174: Modos De Despliegue
DVR, y el botón de encendido y apagado en la parte trasera este en posición de encendido. 1. La DVR ejecutará una prueba de 8CH STANDALONE DVR LOREX microprograma (firmware). Durante la (FW:2.50.85 UCODE:86) secuencia de carga la siguiente información será... -
Página 175: Descripción General De La Pantalla
Modos de despliegue Descripción general de la pantalla 1.TITULO DE LA CAMARA Y ESTADO DE LA GRABACION – Muestra el nombre de la cámara (hasta 8 caracteres) y muestra el estado □ actual de la grabación (si el símbolo aparece significa que el sistema esta grabando). -
Página 176: Símbolos En Pantalla - Símbolos De Los Canales
Modos de despliegue 100% 07/01/01 01:02:03 100% 07/01/01 01:02:03 QUAD2 (CH 5~8) – Presione el botón de VISTA 9-CANALES – Presione el botón de CH5 para mostrar la vista cuádruple (serie INTRO para ver todas las cámaras (serie L208/L218) L208/L218) Símbolos en pantalla –... -
Página 177: Controles De Configuración Del Sistema
Controles de configuración del sistema Controles de configuración del sistema • Ingrese al menú del sistema presionando el botón de Setup Camera MENU/EXIT. Ingrese la contraseña para mostrar en el menú de Record selección de pantalla. Sensor • Navegue a través de las 11 opciones presionando las teclas de Motion Detection ▲▼... -
Página 178: Árbol De Configuración Del Sistema
Controles de configuración del sistema Árbol de configuración del sistema. CONFIGURAC CAMARA CANAL VISUALIZACION BRILLO CONTRASTE TINTE SATURACION GRABACION VELOCIDAD GRABAC CALIDAD GRABACION DURAC EVENT GRABAC GRABACION HORARIOS HABIL GRABAC HORAR CENSOR DURACION ALARMA CENSOR 1 CENSOR 2 CENSOR 3 CENSOR 4 DETECT MOVIM CANAL... - Página 179 Controles de configuración del sistema MENU PRINC AUDIO GRABACION SILENCIAR ENTRADA VOLUMEN SALIDA VOLUMEN SISTEMA CONFIG DISCO DURO CAMBIO CONTRASEÑA HABILITAR CONTRASEÑ CONFIG HORA LISTA EVENTOS SISTEM RS-485 DISPOSIT PAN \ TILT ACTUALIZA F/W BUSQUEDA BUSQUEDA POR HORA GRABACION NORMAL GRABACION POR HORA GRABACION MOVIMIENTO GRABACION CENSOR...
-
Página 180: Configuracion De La Camara
Controles de configuración del sistema Uso del teclado virtual El control mediante el teclado virtual llega a estar disponible cuando la entrada por teclado CANAL es necesaria para ingresar la información tal como lo son nombres, información de la red Cambia entre CH1~CH4 o CH1~CH8 (Serie etc. -
Página 181: Submenu De La Velocidad De La Grabacion
Controles de configuración del sistema CONFIGURACION DE LA GRABACION CALIDAD DE LA GRABACION La configuración de la grabación controla los valores de grabación de la DVR. Ajusta la calidad de la grabación a BAJO, NORMAL ▲▼ o ALTA. Esta configuración es la misma para todos Use la flechas para navegar a través de la los canales . -
Página 182: Grabacion Por Horarios
Controles de configuración del sistema GRABACION POR HORARIOS HABILITACION DE LA GRABACION POR HORARIOS Apaga o enciende la grabación por horarios NOTA: Es importante dejar esta configuración encendida. Si la configuración esta apagada, la DVR no grabará ningún dato, (grabación manual (cuando el botón de REC es presionado) sobrescribirá... -
Página 183: Configuracion De Deteccion De Movimiento
Controles de configuración del sistema CONFIGURACION DE SUBMENU AREA DE MOVIMIENTO DETECCION DE MOVIMIENTO Use el área de detección de movimiento para determinar cuales áreas de la imagen La configuración de detección de movimiento detectarán movimiento. Las áreas sombreadas controla el comportamiento cuando el con un color más oscuro indican que el área movimiento es detectado. -
Página 184: Control De Visualizacion
Controles de configuración del sistema CONFIGURACION DEL AUDIO CONTROL DE VISUALIZACION configuración audio ajusta El control de visualización control el despliegue entrada/salida del audio en el sistema de la en pantalla de la DVR. DVR. ▲▼ Use la flechas para navegar a través de ▲▼... -
Página 185: Menu Del Sistema
Controles de configuración del sistema SOBRESCRIBIR – Si la opción de sobrescribir MENU DEL SISTEMA está configurada a Yes, cuando el disco duro se llega a llenar en el sistema este empezará a La configuración del sistema controla muchos sobrescribir sobre la información mas antigua. aspectos de la funcionalidad de la DVR, Si el sobrescribir esta apagado, entonces la incluyendo la contraseña, hora y fecha, red y... -
Página 186: Habilitacion De Contraseña
Controles de configuración del sistema HABILITACION DE CONTRASEÑA SUBMENU DE LISTA DE EVENTOS DEL SISTEMA Al habilitar el uso de la contraseña en el sistema (ON) o apagado (OFF) , la contraseña se La lista de eventos provee una lista detallada SYSTEM MENU requerirá... -
Página 187: Submenu De La Red
Controles de configuración del sistema SUBMENU DE LA RED La información del submenú de la red permite CONFIGURACION DHCP a los usuarios el acceso remoto a la DVR. NOTE: La red automáticamente obtiene la información de la DVR desde el enrutador. El Habilitar (ENABLE) –... - Página 188 Controles de configuración del sistema CONFIGURACION ESTATICA Use los botones con la flechas para cambiar los valores de la red:...
- Página 189 DDNS contiene la configuración de los valores para el acceso • CONTRASEÑA DDNS: Ingrese la remoto mediante el servicio DDNS de Lorex contraseña desde el registro del DDNS (http://lorexddns.net). usando el teclado virtual. Presione Intro una vez completado.
-
Página 190: Submenu Dispositivo Pan/Tilt
Controles de configuración del sistema SUBMENU RS-485 SUBMENU DISPOSITIVO PAN/TILT La información en el submenú RS-485 permite NOTA: La configuración de los valores para a los usuarios configurar los valores de un esta sección debe ser provista de la dispositivo RS-485. documentación incluida con la cámara PTZ. -
Página 191: Menu De Búsqueda
Controles de configuración del sistema MENU DE BÚSQUEDA MENU DEL ESTADO El menú de búsqueda contiene una lista de submenús para buscar video grabado El menú del estado muestra la información del previamente. sistema. Presionando la tecla REV también mostrará la ventana con el estado. ▲▼... -
Página 192: Grabacion
Controles de configuración del sistema GRABACION Cuando un canal de grabación es visualizado Símbolos de la grabación por horarios: símbolo, indicara que el canal esta en modo de grabación. Blanco (Sin grabar) Rojo (grabación continua): La DVR está en constante grabación, y no detecta movimiento o un censor. -
Página 193: Funcion De Busqueda
FUNCION DE BUSQUEDA FUNCION DE BUSQUEDA Búsqueda por hora Existen varias maneras para dar acceso a la función de búsqueda: • Desde el menú principal y menú de búsqueda • Presionando el botón de REPRODUCCION • Presionando el botón de búsqueda. Sin embargo, cada menú... -
Página 194: Tipos De Búsqueda
TIPOS DE BÚSQUEDA TIPOS DE BÚSQUEDA LISTA DE EVENTOS GRABADOS La lista de eventos grabados mostrará todos los eventos de de un tipo específico (modo se • BÚSQUEDA HORA: Busca el video describe en la sección de tipos de búsqueda): basado en la hora y fecha. -
Página 195: Funcion De Respaldo
REPRODUCCION DE VIDEO FUNCION DE RESPALDO REPRODUCCION DE VIDEO Existen dos métodos para respaldar los datos de video: • A una memoria USB portátil • A un CD en blanco* La DVR de la serie L200 puede reproducir video previamente grabado en pantalla, mientras que esta este grabando imágenes en vivo. -
Página 196: Respaldo Via Cd-R/W (Opcion)
RESPALDO VIA CD-R/W (OPCION) * RESPALDO VIA CD-R/W (OPCION)* Use las teclas con la flechas ▲▼◄► y el Para salvar el video a un CD-R o CD-RW, configure el inicio y fin del video seleccionado: botón de intro para cambiar el inicio y fin de la •... -
Página 197: Actualizacion Del Firmware
Firmware y la nueva versión de Firmware: Para confirmar que el Firmware haya sido actualizado exitosamente, revise la nueva versión en la pantalla de carga. 8CH STANDALONE DVR LOREX (FW:2.50.85 UCODE:86) VIDEO: NTSC DISK0: 78533MB HD7280PLAT20 NEW DISK... -
Página 198: Ptz (Pan/Tilt/Zoom)
PTZ (PAN/TILT/ZOOM) PTZ (PAN/TILT/ZOOM) Esta DVR soporta una cámara PTZ mediante una interfaz RS485 (ver anexo #6 para detalles). Presione el botón de PTZ en modo en vivo para ingresar al modo de PTZ. Los controles de PTZ incluyen: Botón Descripción Ingresa / sale modo PTZ. -
Página 199: Aplicación De Cliente De Lorex
La DVR de la serie L200 viene con una aplicación de Cliente para monitoreo remoto, control de reproducción y grabación de datos de video en el computador personal. La aplicación de cliente de Lorex tiene dos componentes: • Modo de reproductor: Usado para ver datos de video desde el dispositivo de respaldo tal como los es una memoria USB portátil o un CD-RW*. -
Página 200: Modo De Reproducción
CD/DVD*. Una vez que los datos del respaldo están conectados al PC, empiece el programa de cliente de Lorex. Dele un click al ícono en la parte superior del programa de cliente de Lorex para cambiar al modo de reproducción. -
Página 201: Menu De Reproducción
Aplicación de Cliente de Lorex MENU DE REPRODUCCIÓN REPRODUCCIÓN El menú de reproducción incluye los botones para: • Reproducción • Reversa • Pausa • Adelantamiento • Reversa • Próximo cuadro • Cuadro previo • Velocidad normal • Acelerar • Deshacelerar Los funciones de estos botones están... - Página 202 Aplicación de Cliente de Lorex Captura La función de captura puede ser usada para salvar partes del video al disco duro local. Dele un click a la opción de Exportar para salvar el video seleccionado a un archivo *.VVF . Dele un click y marque el punto inicial y el punto final.
-
Página 203: Funcion De Audio
Aplicación de Cliente de Lorex FUNCION DE AUDIO La función de audio controla el volumen de audio, y enciende o apaga el silenciarlo (MUTE). Pantalla completa Seleccione la vista de pantalla complete para ver una cámara, o presione Alt+Enter. Dele un click doble... - Página 204 Aplicación de Cliente de Lorex Tasa de aspecto El tamaño de la imagen puede configurarse a 640x448 o 640x544. Modo dividido El modo dividido (QUAD) puede ajustarse a 1ch con pantalla completa, pantalla cuádruple de 4ch, pantalla dividida de 9ch.
- Página 205 Aplicación de Cliente de Lorex Menú de opciones El menú de opciones incluye la configuración para: • Reproducción • Formato de fecha y hora • Carpeta para salvar los datos. Opciones generales • Siempre arriba (Always on top): El nivel más alto en la ventana •...
- Página 206 Aplicación de Cliente de Lorex Exportar Salva el respaldo de datos en un formato AVI en la computadora. • Seleccione los datos de video a respaldar (Seleccione el archivo de entrada). • Seleccione el lugar y el nombre del archivo al salvar (Seleccione el archivo de salida).
-
Página 207: Boton De Funcion
Aplicación de Cliente de Lorex Cierre del programa para ver archivos de video (Viewer) Para cerrar el Viewer, dele un click al botón de EXIT, o un click al botón de X en la parte superior derecha del programa para cerrarlo. - Página 208 Aplicación de Cliente de Lorex Reproducción Adelantamiento. Cuando usted le da un click a este botón, este tomara una imagen digital mientras se reproduce y automáticamente será grabado en formato BMP en un directorio en su PC local (carpeta inicial : “C:\VxCapture”)
-
Página 209: Modo Viewer
PC pueda establecerse. El programa Viewer puede ser usado para conectarse a la DVR en la red local (LAN), o remotamente a través del Internet (WAN). Ejecute el programa de cliente de Lorex y dele un click al ícono de Viewer en la parte superior Dele un click al botón al lado inferior izquierdo del programa VIEWER (o presione la tecla L). -
Página 210: Conexion En La Wan (Remotamente En El Internet)
Aplicación de Cliente de Lorex CONEXION A LA LAN: Para conectar la DVR a la LAN, presione el botón de REW en la DVR para conseguir la dirección IP local (ej. 192.168.0.104). Ingrese la siguiente información en la ventana de conexión: •... -
Página 211: Menu Del Viewer
MENU DEL VIEWER Control del DVR La DVR puede ser controlada a través del Viewer de la aplicación de Lorex Cliente El panel de control de la DVR tiene los siguientes botones localizados en la parte inferior de panel: •... - Página 212 Aplicación de Cliente de Lorex Audio La opción del audio controla el volumen, y la configuración para apagar o encender de silenciar durante la reproducción. Grabación local El video transmitido en vivo puede ser salvado en la PC conectada usando el programa de viewer. Dele un click a Local Recording ->...
- Página 213 Aplicación de Cliente de Lorex Pantalla completa Para cambiar al modo de pantalla completa, seleccione la opción de FULL SCREEN o presione ALT+F4. Dele un click doble en el puerto superior del programa para maximizar la pantalla. Tasa de aspecto.
-
Página 214: Funciones Opcionales
Aplicación de Cliente de Lorex FUNCIONES OPCIONALES El menú de opciones incluye: • Repetir la reproducción • Tratandose de conectarse • Auto reconexión • La carpeta para salvar el video OPCIONES GENERALES • Siempre arriba (Always on top): El nivel más alto en la ventana •... -
Página 215: Botones De Funciones
Aplicación de Cliente de Lorex Cierre del Viewer Para cerrar el Viewer, déle un click la botón de salir (EXIT), o déle un click al botón de X al lado superior derecho para cerrar. BOTONES DE FUNCIONES Usted le puede dar un click a los botones que se muestran abajo en el programa para ejecutar funciones,... - Página 216 Aplicación de Cliente de Lorex ÏCONO Tecla FUNCION Conecta / disconecta la DVR. Salva la pantalla actual Reproducción/pausa. Rebobinar. Adelantar. Parar. Grabar. • • Arriba, abajo, izquierda, derecha. • • Tecla intro INTRO / Selecciona Menú / Salir Búsqueda por hora.
-
Página 217: Anexo A: Especificaciones De La Dvr
Anexo A: Especificaciones de la DVR Anexo A: Especificaciones de la DVR Serie L204 / L208 Las especificaciones están compartidos entre todos los modelos menos que se indique Característica Especificacion L204 L208 Sistema Tiempo real (RTOS) operativo Entrada de video 4 canales (BNC) 8 canales (BNC) 2-compuesto, 1-VGA... - Página 218 L214 / L218 Series Specifications are shared among all models unless otherwise noted. Característica Especificacion L214 L218 Sistema Tiempo real (RTOS) operativo 8 canales (BNC) Entrada de video 4 canales (BNC) Salida de video 2-compuesto, 1-VGA Entrada de video NTSC / PAL estándar Resolución del 720x480 NTSC...
-
Página 219: Anexo B: Diagrama Total De Conexiones
Anexo B: Diagrama total de conexiones Anexo B: Diagrama total de conexiones El siguiente diagrama describe un grupo de conexiones disponibles con de la DVR. RATÓN SENSOR CAMARAS BNC MONITOR DE PC MONITOR ESCLAVO, TV O SISTEMA DE OBSERVACION... -
Página 220: Anexo C: Reemplazo Del Disco Duro
Anexo C: Reemplazo del disco duro Anexo C: Reemplazo del disco duro Disco duro SATA (L218/L214) La DVR viene con un disco duro preinstalado; sin embargo la unidad trabajará reemplazando un disco duro SATA (hasta 1 TB). La capacidad de almacenaje del disco duro y nombre del modelo se muestran en la pantalla cuando la DVR carga el sistema. -
Página 221: Formateando El Nuevo Disco Duro
Disco duro SATA (cont’) Formateando el Nuevo disco duro El nuevo disco duro DEBE ser formateado. 8CH STANDALONE DVR LOREX (FW:2.50.85 UCODE:86) Si un nuevo disco duro es detectado, el sistema le indicará a usted formatear el disco. Si usted no VIDEO: NTSC escoge formatearlo el disco no será... -
Página 222: Removiendo El Cobertor Trasero E Instalando El Disco
Reemplazo del disco duro (cont’.) Disco duro PATA (IDE) (L204/L208) La DVR viene con un disco duro preinstalado; sin embargo la unidad trabajará reemplazando un disco duro IDE (hasta 500GB). Un máximo de dos (2) discos duros pueden ser instalados en la DVR; sin embargo el CD-RW de primero desconectarse.* La capacidad de almacenaje del disco duro y nombre del modelo se muestran en la pantalla cuando la DVR carga el sistema. -
Página 223: Instalación Del Nuevo Disco
Vuelva a poner la tapa del tipo en la parte superior en la DVR y reinstale los tornillos Formateo de un disco duro nuevo El nuevo disco duro DEBE ser formateado. 8CH STANDALONE DVR LOREX NOTA: Si un nuevo disco duro es detectado, el (FW:2.50.85 UCODE:86) sistema le indicará... -
Página 224: Anexo D: Localización De Averías
Cuando existe un fallo en el sistema, puede que no sea serie y que se pueda corregir fácilmente. Los siguiente describe los problemas más comunes y soluciones. Por favor refiérase a lo siguiente antes de llamar a soporte técnico de Lorex: Problema:... - Página 225 Localización de averías (cont’d.) Localización de averías (cont’d.) Problema: La imagen en la DVR es pobre, se encoge o parpadea Revise: • Revise el cable de video de la cámara y conexiones • Desconecte y reconecte el cable a la DVR y a la cámara •...
-
Página 226: Anexos E: Descripción De Conexión A La Red
Anexos E: Descripción de CONEXIÓN a la red Anexos E: Descripción de CONEXIÓN a la red La DVR puede ser remota controlada usando su red existente y el software provisto. 1. Conecte la DVR al enrutador usando el cable existente. Encienda la DVR. NOTA: La DVR de estar conectada al enrutador antes del encender el sistema. -
Página 227: Como Buscar Su Dirección Ip Externa
Configuración de su cuenta DDNS (paso #3) Lorex ofrece un servicio gratis de DDNS con su sistema. Una cuenta de DDNS le permite a usted configure un URL (sitio web) el cual apunta de regreso a su red local. - Página 228 Anexos E: Descripción de CONEXIÓN a la red Configuración de su cuenta DDNS (cont’d.) 3. Complete los campos de la información de la cuenta con su información personal 4. Complete las campos con la información del sistema : • • Licencia del producto: Seleccione su producto con el modelo desde la lista el menú.
-
Página 229: Como Abrir Los Puertos En El Enrutador
Anexos E: Descripción de CONEXIÓN a la red Como abrir los puertos en el enrutador (Paso #4) Deberá de activar y abrir los puertos (port forwarding) sobre su enrutador para permitir las comunicaciones externas con su sistema para el puerto: •... - Página 230 Anexos E: Descripción de CONEXIÓN a la red Configuración DDNS en la DVR (paso #5) Una vez que la configuración del DDNS haya sido efectuada en línea, la información debe ser ingresada en la DVR para permitir la conexión remota mediante el Software: 1.
-
Página 231: Anexo F: Control Del Ptz
Anexo F: Control del PTZ Anexo F: Control del PTZ Una cámara PTZ (no incluida con este sistema) puede se conectada a la regleta para el control PTZ en el panel posterior de la DVR, y es habilitada a través del menú del sistema. Cámaras PTZ adicionales están disponibles en http://www.lorexcctv.com Instalación de una cámara PTZ (tipo RS-485):... -
Página 232: Anexo G: Conexión De Una Dispositivo De Movimiento / Alarma
Anexo G: Conexión de una dispositivo de movimiento / alarma Anexo G: Conexión de una dispositivo de movimiento / alarma Los controles de detección de movimiento y alarma son habilitados a través del menú del sistema en la DVR. Dispositivos tipo censores de movimiento adicionales pueden ser conectados al sistema (censores de movimiento, puerta, ventana). -
Página 233: Anexo H: Tabla De Uso Del Disco Duro
Anexo H: Tabla de uso del disco duro Anexo H: Tabla de uso del disco duro La siguiente tabla es provista con un aproximado del uso del disco duro. Los valores en la calidad de imagen y cuadros por segundo alteran el uso del disco. Tabla uso del disco duro Tiempo Tamaño por... - Página 236 SEE HEAR PROTECT Enhance your security with genuine Lorex Cameras, Digital Video Recorders, Integrated Systems and Accessories. Order whatever you need at www.lorexcctv.com or call 1-888-42-LOREX (1-888-425-6739) Restaurant Warehouse Office Convenience Store CVC6998HR CVC6993R CNC1020 VQ1536HR PROTECT EVERYTHING Day Care...