Schlage L9000 Manual Del Usuario
Ocultar thumbs
Ver también para L9000:
- Instrucciones de instalación (24 páginas) ,
- Instrucciones de instalación (12 páginas) ,
- Instrucciones de instalación (8 páginas)
Publicidad
Enlaces rápidos
*P516-908*
P516-908
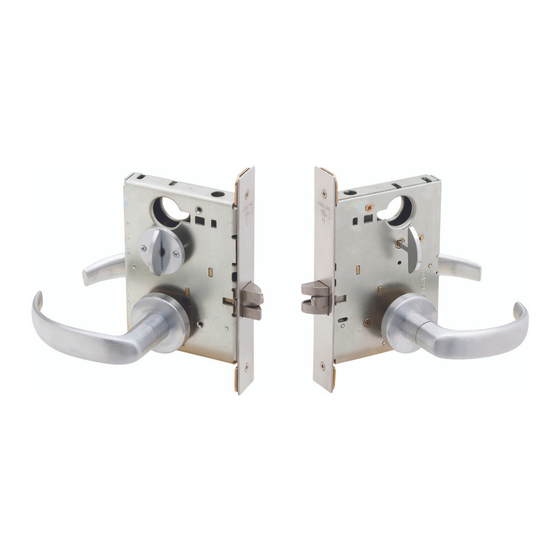
L9000 Series Lock with Indicator Escutcheon Trim
Indicator trim is available for either the inside or outside of the door on allowable functions.
Non-indicator trim is furnished on the opposite side of the door.
The L9000 lock with indicator is not intended for exterior door applications.
For retrofit, see page 7.
Indicator options (interior):
Cylinder or thumb turn
Check the door preparation dimensions with the template included in the package.
1
IMPORTANT! Check lock handing before installation.
To change handing:
1. Pull out the latch
and rotate 180°.
2. Remove the lock
handing screw
from one side of
the chassis and
install it on the
opposite side.
The lock handing
screw should
always be on the
interior side of the
door.
L9000 Lock with Indicator
Tools
Thumb turn indicator inside and cylinder non-indicator outside shown
Pull
Rotate
180°
OR
2
Install lock chassis
Handing
screw
Indicator options (exterior):
Cylinder
OR
Emergency
turn
DO NOT FULLY TIGHTEN
CHASSIS MOUNTING SCREWS.
Installation Instructions
Coin turn
Publicidad

Manuales relacionados para Schlage L9000


Resumen de contenidos para Schlage L9000
- Página 1 Indicator trim is available for either the inside or outside of the door on allowable functions. Non-indicator trim is furnished on the opposite side of the door. The L9000 lock with indicator is not intended for exterior door applications. For retrofit, see page 7.
- Página 2 Connect the cam to the indicator slide. The cam must Install springs and spindles engage either the left or right side of the indicator slide Exterior according to door handing. All functions • Unlock the door. • Move the indicator slide against the top rim of the mounting plate (unlocked position).
- Página 3 Functions Install outside spring cage or spacer. L/LV9044 L/LV9444 All functions L The spring cage arrow must point in direction of lever down rotation. Install spacer for L/LV9485 Install outside mounting posts. Exterior Functions L/LV9050 L/LV9071 L9465 LM/LMV9350 L/LV9056 L/LV9456 L9466 LM/LMV9370 L/LV9060...
- Página 4 Install outside cylinder (if applicable) Install inside spring cage and mounting plate Insert key halfway into the cylinder. Interior Install the cylinder with cylinder spring as shown. Functions L/LV9050 L9465 L/LV9056 L9466 L/LV9060 L9473 L/LV9070 L/LV9485 L/LV9071 LM/LMV9350 L/LV9456 LM/LMV9370 L/LV9457 LM/LMV9371 L/LV9458...
- Página 5 Connect the cam to the indicator slide. The cam must Install inside trim engage either the left or right side of the indicator slide DO NOT OVERTIGHTEN THE MOUNTING SCREWS according to door handing. • Unlock the door. Functions • Move the indicator slide against the top rim of the L/LV9040 L/LV9456 mounting plate (unlocked position).
- Página 6 Tighten bushing with spanner wrench 13a Tighten cylinder mounting screw (if applicable). All functions 13b Tighten top and bottom chassis mounting screws. Chassis mounting Cylinder screws mounting screw Install inside cylinder (if applicable) Install armor front 12a Insert key halfway into the cylinder. 12b Install the cylinder with cylinder spring as shown.
- Página 7 INDICATOR LOCK RETROFIT INSTRUCTIONS Inside Indicator Trim Outside Indicator Trim Inside trim options: Cylinder or thumb turn Outside trim options: Emergency turn, coin turn or cylinder Cylinder Emergency turn Coin turn Thumb turn Cylinder Remove armor front Remove cylinder(s) if applicable Loosen the cylinder mounting screw.
-
Página 8: Customer Service
Remove the outside cylinder. Insert the key halfway into the cylinder and rotate cylinder For indicator trim on outside of door, remove the inside counterclockwise to remove. mounting plate and spring cage. Then, remove the ouside trim. Interior Key inserted halfway Mounting plate Spring cage Exterior... - Página 9 Cerradura L9000 con Indicador P516-908 Serrure L9000 avec Indicateur Cerradura Serie L9000 con borde de placa de seguridad con indicador Instrucciones de instalación Serrure de la série L9000 avec garniture d’indicateur d’entrée de serrure Notice d'installation El borde con indicador está disponible para el interior o el exterior La garniture d’indicateur est vendue pour l’Intérieur ou l’extérieur de...
- Página 10 ¡IMPORTANTE! Compruebe el lado de la cerradura Instale los resortes y husillos antes de la instalación Installez les ressorts et les axes IMPORTANT! Vérifiez si la serrure est pour droitier ou gaucher avant de l’installer. Exterior Todas las funciones Extérieur Toutes fonctions Para cambiar el lado: 1.
- Página 11 Ensamble la placa de montaje de la placa de seguridad, Conecte la leva al deslizador del indicador. La leva debe el deslizador del indicador y la leva como se muestra. acoplarse al lado izquierdo o derecho del deslizador del indicador de acuerdo con el lado de la puerta. Assemblez la plaque de montage de l’entrée de serrure, l’indicateur mobile et la came comme illustré.
- Página 12 Coloque el frente de la placa de seguridad en el Instale los postes externos de montaje. ensamblaje del indicador. Installez les supports de montage extérieurs. Placez la têtière de l’entrée de serrure sur l’assemblage de l’indicateur. Frente de la placa de seguridad Têtière de l’entrée de serrure...
- Página 13 Gire el cilindro en sentido horario. Fonción Fonction L/LV9050 L/LV9070 L/LV9457 L9466 LM/LMV9350 Tournez le cylindre dans le sens horaire. L/LV9056 L/LV9071 L/LV9458 L9473 LM/LMV9370 L/LV9060 L/LV9456 L9465 L/LV9485 LM/LMV9371 Llave insertada a mitad de camino Clé insérée à moitié Exterior Exterior Extérieur...
- Página 14 Ensamble la placa de montaje de la placa de seguridad, Instale la jaula del resorte y la placa de montaje el deslizador del indicador y la leva como se muestra. Installez la cage du ressort intérieur et la plaque de Assemblez la plaque de montage de l’entrée de serrure, montage l’indicateur mobile et la came comme illustré.
- Página 15 Coloque el frente de la placa de seguridad en el Conecte la leva al deslizador del indicador. La leva debe ensamblaje del indicador. acoplarse al lado izquierdo o derecho del deslizador del indicador de acuerdo con el lado de la puerta. Placez la têtière de l’entrée de serrure sur l’assemblage de l’indicateur.
- Página 16 Instale el borde interno Fonción Fonction Installez la garniture extérieur (sin indicador) NO AJUSTE EXCESIVAMENTE (sans indicateur) L/LV9070 LOS TORNILLOS DE MONTAJE. L9465 NE SERREZ PAS TROP LES VIS DE MONTAGE. Fonción Fonction L/LV9040 L/LV9457 L/LV9044 L/LV9458 L/LV9050 L9460 L/LV9056 L9473 L/LV9440 L/LV9480...
- Página 17 Instale el cilindro interno (si corresponde) 13a Ajuste el tornillo de montaje del cilindro (si corresponde). Installez le cylindre intérieur (s’il y a lieu) Serrez la vis de montage du cylindre (s’il y a lieu). 12a Introduzca la llave a mitad de camino en el cilindro. Insérez la clé...
- Página 18 INSTRUCCIONES DE ADAPTACIÓN DE LA CERRADURA CON INDICADOR INSTRUCTIONS DE RÉNOVATION DE L’INDICATEUR DE VERROUILLAGE Borde con indicador interno Borde con indicador externo Garniture de l’indicateur Intérieur Garniture de l’indicateur extérieur Opciones de borde interno: Giro de cilindro o manual Opciones de borde externo: Giro de emergencia, giro con moneda o cilindro Options de garniture Intérieur : Cylindre ou barrette tournant...
- Página 19 Retire el cilindro interno. Enlevez le cylindre intérieur. Retire la palanca interna. Inserte la llave a mitad de camino en el cilindro y gire el cilindro en Enlevez la fourchette intérieur. sentido antihorario para extraer. Insérez la clé à moitié dans le cylindre et tournez le cylindre dans le sens antihoraire pour l’enlever.
- Página 20 Compruebe la preparación de la puerta Vérifiez le fonctionnement de la porte Para el borde con indicador en el exterior de la puerta, retire la IMPORTANTE placa de montaje interior y la jaula del resorte. Luego, retire el borde externo. •...