
Manuales relacionados para Gram FH Serie


Resumen de contenidos para Gram FH Serie
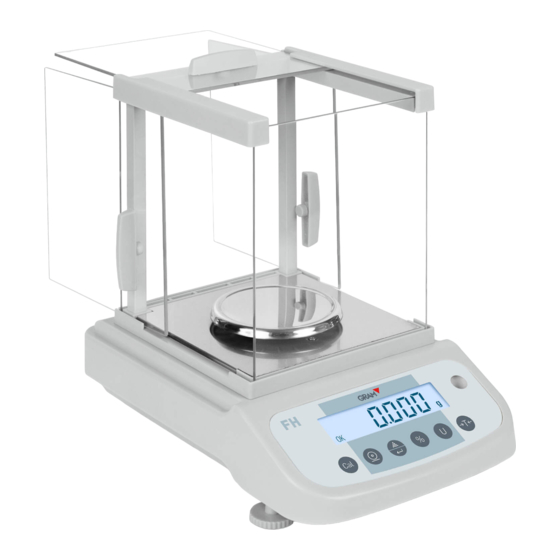
- Página 1 SERIES / SERIE / SÉRIE 100 / 200 / 2000 / 6000 OPERATION MANUAL MANUAL DE UTILIZACION MANUEL D´UTILISATION...
-
Página 2: Tabla De Contenido
INDEX English Safety information Installation Preparatory before using Storage Unfolding the package Package list Installation of the balance Usage Conditions Install the balance with wind shield Install the balance with round weighing pan Connect the Power Adapter Install the External Facilities Warm-up Time Adjust the Level Gauge Purpose Display and keys description... - Página 3 Pin description Routine maintenance and troubleshooting Troubleshooting Clearance Clearing the stainless steel surface Safety check Troubleshooting Technical conditions Guarantee...
- Página 4 ÍNDICE Español Información de seguridad Instalación Antes de utilizar la balanza Entorno de la balanza Embalaje Lista de material Instalación de la balanza Condiciones de uso Install the balance with wind shield Install the balance with round weighing pan Conectar el adaptor Install the External Facilities Tiempo de precalentamiento Nivelar la balanza...
- Página 5 Solución de averías Limpieza Limpieza de la superficie de acero inoxidable Revisión de seguridad Solución de problemas Condiciones técnicas Garantía...
- Página 6 SOMMAIRE Français Informations de sécurité Installation Avant d’utiliser la balance Environnement de la balance Emballage Liste du matériel Installation de la balance Conditions d’utilisation Installation de la balance avec pare-brise Installer la balance sans pare-brise Branchement secteur Raccordement d’appareils périphériques Temps de préchauffage Mise à...
- Página 7 Nettoyage Nettoyage de la surface d’acier inoxydable Révision de sécurité Solution des problèmes Conditions techniques Garantie...
-
Página 8: Safety Information
ENGLISH SAFETy INFORMATION To avoid unnecessary demage to the balance, please pay attention to the following tips: • Please do not use this balance in dangerous área. • Only the trained technicians could operate this balance. • Please turn off the power of the balance before connect it or disconnect it with other facilities. -
Página 9: Preparatory Before Using
• If the facility or the power cord has apparent damage, please turn off the power, put it or them in a safe place and do not use it or them before they are fixed. • This balance could only be connected to our accessories or optional fittings. -
Página 10: Package List
future. When pack the balance, please remove all the cables to avoid unnecessary damage. Package list • The balance. • Weighing pan. • Pan support. • Power adapter. • User manual. INSTALLATION OF THE bALANCE Put it in a proper place, please avoid the following situations: •... -
Página 11: Install The Balance With Wind Shield
Install the balance with wind shield • Assemble the parts in the indicated order. Install the balance with round weighing pan • Installation Sequence. • Pan support. • Weighing pan. Connect the Power Adapter Only the power adapter offered by us is allowed. •... -
Página 12: Adjust The Level Gauge Purpose
Adjust the Level gauge Purpose • Adjust the level guage of the balance. The level guage needs to be adjusted once its place is changed. The two front bottom bolts are used to adjust the level guage. • Spin the two bolts as shown in the figure until the bubble in the level gauge is in the ceter of the circle. - Página 13 OZ - Reading shown is given in ounces (1g = 0.03527396200 oz) ct - Reading shown is given in carats (1g = 5.0000000000 ct) dwt - Reading shown is given in pennyweight (1g = 0.64301493100 dwt) Reading shown is given in percent weight PCS - Reading shown is given in as a counting -------...
-
Página 14: Calibration
CALIbRATION To decide the accuracy of the balance through test the difference between thereading and the actual weight of the object on the weighing pan. Prerequisite of calibration: 1. There is no loading on the weighing pan. 2. Press the key. -
Página 15: Basic Weighing
bASIC WEIgHINg Procedure 1. Plug in the power, the balance will automatically proceed system initialization and deduct the tare weight. 2. Place the container on the weighing pan. 3. Press the key. 4. Place the simple object in the container. 5. -
Página 16: Percent Deviation
6. Add the rest of ítems, the balance will show the total pieces. 7. If you want print the result, press the key. key, the symbol PCS 8. To return to normal weighing mode, press the disappears. PERCENT DEvIATION Displayed sign: % Procedure 1. -
Página 17: Weighing Units
3. Press the key. Wait for the stable display, it reads “100.000” or “100.00”. 4. Remove the container with standard object. Put another same container on the weighing pan, wait for the stable display, it reads “0.000” or “0.00”. 5. Add the goal object in the container, wait for tyhe stable display, the value displayed is the percentage the weight of the goal object varies from the standard weight. -
Página 20: User Setups
USER SETUPS The balance could be set up to meet individual requirement. 1. Press the key while pressing the key to enter to setup program. 2. Press the key to choose the ítem to be set up, then press to confirm. key, it reads “ESC”, 3. -
Página 21: Setting The Baud Rate
5. Press the key repeatedly to see the predeterminated time interval and to confirm. The message “0 SEC” means countinous print. press the 6. Press the key to return to weighing mode. 7. After entering print setup, press the key repeatedly to see predetermined line foods (1-18) Choose the proper line feeds, press the to return to normal weighing mode. -
Página 22: Restoring The Factory Default Setup
RESTORINg THE FACTORy DEFAULT SETUP 1. Press the key while pressing the key the display will show “PrInT”. 2. Press the key repeatedly until it reads “InITIA”. key to confirm, the display reads “bUSy” and the returns 3. Press the to weighing mode. -
Página 23: Rs-232 Interface Hardware
A b C D E F g H I J k L M A - +/-: Signs field, usually no display as a space when it is a positive number, “-” is displayed when it is a negative number. b – g: Number and decimal field, spaces are used when there are less than six digits. -
Página 24: Pin Description
Pin description 2 – TXD - - - scale transmits data 3 – RXD - - - scale receives data 5 – GRD - - - signal ground Note: “Handshake” signals, such as “clear to send” (CTS) are not used. The peripheral must have a mínimum buffer (15 characters). -
Página 25: Clearance
Clearance • Turn off the balance and unplug the data cables. • Avoid the liquid into the balance. • Any corrosive cleaner (solvent) is forbidden to use. • Wipe the balance with a piece of soft cloth. • Remove the weighing pan before wipe the balance. •... -
Página 26: Safety Check
Safety check If the balance could not work normally: • Cut off the power immediatelly, keep and do not use it again. • Keep it in a safe place to make sure it won´t be used for the moment. • Inform the nearest Service Center or your Distributor. - Página 27 Refer to calibration section, NOCAL Calibration is unresponsive. check if it is the right calibration weight. Lack of data or wrong data Refer to user manual. UNAbLE with which the balance could not perform the function. Unstable the ambient Put the balance in another environment (excessive UNSTAbLE place.
-
Página 28: Technical Conditions
TECHNICAL CONDITIONS AC-DC adapter Input: 220V/110V, output: 7.5V (+15% to -20%) 48-60Hz Power consumption: Maximam=16W, Average=8W... -
Página 29: Guarantee
This scale is guaranteed for one year from the delivery date. The guarantee covers any fabrication defect of the material. During this period gRAM PRECISION, SL, covers the manpower and the spare parts necessary for the reparation of the scale. -
Página 30: Información De Seguridad
ESPAÑOL INFORMACIóN DE SEgURIDAD Para evitar daños innecesarios a la balanza, por favor preste mucha atención a los siguientes consejos: • No utilizar la balanza en áreas peligrosas. • Desconectar la balanza de la red antes de conectarla o desconectarla en otras instalaciones. -
Página 31: Antes De Utilizar La Balanza
favor desconectar la balanza de la red, situarla en un lugar seguro y no utilizarla hasta que la instalación de la misma sea segura. • La balanza solo puede ser conectada a nuestros accesorios o piezas opcionales. No nos haremos reponsables de cualquier modificación que el usario efectúe a la balanza, incluyendo el uso inadecuado de las instalaciones o que el cable de corriente, no sea el suministrado junto con la balanza. -
Página 32: Lista De Material
Lista de material • Balanza. • Plato de pesada. • Soporte del plato. • Adaptador de red. • Manual de instrucciones. INSTALACIóN DE LA bALANZA Instalar la balanza en un lugar apropiado, evitar las siguientes situaciones: • Altas temperaturas y rayos solares directos. •... -
Página 33: Install The Balance With Wind Shield
Montaje de balanza con vitrina • Montar las piezas según el orden indicado. Montaje balanza con el plato de pesada redondo • Instalar el soporte del plato. • Colocar el plato de pesada. Conectar el adaptor • Conectar el adaptador a la balanza. •... -
Página 34: Nivelar La Balanza
Nivelar la balanza • Nivelar la balanza utilizando los dos pies regulables delanteros hasta que la burbuja del nivel quede en el centro del círculo. • Cada vez que la balanza sea instalada en un lugar distinto se deberá nivelar antes de su utilización. - Página 35 ct - Lectura en quilates (1g = 5.0000000000 ct). dwt - Lectura en pennyweight (1g = 0.64301493100 dwt). Lectura en modo porcentaje. PCS - Lectura en modo cuentapiezas. ------- La balanza está desarrollando una lectura estable. UNAbLE - Error de operación. HHHHH - El objeto situado sobre el plato de pesada excede la capacidad de la balanza.
-
Página 36: Calibración
CALIbRACIóN Procedimiento 1. Nivelar la balanza ajustando el nivel de burbuja y precalentar la balanza durante 30 minutos. 2. Pulsar la tecla 3. Pulsar la tecla , el display mostrará la capacidad de la balanza, por ejemplo 3000. 4. Pulsar la tecla repetidamente, el display irá... -
Página 37: Función Cuentapiezas
FUNCIóN CUENTAPIEZAS Símbolo en el display: PCS Procedimiento 1. Colocar el recipiente sobre el plato de pesada. 2. Pulsar la tecla de 3. Seleccionar el número de piezas que se utilizará como referencia, pulsar la tecla , el display mostrará “qTy10”, pulsar la tecla para visualizar los números de piezas disponibles (10, 25, 50, 100). -
Página 38: Función Porcentajes
FUNCIóN PORCENTAJES Símbolo en el display: % Procedimiento 1. Pulsar la tecla 2. Colocar el peso de referencia sobre el plato. Cuando la lectura sea estable, pulsar la tecla , el display mostrará “100.000” o “100.00”, que se refiere a la exactitud 100% de la balanza. El indicador aparecerá en el display. -
Página 39: Configuración De Parámetros
5. Verter el producto en el interior del recipiente, el valor visualizado es la diferencia de porcentaje entre el producto y el peso de referencia. 6. Pulsar la tecla para volver al modo normal de pesaje. 7. Si se desea, el resultado puede ser transmitido a una impresora. CONFIgURACIóN DE PARáMETROS Para acceder al modo configuración, pulsar la tecla y sin soltarla pulsar... -
Página 41: Configuración De Impresión
CONFIgURACIóN DE IMPRESIóN Hay tres modos de impresión: STAbLE Print: impresión cuando la lectura del display es estable. INSTANT Print: impresión inmediatamente después de pulsar la tecla INTERvAL Print: impresión en intervalos de tiempo predeterminados. Nota: La función de impresión está separada de la configuración del avance de línea, configurar primeramente la función de impresión y seguidamente el número de avance de línea. -
Página 42: Configuración Velocidad De Transmisión
7. Una vez realizada la configuración, pulsar la tecla repetidamente para visualizar el avance de línea predeterminado. (1-18) Seleccionar el apropiado parámetro de avance de línea, pulsar la tecla para volver al modo normal de pesaje. CONFIgURACIóN vELOCIDAD DE TRANSMISIóN 1. -
Página 43: Habilitar Las Unidades De Pesada
HAbILITAR LAS UNIDADES DE PESADA Las unidades de pesada pueden ser activadas o desactivadas por el usuario: 1. Pulsar la tecla y sin soltarla pulsar la tecla el display mostrará “PrInT”. repetidamente hasta visualizar el mensaje “unIT”. 2. Pulsar la tecla , el display mostrará... -
Página 44: Comunicación A Un Ordenador
COMUNICACIóN A UN ORDENADOR Las funciones de las teclas de la balanza pueden ser utilizadas via RS-232. Están disponibles los siguientes comandos: U – : Conversión unidades de pesada. T – : Función tara. C – : Calibración con una pesa de calibración externa. P –... -
Página 45: Interface Rs-232
Campo de unidad, describe la unidad de pesada de las pesadas transmitidas. La balanza transmitirá G para gramos, O para onzas y C para quilates. Carácter de estabilidad, corresponde al símbolo OK del display de la balanza. S significa que la lectura es estable, un espacio significa que la lectura es inestable. -
Página 46: Rutina De Mantenimiento Y Solución De Problemas
Nota:Los modos de señal CTS no son utilizados. El periférico debe tener un buffer mínimo (15 caracteres). Recomendamos que la longitud del cable sea de 15 metros, la impedancia de carga del equipo conectado sea entre 3000 y 7000 ohms con no más de 2500 pf de capacidad en paralelo. -
Página 47: Limpieza De La Superficie De Acero Inoxidable
Limpieza de la superfiie de acero inoxidable Todos los componentes de acero inoxidable necesitan ser limpiados regularmente. Retirar el plato de pesada y limpiarlo con un trapo suave o esponja. Recomendamos utilizar un limpiador especial para el acero inoxidable. Limpiar la superficie de acero inoxidable de la balanza y seguidamente el plato de pesada. - Página 48 a) Instalar correctamente a) El plato de pesada no está el plato y pulsar la tecla instalado correctamente. LLLLLLL b) La célula de carga está b) Contactar con el Servicio averiada Técnico. Ver la sección de calibración NOCAL La calibración no responde. y comprobar que la pesa de calibración es la adecuada.
-
Página 49: Condiciones Técnicas
CONDICIONES TéCNICAS Adaptador AC-DC Entrada: 220V/110V, Salida: 7.5V (+15% to -20%) 48-60Hz Consumo de alimentación: Maximo=16W, Promedio=8W... -
Página 50: Garantía
Esta balanza está garantizada contra todo defecto de fabricación y de material, por un periodo de 1 año a partir de la fecha de entrega. Durante este periodo, gRAM PRECISION, SL, se hará cargo de la reparación de la balanza. -
Página 51: Informations De Sécurité
FRANÇAIS INFORMATIONS DE SéCURITé Pour éviter les dommages inutiles à la balance, veuillez prêter attention aux conseils suivants: • Ne pas utiliser la balance dans des endroits dangereux. • Déconnecter la balance du secteur avant de la connecter ou la déconnecter avec d’autres appareils. -
Página 52: Avant D'utiliser La Balance
apparents, veuillez déconnecter la balance du secteur, la garder dans un endroit sûr et ne pas l’utiliser avant que l’installation ait été sécurisée. • La balance ne peut être connectée qu’à nos accessoires et pièces optionnelles. Nous déclinons toute responsabilité pour les modifications de la balance réalisées par l’utilisateur, ce qui inclut l’usage inadéquat de l’installation ou l’utilisation d’un câble d’alimentation autre que celui fourni avec la balance. -
Página 53: Installation De La Balance
Liste du matériel • Balance. • Plateau de pesée. • Support du plateau. • Bloc d’alimentation secteur. • Manuel d´instructions. INSTALLATION DE LA bALANCE Installez la balance dans un endroit approprié, évitez les situations suivantes: • Hautes températures et exposition directe au soleil. •... - Página 54 Installation de la balance avec pare-brise (cage de pesée) Monter toutes les pièces selon l’ordre indiqué. Installer la balance sans pare-brise (cage de pesée) • Installer le support du plateau de la balance. • Installer le plateau de pesée. branchement secteur •...
- Página 55 Mise à niveau de la balance • Procéder à la mise à niveau de la balance à l´aide des vis des pieds, jusqu´à ce que la bulle d´air du niveau se trouve dans le cercle prescrit. • A chaque installation de la balance à un nouvel endroit, elle devra être nivelée avant utilisation.
- Página 56 ct - Lecture en carats (1g = 5.0000000000 ct) dwt - Lecture en pennyweight (1g = 0.64301493100 dwt) Lecture en mode pourcentages PCS - Lecture en mode compte-pièces ------- La balance développe une lecture stable UNAbLE - Erreur d´opération HHHHH - L´objet situé...
-
Página 57: Pesage Simple - Fonction De Tare
CALIbRAgE Procédure 1. Procéder à la mise à niveau de la balance et la préchauffer pendant 30 minutes. 2. Appuyer sur la touche 3. Appuyer sur la touche , l’écran affichera la capacité de la balance, par exemple 3000. 4. Appuyer sur la touche de façon répétée, l’écran affichera le point de calibrage à... -
Página 58: Fonction Compte-Pièces
FONCTION COMPTE-PIèCES Symbole à l´affichage: PCS Procédure 1. Placer le récipient sur le plateau de pesée. 2. Appuyer sur la touche 3. Choisir le nombre de pièces qui servira de réference , appuyer sur la , l´écran affichera “Qty 10”, appuyer sur la touche touche pour visualiser les chiffres de pièces disponibles (10, 25, 50,100) Plus large... - Página 59 2. Placer le poids de référence sur le plateau. Quand la lecture devient , l´écran affichera “100.000” ou stable, appuyer sur touche “100.00”, ce qui fait réference à l´exactitude à 100% de la balance. L´indicateur % s´affichera. 3. Enlever le poids de réference, l´écran affichera “0.000” ou “0.00”. 4.
-
Página 60: Configuration Des Paramètres
CONFIgURATION DES PARAMèTRES Pour accéder au mode configuration, appuyer sur la touche et sans la lâcher appuyer sur la touche 1. Appuyer sur la touche pour choisir le paramètre désiré et appuyer sur la touche pour confirmer. 2. Si vous voulez quitter le mode configuration à n’importe quel moment, appuyez sur la touche , la balance affichera “ESC”, appuyez sur la touche... - Página 62 CONFIgURATION DE L’IMPRESSION Il y a trois modes d’impression: STAbLE print: impression quand la lecture de l’affichage est stable INSTANT print: impression immédiate après avoir appuyé sur la touche INTERvAL print: Impression à des intervalles de temps prédéterminés. Note: La fonction impression est séparée de la configuration de l’interlignage. Il est important de configurer d’abord la fonction d’impression et ensuite le chiffre de saut de lignes.
-
Página 63: Configuration Vitesse De Transmission
7. Une fois la configuration achevée, appuyer sur la touche de façon répétée pour visualiser le saut de lignes prédéterminé. (1-18) Choisir le paramètre de saut de ligne approprié, appuyer sur la touche pour retourner au mode normal de pesée. CONFIgURATION vITESSE DE TRANSMISSION 1. - Página 64 CONFIgURATION DES UNITéS DE PESéE Les unités de pesée peuvent être activées et désactivées par l’utilisateur. 1. Appuyer sur la touche et sans la lâcher, appuyer sur la touche l’écran affichera “PrinT”. de façon répétée jusqu’à voir le message “unIT”. 2.
- Página 65 U – : Conversion des unités de pesée. T – : Fonction de tare. C – : Calibrage avec un poids de calibrage externe. P – : Fonction d´impression. : Fonction pourcentages. : Impression instantanée. M – : Fonction compte-pièces. Quand on connecte la balance à...
- Página 66 balance. S signifie que la lecture est stable, un espace signifie que la lecture est instable. Caractère de retour Caractère de saut de ligne, indique le saut de ligne. INTERFACE RS-232 Cette balance adopte la transmission et réception de lignes du RS-232 standard. Le format de données est: 1 start bit.
- Página 67 Nous recommandons que la longueur du câble soit de minimum 15 mètres,que l’impédance de charge de l’appareil connecté soit entre 3000 et 7000 ohms avec pas plus de 2500 pf de capacité en parallèle. MAINTENANCE ET SOLUTION DES PRObLèMES Solution des pannes Seuls les professionnels qualifiés peuvent effectuer la réparation de la balance.
-
Página 68: Solution Des Problèmes
Révision de sécurité Si la balance ne fonctionne pas correctement: • La déconnecter immédiatement et la maintenir hors d’usage. • La garder dans un endroit sûr et ne pas l’utiliser pour l’instant. • Contacter le service technique ou votre distributeur pour sa réparation. SOLUTION DES PRObLèMES DISPLAy MOTIvO... - Página 69 Voir la section de calibrage et vérifier que le poids de NOCAL Le calibrage ne répond pas. calibrage est bien celui approprié. Manque de données ou UNAbLE données erronées au moment Lire le manuel d’utilisation. de connecter la balance. L´environnement autour de la balance est instable.
- Página 70 CONDITIONS TECHNIQUES Adaptateur AC-DC Entrée: 220V/110V, Sortie: 7.5V (+15% à -20%) 48-60Hz Consommation d’alimentation: maximum= 16W, moyen= 8W...
- Página 71 Cette balance est garantie contre tout défaut de fabrication et de matériel, pendant une durée d’un an à compter de la date de livraison. Durant cette période gRAM PRECISION, SL, prendra en charge la réparation de la balance. Cette garantie ne couvre pas les dégâts occasionnés par un usage inapproprié...
- Página 72 001/08072016 Gram Precision S.L. Travesía Industrial, 11 · 08907 Hospitalet de Llobregat · Barcelona (Spain) Tel. +34 902 206 000 · +34 93 300 33 32 Fax +34 93 300 66 98 gram.es comercial www.gram.es...