Publicidad
Tabla de contenido
- 1 Important Safety Instructions
- 2 Instrucciones Importantes de Seguridad
- 3 Para Evitar Lesiones Graves O la Muerte de Niños al Caerse O al Ser Estrangulados en las Correas
- 4 Consignes de Sécurité Importantes
- 5 Troubleshooting
- 6 Solución de Problemas
- 7 Détection des Pannes
- 8 FCC Statement
- Descargar este manual
Publicidad
Tabla de contenido
Solución de problemas

Manuales relacionados para Bright Starts InGenuity


Resumen de contenidos para Bright Starts InGenuity
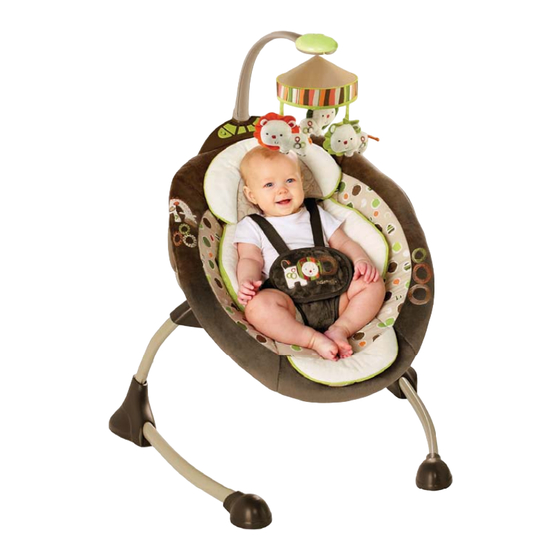
- Página 1 #60073-NA Coco Café ™ Cozy Coo Sway Seat™...
-
Página 2: Important Safety Instructions
IMPORTANT SAFETY INSTRUCTIONS WARNING TO PREVENT SERIOUS INJURY OR DEATH FROM CHILDREN FALLING OR BEING STRANGLED IN STRAPS: • NOT INTENDED FOR CARRYING BABY. • NEVER leave child unattended in the swing. • ALWAYS use restraint system. • NEVER use with an active child who may be able to climb out of the seat. •... -
Página 3: Consignes De Sécurité Importantes
• PELIGRO DE CAÍDAS: NUNCA coloque la mecedora en superfi cies de trabajo, mesas, en escalones o cerca de ellos, ni en ninguna otra superfi cie elevada. • SIEMPRE úselo sobre el suelo. • PELIGRO DE ASFIXIA: NUNCA lo utilice sobre una superfi cie blanda (como una cama, un sofá... - Página 4 • Examiner régulièrement le produit pour s’assurer qu’aucune pièce n’est endommagée, manquante ou mal fi xée. • NE PAS utiliser le produit s’il manque des pièces, ou si elles sont endommagées ou cassées. • Veuillez contacter Kids II pour obtenir des pièces de rechange et des instructions, si nécessaire.
- Página 5 Parts List and Drawing • Lista de partes y dibujos • Liste des pièces et dessins Qty. Nro. Cant. Description Descripción Description N° Qté M5 Phillips head screws Tornillos mecánicos con Tournevis cruciformes M5 cabeza Phillips M5 Left base frame leg Pata del armazón de la Assemblage du croisillon base izquierda...
- Página 6 – 6 –...
- Página 7 Assembly Instructions • Instrucciones para armarlo Instructions de montage Base Frame Assembly • Ensamblaje de la armazón de la base • Ensemble de la cadre de base Locate the parts for the base frame and locate the snap-in electrical connectors at the bottom of the center base frame and on the right base frame leg.
- Página 8 Seat Frame Assembly • Ensamblaje del armazón del asiento • Assemblage du cadre du siège Step 1 • Paso 1 • Étape 1 Locate the center sway module, the seat support tube, and the two (2) M5 screws. Align the two holes in the seat support tube to the plastic posts on the center sway module.
- Página 9 Step 2 • Paso 2 • Étape 2 Locate the snap-in electrical connectors at the top of the center sway module and on the seat top control module. Join the snap-in electrical connectors together to connect the center sway module wiring to the seat top control module wiring.
- Página 10 Step 3 • Paso 3 • Étape 3 Attach the center sway module to the seat top control module by depressing the release tab and lowering the seat top control module until an audible click is heard. Sujete el módulo de balanceo central al módulo de control superior del asiento; para ello, libere la lengüeta y baje el módulo de control superior del asiento hasta escuchar un clic.
- Página 11 Step 4 • Paso 4 • Étape 4 Press down on the seat top control module above the U-shaped support tube until an audible click is heard. Presione sobre el módulo de control superior del asiento arriba del tubo de apoyo en forma de U hasta que se escuche un clic.
- Página 12 Step 5 • Paso 5 • Étape 5 Insert both ends of the footrest tube into the corresponding holes on the seat top control module until an audible click is heard. Inserte ambos extremos del tubo para apoyar los pies en los orifi cios correspondientes del módulo de control superior del asiento hasta que se escuche un clic.
- Página 13 Swing Frame Assembly • Armado del armazón de la mecedora • Assemblage du cadre de la balançoire Attach the fully assembled seat frame to the base frame by lowering the post on the underside of the center sway module into the hole in the center base frame until an audible click is heard.
- Página 14 Seat Pad Assembly • Conjunto de la almohadilla del asiento • Assemblage du coussin du siège Step 1 • Paso 1 • Étape 1 Locate the fabric seat pad. Turn it over and unfasten the buckles on the two vertical straps, the horizontal strap, and on each side of the shoulder straps.
- Página 15 Step 3 • Paso 3 • Étape 3 Pass each hook-and-loop strap on the back of the seat pad through the corresponding slot on the control panel hub. Attach each strap using the corresponding hook-and-loop tab on the back of the seat pad. Pase cada correa de sujeción del reverso de la almohadilla del asiento por la ranura correspondiente del buje del panel de control.
- Página 16 Using the Seat Restraint • Utilización del sujetador del asiento • Utilisation des sangles de sécurité du siège This product has a 5-point seat restraint for child safety. Este producto cuenta con un sujetador de asiento de 5 puntos para la seguridad del niño.
- Página 17 Step 2 • Paso 2 • Étape 2 To adjust the shoulder strap height for the size of your child: • Place the child in the seat. • Identify which shoulder strap slot is at or below the top of the shoulders. •...
- Página 18 Step 3 • Paso 3 • Étape 3 To adjust the shoulder strap length, slide the straps through the two buckles behind the backrest as needed. Para ajustar la longitud de las correas para hombros, deslice las correas a través de las hebillas detrás del respaldo, según sea necesario.
- Página 19 Step 5 • Paso 5 • Étape 5 Adjust the straps in the buckles as needed so that the restraint fi ts snugly (but not too tightly). Be sure the seat restraint is secure by pulling it away from the child’s body. The buckles should remain fastened.
- Página 20 Este producto requiere cuatro (4) baterías tamaño D/LR20 (1.5V) (no incluidas). Use baterías alcalinas para un mejor funcionamiento sin el adaptor de CA. PRECAUCIÓN Siga los lineamientos para las baterías en esta sección. De lo contrario, la vida útil de las baterías podría reducirse o las baterías podrían tener una fuga o romperse.
- Página 21 Step 1 • Paso 1 • Étape 1 Locate the battery compartment on the center sway module. Use a Phillips screwdriver to loosen the screw that secures the battery cover. Ubique el compartimiento para la batería en el módulo estabilizador central. Utilice un destornillador Phillips para desajustar el perno que asegura la tapa de la batería.
- Página 22 Step 3 • Paso 3 • Étape 3 Replace the battery cover on the unit and tighten the screw. Do not over tighten. Vuelva a colocar la tapa de las baterías en la unidad y apriete el tornillo. No lo apriete demasiado.
- Página 23 Using the Bolster and Headrest • Uso del suplemento y apoyacabeza • Utilisation de la garniture du siège et de l’appui-tête Step 1 • Paso 1 • Étape 1 Bolster Fabric loop to attach Suplemento bolster Garniture du siège Lazo de tela para en- ganchar el suplemento Boucle de fi...
- Página 24 – 24 –...
- Página 25 Toy Mobile Installation • Instalación del móvil de juguetes • Installation du mobile de jouets Step 1 • Paso 1 • Étape 1 Locate the mobile arm and toy mobile. Insert the end of the mobile arm into the corresponding socket on the swing frame assembly until an audible click is heard. Ubique el brazo del móvil y el móvil de juguetes.
- Página 26 After adjusting the seat, the child can be placed in the seat. Este producto de InGenuity™ tiene tres posiciones reclinables ajustables. Para ajustar la reclinación del asiento: 1 Empuje las lengüetas de liberación en la parte posterior de la estructura del asiento.
- Página 27 Using the Swing Control Module • Utilización del módulo de control de la mecedora • Utilisation du module de commande de la balançoire Low Battery Indicator (red) Indicador de batería baja (rojo) Swing Timer Select Indicateur de niveau de piles faible (rouge) Button Botón de selección Volume Control Switch...
- Página 28 Slide the Power Switch to power the Swing Control Module. The Sway Speed function provides 3 speed settings and OFF. The LEDs operate sequentially and in bar graph mode. To start the swing function, press the button until the fl ashing LED bar graph displays the desired setting.
- Página 29 Deslice el interruptor de energía para accionar el módulo de control de la mecedora. La función de velocidad de la mecedora proporciona 3 velocidades y una posición de APAGADO. Las luces LED operan en secuencia y en modo de grá co de barras. Para encender la función de mecedora, presione el botón hasta que la luz LED parpadeante del grá...
- Página 30 Faites glisser le bouton de mise en marche pour alimenter le module decommande du balancement. La fonction de balancement rapide possède 3 réglages de vitesse et la fonction OFF (ARRÊT). Les voyants DEL fonctionnent de manière séquentielle et en mode graphique à barres. Pour démarrer la fonction de balancement, appuyez sur le bouton jusqu’à...
- Página 31 Using the AC Adapter • Uso del adaptador de CA Utilisation de l’adaptateur AC Locate the AC adapter. Insert the pronged end of the AC adapter into the electrical slot located at the base of the right base frame leg. Once the connection is made, plug the AC adapter into a standard wall outlet to power this product.
-
Página 32: Troubleshooting
Troubleshooting Before calling InGenuity™… We are always happy to take your call; however, if you have a question about the operation of your InGenuity™ product, these simple solutions may answer your question quickly and easily: Issue Probable Cause Solution Swing does not... -
Página 33: Solución De Problemas
Solución de problemas Antes de llamar a InGenuity™… Siempre nos complace contestar su llamado; sin embargo, si tiene una pregunta acerca de la operación de su producto InGenuity™, estas soluciones simples pueden responder a su pregunta de manera fácil y rápida: Solución... -
Página 34: Détection Des Pannes
Détection des pannes Avant d’appeler Ingenuity™… Nous sommes toujours ravis de vous répondre au téléphone, cependant, si vous avez des questions sur le fonctionnement de votre produit InGenuity™, ces simples solutions pourraient répondre facilement et rapidement à vos questions : Solution Problème... - Página 35 Solution Problème Cause probable N’a pas effectué toutes les 1 Faire glisser l’interrupteur sur la posi- étapes requises pour com- tion ON (MARCHE). mencer le mouvement de 2 Sélectionner le réglage de la vitesse balancement de balancement 3 Pousser doucement le siège pour commencer le mouvement de bal- Le siège ne se ancement...
- Página 36 Care and Cleaning • Cuidado y limpieza • Entretien et nettoyage Seat pad – Remove from frame. Fasten buckles on seat restraint and seat pad. Fasten all hook-and-loop patches to the corresponding patch. Machine wash with cold water, gentle cycle. No bleach. Tumble dry, using low heat. Bolster –...
-
Página 37: Fcc Statement
FCC Statement This device complies with Part 15 of the FCC rules. Operation is subject to the following two conditions: 1. this device may not cause harmful interference, and 2. this device must accept any interference received, including interference that may cause undesired operation. - Página 38 – 38 –...
- Página 39 – 39 –...
- Página 40 Look for these other great products from InGenuity s from InGenuity #60032 #60050 Products sold separately and subject to availability. Patents pending ingenuitybaby.com facebook.com/brightstarts MANUFACTURED FOR Kids II, Inc. Kids II US Mexico S.A. de C.V. Mexico JAPAN © - 040512-KN...