Publicidad
Enlaces rápidos
ENGLISH • ESPAÑOL • FRANÇAIS
IMPORTANT! KEEP FOR FUTURE REFERENCE.
Please read all instructions before assembly and use of the bouncer.
¡IMPORTANTE! CONSÉRVELO PARA REFERENCIA FUTURA.
Por favor lea todas las instrucciones antes de armar y usar la asiento.
IMPORTANT ! À CONSERVER POUR CONSULTATION.
Lire les instructions dans leur intégralité avant de monter et utiliser le transat.
6926-EU
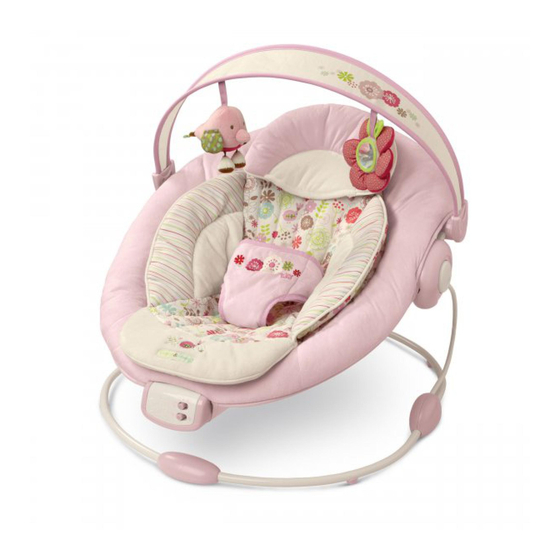
Cradling Bouncer • Asiento Cuna
Transat Enveloppant
Publicidad

Manuales relacionados para Bright Starts Comfort & Harmony 6926-EU


Resumen de contenidos para Bright Starts Comfort & Harmony 6926-EU
- Página 1 ENGLISH • ESPAÑOL • FRANÇAIS IMPORTANT! KEEP FOR FUTURE REFERENCE. Please read all instructions before assembly and use of the bouncer. ¡IMPORTANTE! CONSÉRVELO PARA REFERENCIA FUTURA. Por favor lea todas las instrucciones antes de armar y usar la asiento. IMPORTANT ! À CONSERVER POUR CONSULTATION. Lire les instructions dans leur intégralité...
-
Página 2: Peligro De Caídas
WARNING To Prevent Serious Injury or Death: • NOT INTENDED FOR CARRYING BABY. • NEVER leave child unattended in the bouncer. • ALWAYS use restraint system. • NEVER use for a child who is able to sit upright unassisted. • This bouncer is not intended for prolonged periods of sleeping. - Página 3 • PELIGRO DE ASFIXIA: NUNCA la utilice sobre una superfi cie blanda (cama, sofá, almohadón) ya que la silla vibradora puede inclinarse y provocar asfi xia. AVERTISSEMENT Pour éviter les risques d’accident grave ou de décès : • CE PRODUIT N’EST PAS DESTINÉ À TRANSPORTER UN BÉBÉ. •...
- Página 4 • Assemblage par un adulte obligatoire. • Déballez le transat avec soin. • Examiner régulièrement le produit afi n de vous assurer qu’il ne présente pas de pièces endommagées, manquantes ou qui se détachent. • NE PAS utiliser le produit s’il manque des pièces, ou si elles sont endommagées ou cassées.
- Página 5 Insert the front base frame tube into the right hub. Holes pointing to the inside Repeat for the left hub. Orifi cios que apuntan al interior Inserte el tubo del frente del armazón de la base Orifi ces pointés vers l’intérieur en el cubo derecho.
- Página 6 Seat Frame Assembly • Ensamblaje de la armazón del asiento • Ensemble de la cadre du siège Place the left (“L”) and right (“R”) recline mechanisms near the footrest wire ends as shown. Coloque los mecanismos reclinables izquierdo (“L”) y derecho (“R”) cerca de los extremos del alambre del apoyapiés, como se muestra.
- Página 7 Push each end of the backrest tube into the corresponding recline mechanism. Empuje cada extremo del tubo del respaldo e introdúzcalo en el mecanismo reclinable correspondiente. Pousser chaque extrémité du tube de l’appui-tête dans le mécanisme d’inclinaison correspondant. Click • Clic • Clic Position the seat frame above the base frame as shown.
- Página 8 Battery Installation • Instalación de las Baterias Installation de Piles The music/vibration unit requires (3) size C/LR14 (1.5V) batteries (not included). Please use alkaline batteries for better performance. CAUTION: Follow the battery guidelines in this section. Otherwise, battery life may be shortened or the batteries may leak or rupture.
- Página 9 • Ne pas mélanger piles neuves et usagées. • Ne pas mélanger les piles alcalines, standard ou rechargeables. • Vous devez utiliser seulement des piles de types semblables ou équivalents à ce qui est recommandé. • Mettre les piles en place en respectant les polarités inscrites dans le compartiment prévu à...
- Página 10 Replace the battery cover on the Music/vibration Unit and tighten the screw. Do not overtighten. Vuelva a colocar la tapa de las baterías en la Unidad de Música/vibración y apriete el tornillo. No apriete demasiado. Remettre le cache du compartiment à piles en place sur le Module Musique/vibrations et aserrer la vis.
- Página 11 Seat Pad Installation • Instalación de la Almohadilla del Asiento Installation de le Coussin de l’assise Unbuckle the straps on each side of the seat pad. Buckles Desabroche las correas a cada lado de la almohadilla del asiento. Hebillas Défaire les boucles des sangles de chaque côté du coussin de l’assise. Boucles Fabric loop Open the pocket at the top edge of the seat pad and...
- Página 12 Pull the fabric fl aps over the footrest wire to fi t the bottom of the seat pad to the bouncer frame. Jale las lengüetas de tela por arriba del alambre del apoyapiés para hacer que la parte inferior de la almohadilla del asiento calce en el armazón de la sillita.
- Página 13 Operating Instructions • Instrucciones de funcionamiento Mode d’emploi Using the Toy Bar • Utilice la Barra de Juguetes Utilisation la Barre à Jouets Toys at front Hold the toy bar above the bouncer, positioning the Juguetes en frente toys towards the front. Insert each end of the toy bar into the corresponding socket on the frame above the Jouets au devant recline mechanism.
- Página 14 Using the Recline Function • Cómo utilizar la función de reclinado • Utilisation de la fonction inclinaison Press Presione Pression Press Two positions Presione Dos posiciones Pression Deux positions Press the left and right release buttons simultaneously and carefully rotate the frame up or down into the desired position.
- Página 15 Using the Seat Restraint • Utilice el sujetador del asiento Utilisation des sangles de sécurité du siège Click • Clic • Clic Klick • Scatto • Clique Adjust the straps in the buckles as needed so that the restraint fi ts snugly (but not too tightly).
- Página 16 Using the Bolster and Headrest Uso del suplemento y apoyacabeza Utilisation de la garniture du siège et de l’appui-tête Bolster Slots Suplemento Ranuras Garniture du siège Fentes Headrest Fabric loop to attach headrest Apoyacabeza Lazo de tela para enganchar el apoyacabeza L’appui-tête Boucle de fi...
- Página 17 Using the Music/vibration Unit • Uso de la unidad de música/ vibración • Utilisation du module Musique/Vibration Vibration ON/OFF switch Music/volume switch Interruptor de encendido/apagado (ON/OFF) Interruptor de Música/Volumen Interrupteur Vibrations ON/OFF Interrupteur Musique/Volume OFF • Apagado • ARRÊT Low • Bajo • Bas High •...
- Página 18 Changing the Batteries • Cambio de baterías Remplacement des piles See page 8. Consulte la página 8. Voir page 8. Care and Cleaning • Cuidado y limpieza • Entretien et nettoyage Seat pad – Remove from frame. Fasten buckles on seat restraint and seat pad. Fasten all hook-and-loop patches to the corresponding patch.
- Página 19 FCC Statement • Declaración de la FCC • Déclaration FCC This device complies with Part 15 of the FCC rules. Operation is subject to the following two conditions: this device may not cause harmful interference, and this device must accept any interference received, including interference that may cause undesired operation.
- Página 20 Cet appareil est conforme à la Partie 15 des règles de la FCC. L’utilisation est sujette aux deux conditions suivantes : ce dispositif ne peut causer d’interférences nuisibles, et ce dispositif doit accepter toute interférence reçue, y compris les interférences pouvant causer un fonctionnement indésirable.
- Página 21 Canada ICES-003 Statement • Declaración ICES-003 de Canadá • Déclaration NMB-003 Canada This Class B digital apparatus complies with Industry Canada Standard ICES-003. Operation is subject to the following two conditions: this device may not cause harmful interference, and this device must accept any interference received, including interference that may cause undesired operation.
- Página 22 6926 Parts List and Drawing • Lista de partes y dibujo Liste de pièces et dessin Qty. Cant. Description Descripción Description N° Qté Front base frame tube Tubo del frente del tube du cadre de base armazón de la base avant Left hub with wire Cubo izquierdo con...
- Página 23 – 23 –...
- Página 24 Kids II Limited Warranty • Garantía Limitada de Kids II ® ® Garantie limitée Kids II ® Kids II is committed to making innovative, high quality products for babies and children. We warrant this product to be free from defects in material and workmanship existing at the time of manufacture for a period of one year from the date of initial purchase (sales receipt is required for proof of purchase).