
Manuales relacionados para Sanus VF3012


Resumen de contenidos para Sanus VF3012
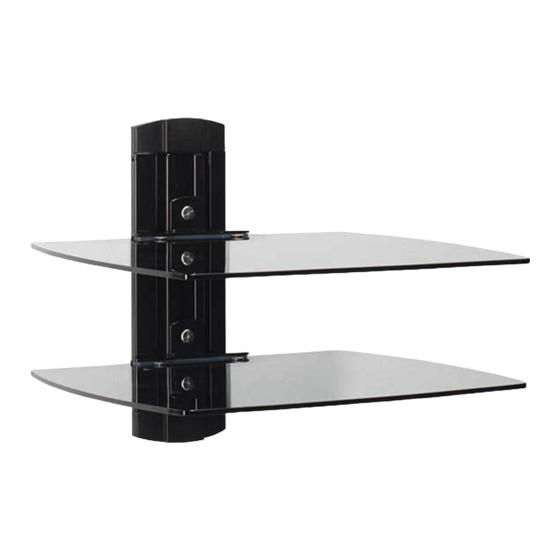
- Página 1 MODEL VF3012 INSTRUCTION MANUAL We’ll Make It Stress-Free If you have any questions along the way, just give us a call. 1-800-359-5520. We’re ready to help! Scan here to learn more about your product online...
-
Página 2: Before You Begin
IMPORTANT SAFETY INSTRUCTIONS – SAVE THESE INSTRUCTIONS – PLEASE READ ENTIRE MANUAL PRIOR TO USE Before You Begin Tempered glass has been chosen for this product because of its strength and CAUTION: DO NOT mount the top shelf higher than safety characteristics. -
Página 3: Required Tools
Dimensions Required Tools 439 mm 406.4 mm 439 mm 406.4 mm (17.29 in.) (17.29 in.) (16 in.) (16 in.) 457 mm 457 mm (18 in.) (18 in.) 203 mm 386.6 mm 203 mm 386.6 mm (8 in.) (8 in.) (15.22 in.) (15.22 in.) ADJUSTABLE ADJUSTABLE... - Página 4 Supplied Parts and Hardware This product contains small items that could be a choking hazard if swallowed. WARNING: Before starting assembly, verify all parts are included and undamaged. If any parts are missing or damaged, do not return the damaged item to your dealer;...
- Página 5 Parts and Hardware for STEP 2 Parts and Hardware for STEP 3 Shelf Sleeves Shelf Screws Glass Shelves Shelf Supports Glide Locks 1/4-20 x 5/8 in. Shelf Washers 1/4 in. 1/4-20 x18 mm Glide Lock Screws Parts for STEP 4 M4 Hex Key Top Cap Bottom Cap...
- Página 6 STEP 1 Attach the Wall Plate to the Wall - Wood Stud Option Locate your stud(s). Verify the center of the stud using an awl, a thin nail, or an edge to edge stud finder. Avoid potential personal injuries and property damage! CAUTION: Drywall covering the wall must not exceed 16 mm (5/8 in.).
- Página 7 STEP 1 Drill pilot holes. Pilot holes must be drilled to a depth of 63.5 mm (2½ in.), using a 5.5 mm (7/32 in.) diameter drill bit. IMPORTANT: Using the bit driver tighten the lag bolts only until they are pulled firmly against the wall plate Improper use could reduce the holding power of the lag bolts .
- Página 8 STEP 1 Attach the Wall Plate to the Wall - Solid Concrete or Concrete Block Option Level the wall plate and mark the hole locations. Avoid potential personal injuries and property damage! CAUTION: Mount the wall plate directly onto the concrete surface ●...
- Página 9 STEP 1 Insert anchors Be sure the anchors are seated flush with the concrete surface. CAUTION: Using the bit driver tighten the lag bolts only until they are pulled firmly against the wall plate Improper use could reduce the holding power of the lag bolts .
- Página 10 STEP 1 Attach the Wall Plate to the Wall - Drywall Option Level the wall plate and mark the hole locations. CAUTION: Avoid potential injuries or property damage! ● Mount the wall plate directly onto the wall. ● Drywall covering the wall must be at least 13 mm (1/2 in.) thick. ●...
- Página 11 STEP 1 Insert drywall anchors 3A. Fold metal channel until it is flat with the plastic straps and slide the metal channel into the drilled hole 3B. Hold the plastic straps by the end and pull towards you until the metal channel is flush behind the drywall 3C.
- Página 12 STEP 1 Tighten the screws only until they are pulled firmly against the wall plate Improper use could reduce the holding power of the screw. DO NOT over-tighten the screws. CAUTION:...
- Página 13 STEP 2 Assemble and Install Shelf Brackets Use the hex key to loosely attach the glide locks to the shelf supports with the screws...
-
Página 14: Top View
STEP 2 Slide assembled shelf bracket assemblies onto wall plate with the glide lock behind the rails of the wall plate Slide the shelf bracket assemblies into position then tighten the bracket screws using the hex key TOP VIEW... - Página 15 STEP 3 Install Glass Shelves Fit the shelf sleeves onto the glass shelves and slide glass shelves into the shelf bracket assemblies. Secure glass shelves with shelf screws and washers using the hex key...
- Página 16 STEP 4 Attach Shelf Caps...
- Página 17 Managing Cables Cables can be routed down the rails of the wall plate and through the caps...
- Página 18 Evite lesiones y daños materiales. PRECAUCIÓN: El modelo VF3012 está diseñado para soportar equipos accesorios de audio y video; NO está diseñado para soportar un televisor. ● No utilice este producto para ningún otro propósito que no sea el explícitamente especificado por el fabricante.
- Página 19 ESPAÑOL Piezas y elementos de sujeción suministrados Ver página 4 Este producto contiene piezas pequeñas que, si fuesen tragadas, podrían producir asfixia. ADVERTENCIA: Antes de iniciar el ensamblaje, compruebe que todas las piezas estén incluidas y en buenas condiciones. Si faltan piezas o alguna está dañada, no devuelva el artículo al distribuidor;...
- Página 20 ESPAÑOL Realice los orificios guía. Los orificios guía deben realizarse con una mecha de 10 mm (3/8'') de diámetro hasta una profundidad de 75 mm (3''). IMPORTANTE: Nunca perfore el cemento que une los bloques. Inserte los anclajes Cerciórese de que los anclajes queden nivelados respecto de la superficie de hormigón.
- Página 21 ESPAÑOL PASO 2: Armar e instalar los soportes de los estantes Ver página 12 Utilice la llave hexagonal para fijar sin ajustar las trabas deslizables a los soportes para estantes con los tornillos Deslice los soportes para estantes ensamblados en la placa mural , con la traba deslizable detrás de los rieles de la placa mural Deslice los soportes para estantes hacia la posición deseada y luego ajuste los tornillos de los soportes...
- Página 22 Follow us on Twitter @sanussystems ©2013 Milestone AV Technologies, a Duchossois Group Company. All rights reserved. Sanus is a division of Milestone. All other brand names or marks are used for identifi cation purposes and are trademarks of their respective owners.