PEERLESS Paramount PSP2 Instalación Y Montaje
Ocultar thumbs
Ver también para Paramount PSP2:
- Instalación y montaje (19 páginas) ,
- Instalación y ensamblaje (18 páginas)
Tabla de contenido
Publicidad
Idiomas disponibles
Idiomas disponibles
Enlaces rápidos
Installation and Assembly:
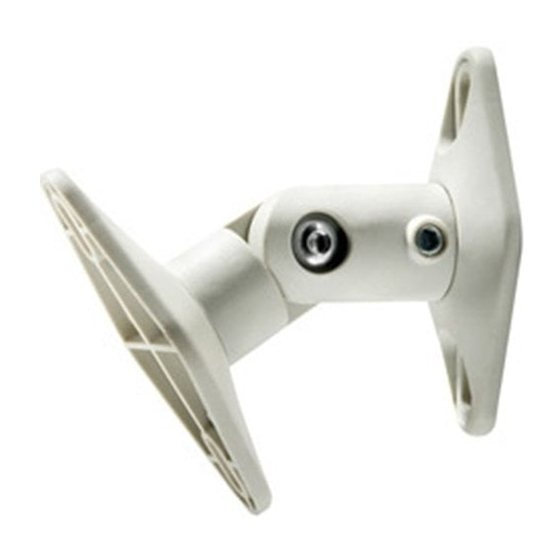
Universal Speaker Mounts
MODELS: PSP2, PSP2-W, PSP5, PSP5-W
Features:
Colors: Black- PSP2 & PSP5 White- PSP2-W & PSP5-W
•
Universal design fi ts most satellite speakers
•
Easily mounts to wall or ceiling. Includes extensions for ceiling mounting
•
Pivot and swivel capabilities make it easy to position speaker for optimal sound quality
•
Maximum load capacity: 8 lb (3.62 kg)
•
Available in packs of two (PSP2 & PSP2-W) or fi ve (PSP5 & PSP5-W)
•
Note: Read entire instruction sheet before you start installation and assembly.
• Do not begin to install your Peerless product until you have read and understood the instructions and warnings
contained in this Installation Sheet. If you have any questions regarding any of the instructions or warnings, please
call Peerless customer care at 1-800-865-2112.
• This product should only be installed by someone of good mechanical aptitude, has experience with basic building
construction, and fully understands these instructions.
• Make sure that the supporting surface will safely support the combined load of the equipment and all attached hard-
ware and components.
• Never exceed the Maximum Load Capacity of 8 lb (3.62 kg).
• If mounting to wood wall studs, make sure that mounting screws are anchored into the center of the studs. Use of
an "edge to edge" stud fi nder is highly recommended.
• Always use an assistant or mechanical lifting equipment to safely lift and position equipment.
• Tighten screws fi rmly, but do not overtighten. Overtightening can damage the items, greatly reducing their holding
power.
3215 W. North Ave. • Melrose Park, IL 60160 • (800) 865-2112 or (708) 865-8870 • Fax: (708) 865-2941 • www.peerlessmounts.com
WARNING
Maximum Load Capacity:
8 lb (3.62 kg)
Publicidad
Tabla de contenido

Manuales relacionados para PEERLESS Paramount PSP2


Resumen de contenidos para PEERLESS Paramount PSP2
- Página 1 Note: Read entire instruction sheet before you start installation and assembly. WARNING • Do not begin to install your Peerless product until you have read and understood the instructions and warnings contained in this Installation Sheet. If you have any questions regarding any of the instructions or warnings, please call Peerless customer care at 1-800-865-2112.
-
Página 2: Tools Needed For Assembly
N #12 x 1-3/4" self tapping screw O #12-14 Alligator concrete anchor P allen wrench Q D5 washer 2 of 18 ISSUED:10-23-07 SHEET #: 087-9016-4 02-12-18 Visit the Peerless Web Site at www.peerlessmounts.com For customer care call 1-800-729-0307 or 708-865-8870. - Página 3 If 8-32 x 5/8” screw does not fully secure mounting plate to speaker, spacer (I) SPEAKER can be used. 3 of 18 ISSUED:10-23-07 SHEET #: 087-9016-4 02-12-18 Visit the Peerless Web Site at www.peerlessmounts.com For customer care call 1-800-729-0307 or 708-865-8870.
- Página 4 Secure mounting plate to speaker with two #12 x 3/4” self tapping screws (M). 4 of 18 ISSUED:10-23-07 SHEET #: 087-9016-4 02-12-18 Visit the Peerless Web Site at www.peerlessmounts.com For customer care call 1-800-729-0307 or 708-865-8870.
- Página 5 WARNING • When installing Peerless wall mounts on cinder block, verify that you have a minimum of 1-5/8” of actual concrete surface in the 1/4” diameter hole to be used for the concrete anchors. It is suggested that a standard electric drill on slow setting is used to drill the hole instead of a hammer drill to avoid breaking out the back of the hole when enter- ing a void or cavity.
- Página 6 ISSUED:10-23-07 SHEET #: 087-9016-4 02-12-18 Visit the Peerless Web Site at www.peerlessmounts.com For customer care call 1-800-729-0307 or 708-865-8870. © 2007, Peerless Industries, Inc. All rights reserved. All other brand and product names are trademarks or registered trademarks of their respective owners.
-
Página 7: Instalación Y Ensamblaje: Soportes Universales Para Altavoces
Nota: Lea la hoja de instrucciones completa antes de comenzar la instalación y el ensamblaje. ADVERTENCIA • No comience a instalar su producto de Peerless hasta haber leído y entendido las instrucciones y las advertencias contenidas en la Hoja de Instalación. Si tiene alguna pregunta acerca de cualquiera de las instrucciones o las ad- vertencias, por favor, llame a de Peerless al 1-800-865-2112. -
Página 8: Herramientas Necesarias Para El Ensamblaje
N tornillo autorroscante N.o 12 x 1-3/4" O anclaje alligator para concreto N.o 12-14 P llave allen Q D5 lavadora 8 of 18 ISSUED:10-23-07 SHEET #: 087-9016-4 02-12-18 Visite el sitio Web de Peerless en www.peerlessmounts.com Para el Servicio al cliente llame al 1-800-729-0307 ó 708-865-8870... -
Página 9: Quite La Placa De Montaje
fi ja la placa de montaje al ALTAVOZ altavoz por completo, puede utilizar un espaciador (I). 9 of 18 ISSUED:10-23-07 SHEET #: 087-9016-4 02-12-18 Visite el sitio Web de Peerless en www.peerlessmounts.com Para el Servicio al cliente llame al 1-800-729-0307 ó 708-865-8870... - Página 10 Fije la placa de montaje al altavoz con dos tornillos autorroscantes N. 12 x 3/4” (M). 10 of 18 ISSUED:10-23-07 SHEET #: 087-9016-4 02-12-18 Visite el sitio Web de Peerless en www.peerlessmounts.com Para el Servicio al cliente llame al 1-800-729-0307 ó 708-865-8870...
-
Página 11: Instalar La Placa De Montaje A La Pared O Al Techo
ADVERTENCIA • Cuando vaya a instalar soportes de pared de Peerless en bloques de hormigón de escorias, asegúrese de que cuente con una superfi cie de concreto de un grosor mínimo de 1 5/8” en el agujero de 1/4” de diámetro, que pueda usar para los anclajes para concreto. -
Página 12: Instalar Los Brazos A La Placa De Montaje
SUJECIÓN 12 of 18 ISSUED:10-23-07 SHEET #: 087-9016-4 02-12-18 Visite el sitio Web de Peerless en www.peerlessmounts.com Para el Servicio al cliente llame al 1-800-729-0307 ó 708-865-8870 © 2007, Peerless Industries, Inc. All rights reserved. All other brand and product names are trademarks or registered trademarks of their respective owners. - Página 13 Remarque : lisez entièrement la fi che d’instructions avant de commencer l’installation et l’assemblage. AVERTISSEMENT • Ne commencez pas à installer votre produit Peerless avant d’avoir lu et assimilé les instructions et les mises en garde contenues dans cette fi che d’installation. Pour toute question concernant les instructions ou les mises en garde, appelez le service à...
-
Página 14: Liste Des Pièces
Français Outils nécessaires pour l’assemblage • localisateur de montants (le localisateur de montants « bord à bord » est recommandé) • tournevis cruciforme • perceuse • mèche de 1/8 po pour les murs à montants en bois • mèche de 5/16 po pour les murs en béton et les blocs de béton de mâchefer •... -
Página 15: Retrait De La Plaque De Montage
Français Retrait de la plaque de montage Les haut-parleurs satellites peuvent nécessiter soit la plaque de montage à un trou (B), soit la plaque de montage à deux trous (A). Pour retirer les plaques de montage (le cas échéant) du bras (C ou D), desserrez les vis de pression hexago- VIS DE VIS DE... - Página 16 Français Montage à un trou de serrure Insérez la vis cruciforme 8-32 x 5/8 po (F) et lave-linge (Q) dans la plaque de montage à un trou (B) et vissez l’écrou pour trou de serrure rond de 8-32 (J) de quelques tours sur la vis cruciforme 8-32 x 5/8 po comme illustré fi gures 2.1 et 2.2, Assurez-vous que les bords biseautés de l’écrou de trou de serrure rond sont placés face à...
-
Página 17: Installation De La Plaque De Montage Au Mur Ou Au Plafond
• Si vous installez des montures murales Peerless sur un bloc de béton de mâchefer, vérifi ez que vous disposez d’une épaisseur de béton d’au moins 0,31 cm (1 5/8 po) dans le trou de 1/4 po de diamètre destiné aux ancrages de béton. - Página 18 ISSUED:10-23-07 SHEET #: 087-9016-4 02-12-18 Adresse de notre site internet : www.peerlessmounts.com Service clientèle : 1-800-729-0307 ou 708-865-8870 © 2007, Peerless Industries, Inc. All rights reserved. All other brand and product names are trademarks or registered trademarks of their respective owners.