
Manuales relacionados para oneConcept Kingcool


Resumen de contenidos para oneConcept Kingcool
- Página 1 Kingcool Luftkühler Air Cooler Enfriador de aire Refroidisseur d‘air Raffreddamento dell‘aria 10031341 10031342...
-
Página 3: Tabla De Contenido
Sehr geehrter Kunde, wir gratulieren Ihnen zum Erwerb Ihres Gerätes. Lesen Sie die folgenden Hinweise sorgfältig durch und befolgen Sie diese, um möglichen Schäden vorzubeugen. Für Schäden, die durch Missachtung der Hinweise und unsachgemäßen Gebrauch entstehen, übernehmen wir keine Haftung. Scannen Sie den QR-Code, um Zugriff auf die aktuellste Bedienungsanleitung und weitere Informationen rund um das Produkt zu erhalten. -
Página 4: Sicherheitshinweise
SICHERHEITSHINWEISE • Prüfen Sie vor der Benutzung die Spannungsangabe auf dem Typenschild. Schließen Sie das Gerät nur an Steckdosen an, die der Spannung des Geräts entsprechen. • Halten Sie das Kabel fern von heißen Oberflächen und scharfkantigen Gegenständen. • Verlegen Sie das Kabel nicht unter einem Teppich und decken Sie es auch nicht mit anderen Gegenständen oder Stoffen ab. - Página 5 • Während des Betriebs befeuchtet das Gerät die Umgebungsluft. Vermeiden Sie jedoch zu hohe Luftfeuchtigkeit. Wir empfehlen Ihnen eine Luftfeuchtigkeit zwischen 40-50 %. Zu hohe Luftfeuchtigkeit kann zu Schimmel oder gesundheitlichen Problemen führen. • Stellen Sie das Gerät nur auf Untergründe, die unempfindlich gegenüber Nässe und hoher Luftfeuchtigkeit sind.
-
Página 6: Geräteübersicht
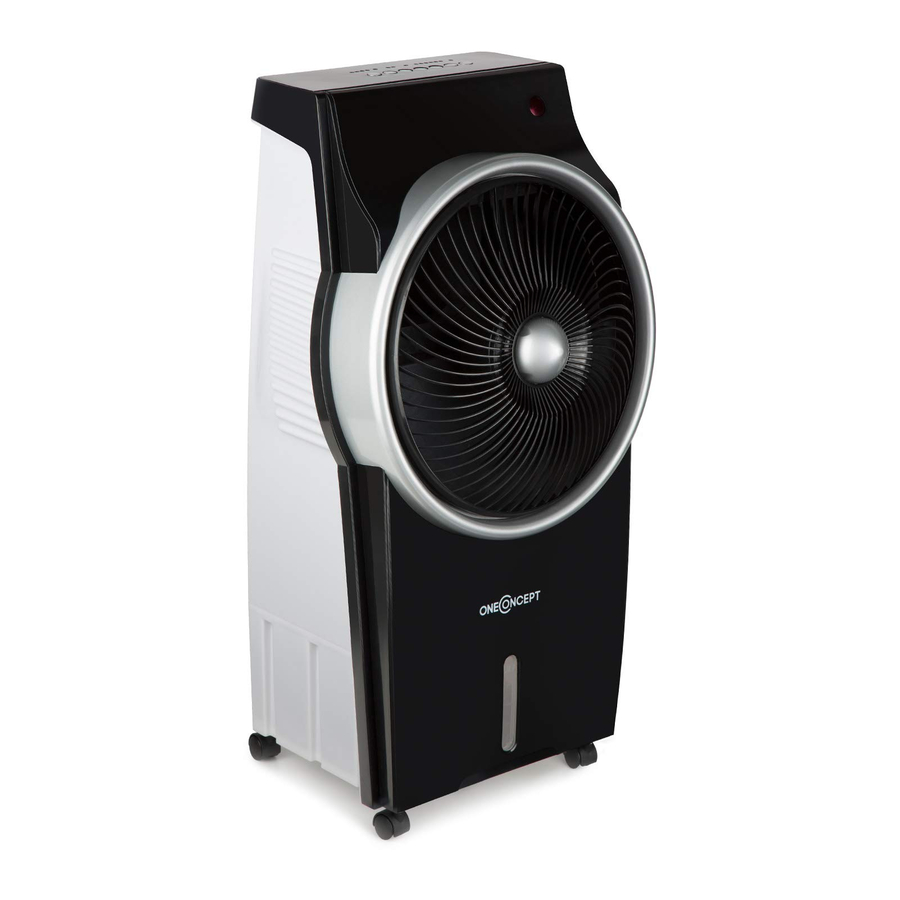
GERÄTEÜBERSICHT Tasten Synchronmotor Bedienfeld Turbine Empfänger (Fernbedienung) Feuchtes Gewebe Hintere Abdeckung Motor Drehflügel Wasserpumpe Wassertankabdeckung Anionen-Generator Vordere Abdeckung Wassertank Rollen INBETRIEBNAHME UND BEDIENUNG Wasser einfüllen • Öffnen Sie die Tür des Wassertanks und geben Sie maximal 8 Liter Wasser in den Tank. •... - Página 7 Bedienfeld und Tastenfunktionen POWER Stecken Sie den Stecker in die Steckdose und drücken Sie die POWER- Taste. Das Gerät startet mit niedriger Geschwindigkeit. Wenn Sie das Gerät ausschalten möchten, drücken Sie erneut auf die POWER-Taste. TIMER Drücken Sie mehrmals hintereinander auf die TIMER-Taste, um den einen der folgenden Ausschalt-Timer einzustellen: 0,5 Stunden >...
-
Página 8: Reinigung Und Pflege
REINIGUNG UND PFLEGE • Ziehen Sie vor der Reinigung immer den Stecker aus der Steckdose. • Wischen Sie das Gehäuse mit einem weichen Tuch ab. Benutzen Sie zur Reinigung keine chemischen Reiniger oder Lösemittel. • Verstauen Sie das Gerät an einen trockenen, sauberen und gut belüfteten Ort. - Página 9 Dear Customer, Congratulations on purchasing this device. Please read the following instructions carefully and follow them to prevent possible damages. We assume no liability for damage caused by disregard of the instructions and improper use. Scan the QR code to get access to the latest user manual and more product information.
-
Página 10: Safety Instructions
SAFETY INSTRUCTIONS • Check the voltage on the rating plate before use. Only connect the appliance to sockets which correspond to the voltage of the appliance. • Keep the appliance and cable away from sources of heat, sharp objects or anything that may cause damage. - Página 11 • When in operation, evaporative coolers moisturize the ambient air. Over- humidification of residential rooms should be avoided. Recommendation: 40-50 % relative humidity. Excessive humidity of the air can damage the home and cause health problems. • The appliance may only be set up on water- and moisture-proof flooring materials (spilling some drops of water is unavoidable when the content of the tank is changed).
-
Página 12: Product Description
PRODUCT DESCRIPTION Keys Synchronous motor Control panel Turbines Receiver (Remote Control) Wet curtain Back cover Motor Rotary vane Water pump Water cover Anion Generator Front cover Water tank Caster OPERATION Water Injection • First opened the door of water injection, add water to the specified value. •... - Página 13 Control Panel and Keys POWER Plug the plug into the socket and press the POWER button. The device starts at low speed. To turn the unit off, press the POWER button again. TIMER Press the TIMER button several times to set one of the following switch-off timers: 0.5 hour >...
-
Página 14: Cleaning And Care
CLEANING AND CARE • Before cleaning always remove the plug from the electrical socket. • Please use a soft cloth to wipe the shell.Do not use water gasoline,or other chemical solutions. • Story and dry place to keep away from heat and sunlight. •... -
Página 15: Datos Técnicos
Estimado cliente, Le felicitamos por la adquisición de este producto. Lea atentamente las siguientes instrucciones y sígalas para evitar posibles daños. No asumimos ninguna responsabilidad por los daños causados por el incumplimiento de las instrucciones y el uso inadecuado. Escanee el siguiente código QR para obtener acceso a la última guía del usuario y más información sobre el producto. -
Página 16: Indicaciones De Seguridad
INDICACIONES DE SEGURIDAD • Antes de utilizar el aparato, compruebe la tensión en la placa técnica del mismo. Conecte el aparato a tomas de corriente que se adecuen a la tensión del mismo. • Mantenga el cable lejos de las superficies calientes y de los objetos afilados. - Página 17 • Cuando el aparato está en marcha, humedece el aire ambiente. Evite que la humedad del aire sea demasiado elevada. Recomendamos mantener una humedad del aire entre 40-50 %. Una humedad del aire demasiado elevada puede provocar la aparición de moho y problemas de salud. •...
-
Página 18: Descripción Del Aparato
DESCRIPCIÓN DEL APARATO Botones Motor síncrono Panel de control Turbina Receptor (Mando a distancia) Tejido húmedo Cubierta trasera Motor Aldabilla Bomba de agua Tapa del depósito de agua Generador de aniones Tapa superior Depósito de agua Rollen PUESTA EN MARCHA Y USO Rellenar agua •... - Página 19 Panel de control y funciones de los botones POWER Introduzca el enchufe en la toma de corriente y pulse el botón Power. El aparato comenzará a funcionar en el nivel de velocidad más bajo. Si desea apagar el aparato, pulse de nuevo el boton POWER. TIMER Pulse varias veces consecutivas el botón TIMER para configurar el temporizador con uno de los siguientes valores.
-
Página 20: Limpieza Y Cuidado
LIMPIEZA Y CUIDADO • Desconecte el enchufe antes de limpiar el aparato. • Limpie la carcasa con un paño suave. No utilice limpiadores ni disolventes químicos para la limpieza. • Guarde el aparato en un lugar seco, limpio y bien ventilado. •... -
Página 21: Fiche Technique
Chère cliente, cher client, Toutes nos félicitations pour l’acquisition de ce nouvel appareil. Veuillez lire attentivement et respecter les instructions de ce mode d’emploi afin d’éviter d’éventuels dommages. Nous ne saurions être tenus pour responsables des dommages dus au non-respect des consignes et à... -
Página 22: Consignes De Sécurité
CONSIGNES DE SÉCURITÉ • Avant d‘utiliser l‘appareil, vérifiez sa tension sur la plaque signalétique. Ne branchez l‘appareil que sur des prises dont la tension correspond à ce le de l‘appareil. • Tenez le câble à l‘écart des surfaces chaudes et des objets aux angles pointus. - Página 23 • Pendant le fonctionnement, l‘appareil humidifie l‘air ambiant. Evitez toutefois une trop grande humidité de l‘air. Nous vous recommandons une teneur en humidité de 40-50 %. Une humidité de l‘air trop importante peut provoquer des moisissures ou des problèmes de santé. •...
-
Página 24: Aperçu De L'appareil
APERÇU DE L’APPAREIL Touches Moteur synchronisé Panneau de commande Turbine Capteur (télécommande) Tissu humide Protection arrière Moteur Pales rotatives Pompe à eau Cache du réservoir Générateur d’anions Protection avant Réservoir d’eau Roulettes MISE EN MARCHE ET UTILISATION Remplissage de l’eau •... - Página 25 Panneau de commande et fonctions des touches POWER Brancher la fiche dans la prise et appuyer sur la touche POWER. L’appareil démarre à faible vitesse. Pour éteindre l’appareil, appuyer de nouveau sur la touche POWER. TIMER Appuyer plusieurs fois de suite sur la touche TIMER pour régler un des minuteurs d’éteinte suivants : 0,5 heure >...
-
Página 26: Nettoyage Et Entretien
NETTOYAGE ET ENTRETIEN • Toujours débrancher l’appareil avant de le nettoyer. • Essuyer le boîtier avec un chiffon humide. Ne pas utiliser de produit d’entretien chimique ou de solvant pour nettoyer l’appareil. • Ranger l’appareil dans un endroit sec, propre et bien aéré. •... - Página 27 Gentile cliente, La ringraziamo per aver acquistato il dispositivo. La preghiamo di leggere attentamente le seguenti istruzioni per l’uso e di seguirle per evitare possibili danni. Non ci assumiamo alcuna responsabilità per danni scaturiti da una mancata osservazione delle avvertenze di sicurezza e da un uso improprio del dispositivo.
-
Página 28: Avvertenze Di Sicurezza
AVVERTENZE DI SICUREZZA • Prima dell‘uso controllare la tensione sulla targhetta del dispositivo. Collegare il dispositivo solo ad una presa che corrisponde alla tensione indicata. • Tenere lontano il cavo di alimentazione da superfici calde e da oggetti appuntiti. • Non sistemare il cavo di alimentazione sotto un tappeto e non coprirlo con altri oggetti o tessuti. - Página 29 • Durante l´uso, il dispositivo umidifica l´ambiente. Tuttavia evitare un‘umidità troppo elevata. Si consiglia un‘umidità compresa tra il 40-50%. Un‘eccessiva umidità può causare muffa o problemi di salute. • Collocare il dispositivo solo su superfici resistenti all‘umidità. Durante l‘installazione e la rimozione del serbatoio potrebbero cadere alcune gocce.
-
Página 30: Descrizione Del Prodotto
DESCRIZIONE DEL PRODOTTO Tasti Motore sincrono Pannello dei comandi Turbina Ricevitore (telecomando) Cuscinetto di raffreddamento Coperchio posteriore Motore Pale rotanti Pompa acqua Coperchio serbatoio Generatore anioni Coperchio frontale Serbatoio Rotelline MESSA IN FUNZIONE E UTILIZZO Versare l´acqua • Aprire lo sportello del serbatoio e versare massimo 8 litri d´acqua. •... - Página 31 Pannello dei comandi e tasti funzione POWER Inserire la spina nella presa e premere il tasto POWER. Il dispositivo si avvia a velocità bas- sa. Per spegnere il dispositivo, premere di nuovo il tasto POWER. TIMER Premere ripetutamente il tasto TIMER per impostare uno dei seguenti timer di spegnimento 0,5 ore>...
-
Página 32: Pulizia E Manutenzione
PULIZIA E MANUTENZIONE • Prima di pulire il dispositivo, staccare la spina dalla presa di corrente. • Pulire le superfici esterne con un panno morbido. Non utilizzare per la pulizia prodotti chimici o solventi. • Conservare il dispositivo in un luogo asciutto, pulito e ben ventilato. •...