Publicidad
Idiomas disponibles
Idiomas disponibles
BEALE
™
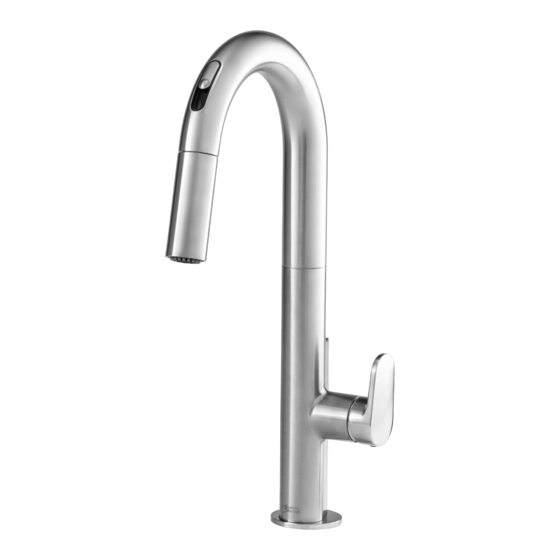
ELECTRONIC PULL-DOWN
KITCHEN FAUCET
Thank you for selecting American Standard...
the benchmark of fine quality for over 100 years.
To ensure that your installation proceeds smoothly-please read
these instructions carefully before you begin.
RECOMMENDED TOOLS
1
INSTALL FAUCET WITH OR WITHOUT DECK ESCUTCHEON
(A) Installation on 1-hole mounting surface: (please refer to template provided)
• Make certain the SEAL (2) is properly seated in bottom recess of MOUNTING RING (10) and SEAL (13) in top recess of
MOUNTING RING (10). Place mounting ring over mounting hole at the deck. Insert CABLES (12), HOSES (3) and SHANK (4)
through mounting ring and deck, seat SPOUT BASE onto sink or mounting surface. Do not use putty.
• From below: Insert CABLES (12) and HOSES (3) through RUBBER WASHER (6), BRASS WASHER (7), and threaded
LOCKNUT (8).
• Assemble RUBBER WASHER (6), BRASS WASHER (7), and threaded LOCKNUT (8) onto SHANK (5) from underside
of sink or mounting surface. Hand tighten LOCKNUT (8).
• Make sure faucet is aligned properly with handle on the right and logo facing directly forward.
• Use a screwdriver to tighten SCREWS (9) on LOCKNUT (8). Work your way around LOCKNUT (8), tightening the screws
slightly each time until all are snug to ensure even pressure.
(B) Optional: Installation on 3-hole mounting surface: Requires Deck Escutcheon - order separately
• Make certain the SEAL (13) is properly seated in top recess of DECK ESCUTCHEON (1) and FOAM SEAL (14) is properly
seated in bottom recess of DECK ESCUTCHEON (1). Do not use putty. (Please refer to the template provided)
• Screw in two THREAD RODS (15) onto bottom of DECK ESCUTCHEON (1).
• Place deck escutcheon over mounting holes of the deck.
• Insert SUPPLY CABLES (12), HOSES (3), SPRAY HOSE (4) and SHANK (5) through hole of DECK ESCUTCHEON (1) and
mounting surface.
• Follow mounting instructions above
to secure faucet to mounting surface.
Thread the MOUNTING NUTS (11) to
secure DECK ESCUTCHEON.
Product names listed herein are trademarks of AS America, Inc.
© AS America, Inc. 2016
INSTALLATION
INSTRUCTIONS
Flat Blade Screwdriver
A
13
10
SPOUT BASE
2
4931380
4931385
Phillips Screwdriver
CAUTION
13
10
2
12
5
3
SINK OR
MOUNTING
4
SURFACE
6
7
8
9
- 1 -
Certified to comply with ANSI A112.18.1M
Adjustable Wrench
Turn off water at
main supply
B (OPTIONAL)
13
SPOUT BASE
15
5
3
11
4
6
7
8
9
M965686 Rev. 1.9 (1/19)
1
14
Publicidad
Tabla de contenido

Manuales relacionados para American Standard BEALE 4931380


Resumen de contenidos para American Standard BEALE 4931380
- Página 1 4931380 ELECTRONIC PULL-DOWN 4931385 KITCHEN FAUCET Thank you for selecting American Standard... the benchmark of fine quality for over 100 years. To ensure that your installation proceeds smoothly-please read these instructions carefully before you begin. Certified to comply with ANSI A112.18.1M...
- Página 2 MAKE WATER SUPPLY CONNECTIONS • Turn off hot and cold water supplies before beginning. • Place each SCREEN FILTER (3) on each wall supply outlet. Be sure that SCREEN FILTER (3) is inserted in the correct direction. (See Illustration) (3) SCREEN FILTER •...
- Página 3 ELECTRICAL CONNECTIONS - SENSOR TO SOLENOID • Connect SOLENOID CONNECTOR (12) with the sensor connector from the faucet with the yellow tag stickers, secure this connection by installing inside the CONNECTORS HOUSING (3) as shown and lock by twisting the white end pieces.
- Página 4 CHECK CONNECTIONS FOR LEAKS • Move HANDLE (1) into “off” position. • Turn on water supplies and check connections for leaks. • Operate HANDLE (2) up and down, left and right to flush water lines thoroughly. • Operate HAND SPRAY and check connections for leaks. CHECK CONNECTIONS FOR LEAKS TEST INSTALLED FAUCET...
- Página 5 SPRAY OPERATION • With FAUCET on, press TOGGLE BUTTON (4) on SPRAY (3) to switch from stream to spray. • Press and hold PAUSE BUTTON (5) to temporarily stop flow from SPRAY (3). Release PAUSE BUTTON (5) to resume flow from SPRAY (3). STREAM (AERATOR) SPRAY SERVICE...
- Página 6 BEALE ™ ELECTRONIC PULL-DOWN KITCHEN FAUCET MODEL NUMBER 4931380 Replace the “YYY” with 4931385 appropriate finish code POLISHED CHROME STAINLESS STEEL M951483-0070A M964450-YYY0A CARTRIDGE SPRAY WITH HOSE M918511-0070A CARTRIDGE SCREWS M907315-YYY0A M970209-0070A ESCUTCHEON CAP AERATOR M922372-0070A AERATOR KEY M964453-YYY0A HANDLE KIT M964452-YYY0A MOUNTING RING M970620-0070A...
-
Página 7: Électronique Déroulants Robinet De Cuisine
4931380 ÉLECTRONIQUE DÉROULANTS 4931385 ROBINET DE CUISINE Nous vous remercions d’avoir choisi American Standard… synonyme de qualité supérieure depuis plus de 100 ans. Pour que l’installation se déroule sans problème, veuillez lire attentivement ces instructions avant de commencer. Certifié conforme aux normes ANSI A112.18.1M OUTILS RECOMMANDÉS... - Página 8 RACCORDS DE L’ALIMENTATION EN EAU • Fermez l’alimentation en eau chaude et en eau froide avant de commencer. VÉRIFICATION DE • Mettre chaque CRÉPINE (3) sur chaque sortie L’ÉTANCHÉITÉ d’alimentation murale. S’assurer d’insérer la DES RACCORDS CRÉPINE (3) dans le bon sens. (Voir illustration) •...
- Página 9 RACCORDEMENTS ÉLECTRIQUES - DU CAPTEUR AU SOLÉNOÏDE • Branchez le RACCORD DU SOLÉNOÏDE (12) au raccord du capteur à partir du robinet avec les étiquettes jaunes, sécurisez ce raccordement en installant le BOÎTIER DE CONNECTEURS (3) comme indiqué, et verrouillez-le en tournant les pièces à...
- Página 10 VÉRIFICATION DE L’ABSENCE DE FUITES • Abaisser la POIGNÉE en position fermée. • Ouvrir l’alimentation d’eau et vérifier l’étanchéité des raccords. • Actionner la POIGNÉE (2) de haut en bas et de gauche à droite pour faire circuler l’eau complètement. •...
- Página 11 FONCTIONNEMENT DU JET PULVÉRISATEUR • Une fois le ROBINET en marche, appuyez sur le COMMUTATEUR (4) situé sur le JET PULVÉRISATEUR (3) afin de passer du jet continu au jet pulvérisateur. • Appuyez et maintenez enfoncé le BOUTON PAUSE (5) afin d’interrompre momentanément le débit du JET PULVÉRISATEUR (3).
- Página 12 BEALE ÉLECTRONIQUE DÉROULANTS ROBINET DE CUISINE NUMÉRO DU MODÈLE Remplacer le «YYY» par le code de fini approprié 4931380 CHROME POLI 4931385 ACIER INOXYDABLE M951483-0070A M964450-YYY0A CARTOUCHE JET PULVÉRISATEUR M918511-0070A AVEC TUYAU VIS DE LA CARTOUCHE M970209-0070A M907315-YYY0A AÉRATEUR CAPUCHON DE L'ÉCUSSON M922372-0070A CLÉ...
-
Página 13: Electrónica De Grifo De Cocina Desplegable
™ 4931385 ELECTRÓNICA DE GRIFO DE COCINA DESPLEGABLE Gracias por elegir American Standard, el punto de referencia de óptima calidad durante más de 100 años. Para realizar la instalación sin problemas, lea atentamente estas instrucciones antes de comenzar. Certificada de conformidad con la norma ANSI A112.18.1M... - Página 14 REALIZAR LAS CONEXIONES DE LOS SUMINISTROS DE AGUA • Apague los suministros de agua caliente y fría antes de comenzar. COMPROBACIÓN • Coloque cada FILTRO DE REJILLA (3) en cada enchufe de DE FUGAS EN LAS CONEXIONES suministro de la pared. Asegúrese de que el FILTRO DE REJILLA (3) se encuentre insertado en la dirección correcta.
- Página 15 CONEXIONES ELÉCTRICAS - SENSOR AL SOLENOIDE • Conecte el CONECTOR DEL SOLENOIDE (12) al conector del sensor desde la llave con las calcomanías de etiqueta amarilla, fije esta conexión instalando dentro del ARMAZÓN DE LOS CONECTORES (3), tal como se indica y bloquee girando las piezas de extremo blanco.
-
Página 16: Características
COMPROBACIÓN DE FUGAS EN LAS CONEXIONES • Desplace la MANIJA (1) a la posición de cierre. • Abra los suministros del agua y revise si hay fugas en las conexiones. • Mueva la MANIJA (2) hacia arriba y abajo, a izquierda y derecha, para hacer correr el agua por las tuberías. - Página 17 FUNCIONAMIENTO DEL ROCIADOR • Con la LLAVE encendida, presione el INTERRUPTOR (4) en el ROCIADOR (3) para cambiar de chorro a rociador. • Presione y sostenga el BOTÓN DE PAUSA (5) para detener temporariamente el flujo del ROCIADOR (3). Suelte el BOTÓN DE PAUSA (5) para reactivar el flujo del ROCIADOR (3).
- Página 18 BEALE ™ ELECTRÓNICA DE GRIFO DE COCINA DESPLEGABLE NÚMERO DE MODELOS Reemplace las “YYY” conel 4931380 código de terminación adecuado CROMO PULIDO 4931385 ACERO INOXIDABLE M951483-0070A M964450-YYY0A CARTUCHO ROCIADOR CON M918511-0070A MANGUERA TORNILLOS DEL CARTUCHO M970209-0070A M907315-YYY0A AIREADOR TAPA DEL CHAPETÓN M922372-0070A LLAVE DEL AIREADOR...