Tabla de contenido

Manuales relacionados para Serta AIR 44954


Resumen de contenidos para Serta AIR 44954
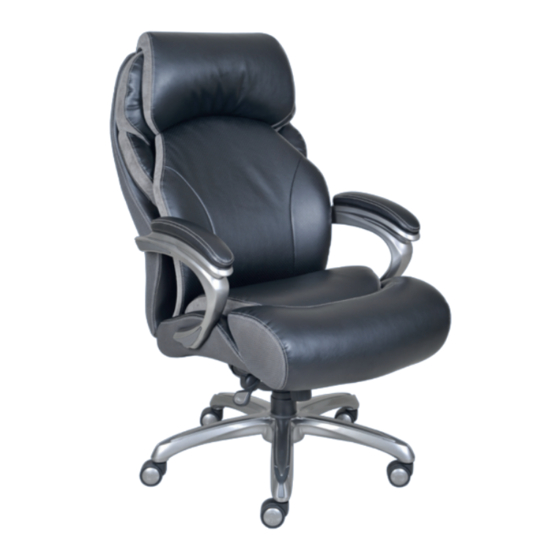
- Página 1 Serta Smart Layers™ ® Big and Tall Executive Air™ Chair Silla ejecutiva de durabilidad commercial marca Serta ® Smart Layers™ con Air™ Assembly Instructions Instrucciones de ensamblaje MODEL / MODELO 44954 45391 45392 Soporte m á ximo de la silla:...
-
Página 2: Instrucciones De Ensamblaje
Chair Assembly Instructions Carefully unpack all parts and identify them against the parts list before attempting to assemble. To avoid scratching the components, assemble the chair on a protected surface. Note: The casters sold with this chair are intended for use on carpet and not recommended for use on tile or hard wood floors. -
Página 3: Arm Inserts Molduras Del Brazo
PARTS/PARTES Seat Plate Casters Star Base Gas Lift with Telescoping Cover Ruedas Base en forma de estrella Mecanismo del asiento Elevador neumático y cubierta Quantity/cantidad: 5 Quantity/cantidad: 1 telescópica Quantity/cantidad:1 Quantity/cantidad: 1 Back Cushion Right Arm Seat Cushion Left Arm Cojín del respaldo Cojín del asiento Brazo izquierdo... - Página 4 Step 1 Place the Star Base (B) upside down and insert 5 Casters (A) into the holes on the Star Base (B). Paso 1 Ponga la base en forma de estrella (B) con las patas hacia arriba y inserte las 5 ruedas (A) en los hoyos situados en la base (B). Step 2 Turn the Star Base (B) over and insert the Gas Lift with Telescoping Cover (C) through the center hole on top of Star Base (B).
- Página 5 Step 3 Attach Seat Plate (D) to the bottom of the Seat Cushion (F) (with the front of the seat plate facing the front of seat cushion). Attach by using 1-3/4” Screws (J) for the front holes of the Seat Plate (D) and 7/8”...
- Página 6 Step 4 Insert Levers (D1 & D2) of Seat Plate (D) to the pre-attached cable lever receivers on the underside of Seat Cushion (F) (with the front of the levers facing the front of seat cushion). Push down the key on the receivers to pull out the levers. *Note : Fix the cable for the seat plate into the plastic clips attached to the bottom of the seat cushion.
- Página 7 Step 5 Align the Back Cushion (G) with the Seat Cushion (F) by positioning the back support plate over the Seat Plate (D) with 1-1/4” Screws (K). *Note : Do not tighten the screws completely. Paso 5 Alinee el cojín del respaldo (G) con el cojín del asiento (F) por medio de colocar la placa de soporte del respaldo sobre la placa del asiento (D) con tornillos de 32mm (K).
- Página 8 Step 6 Insert 1-1/2” Screws (L) into arm holes, attaching Arms (E1 & E2) (with the front of arms facing the front of seat cushion) to sides of Seat Cushion (F) and Back Cushion (G). *Note : Tighten all the screws completely. Remember to tighten the back support plate screws.
- Página 9 Step 7 Put the Plastic Shroud (H) over the Seat Plate (D) (with front of plastic shroud facing the front of seat cushion). Align shroud posts to holes on bottom of Seat Cushion (F) and press into position. Paso 7 Coloque la cubierta de plástico (H) sobre la plancha del asiento (D) (con la parte frontal de la cubierta de plástico mirando hacia el frente del...
- Página 10 Step 8 Position the assembled chair upright with the seat plate facing down. Insert the Gas Lift with Telescoping Cover (C) into the center hole of the Seat Plate (D). Paso 8 Coloque la silla ensamblada verticalmente, con la plancha del asiento hacia abajo.
- Página 11 Step 9 Place the Arm Inserts (M1 & M2 & N1 & N2) into arm grooves once all screws have been tightened. Paso 9 Ponga las molduras de los brazos (M1 y M2 y N1 y N2) en las ranuras de los brazos una vez que haya ajustado todos los tornillos.
- Página 12 Step 10 Remove the Packing Material (P) placed between the back cushion and the air frame. The chair is now ready for use. Paso 10 Quite el material de embalaje (P) ubicado entre el cojín del respaldo y el marco de aire. El sillón está listo para que lo use.
-
Página 13: Function Instruction
Operating Instructions Instrucciones de Uso Function Instruction - 1 To Adjust Seat Height : While seated, lean forward and reach under the right side of the chair to find the lever. Lift the lever and raise your body up slightly to allow the chair to rise to the desired height. - Página 14 Function Instruction - 2 To Operate Tilt Lockout : While seated, reach under the left side of the chair to find the lever. Push down the lever and lean back to allow the chair to tilt backwards. To lock the chair in the upright or vertical position, sit upright and pull the lever to the up position.
- Página 15 Function Instruction - 3 To Adjust Tension On The Tilt : Reach under the front center of the chair, grasp the round knob (R) and turn it counter- clockwise to stiffen the tilt mechanism for a heavier user. Turn the knob (R) clockwise to loosen the tilt mechanism for a lighter user.
- Página 16 Function Instruction - 4 About the breathability of the Air Lumbar Cushion : While seated, the open-air contours of the cushion which is designed to breathe and flex, can dynamically provide continuous support by connecting with your body’s natural movement. The air cushion conforms to the curve of your spinal cord and is intended to relieve your back from stress.
- Página 17 Function Instruction - 5 About the Neutral Posture of the Air Lumbar Cushion : The Air chair has been shown to help the user achieve Neutral Posture. Neutral Posture has been shown to reduce back strain and increase long term seated comfort. *Provides constant support as you lean back and twist *Flexible lumbar pivots and conforms following your movement *Continuous proper lumbar support helps keep the body in an...
- Página 18 Limited Warranty True Innovations seating products are warranted against defects in material and workmanship while owned by the “Original Purchaser”. The term “Original Purchaser” is defined as that party or entity which purchases True Innovations furniture from an authorized True Innovations retailer as shown by the original sales receipt.
-
Página 19: Garantía Limitada
Garantía Limitada Los productos de True Innovations seating están garantizados contra defectos de material y mano de obra mientras está en posesión de su “Comprador Original”. El término “Comprador Original” se define como el individuo o entidad que compra el mueble de True Innovations de un distribuidor autorizado así...