
Manuales relacionados para Graco Made2Grow


Resumen de contenidos para Graco Made2Grow
- Página 1 Made2Grow ™ Owner’s Manual • Manual du propriétaire Owner’s Manual • Manual del propietario • Manual del propietario ©2019 NWL0000997155C 11/19...
-
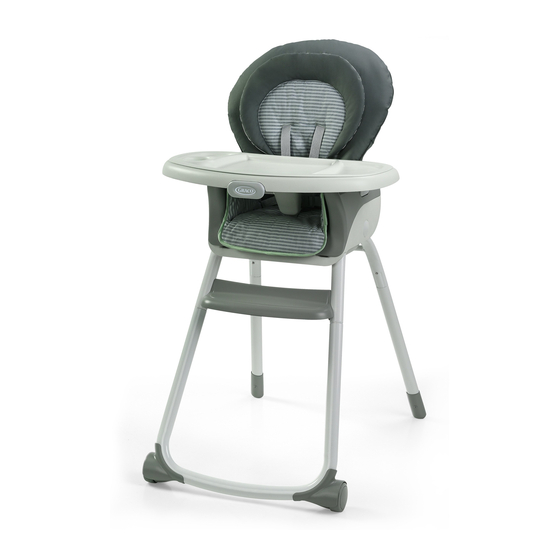
Página 2: Features • Características
1 WARNING • ADVERTENCIA Pages • Páginas 7-10 Pages • Páginas 2 Features • Características This product can be used in the following modes: Este producto puede usarse en los siguientes modos : Parts list • Lista de las piezas Body Support •... - Página 3 Failure to follow these warnings and the assembly instructions could result in serious injury or death. Read all instructions before use. • PLEASE SAVE OWNER’S HIGHCHAIR: MANUAL FOR FUTURE USE. • FALL HAZARD: Children have • ONLY USE PRODUCT AS suffered severe head injuries INSTRUCTED.
- Página 4 BOOSTER: • DO NOT USE the booster on a stool, swivel chair, folding • CHILDREN HAVE SUFFERED chair or any other type of chair HEAD INJURIES, INCLUDING to which this booster cannot SKULL FRACTURES, AFTER be firmly attached. The FALLING WITH OR FROM recommended type of chair BOOSTER SEATS.
- Página 5 ADVERTENCIA No cumplir con estas advertencias y las instrucciones de ensamblaje, podría resultar en lesiones serias o la muerte. Lea todas las instrucciones antes de usar. • POR FAVOR, GUARDE EL • NO FUERCE LA BANDEJA MANUAL DEL PROPIETARIO contra el niño. Use solamente PARA USO FUTURO.
- Página 6 ADVERTENCIA • NUNCA deje que un niño se • Use este asiento para dar de aparte de la mesa. comer solamente con niños capaces de sentarse erguidos ASIENTO PARA DAR DE COMER: sin ayuda. • NIÑOS HAN SUFRIDO • USE SIEMPRE las correas del LESIONES EN LA CABEZA, asiento para dar de comer para INCLUYENDO FRACTURAS DEL...
- Página 7 2-A This product can be used in the following modes: Este producto puede usarse en los siguientes modos: Stage 1: Infant highchair with recline Infant highchair Full-size Infant booster Infant highchair Full-size Infant b Stage 2: Full Size Highchair with recline highchair with recline highchair...
- Página 8 Infant highchair Full-size Infant booster with recline highchair Stage 4: Toddler booster Up to 6 years Infant highchair Full-size & 60 lb (27.3 kg) with recline highchair Etapa 4: Asiento para dar de comer a niños pequeños Hasta los 6 años y 60 libras (27.3 kg) Toddler booster Youth stool...
- Página 9 2-B Parts list • Lista de las piezas This model may not include some Este modelo podría no incluir algunas features shown below. Check that de las características que se indican a you have all the parts for this continuación. Verifique que tenga model BEFORE assembling your todas las piezas de este modelo product.
- Página 10 2-C Body Support • Soporte del cuerpo Never use this body support on any other product. No use nunca este soporte del cuerpo en ningún otro producto. 1. Pull shoulder straps through openings in body support. 1. Pase las correas del hombro a través de las aberturas en el soporte del cuerpo.
- Página 11 Assembling seat frame • Ensamblar el armazón del asiento 1. Place seat so legs are visible as shown. Snap rear leg tube into fold latch. CHECK that rear legs are secured by pulling up on them. 1. Coloque el asiento de modo que se vean las patas, como se muestra.
- Página 12 3. Insert leg tubes with wheels into tubes with footrest attached. CHECK that buttons snap into place as shown. 3. Inserte los tubos de las patas con las ruedas en los tubos con el apoyapiés instalado. VERIFIQUE que los botones se traben en su lugar como se indica.
- Página 13 Booster • Asiento para dar de comer 1. Remove booster seat by pushing in on buttons on side of seat and lifting up. 1. Retire el asiento para dar de comer apretando los botones del costado del asiento y levantándolo. 2.
- Página 14 3. Push down on seat back to make sure attachment points secure SNAP! into seat bottom. ¡CRAC! 3. Empuje el respaldo del asiento hacia abajo para asegurarse de que los puntos de sujeción estén seguros en el fondo del asiento. SNAP! ¡CRAC! 4.
- Página 15 6. Pull crotch strap through opening in seat pad. 6. Pase la correa de la entrepierna por la abertura en la almohadilla del asiento. 7. Attach hooks to bottom of seat as shown. 7. Sujete los ganchos al fondo del asiento como se indica.
- Página 16 Stage 1 and 2: Highchair • Etapa 1 y 2: Silla alta Infant Highchair with Recline - Up to 3 years & 40 lb (18 kg) • Silla alta para bebé con reclinación - hasta los 3 años y 40 libras (18 kg) 1.
- Página 17 1. Pull harness so that mounts are flush with back of booster. 1. Tire del arnés para que los montantes estén alineados con el respaldo del asiento para dar de comer. 2. Place infant booster on youth stool. 2. Coloque el asiento para dar de comer al bebé...
- Página 18 1. Squeeze both handles on bottom of tray OR press button on front of tray and place onto highchair. 1. Presione ambas manijas en el fondo de la bandeja U oprima el botón de adelante de la bandeja y póngalo en la silla alta.
- Página 19 To adjust tray • Cómo ajustar la bandeja 1. Press button on front of tray and push towards seat to adjust tray positions. There are four adjustment options. 1. Oprima el botón del frente de la bandeja y empújela hacia el asiento para ajustar las posiciones de la bandeja.
- Página 20 To Remove tray • Para sacar la bandeja 1. Squeeze both handles on bottom of tray OR press button on front of tray to release. 1. Presione ambas manijas en el fondo de la bandeja U oprima el botón de adelante de la bandeja para liberarla.
- Página 21 To secure child • Cómo sujetar al niño WARNING Falling hazard: Always use the restraint system. ADVERTENCIA Peligro de caídas: Use siempre el sistema de seguridad. 5 point harness • Arnés de 5 puntos 1. To open, press button on buckle to release the waist straps.
- Página 22 3. Use slide adjuster on shoulder, waist and crotch straps for tighter adjustment. 3. Use el ajustador deslizable en las correas del hombro, la cintura y la entrepierna para ajustarlas más apretadamente. Convert to 3 point harness • Convertir en un arnés de 3 puntos 1.
- Página 23 3. Line up ends of shoulder straps from seat back and pull out to remove. 3. Alinee los extremos de las correas de los hombros del respaldo del asiento y tire para retirarlas. 4. Reattach seat pad to plastic seat back.
- Página 24 Harness height adjustment • Ajuste de la altura del arnés 1. To remove shoulder straps, press button on buckle to release the waist straps. 1. Para retirar las correas de los hombros, oprima el botón de la hebilla para soltar las correas para la cintura.
- Página 25 4. Change shoulder strap slots on seat back and insert shoulder straps through matching seat pad slot. 4. Cambie las ranuras para las correas de los hombros del respaldo del asiento e inserte las correas de los hombros por la ranura de la almohadilla del asiento correspondiente.
- Página 26 6. CHECK the shoulder straps are installed correctly by pulling on the straps and checking the back side of the plastic seat back to ensure ends of shoulder straps are visible as shown. 6. VERIFIQUE que las correas de los hombros estén correctamente instaladas tirando de ellas y mirando la parte trasera del respaldo del asiento de plástico...
- Página 27 Recline • Reclinación WARNING DO NOT adjust the seat recline with the child in it. ADVERTENCIA : NO ajuste la reclinación del asiento cuando el niño está sentado. 1. Squeeze handle on back of seat and push down or pull up to adjust.
- Página 28 To use tray insert • Cómo usar accesorio de la bandeja Dishwasher safe. Se puede lavar en el lavaplatos. 1. Attach tray insert by pushing it down on the tray. 1. Instale el accesorio de la bandeja empujándolo hacia abajo sobre la bandeja.
- Página 29 To Fold/Unfold • Cómo plegarlo/desplegarlo 1. Pull out on fold latch on rear of seat and rotate rear legs in. 1. Tire de la traba de plegado de la parte posterior del asiento y gire las patas posteriores hacia dentro. 2.
- Página 30 To Store Tray • Cómo almacenar la bandeja 1. To store tray, attach hook on tray to rear of seat as shown. 1. Para almacenar la bandeja, sujete el gancho en la bandeja a la parte posterior del asiento como se indica.
- Página 31 Stage 3: Infant Booster • Etapa 3: Asiento para dar de comer al bebé Booster seat for use on dining chair with minimum seat base of 16.5”w (41.91 cm) x 17”l (43.18 cm) and 8”h (20.32 cm) seat back. El asiento para dar de comer debe usarse sobre una silla de comedor con una base que mida 16.5 pulgadas (41.91 cm) de ancho por...
- Página 32 WARNING: DO NOT remove seat with the child in it. ADVERTENCIA : NO saque el asiento mientras el niño esté sentado. To remove infant booster, push in on buttons on side of booster and lift up. Para retirar el asiento para dar de comer, apriete los botones del costado del asiento y levántelo.
- Página 33 2. Slide strap storage doors open. 2. Deslice las puertas de almacenamiento de la correa para abrirlas. 3. Pull 4 straps out as shown. 3. Tire las 4 correas como se indica. 4. Place infant booster with fully upright seatback on a chair with no armrests and that has a back, ensuring that the straps are hanging freely.
- Página 34 5. Wrap rear straps around back of seat and secure clip. Tighten by pulling on the adjustment strap. 5. Envuelva las correas traseras SNAP! alrededor del respaldo del asiento ENCLENCHEZ! y asegure la presilla. Ajústelas ¡CRAC! tirando de la correa de ajuste. 6.
- Página 35 7. To attach tray, squeeze both handles on bottom of tray OR press button on front of tray and place onto infant booster. 7. Para sujetar la bandeja, presione ambas manijas en el fondo de la bandeja U oprima el botón de adelante de la bandeja y póngala en el asiento para dar de comer al bebé.
- Página 36 Stage 4: Toddler Booster • Etapa 4: Niño pequeño Booster seat for use on dining chair with minimum seat base of 16.5”w (41.91 cm) x 17”l (43.18 cm) and 8”h (20.32 cm) seat back. El asiento para dar de comer debe usarse sobre una silla de comedor con una base que mida 16.5 pulgadas (41.91 cm) de ancho por 17...
- Página 37 3. To remove backrest, flip infant booster upside down and pull lever on side of infant booster base to release seat back and pull up on backrest. Repeat on other side. 3. Para sacar el respaldo, voltee boca abajo el asiento para dar de comer al bebé...
- Página 38 6. Place booster on a chair with no armrests and that has a back, ensuring that the straps are hanging freely. Make sure that there are no extra seatpads or cushions on the chair that you are using with the toddler booster.
- Página 39 8. Wrap bottom straps around base of seat and secure clip under the seat. Tighten by pulling on the adjustment strap. CHECK to make sure toddler booster is securely attached by moving from side to side. 8. Envuelva las correas inferiores alrededor de la base del asiento y asegúrelas con la presilla debajo del asiento.
- Página 40 To store attachment straps • Para almacenar las correas de sujeción 1. Insert straps into storage areas. 1. Inserte las correas en los lugares para el almacenamiento. 2. Slide strap storage doors closed. Straps MUST be stored to attach booster to highchair frame/youth stool.
- Página 41 Stage 5: Youth Stool • Etapa 5: Silla Juvenil Infant highchair Full-size Infant booster with recline highchair Youth Stool • Silla juvenil Youth stool is for a child 3 to 6 years of age and up to 60 lb (27.3 kg). Place child in youth stool.
- Página 42 Toddler booster Youth stool Stage 6: Seat 2 Kids at Once • Etapa 6: Dos asientos a la vez Option 1: Infant Booster and Youth Toddler booster Youth stool Stool Opción 1: Asiento para dar de comer al bebé y silla juvenil Infant highchair Full-size Infant booster...
- Página 43 Care and maintenance • Cuidado y mantenimiento Removing seat pad • Quitar la almohadilla del asiento Certain models only, CHECK care tag on seat pad. Ciertos modelos solamente, VERIFIQUE la etiqueta de cuidado en la almohadilla del asiento. 1. Disconnect hooks from bottom of seat as shown.
- Página 44 4. To remove backrest, pull lever on side of infant booster base to release seat back and pull up on backrest. Repeat on other side. 4. Para sacar el respaldo, tire de la palanca en el costado de la base del asiento para dar de comer al bebé...
- Página 45 7. Disconnect webbing tabs from seat back. 7. Destrabe las lengüetas de la correa del respaldo del asiento. 8. Insert shoulder straps through seat pad. 8. Inserte las correas del hombro por la almohadilla del asiento. Reverse steps to re-attach. Invierta los pasos para volver a sujetarla.
- Página 46 • Tray insert is dishwasher safe • FROM TIME TO TIME CHECK YOUR HIGHCHAIR for worn parts, torn fabric or stitching. Replace or repair the parts as needed. Use only Graco replacement parts. • TO CLEAN HIGHCHAIR FRAME, use only household soap and warm water.
- Página 47 Notes • Notas...
- Página 48 1-800-345-4109 Product registration (U.S.A) Registro del producto (EE.UU.) To register your Graco product from within the U.S.A. visit us online at www.gracobaby.com/productregistration or return registration card provided with your product. We currently do not accept product registrations from those living outside the United States of America.