
Manuales relacionados para AL-KO solo 442


Resumen de contenidos para AL-KO solo 442
- Página 1 Saug-/Blasgerät Deckblatt ORIGINAL-BETRIEBSANLEITUNG SAUG-/BLASGERÄT 2500043_a 05 | 2016...
- Página 2 Italiano ..............................97 Pусский ..............................119 Україна..............................143 © 2016 AL-KO KOBER GROUP Kötz, Germany This documentation or excerpts therefrom may not be reproduced or disclosed to third parties without the express permission of the AL-KO KOBER GROUP. Saug-/Blasgerät 442...
- Página 3 2500043_a...
- Página 4 Saug-/Blasgerät 442...
- Página 5 2500043_a...
-
Página 6: Tabla De Contenido
Original-Betriebsanleitung ORIGINAL-BETRIEBSANLEITUNG Inhaltsverzeichnis Zu dieser Betriebsanleitung ...................... 8 Zeichenerklärungen und Signalwörter.................. 8 Produktbeschreibung ........................ 8 Bestimmungsgemäße Verwendung .................. 8 Möglicher vorhersehbarer Fehlgebrauch ................ 8 Lieferumfang ........................... 9 Symbole am Gerät ........................ 10 Produktübersicht ........................ 10 Sicherheitshinweise ........................ 11 Bediener .......................... 11 Persönliche Schutzausrüstung.................... - Página 7 Original-Betriebsanleitung 10 Lagerung............................ 24 11 Technische Daten ........................... 25 12 Hilfe bei Störungen ......................... 26 13 Umweltschutz .......................... 27 14 Garantie ............................ 28 15 EG-Konformitätserklärung ...................... 28 2500043_a...
-
Página 8: Zu Dieser Betriebsanleitung
Zu dieser Betriebsanleitung 1 ZU DIESER BETRIEBSANLEITUNG montierte rotierende Häckselmesser werden ein- gesaugtes Laub und Schmutz zerkleinert und in ■ Lesen Sie unbedingt vor der Inbetriebnahme einem Fangsack aufgefangen. diese Betriebsanleitung sorgfältig durch. Dies Durch an- und abbaubare Zubehörteile kann das ist Voraussetzung für sicheres Arbeiten und Gerät auf Saug- oder Blasbetrieb umgerüstet störungsfreie Handhabung. -
Página 9: Lieferumfang
Produktbeschreibung Lieferumfang WARNUNG! Das Gerät mit allen Zubehörteilen wird in einer Verletzungsgefahr Kiste geliefert. Zum Lieferumfang gehören die Durch beim Blasbetrieb über das An- hier aufgelisteten Positionen. Prüfen Sie, ob alle sauggitter eingesaugte und dann über Positionen enthalten sind: die Blasrohre ausgeblasene Gegenstän- de können Personen oder Tiere schwer verletzt werden. -
Página 10: Symbole Am Gerät
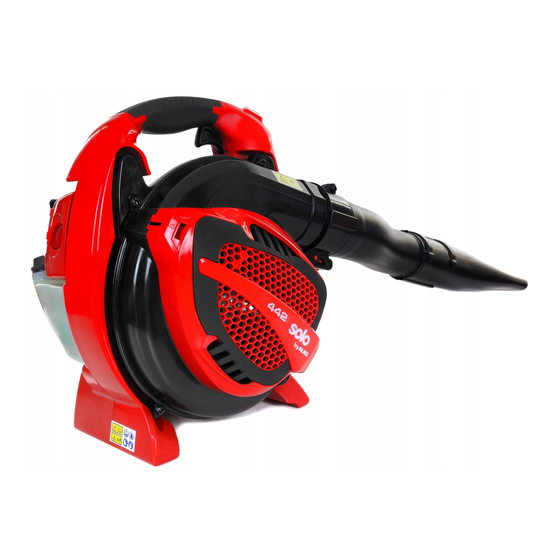
Produktbeschreibung Symbole am Gerät Produktübersicht Dieser Abschnitt beschreibt die Teile und Be- Symbol Bedeutung dienelemente des Saug-/Blasgeräts. Zubehörtei- le, siehe Kapitel 2.3 "Lieferumfang", Seite 9. Ein/Aus-Kippschalter. Dieser Schalter steht immer auf Ein "I". Wenn der Schalter auf "0" gekippt wird, schaltet das Gerät sofort aus. -
Página 11: Sicherheitshinweise
Sicherheitshinweise ■ 3 SICHERHEITSHINWEISE Die persönliche Schutzausrüstung besteht aus: VORSICHT! ■ Gehörschutz (z. B. Gehörschutzkapseln), Gefahr eines Gehörschadens besonders bei einer täglichen Arbeitszeit von über 2,5 Stunden Das Gerät ist während des Betriebes ex- ■ trem laut. Dies kann einen Gehörscha- Schutzbrille den beim Bediener und bei sich in der ■... -
Página 12: Arbeitsplatzsicherheit
Sicherheitshinweise ■ ■ Wenn Sie Benzin verschüttet haben, entste- Schalten Sie das Gerät immer aus, wenn Sie hen Benzindämpfe. Starten Sie das Gerät den Saug- oder Blasbetrieb nicht benötigen, deshalb nicht am selben Ort, sondern min- z. B. beim Wechsel des Arbeitsbereiches, bei destens 3 m davon entfernt. -
Página 13: Montage Und Demontage
Montage und Demontage ■ ■ Alle Bedienelemente funktionieren. mit Rundstrahldüse: erzeugt runden Luft- strahl für leichtes, trockenes Laub und ■ Alle für die jeweilige Betriebsart vorgese- Schmutz henen Zubehörteile sind am Gerät mon- tiert. Das untere Blasrohr ist mit einer Längsnut (02/3) und sich daran anschließenden Quernuten ■... -
Página 14: Montage Für Den Saugbetrieb
Montage und Demontage Montage für den Saugbetrieb 3. Schieben Sie das obere Saugrohr (07/1) in die Gehäuseöffnung (07/2) und drehen Sie Unteres Saugrohr mit dem oberen Saugrohr es kräftig entgegen des Uhrzeigersinns, bis verbinden (05) es einrastet. 1. Richten Sie das untere Saugrohr (05/1) zum Abluftkrümmer mit dem Gerätestutzen oberen Saugrohr (05/2) so aus, dass sich die verbinden (08) -
Página 15: Inbetriebnahme
Inbetriebnahme Saugrohr von der Gehäuseöffnung Benzin/Öl-Gemisch herstellen und entfernen (12) einfüllen 1. Drehen Sie das Saugrohr (12/1) kräftig im ACHTUNG! Uhrzeigersinn, bis es ausrastet und sich ab- Gefahr von Motorschäden nehmen lässt. Das Einsauggitter (12/2) klappt zu. Reiner Benzin führt zur Beschädigung und zum Totalausfall des Motors. -
Página 16: Bedienung Des Motors
Bedienung des Motors 4. Drehen Sie den Verschluss (14/1) des Kraft- 3. Führen Sie gleichzeitig durch: stoffstanks langsam auf, damit das unter ■ Drücken Sie das Gerät am oberen Griff Druck stehende Benzin/Luft-Gemisch im (16/1) mit einer Hand fest nach unten auf Kraftstofftank (14/2) langsam in die Umge- den Boden. -
Página 17: Motordrehzahl Ändern
Bedienung des Motors Warmstart (15, 16, 17) HINWEIS Wenn der Motor noch betriebswarm ist, d. h. kurz Wenn der Choke versehentlich einge- nachdem er ausgeschaltet wurde, wird ein schaltet war: Drehen Sie den Choke- "Warmstart" durchgeführt. Der Choke wird dabei Drehknopf entgegen des Uhrzeigersinns nicht benutzt. -
Página 18: Betriebsarten
Betriebsarten ■ 7 BETRIEBSARTEN hohe Motordrehzahl: für sehr schweres oder nasses Material, z. B. frischer Arbeiten im Blasbetrieb (18) Schnee und grober Schmutz Im Blasbetrieb kann das Gerät mit einer Hand Arbeiten im Saugbetrieb (19) getragen werden. Im Saugbetrieb muss das Gerät mit beiden Hän- WARNUNG! den getragen werden. -
Página 19: Wartung Und Pflege
Wartung und Pflege ■ 7. Während der Arbeit: Ziehen Sie das Luftfiltergehäuse (20/2) ■ Betreiben Sie das Gerät mit mittlerer/ho- ■ her Motordrehzahl. Ziehen Sie den Filterschwamm (20/3) vom Zapfen (20/4) ab. ■ Halten Sie die Einsaugöffnung des Saug- rohrs nur wenige Zentimeter über dem 2. -
Página 20: Kraftstoff-Filter Prüfen/Ersetzen (22)
Wartung und Pflege ■ Falls nach kurzer Betriebszeit die Zünd- 2. Kraftstoff-Filter prüfen/ersetzen: kerze wieder defekt ist, müssen der Mo- ■ Drehen Sie den Verschluss (22/1) des tor und die Vergasereinstellungen von ei- Kraftstofftanks (22/2) auf. Lassen Sie den ner autorisierten Service-Werkstätte Verschluss (22/1) am Kraftstofftank hän- überprüft werden. - Página 21 Wartung und Pflege 1. Stecken Sie das passende Werkzeug in die Schraube. 2. Drehen Sie die Schraube mit einem kurzen Ruck im Uhrzeigersinn fest. HINWEIS An den Vergaser-Regulierschrauben darf nicht gedreht werden. Für diese Regulier- schrauben wurde deshalb kein Steck- schlüssel mitgeliefert.
-
Página 22: Wartungsplan
Wartung und Pflege Wartungsplan Die folgenden Hinweise beziehen sich auf normale Einsatzverhältnisse. Bei besonderen Bedingungen, wie z. B. besonders langer, täglicher Arbeitszeit oder sehr schmutzigem Arbeitsbereich, müssen die angegebenen Wartungsintervalle entsprechend verkürzt werden. Beim Austausch von Teilen dürfen nur Original-Ersatzteile verwendet werden. Intervall Bauteile Durchzuführende Arbeiten... - Página 23 Wartung und Pflege Intervall Bauteile Durchzuführende Arbeiten ■ Wenn erforderlich Luftfilter Reinigen oder Ersetzen ■ Kraftstoff-Filter im Tank Ersetzen ■ Vergaser Leerlaufeinstellung nachstellen ■ Kühlluft-Einlass Reinigen ■ Alle erreichbaren Schrauben Nachziehen (außer Einstellschrauben) ■ Schwingungsdämpfungsele- Prüfen mente ■ Kanister für Benzin und Reinigen Zweitaktöl 1) Dieser Vorgang ist von Ihrem Händler oder einer autorisierten Service-Werkstätte durchzuführen.
-
Página 24: Transport
Transport 9 TRANSPORT 3. Zylinder ölen: ■ Lassen Sie das Gerät vollständig abküh- Gerät zwischen zwei Arbeitsbereichen len. transportieren ■ Ziehen Sie den Zündkerzenstecker ab ■ Schalten Sie den Motor aus. und schrauben Sie die Zündkerze her- ■ Halten Sie das Gerät an den Griffen. aus. -
Página 25: Technische Daten
Technische Daten 11 TECHNISCHE DATEN Art.-Nr.: 127380 Abmessungen (L x B x H) [mm], ohne Rohre 350 x 250 x 350 Gewicht [kg] ■ mit Zubehör für Blasbetrieb ■ mit Zubehör für Saugbetrieb Hubraum [cm 27,6 Maximale Motorleistung [kW] Maximale Motordrehzahl [min 8300 Zündkerze CHAMPION RCJ7Y... -
Página 26: Hilfe Bei Störungen
Hilfe bei Störungen 12 HILFE BEI STÖRUNGEN Störung Ursache Beseitigung Motor startet nicht oder mit Motorstart wurde falsch durch- siehe Kapitel 6.1 "Motor star- Schwierigkeiten. geführt. ten", Seite 16 Zündkerze ist verschmutzt, de- siehe Kapitel 8.2 "Zündkerze fekt oder der Elektrodenabstand warten (21)", Seite 19 stimmt nicht. -
Página 27: Umweltschutz
Umweltschutz Störung Ursache Beseitigung Motor beginnt unnormal und Geräte-/Motorteile haben sich 1. Stoppen Sie den Motor. stark zu vibrieren. abgelöst und/oder sind beschä- 2. Untersuchen Sie das Gerät digt. auf Beschädigungen. 3. Kontrollieren Sie die Zünd- kerze (siehe Kapitel 8.2 "Zündkerze warten (21)", Seite 19). -
Página 28: Garantie
Wir erklären hiermit, dass dieses Produkt in der auf dem Markt vertriebenen Form die Anforderungen der harmonisierten EU-Richtlinien, der EU-Sicherheitsstandards und die produktspezifischen Stan- dards erfüllt. Produkt Hersteller Bevollmächtigter Saug-/Blasgerät AL-KO Geräte GmbH Andreas Hedrich Ichenhauser Str. 14 Ichenhauser Str. 14 Seriennummer D-89359 Kötz D-89359 Kötz... - Página 29 Translation of the original instructions for use TRANSLATION OF THE ORIGINAL INSTRUCTIONS FOR USE Contents About these instructions for use ..................... 31 Legends and signal words..................... 31 Product description ......................... 31 Designated use ........................ 31 Possible foreseeable misuse.................... 31 Scope of supply........................ 32 Symbols on the machine .......................
- Página 30 Translation of the original instructions for use 10 Storage ............................ 46 11 Technical data .......................... 47 12 Help in case of malfunction...................... 48 13 Protection of the environment ...................... 49 14 Guarantee ............................ 50 15 EU declaration of conformity...................... 50 Saug-/Blasgerät 442...
-
Página 31: About These Instructions For Use
About these instructions for use 1 ABOUT THESE INSTRUCTIONS FOR The appliance can be converted to vacuum or blowing operation using attachable and detach- able accessory parts. ■ It is essential to read through these instruc- tions for use carefully before start-up. This is Designated use essential for safe working and trouble-free This vacuum/blowing appliance is designed for... -
Página 32: Scope Of Supply
Product description Scope of supply WARNING! The appliance is supplied with all accessory parts Risk of injury in a box. The items listed here are part of the Persons or animals can be severely in- scope of supply. Check that all items are in- jured due to objects vacuumed through cluded: the vacuum grille during blowing opera-... -
Página 33: Symbols On The Machine
Product description Symbols on the machine Product overview This section describes the parts and controls of Symbol Meaning the vacuum/blowing appliance. Accessory parts, see chapter 2.3 "Scope of supply", page 32. On/Off toggle switch. This switch is always set to On "I". -
Página 34: Safety Instructions
Safety instructions ■ 3 SAFETY INSTRUCTIONS The personal protective equipment com- prises: CAUTION! ■ Hearing protection (e.g. ear defenders, Danger of hearing impairment especially when working for than 2.5 hours a day) The appliance is extremely loud during ■ operation. This can cause hearing impair- Protective glasses ment to the operator and to persons and ■... -
Página 35: Safety In The Workplace
Safety instructions ■ ■ Ensure that your clothing does not come into Never operate the appliance with worn or de- contact with petrol. If petrol has got onto your fective parts. Worn or defective appliance clothing, change it immediately. parts can cause serious injuries. ■... -
Página 36: Assembly And Dismantling
Assembly and dismantling ■ Never operate the appliance with worn or de- NOTE fective parts. Always replace defective parts The length of the complete tube cannot with original spare parts from the manufac- be changed. The lower blower tube turer. If the appliance is operated with worn (02/1) cannot be pushed further over the or defective parts, guarantee claims against upper blower tube than the end stop ring... -
Página 37: Dismantling The Collecting Sack And The Vacuum Tubes
Start-up The two vacuum tubes are now firmly connected behind the bulge (09/4). The zip fastener and together. They are not intended to be detached carrying belt of the collecting sack must point from each other again. upwards. 3. Pull the hook and loop fastener (09/1) tight Opening the intake grille of the appliance (06) and close it. -
Página 38: Making And Pouring In The Petrol/Oil Mixture
Operating the motor ■ ■ Is the throttle lever easy to move and does it Pour in the petrol up to the 300, 400 or snap quickly back to the starting position 500 ml mark (e.g. 400 ml, see graphic). after being released? If not, clean it. Have it 2. -
Página 39: Starting The Engine
Operating the motor ■ Starting the engine Slowly release the throttle lever (17/1). Push it again if the motor no longer runs Set the appliance on the ground before starting properly. the motor. The blow or vacuum tubes fitted to the ■... -
Página 40: Changing The Motor Speed
Operating modes 7 OPERATING MODES NOTE If the choke was accidentally switched Working in blowing operation (18) on: Turn the rotary choke knob anti- The appliance can be carried with one hand in clockwise to the starting position and re- blowing operation. -
Página 41: Working In Vacuum Operation (19)
Maintenance and care ■ Working in vacuum operation (19) Do not fill the collecting sack completely. The vacuum power decreases if the col- In vacuum operation, the appliance must be car- lecting sack is full. ried with both hands. Hang the collecting sack ■... -
Página 42: Maintaining The Spark Plug (21)
Maintenance and care ■ ■ Let the filter sponge (20/3) dry thoroughly Screw the spark plug (21/3) back in by so it no longer contains any water. A wet hand and tighten it thoroughly using the filter can make the motor difficult to start. spark plug spanner (21/2). -
Página 43: Checking/Tightening The Appliance Screws (24)
Maintenance and care This regulating screw can only be adjusted with a special socket wrench not included in the scope of delivery. NOTE The carburettor must only be adjusted by an authorised service workshop. Checking/tightening the appliance screws (24) The screws of the appliance can loosen due to the vibrations of the motor. -
Página 44: Maintenance Schedule
Maintenance and care Maintenance schedule The following information relates to normal application conditions. Under special conditions, such as working for a particularly long time or in a very dirty working area, the specified maintenance intervals must be shortened accordingly. Parts are only allowed to be renewed by genuine spare parts. Interval Components Work to be performed... - Página 45 Maintenance and care Interval Components Work to be performed ■ If necessary Air filter Clean or replace ■ Fuel filter in the tank Renew ■ Carburettor Adjust idle setting ■ Cooling air inlet Clean ■ All accessible screws (ex- Retighten cept setscrews) ■...
-
Página 46: Transport
Transport ■ 9 TRANSPORT Drop a little oil into the spark plug open- ing. Transporting the appliance between two ■ Slowly pull on the starter handle so the working areas piston moves and the oil is distributed in ■ Switch off the motor. the cylinder. -
Página 47: Technical Data
Technical data 11 TECHNICAL DATA Item no.: 127380 Dimensions (L x W x H) [mm], without tubes 350 x 250 x 350 Weight [kg] ■ With accessories for blowing operation ■ With accessories for vacuum operation Displacement [cm 27.6 Maximum motor power [kW] Maximum motor speed [rpm] 8300 Spark plug... -
Página 48: Help In Case Of Malfunction
Help in case of malfunction 12 HELP IN CASE OF MALFUNCTION Malfunction Cause Remedy Motor does not start, or only Motor start was not carried out see chapter 6.1 "Starting the en- starts with difficulty. properly. gine", page 39 Spark plug is dirty, defective or see chapter 8.2 "Maintaining the the electrode spacing is not spark plug (21)", page 42... -
Página 49: Protection Of The Environment
Protection of the environment Malfunction Cause Remedy Motor starts abnormally and Appliance/motor parts have be- 1. Stop the motor. vibrates heavily. come detached and/or are dam- 2. Inspect the appliance for aged. damage. 3. Check the spark plug (see chapter 8.2 "Maintaining the spark plug (21)", page 42). -
Página 50: Guarantee
We hereby declare that this product in its marketed form conforms to the requirements of the harmon- ised EU Directives, EU safety standards and the product-specific standards. Product Manufacturer Duly authorised person Vacuum/blowing appliance AL-KO Geräte GmbH Andreas Hedrich Ichenhauser Str. 14 Ichenhauser Str. 14 Serial number D-89359 Kötz D-89359 Kötz... - Página 51 Traduction de la notice d’utilisation originale TRADUCTION DE LA NOTICE D’UTILISATION ORIGINALE Table des matières À propos de cette notice ......................... 53 Explications des symboles et des mentions................ 53 Description du produit ........................ 53 Utilisation conforme....................... 53 Éventuelles utilisations prévisibles .................. 53 Contenu de la livraison......................
- Página 52 Traduction de la notice d’utilisation originale 10 Entreposage ........................... 69 11 Caractéristiques techniques ...................... 70 12 Aide en cas de pannes ........................ 71 13 Protection de l'environnement ...................... 72 14 Garantie ............................ 73 15 Déclaration de conformité CE ...................... 73 Saug-/Blasgerät 442...
-
Página 53: Propos De Cette Notice
À propos de cette notice 1 À PROPOS DE CETTE NOTICE Les accessoires se montent et se démontent pour transformer l’appareil en aspirateur ou en ■ Lire impérativement la présente notice avec souffleur. attention avant la mise en service. C'est la condition pour un travail sûr et une bonne Utilisation conforme maniabilité. -
Página 54: Contenu De La Livraison
Description du produit Contenu de la livraison AVERTISSEMENT ! L’appareil est livré dans un carton avec tous ses Risque de blessures accessoires. La fourniture comprend tous les ar- Les objets aspirés en mode aspiration ticles énumérés ci-dessous. Vérifier que tous les par la grille d’aspiration et les objets souf- articles sont fournis : flés par le tube de soufflage peuvent... -
Página 55: Symboles Sur L'appareil
Description du produit Symboles sur l'appareil Symbole Signification Symbole sur la plaque signa- Symbole Signification létique : puissance sonore Interrupteur à bascule garantie en [dB(A)] Marche/Arrêt Cet interrup- teur est toujours en position Marche « I ». Si l’interrupteur Aperçu du produit est basculé sur « 0 », l’appa- Cette section décrit les pièces et les éléments de reil s’arrête aussitôt. -
Página 56: Consignes De Sécurité
Consignes de sécurité Équipement de protection individuel N° Pièce ■ Pour éviter les blessures à la tête et aux Grille d’aspiration Sous la grille d’aspira- membres, ainsi que des lésions de l'ouïe, il tion : lame de broyage et rotor convient de porter des vêtements et équipe- ments de protection réglementaires. -
Página 57: Sécurité De L'espace De Travail
Consignes de sécurité ■ ■ Ne jamais remplir le réservoir de l’appareil N’allumer l’appareil que lorsque personne ni dans une pièce fermée. Des vapeurs d’es- aucun animal ne se trouve dans la zone de sence peuvent s'accumuler sur le sol et pro- travail. -
Página 58: Sécurité De L'appareil
Montage et démontage leurs, affaiblissement de la force, change- Montage pour le mode soufflage ment de couleur ou d'état de la peau. En Raccorder le tube soufflage supérieur au règle générale, ces symptômes affectent les manchon de l’appareil (01). doigts, les mains ou le pouls. Le risque est 1. -
Página 59: Démontage Des Tubes De Soufflage
Montage et démontage Démontage des tubes de soufflage Ouvrir la grille d’aspiration (06) de l’appareil 1. Maintenir fermement l’appareil (06/1). Détacher le tube de soufflage inférieur du tube de soufflage supérieur (03) 2. Insérer avec force le tournevis (06/2) de la clé... -
Página 60: Démontage Du Sac De Collecte Et Des Tubes D'aspiration
Mise en service ■ 2. Faire glisser l’orifice d’insufflation (09/2) du Les poignées inférieure et supérieure sont- sac de collecte sur le manchon de soufflage elles fermement fixées à l’appareil ? Resser- (09/3) du tube coudé d’évacuation de l’air rer les poignées desserrées. jusqu’à... -
Página 61: Utilisation Du Moteur
Utilisation du moteur Réalisation du mélange essence/huile (13) 6. Vers dans le réservoir à carburant le mé- lange essence/huile préparé du flacon de Pour le moteur à 2 temps, il faut : mélange pour carburant (14/5) jusqu’en haut ■ de l’essence neuve sans plomb d’un indice de la graduation de niveau de remplissage d’octane d’au moins 90. - Página 62 Utilisation du moteur ■ De l’autre main, tirer d’abord avec pré- 1. Vérifier que le bouton rotatif du starter se caution et lentement sur la poignée du trouve en position initiale. Si ce n'est pas le starter (16/2) jusqu’à ressentir une résis- cas, le tourner jusqu’à...
-
Página 63: Changer Le Régime Du Moteur
Modes de fonctionnement Changer le régime du moteur ATTENTION ! Utiliser un régime de moteur faible pour les ma- Risque de blessure et de dommages tières et saletés légères et sèches, et un régime matériels plus élevé pour les matières et saletés humides Le jet d’air et les matières projetées plus lourdes. -
Página 64: Maintenance Et Entretien
Maintenance et entretien ■ Ne pas remplir entièrement le sac de col- ATTENTION ! lecte. La puissance d’aspiration diminue Risque d’endommagement de l’appa- quand le sac de collecte est entièrement reil rempli. L’aspiration de liquides endommage l’ap- ■ Quand un objet dangereux a été aspiré : pareil. -
Página 65: Maintenance De La Bougie D'allumage (21)
Maintenance et entretien 2. Nettoyage : 3. Vérification de la distance entre les élec- trodes : ■ essorer l’éponge filtrante (20/3) et la net- ■ toyer à l’eau savonneuse. Ne pas utiliser À l’aide d’un gabarit (21/5), vérifier que la d’essence ou d’autres solvants. distance entre les électrodes (21/6) me- sure 0,6 –... -
Página 66: Réglages Du Carburateur (23)
Maintenance et entretien ■ À l’aide d’un crochet métallique, extraire REMARQUE la tête d’aspiration (22/3) du réservoir à Les vis de réglage du carburateur ne carburant (22/2). doivent pas être modifiées. Pour cette ■ Vérifier le filtre à carburant (22/4). Si le raison, aucune clé... -
Página 67: Programme De Maintenance
Maintenance et entretien Programme de maintenance Les remarques suivantes se rapportent à des conditions d'utilisation normales. En cas de conditions particulières, comme une durée de travail quotidienne particulièrement longue ou une zone de travail très encrassée, les intervalles de maintenance indiqués doivent être raccourcis en conséquence. Lors du remplacement de pièces, n'utiliser que des pièces de rechange d'origine. - Página 68 Maintenance et entretien Intervalle Composants Travaux à effectuer ■ Si présence de défauts Filtre à air Remplacer ■ Filtre à carburant dans le ré- Remplacer servoir ■ Éléments amortissant les vi- Remplacer brations ■ Piège à sons Remplacer ■ Câble de démarrage Remplacer ■...
-
Página 69: Transport
Transport 9 TRANSPORT 3. Huiler le piston : ■ Laisser l’appareil entièrement refroidir. Transport de l’appareil d’une zone de travail à ■ Retirer la cosse à bougie et dévisser la une autre bougie. ■ Arrêter le moteur. ■ Déposer quelques gouttes d’huile dans ■... -
Página 70: Caractéristiques Techniques
Caractéristiques techniques 11 CARACTÉRISTIQUES TECHNIQUES Réf. : 127380 Dimensions (L x l x H) [mm], sans les tubes 350 x 250 x 350 Poids [kg] ■ avec les accessoires pour le mode soufflage ■ avec les accessoires pour le mode aspiration Cylindrée [cm 27,6 Puissance maximale du moteur [kW]... -
Página 71: Aide En Cas De Pannes
Aide en cas de pannes 12 AIDE EN CAS DE PANNES Panne Cause Élimination Le moteur ne démarre pas ou Le démarrage du moteur a été voir chapitre 6.1 "Démarrage du avec de grandes difficultés. mal effectué. moteur", page 61 La bougie est encrassée, défec- voir chapitre 8.2 "Maintenance tueuse ou la distance entre les de la bougie d’allumage (21)",... -
Página 72: Protection De L'environnement
Protection de l'environnement Panne Cause Élimination Le moteur se met à vibrer for- Des pièces mécaniques/du mo- 1. Arrêter le moteur. tement, anormalement. teur se sont détachées et/ou 2. Examiner l’appareil pour voir sont endommagées. s’il est endommagé. 3. Contrôler la bougie (voir chapitre 8.2 "Maintenance de la bougie d’allumage (21)", page 65). -
Página 73: Garantie
Nous déclarons par la présente que ce produit, sous la forme mise sur le marché, répond aux disposi- tions des directives CE harmonisées, des normes de sécurité de l'UE et des normes spécifiques aux produits. Produit Fabricant Mandataire Aspirateur/souffleur AL-KO Geräte GmbH Andreas Hedrich Ichenhauser Str. 14 Ichenhauser Str. 14 Numéro de série D-89359 Kötz D-89359 Kötz... - Página 74 Traducción del manual original de instrucciones TRADUCCIÓN DEL MANUAL ORIGINAL DE INSTRUCCIONES Índice Acerca de este manual de instrucciones .................. 76 Explicación de símbolos y palabras de señalización ............ 76 Descripción del producto ........................ 76 Uso previsto .......................... 76 Posible uso indebido previsible ..................... 76 Volumen de suministro......................
- Página 75 Traducción del manual original de instrucciones 10 Almacenamiento .......................... 92 11 Datos técnicos .......................... 93 12 Ayuda en caso de avería ........................ 94 13 Protección del medio ambiente ...................... 95 14 Garantía ............................ 96 15 Declaración de conformidad CE ..................... 96 2500043_a...
-
Página 76: Acerca De Este Manual De Instrucciones
Acerca de este manual de instrucciones 1 ACERCA DE ESTE MANUAL DE la cuchilla trituradora giratoria que hay montada sobre el eje del rotor y se acumulan en un saco INSTRUCCIONES colector. ■ Antes de ponerlo en marcha, es imprescindi- El aparato puede reequiparse con accesorios de ble leer atentamente este manual de instruc- quita y pon para aspirar o soplar. -
Página 77: Volumen De Suministro
Descripción del producto Volumen de suministro ¡ADVERTENCIA! El aparato se suministra dentro de una caja con Riesgo de lesiones todos sus accesorios. Las posiciones que aquí En el modo de soplado pueden producir- se listan forman parte del volumen de suministro. se lesiones graves a personas y anima- Compruebe que están presentes todas las posi- les debido a los objetos que se aspiran a... -
Página 78: Símbolos En El Aparato
Descripción del producto Símbolos en el aparato Símbolo Significado Símbolo de la placa de ca- Símbolo Significado racterísticas: Nivel de poten- Interruptor de encendido/ cia acústica garantizado en apagado Este interruptor [dB(A)] siempre está en la posición "I" encendido. Si el interrup- Vista general de las piezas tor se cambia a "0", el apara- Esta sección describe las partes y elementos de... -
Página 79: Instrucciones De Seguridad
Instrucciones de seguridad ■ La ropa debe ser adecuada (ajustada) y no N.º Componente debe estorbar. Debe utilizar una redecilla si Rejilla de aspiración. Debajo de la rejilla tiene el pelo largo. Nunca lleve prendas de de aspiración: cuchilla trituradora y rotor vestir o accesorios holgados que puedan en- gancharse en el aparato, por ejemplo, bufan- das, camisas anchas o colgantes largos. -
Página 80: Seguridad En El Lugar De Trabajo
Instrucciones de seguridad ■ ■ Si ha derramado gasolina, se han generado Apague siempre el aparato cuando no nece- vapores de gasolina. Por lo tanto, no arran- site aspirar o soplar, por ejemplo, para cam- que el aparato en el mismo lugar, sino al me- biar de zona de trabajo, realizar trabajos de nos a 3 m de distancia. -
Página 81: Montaje Y Desmontaje
Montaje y desmontaje ■ ■ Que funcionen todos los elementos de con boquilla redonda: genera un chorro de mando. aire circular para hojas y suciedad ligera y seca ■ Que todos los accesorios del modo de funcionamiento en cuestión estén monta- El tubo de soplado inferior está... -
Página 82: Montaje Para El Modo De Aspiración
Montaje y desmontaje Montaje para el modo de aspiración 3. Meta el tubo de aspiración superior (07/1) en el orificio de la carcasa (07/2) y gírelo con Una el tubo de aspiración inferior al tubo de fuerza en sentido contrario al de las agujas aspiración superior (05) del reloj hasta que encaje. -
Página 83: Puesta En Funcionamiento
Puesta en funcionamiento Saque el tubo de aspiración de la abertura de Prepare la mezcla de gasolina y aceite y la carcasa (12) viértala 1. Gire con fuerza en sentido de las agujas del ¡ATENCIÓN! reloj el tubo de aspiración (12/1) hasta que Peligro de daños en el motor se desencaje y se pueda retirar. -
Página 84: Funcionamiento Del Motor
Funcionamiento del motor 4. Gire el tapón (14/1) del depósito de combus- 3. Realice las siguientes funciones simultánea- tible lentamente para que la presión genera- mente: da de la mezcla de aire y gasolina del depó- ■ Con una mano, empuje firmemente hacia sito de combustible (14/2) pueda dispersarse abajo sobre el suelo el aparato por la al entorno lentamente. -
Página 85: Modificar El Número De Revoluciones Del Motor
Modos de funcionamiento 1. Compruebe si el botón giratorio del estárter Modificar el número de revoluciones del se encuentra en la posición inicial. Si no es motor así, gírelo en sentido contrario al de las agu- Utilice un número de revoluciones del motor bajo jas del reloj hasta que haga tope. -
Página 86: Trabajar En El Modo De Aspiración (19)
Modos de funcionamiento Trabajar en el modo de aspiración (19) ¡ADVERTENCIA! En el modo de aspiración, el aparato debe ope- Peligro de lesiones graves por compo- rarse con ambas manos. Cuélguese el saco co- nentes giratorios lector en el hombro izquierdo por la correa de Si la rejilla de aspiración está... -
Página 87: Mantenimiento Y Limpieza
Mantenimiento y limpieza ■ ■ Sujete la abertura de succión del tubo de Retire la esponja filtrante (20/3) del pivo- aspiración a tan solo unos centímetros te (20/4). por encima del suelo. 2. Limpieza: ■ No llene completamente el saco colector. ■... -
Página 88: Comprobación Y Sustitución Del Filtro De Combustible (22)
Mantenimiento y limpieza ■ 3. Comprobación de la distancia entre electro- Compruebe el filtro de combustible dos: (22/4). Si el fieltro se ha endurecido, está sucio u obstruido: Retire el filtro de com- ■ Compruebe con una galga (21/5) si la bustible (22/4) y coloque un filtro de com- distancia entre electrodos es de (21/6) bustible nuevo sobre el cabezal de aspi-... - Página 89 Mantenimiento y limpieza NOTA Los tornillos de ajuste del carburador no se pueden girar. Por eso no se ha inclui- do en el volumen de suministro ninguna llave de vaso para estos tornillos de ajus- 2500043_a...
-
Página 90: Plan De Mantenimiento
Mantenimiento y limpieza Plan de mantenimiento Las indicaciones que figuran a continuación se refieren a las condiciones de funcionamiento normales. En circunstancias especiales, por ejemplo, jornadas de trabajo especialmente largas o en áreas de tra- bajo muy sucias, deben acortarse los intervalos de mantenimiento especificados según corresponda. Solamente deberán sustituirse componentes por piezas de repuesto originales. - Página 91 Mantenimiento y limpieza Intervalo Componente Trabajo que debe realizarse ■ Si está defectuoso Filtro de aire Sustituir ■ Filtro de combustible del de- Sustituir pósito ■ Elementos de amortiguación Sustituir de vibraciones ■ Silenciador Sustituir ■ Cordón de arranque Sustituir ■...
-
Página 92: Transporte
Transporte ■ 9 TRANSPORTE Retire el capuchón de la bujía y desator- nille la bujía. Transportar el aparato entre dos áreas de ■ Vierta un poco de aceite en la abertura trabajo de la bujía. ■ Apague el motor. ■ Tire lentamente del asa de arranque para ■... -
Página 93: Datos Técnicos
Datos técnicos 11 DATOS TÉCNICOS Nº. art.: 127380 Dimensiones (L x An x Al) [mm], sin tubos 350 x 250 x 350 Peso [kg] ■ con el accesorio para modo de soplado ■ con el accesorio para modo de aspiración Cilindrada [cm 27,6 Potencia máxima del motor [kW]... -
Página 94: Ayuda En Caso De Avería
Ayuda en caso de avería 12 AYUDA EN CASO DE AVERÍA Problema Causa Solución El motor no arranca o lo hace El motor se arrancó mal. véase capítulo 6.1 "Arranque del con dificultad. motor", Página 84 La bujía está sucia, defectuosa véase capítulo 8.2 "Manteni- o la distancia entre electrodos miento de la bujía (21)", Pági-... -
Página 95: Protección Del Medio Ambiente
Protección del medio ambiente Problema Causa Solución Los gases de escape del mo- La relación de aceite de la mez- Vierta mezcla de gasolina y tor humean mucho y son azu- cla de gasolina y aceite es de- aceite con la relación de mezcla lados. -
Página 96: Garantía
Producto Fabricante Apoderado Aspirador/soplador AL-KO Geräte GmbH Andreas Hedrich Ichenhauser Str. 14 Ichenhauser Str. 14 Número de serie D-89359 Kötz D-89359 Kötz... - Página 97 Traduzione del manuale per l'uso originale TRADUZIONE DEL MANUALE PER L'USO ORIGINALE Sommario Su queste istruzioni per l'uso ...................... 99 Descrizione dei simboli e parole segnaletiche .............. 99 Descrizione del prodotto ......................... 99 Utilizzo conforme alla destinazione .................. 99 Possibile uso errato prevedibile .................... 99 Dotazione ..........................
- Página 98 Traduzione del manuale per l'uso originale 10 Conservazione .......................... 114 11 Specifiche tecniche ........................ 115 12 Supporto in caso di anomalie ....................... 116 13 Tutela dell'ambiente........................ 117 14 Garanzia ............................ 118 15 Dichiarazione di conformità CE .................... 118 Saug-/Blasgerät 442...
-
Página 99: Su Queste Istruzioni Per L'uso
Su queste istruzioni per l'uso 1 SU QUESTE ISTRUZIONI PER L'USO alta velocità. Grazie alle lame del biotrituratore rotanti montate sull'albero rotore le foglie e i detri- ■ Prima della messa in funzione, leggere atten- ti aspirati vengono triturati e raccolti in un cesto di tamente queste istruzioni per l'uso. -
Página 100: Dotazione
Descrizione del prodotto Dotazione ATTENZIONE! L'apparecchio con tutti gli accessori viene fornito Pericolo di infortunio! in una scatola. Il pacchetto include gli articoli Gli oggetti aspirati attraverso il soffiaggio elencati. Controllare se sono inclusi tutti gli artico- sulla grata di aspirazione e poi sui tubi soffianti possono ferire gravemente le persone o gli animali. -
Página 101: Simboli Sull'apparecchio
Descrizione del prodotto Simboli sull'apparecchio Panoramica prodotto Questa sezione descrive le parti e i comandi Simbolo Significato dell'apparecchio di aspirazione/soffiaggio. Acces- sori, vedere capitolo 2.3 "Dotazione", Pagi- Interruttore a levetta On/Off na 100. Questo Interruttore è sempre su On "I". Quando l'interrut- tore è... -
Página 102: Indicazioni Di Sicurezza
Indicazioni di sicurezza ■ 3 INDICAZIONI DI SICUREZZA L'attrezzatura di protezione individuale è co- stituita da: CAUTELA! ■ Protezione dell'udito (ad es. cuffie antiru- Rischio di danni all'udito more), soprattutto quando il tempo di la- voro supera 2,5 ore L'apparecchio è estremamente rumoroso ■... -
Página 103: Sicurezza Sul Posto Di Lavoro
Indicazioni di sicurezza ■ ■ Evitare il contatto tra pelle e prodotti a base Spegnere subito l'apparecchio in caso di inci- di oli minerali. Non inalare i vapori di benzina. dente per evitare ulteriori lesioni e danni. Per fare rifornimento indossare sempre dei ■... -
Página 104: Montaggio E Smontaggio
Montaggio e smontaggio ■ Non aspirare rami, pezzi di vetro, oggetti ta- 1. Allineare il tubo soffiante inferiore (02/1) con glienti, pezzi di metallo, pietre o altri oggetti. il tubo soffiante superiore (02/2) in modo che Questi danneggiano le lame di taglio e il roto- la scanalatura longitudinale (02/3) si trovi di fronte alla camma (02/4). -
Página 105: Montaggio Per La Modalità Di Aspirazione
Montaggio e smontaggio ■ Montaggio per la modalità di Il tubo di aspirazione è girato in modo aspirazione che le due frecce (05/3) e (05/4) si trovi- no sopra. Collegare il tubo di aspirazione inferiore con il 3. Inserire il tubo di aspirazione superiore (07/1) tubo di aspirazione superiore (05) nell'apertura dell'alloggiamento (07/2) e gira- 1. -
Página 106: Smontaggio Del Cesto Di Raccolta E Del Tubo Di Aspirazione
Messa in funzione ■ Smontaggio del cesto di raccolta e del Per la modalità di aspirazione: tubo di aspirazione ■ il cesto di raccolta è ben collegato al go- mito di scarico? In caso contrario, spin- Rimuovere il gomito di scarico dal connettore gere l'apertura di inflazione del cesto di (11) raccolta fino al gomito di scarico e tirare il... -
Página 107: Utilizzo Del Motore
Utilizzo del motore 3. Pulire il tappo del serbatoio, il serbatoio e le 3. Contemporaneamente: parti circostanti dell'apparecchio in modo che ■ Premere l'apparecchio sull'impugnatura non entri alcuna sporcizia nel serbatoio du- superiore (16/1) con una mano verso il rante il riempimento della miscela benzina/ pavimento. -
Página 108: Modificare La Velocità Del Motore
Tipi di funzionamento 2. Premere il pulsante di innesco (15/2) comple- 2. Quando si cambia la posizione in modalità di tamente circa 2-3 volte per pompare la mi- soffiaggio o aspirazione: Rilasciare l'accele- scela di benzina/olio nel carburatore. ratore (17/1). Il motore gira al minimo. 3. -
Página 109: Lavorare In Modalità Di Aspirazione (19)
Manutenzione e cura 2. Avviamento del motore: AVVISO ■ Estrarre il gomito di scarico del cesto di Non lavorare mai contro vento in modo raccolta dal connettore per collocare l'ap- da evitare di sporcare voi e le persone parecchio a terra e avviare il motore. che stanno dietro di voi. -
Página 110: Pulire/Sostituire Il Filtro Dell'aria (20)
Manutenzione e cura ■ Attendere fino a che il motore è completa- Manutenzione della candela (21) mente raffreddato. 1. Smontare la candela: ■ Indossare guanti protettivi. ■ Estrarre la spina della candela (21/1). ■ Sostituire le parti usurate o difettose solo con ■... -
Página 111: Impostazioni Del Carburatore (23)
Manutenzione e cura 1. Preparare l'apparecchio: Controllare/serrare le viti dell'apparecchio (24) ■ Per svuotare il serbatoio del carburante: Far funzionare il motore finché non si fer- Le vibrazioni possono fare allentare le viti del mo- ma da solo. tore. Per il controllo/serraggio delle viti dell'appa- recchio sono forniti in dotazione degli strumenti: ■... -
Página 112: Piano Di Manutenzione
Manutenzione e cura Piano di manutenzione Le indicazioni che seguono si riferiscono a condizioni d'uso normali. In presenza di condizioni particola- ri, come ad es. un orario di lavoro giornaliero particolarmente lungo o ambiente di lavoro molto sporco, gli intervalli di manutenzione specificati devono essere accorciati di conseguenza. In caso di sostituzione di componenti, utilizzare solo parti originali. - Página 113 Manutenzione e cura Intervallo Componenti Lavori da eseguire ■ Se difettoso Filtro dell'aria Sostituire ■ Filtro del carburante nel ser- Sostituire batoio ■ Elementi di smorzamento Sostituire delle vibrazioni ■ Silenziatore Sostituire ■ Corda di avviamento Sostituire ■ Cesto di raccolta Sostituire ■...
-
Página 114: Trasporto
Trasporto ■ 9 TRASPORTO Staccare la spina della candela e svitare la candela. Trasportare l'apparecchio tra due aree di ■ Lasciar cadere qualche goccia di olio lavoro nell'apertura della candela. ■ Spegnere il motore. ■ Tirare lentamente la maniglia dello starter ■... -
Página 115: Specifiche Tecniche
Specifiche tecniche 11 SPECIFICHE TECNICHE Cod. art.: 127380 Dimensioni (lung. x larg. x alt. ) [mm], senza tubi 350 x 250 x 350 Peso [kg] ■ con accessori per soffiaggio ■ con accessori per aspirazione Cilindrata [cm 27,6 Potenza massima motore [kW] Velocità... -
Página 116: Supporto In Caso Di Anomalie
Supporto in caso di anomalie 12 SUPPORTO IN CASO DI ANOMALIE Anomalia Causa Eliminazione Il motore non parte o parte L'avviamento del motore non è vedere capitolo 6.1 "Avviamento con difficoltà. stato eseguito in modo corretto. del motore", Pagina 107 La candela è incrostata, difetto- vedere capitolo 8.2 "Manuten- sa o la distanza tra gli elettrodi è... -
Página 117: Tutela Dell'ambiente
Tutela dell'ambiente Anomalia Causa Eliminazione Il fumo di scarico del motore è La parte di olio nella miscela di Versare la miscela corretta di pesante e bluastro. benzina/olio è troppo alta. benzina/olio. vedere capitolo 11 "Specifiche tecniche", Pagina 115 vedere capitolo 5.2 "Preparare la miscela di benzina/olio e riempire", Pagina 106 Le impostazioni del carburatore... -
Página 118: Garanzia
A questo mezzo dichiariamo che questo prodotto nella forma distribuita sul mercato soddisfa i requisiti delle direttive UE, degli standard di sicurezza UE e degli standard specifici di prodotto armonizzati. Prodotto Costruttore Procuratore Apparecchio di aspirazione/sof- AL-KO Geräte GmbH Andreas Hedrich fiaggio Ichenhauser Str. 14 Ichenhauser Str. 14 D-89359 Kötz D-89359 Kötz... - Página 119 Перевод оригинального руководства по эксплуатации ПЕРЕВОД ОРИГИНАЛЬНОГО РУКОВОДСТВА ПО ЭКСПЛУАТАЦИИ Оглавление Информация о руководстве по эксплуатации ................ 121 Условные обозначения и сигнальные слова.............. 121 Описание продукта ........................ 121 Использование по назначению .................. 121 Случаи предусмотренного применения................ 122 Комплект поставки...................... 123 Символы...
- Página 120 Перевод оригинального руководства по эксплуатации 10 Хранение ............................. 138 11 Технические характеристики...................... 139 12 Устранение неисправностей ...................... 140 13 Защита окружающей среды ....................... 141 14 Гарантия ............................ 142 15 Заявление о соответствии ЕС .................... 142 Saug-/Blasgerät 442...
-
Página 121: Информация О Руководстве По Эксплуатации
Информация о руководстве по эксплуатации 1 ИНФОРМАЦИЯ О РУКОВОДСТВЕ 2 ОПИСАНИЕ ПРОДУКТА ПО ЭКСПЛУАТАЦИИ Данное всасывающее/воздуходувное устрой- ■ ство и является портативным садовым Обязательно прочитайте данное руко- инструментом, которое используется для сду- водство по эксплуатации перед вводом в вания, всасывания и измельчения листвы и эксплуатацию. -
Página 122: Случаи Предусмотренного Применения
Описание продукта Случаи предусмотренного ОСТОРОЖНО! применения Опасность получения травм и мате- Всасывающее/воздуходувное устройство не риального ущерба предназначено для коммерческого использо- Сильная воздушная струя устройства вания в общественных парках, на спортивных и шум могут привести к травмам и па- площадках, в сельском и лесном хозяйствах. нике... -
Página 123: Комплект Поставки
Описание продукта Комплект поставки Символы на устройстве Устройство поставляется в коробке со всеми Символ Значение дополнительными компонентами. Комплект поставки включает в себя перечисленные по- Тумблерный переключа- зиции. Проверьте, включены ли все позиции: тель включения/выключе- ния. Этот переключатель всегда находится в поло- жении... -
Página 124: Обзор Продукта
Указания по технике безопасности Символ Значение Но- компонента мер Символ на заводской та- бличке: Вес устройства без Рукоятка дросселя дополнительных принад- 4,8 kg Рукоятка стартера лежностей Нижняя рукоятка Символ на заводской та- бличке: гарантированный Верхняя рукоятка уровень звуковой мощно- Заборная решетка. Под заборной ре- сти... -
Página 125: Средства Индивидуальной Защиты
Указания по технике безопасности ■ ■ Любой человек, работающий с этим Транспортируйте и храните топливо и мас- устройством, должен быть отдохнувшим, ло только в разрешенных контейнерах. здоровым и находиться в хорошей форме. Убедитесь, что дети не имеют доступа к Если по состоянию здоровья утомление хранящемуся... -
Página 126: Безопасность Людей, Животных И Имущества
Указания по технике безопасности ■ Безопасность людей, животных и Длительная эксплуатация устройства под- имущества вергает оператора вибрации и может вы- звать проблемы с кровообращением ■ Используйте устройство только для тех (симптом «белого пальца»). Чтобы умень- задач, для которых оно предусмотрено. шить... -
Página 127: Монтаж И Демонтаж
Монтаж и демонтаж 4 МОНТАЖ И ДЕМОНТАЖ ПРИМЕЧАНИЕ Поставьте всасывающее/воздуходувное Длину трубы в сборе нельзя изменить. устройство для монтажа и демонтажа на ров- Нижняя обдувочная труба (02/1) не мо- ную, устойчивую поверхность. жет выдвигаться дальше стопорного Дополнительные компоненты являются круп- кольца... -
Página 128: Демонтаж Мешка Для Сбора И Всасывающей Трубы
Монтаж и демонтаж 2. Сдвигайте обе всасывающие трубы, пока (08/4). Два выступа (08/5) отвода отрабо- не произойдет следующее: танного воздуха должны быть повернуты вниз. ■ болты (05/5) не будут зафиксированы в фиксирующем отверстии (05/6). 2. Вставляйте отвод отработанного воздуха (08/1) в разъемы устройства (08/2), пока ■... -
Página 129: Ввод В Эксплуатацию
Ввод в эксплуатацию 2. Толкайте решетку всасывания (12/2) от Подготовка бензо-масляной смеси и устройства до щелчка. заполнение ВНИМАНИЕ! 5 ВВОД В ЭКСПЛУАТАЦИЮ Опасность повреждения двигателя Проверка устройства Чистый бензин может привести к по- Проверка перед началом работы вреждению и полному отказу двигате- ■... -
Página 130: Работа Двигателя
Работа двигателя 3. Протрите крышку топливного бака, топ- 2. Полностью прижмите кнопку праймера ливный бак и поверхность вокруг него, (15/2) примерно 7–10 раз, чтобы закачать чтобы при заливании бензо-масляной сме- бензо-масляную смесь в карбюратор. си в топливный бак не попала грязь. 3. -
Página 131: Изменение Частоты Вращения Двигателя
Работа двигателя Горячий пуск (15, 16, 17) Изменение частоты вращения двигателя Когда двигатель все еще прогрет, то есть вскоре после выключения, выполняется «го- Используйте низкую частоту вращения двига- рячий пуск». Дроссель не используется. теля для легких сухих материалов и грязи, а более... -
Página 132: Режимы
Режимы ■ 7 РЕЖИМЫ средняя частота вращения двигателя: для материала среднего размера и ве- Работа в воздуходувном режиме (18) са, например, мокрых листьев. В воздуходувном режиме устройство можно ■ высокая частота вращения двигателя: нести в одной руке. для очень тяжелых или влажного ма- териала, например, свежего... -
Página 133: Техобслуживание И Уход
Техобслуживание и уход 5. Левой рукой вставляйте отвод отработан- Периодичность работ по техническому обслу- ного воздуха мешка для сбора в разъем живанию и уходу приведена в графике техни- устройства, пока он не встанет на место. ческого обслуживания (см. глава 8.6 "График технического... -
Página 134: Проверка/Замена Топливного Фильтра (22)
Техобслуживание и уход 2. Оценка схемы свечи зажигания: Рекомендуется проводить такие работы в ав- торизованном сервисном центре. ■ Если цвет свечи зажигания рыже-ко- ричневый: Двигатель работает нор- 1. Подготовка устройства: мально, свеча зажигания в порядке. ■ Очистка топливного бака: Оставьте При... -
Página 135: Проверка/Затяжка Винтов (24)
Техобслуживание и уход ПРИМЕЧАНИЕ Установка карбюратора может выпол- няться только в авторизованном сер- висном центре. Проверка/затяжка винтов (24) Из-за вибрации двигателя винты могут осла- биться. Для проверки/затяжки винтов устрой- ства доступны приведенные ниже инструмен- ты, которые входят в комплект поставки: ■... -
Página 136: График Технического Обслуживания
Техобслуживание и уход График технического обслуживания Нижеприведенные указания относятся только к нормальным условиям эксплуатации. В других случаях (особенно при длительной ежедневной эксплуатации или чрезмерно загрязненной рабо- чей зоне) указанные интервалы обслуживания следует соответственно сократить. При замене деталей можно использовать только оригинальные запасные части. Интервал... - Página 137 Техобслуживание и уход Интервал Компоненты Выполняемые работы ■ В случае неисправности Воздушный фильтр Замена ■ Топливный фильтр в баке Замена ■ Элементы гашения вибра- Замена ции ■ Шумоглушители Замена ■ Трос стартера Замена ■ Мешок для сбора Замена ■ Предупреждающие на- Замена...
-
Página 138: Транспортировка
Транспортировка ■ 9 ТРАНСПОРТИРОВКА Откройте решетку всасывания и очи- стите нож измельчителя и ротор. На- Транспортировка устройства между двумя несите немного масла на нож измель- рабочими зонами чителя с помощью тряпки. ■ Выключите двигатель. 3. Смажьте маслом цилиндры: ■ Держите устройство за рукоятки. ■... -
Página 139: Технические Характеристики
Технические характеристики 11 ТЕХНИЧЕСКИЕ ХАРАКТЕРИСТИКИ Артикульный номер: 127380 Размеры (Д х Ш х В) [мм] без труб 350 x 250 x 350 Вес [кг] ■ с принадлежностями для воздуходувного режима ■ с принадлежностями для всасывающего режима Объем двигателя [см 27,6 Максимальная... -
Página 140: Устранение Неисправностей
Устранение неисправностей 12 УСТРАНЕНИЕ НЕИСПРАВНОСТЕЙ Неисправность Причина Способы устранения Двигатель не запускается Запуск двигателя был выпол- см. глава 6.1 "Запуск двига- или запускается с трудом. нен неправильно. теля", Стр. 130 Свеча зажигания загрязнена, см. глава 8.2 "Уход за свечей неисправна или межэлектрод- заживания... -
Página 141: Защита Окружающей Среды
Защита окружающей среды Неисправность Причина Способы устранения Отработавшие газы двигате- Содержание масла в бензо- Залейте бензо-масляную ля сильно дымятся и имеют масляной смеси слишком вы- смесь с правильным соотно- синеватый оттенок. сокое. шением компонентов. см. глава 11 "Технические ха- рактеристики", Стр. 139 см. -
Página 142: Гарантия
Настоящим заявляем, что данный продукт в реализуемой на рынке форме соответствует требо- ваниям гармонизированных директив ЕС, стандартов безопасности ЕС и специальных стан- дартов, распространяющихся на данный продукт. Продукт Производитель Уполномоченное лицо Всасывающее/воздуходувное AL-KO Geräte GmbH Андреас Гедрих устройство Ихенхаузерштр., 14 Ихенхаузерштр., 14 D-89359 г. Кёц D-89359 г. Кёц... - Página 143 Оригінал посібника з експлуатації ОРИГІНАЛ ПОСІБНИКА З ЕКСПЛУАТАЦІЇ Зміст Інформація про посібник із експлуатації ................... 145 Умовні позначення та сигнальні слова ................ 145 Опис пристрою .......................... 145 Використання за призначенням.................. 145 Можливе передбачене використання ................ 145 Комплект поставки...................... 146 Умовні позначення на приладі.................. 147 Огляд...
- Página 144 Оригінал посібника з експлуатації 10 Зберігання............................ 161 11 Технічні характеристики ...................... 162 12 Усунення несправностей ...................... 163 13 Захист довкілля ........................... 164 14 Гарантія............................ 165 15 Декларація про відповідність стандартам ЄС ................ 165 Saug-/Blasgerät 442...
-
Página 145: Інформація Про Посібник Із Експлуатації
Інформація про посібник із експлуатації 1 ІНФОРМАЦІЯ ПРО ПОСІБНИК ІЗ Пристрій приводиться в дію за допомогою двигуна внутрішнього згоряння. Двигун ЕКСПЛУАТАЦІЇ внутрішнього згоряння створює ■ Обов'язково прочитайте цей посібник із високошвидкісний повітряний потік у роторі. експлуатації перед введенням в Всмоктані листя та бруд подрібнюються за експлуатацію. -
Página 146: Комплект Поставки
Опис пристрою НЕБЕЗПЕКА! УВАГА! Вибухо- і пожежонебезпека Небезпека пошкодження обладнання Всмоктувані вибухові і легкозаймисті продукти, гарячий попіл, продукти Всмоктування рідини може привести згоряння без відкритого полум'я або до порушень нормальної роботи. палаючі сигарети призводять до Вологі листя або трава призводять до негайної... -
Página 147: Умовні Позначення На Приладі
Опис пристрою Но компонента Умовне Значення мер позначення Нижня обдувна труба з круглою Умовне позначення на форсункою кришці паливного бака. 40:1 Заповніть суміш в Верхня вигнута обдувна труба співвідношенні 40:1, тобто 40 частин бензину до 1 Відвід відпрацьованого повітря частини масла для Нижня... -
Página 148: Правила Техніки Безпеки
Правила техніки безпеки 3 ПРАВИЛА ТЕХНІКИ БЕЗПЕКИ ОБЕРЕЖНО! Небезпека втрати слуху Пристрій видає сильний шум під час роботи. Це може привести до погіршення слуху оператора, а також людей і тварин, які знаходяться поблизу. ■ Використовуйте беруші під час роботи. ■ Тримайте... -
Página 149: Поводження З Бензином І Маслом
Правила техніки безпеки ■ ■ До засобів індивідуального захисту У разі пролиття бензину виникають пари належать: бензину. Тому не запускайте пристрій в тому ж місці, а лише на відстані не менше ■ засоби захисту слуху (наприклад, 3 м від нього. беруші), особливо, коли... -
Página 150: Безпека Пристрою
Монтаж і демонтаж ■ ■ Завжди вимикайте пристрій, коли вам не якщо він не має пошкоджень, особливо потрібен всмоктувальний або запобіжної решітки. повітродувний режими, наприклад у разі ■ якщо всі елементи керування зміни робочої зони, проведення робіт з працюють справно. техобслуговування... -
Página 151: Демонтаж Обдувних Труб
Монтаж і демонтаж 2. Вставте верхню обдувну трубу (01/1) в Вийміть верхню обдувну трубу з роз'ємів роз'єми пристрою (01/2) до гучного пристрою (04) клацання засувки (01/6) в роз'ємах 1. Вставляйте викрутку (04/1) зі свічкового пристрою. ключа горизонтально в отвір (04/2) засувки в... -
Página 152: Демонтаж Мішка Для Збору І Всмоктувальної Труби
Введення в експлуатацію Вийміть верхню всмоктувальну трубу з Зафіксуйте плечовий ремінь мішка для пристрою (07) збору (10) 1. Надійно тримайте повернену решітку 1. Защепіть карабін (10/1) плечового ременя всмоктування. на кільцях (10/2) мішка для збору. 2. Зіставте верхню всмоктувальну трубу 2. -
Página 153: Підготування Бензо-Масляної Суміші І Заповнення
Введення в експлуатацію ■ Чи легко повертається вмикач/вимикач з 1. Утримуйте контейнер для змішування положення «I» в положення «0» і чи палива (13/1) в горизонтальному повертається він назад у вихідне положенні та заповніть його необхідною положення автоматично? Якщо ні, то кількістю... -
Página 154: Робота Двигуна
Робота двигуна 6 РОБОТА ДВИГУНА 6. Одночасно виконайте описану нижче процедуру. НЕБЕЗПЕКА! ■ Сильно поверніть верхню ручку Небезпека отруєння пристрою (16/1) рукою вниз до землі і відпрацьованими газами двигуна повністю притисніть важіль газу (17/1). ■ Вдихання відпрацьованих газів Потягніть іншою рукою за ручку двигуна... -
Página 155: Зміна Частоти Обертання Двигуна
Режими ■ Дайте тросу стартера розмотатися, Постійно встановлюйте максимальну але не відпускайте ручку стартера частоту обертання (17) (16/2). 1. Потягніть важіль блокування газу (17/2) 4. Повторюйте попередній крок кілька разів, вгору, доки він не ввійде в виїмку важеля доки двигун не запуститься та заглухне. газу... -
Página 156: Робота У Всмоктувальному Режимі (19)
Режими ПРИМІТКА ПРИМІТКА У жодному разі працюйте проти Слідкуйте за тим, щоб не всмоктати напрямку вітру, щоб не забруднити дрібних тварин. людей, які стоять позаду вас. 1. Встановіть всмоктувальні труби і мішок 1. Змонтуйте обдувальні труби (див. pозділ для збору (див. pозділ 4.3 "Монтаж для 4.1 "Монтаж... -
Página 157: Технічне Обслуговування Та Догляд
Технічне обслуговування та догляд 8 ТЕХНІЧНЕ ОБСЛУГОВУВАННЯ ТА 4. Монтаж повітряного фільтра ■ ДОГЛЯД Насадіть губчастий фільтр (20/3) на штирі (20/4) і вставте його до упору. Правильне техобслуговування і догляд ■ Вставте корпус повітряного фільтра необхідні для підтримки працездатності і безпеки... -
Página 158: Перевірка/Заміна Паливного Фільтра (22)
Технічне обслуговування та догляд ■ Знову закрутіть свічку запалювання Налаштування карбюратора (23) (21/3) вручну і надійно затягніть її до На пристрої видно такі регулювальні гвинти упору за допомогою викрутки (21/2). карбюратора: ■ Знову надійно вставте наконечник ■ L = гвинт регулювання вмісту горючої свічки... -
Página 159: Графік Технічного Обслуговування
Технічне обслуговування та догляд Графік технічного обслуговування Подальші вказівки стосуються нормальних умов експлуатації. За особливих умов, наприклад при тривалому щоденному використанні пристрою або дуже забрудненої робочої зони, необхідно скоротити вказані інтервали обслуговування відповідним чином. Під час заміни деталей можна використовувати тільки оригінальні запасні частини. Інтервал... - Página 160 Технічне обслуговування та догляд Інтервал Компонент Виконувані роботи ■ За потреби Повітряний фільтр Очищення або заміна ■ Паливний фільтр в баку Заміна ■ Карбюратор Регулювання холостого ходу ■ Впуск охолоджуючого Очищення повітря ■ Усі доступні гвинти (окрім Підтягування регулювальних) ■ Елементи...
-
Página 161: Транспортування
Транспортування ■ 9 ТРАНСПОРТУВАННЯ Відкрийте решітку всмоктування і очистіть ніж подрібнювача і ротор. Транспортування пристрою між двома Нанесіть трохи масла на ніж робочими зонами подрібнювача за допомогою ганчірки. ■ Вимкніть двигун. 3. Змастіть маслом циліндри: ■ Тримайте пристрій за ручки. ■... -
Página 162: Технічні Характеристики
Технічні характеристики 11 ТЕХНІЧНІ ХАРАКТЕРИСТИКИ Арт. №: 127380 Розміри (Д x Ш x В) [мм] без труб 350 x 250 x 350 Вага [кг] ■ з приладдям для повітродувного режиму ■ з приладдям для всмоктувального режиму Об'єм двигуна [см 27,6 Максимальна... -
Página 163: Усунення Несправностей
Усунення несправностей 12 УСУНЕННЯ НЕСПРАВНОСТЕЙ Несправність Причина Усунення Двигун не запускається або Запуск двигуна було виконано див. pозділ 6.1 "Запуск запускається важко. неправильно. двигуна", Стор. 154 Свічка запалювання див. pозділ 8.2 "Догляд за забруднена, несправна або свічкою запалювання (21)", відстань між електродами Стор. 157 неправильна. -
Página 164: Захист Довкілля
Захист довкілля Несправність Причина Усунення Відпрацьовані гази двигуна Вміст масла в бензо-масляної Залийте бензо-масляну суміш сильно димлять і мають суміші зависокий. із правильним синюватий відтінок. співвідношенням компонентів. див. pозділ 11 "Технічні характеристики", Стор. 162 див. pозділ 5.2 "Підготування бензо-масляної суміші і заповнення", Стор. 153 Налаштування... -
Página 165: Гарантія
Ми заявляємо, що цей виріб у формі, в якій він представлений на ринку, відповідає вимогам гармонізованих директив ЄС, стандартів безпеки ЄС і застосовних до нього стандартів. Виріб Виробник Уповноважена особа Всмоктувальний/повітродувний AL-KO Geräte GmbH Андреас Гедріх пристрій Ichenhauser Str. 14 Ichenhauser Str. 14 D-89359 Kötz D-89359 Kötz... - Página 166 Saug-/Blasgerät 442...
- Página 167 2500043_a...
- Página 168 Darko Opara s.p. (+386)17225850 (+386)17225851 Agromarket d.o.o. (+381)34308000 (+381)3430816 ZIMAS A.S. (+90)2324580586 (+90)2324572697 TOV AL-KO KOBER (+380)44/392-07-08 (+380)44/392-07-09 AL-KO GERÄTE GmbH | Head Quarter | Ichenhauser Str. 14 | 89359 Kötz | Deutschland Telefon: (+49)8221/203-0 | Telefax: (+49)8221/203-8199 | www.al-ko.com 10_2014...