Tabla de contenido
Publicidad
Idiomas disponibles
Idiomas disponibles
Enlaces rápidos
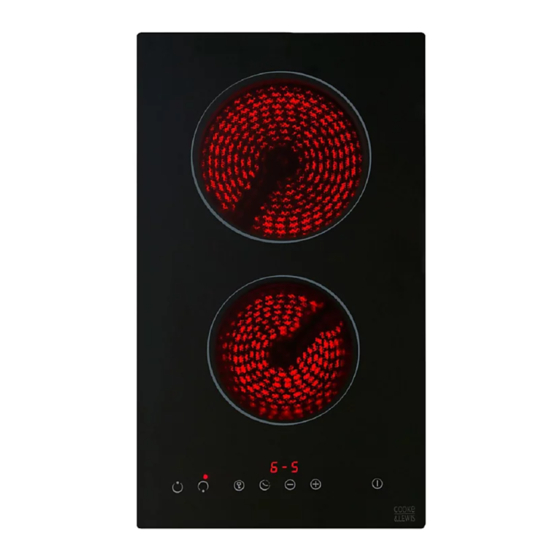
CLCER30 3663602842231
NOTE: A4 and has been resized to A5
NOTE: A4 and has been resized to A5
SEPARATIONS JOB INFO
PID #: 00001
Agency job #: 10298
Product Description: Hob
Barcode:
CLCER30 3663602842231
PROCESS
BLACK
VERSION #
1
R
07/08/17
10/08/17
AM
TjB
This file is the property of Kingfisher Group Plc. No copying, alteration or amendment is permitted without
written authorisation from the Kingfisher Brand Team.
Brand: Cooke & Lewis
Brand Contact: xxxxx@xxxxx.com
Vendor: Asian Global
No. of new line drawings: xx
Page size A4 / No. of printed pages 80
3
4
5
6
00/00/17
00/00/17
00/00/17
00/00/17
INITIALS
INITIALS
INITIALS
INITIALS
7
8
00/00/17
00/00/17
INITIALS
INITIALS
V1.1
V20817
Publicidad
Tabla de contenido

Manuales relacionados para Cooke & Lewis CLCER30


Resumen de contenidos para Cooke & Lewis CLCER30
- Página 1 CLCER30 3663602842231 V20817 NOTE: A4 and has been resized to A5 NOTE: A4 and has been resized to A5 SEPARATIONS JOB INFO PID #: 00001 Brand: Cooke & Lewis Agency job #: 10298 Brand Contact: xxxxx@xxxxx.com Product Description: Hob Vendor: Asian Global Barcode: No.
- Página 2 ÖNEMLI - ț ț ț [02] x1 [01] x 1...
- Página 3 Preparation Préparation Przygotowanie Vorbereitung Preparación Preparação Installation Installation Installation Instalare Utilisation Benutzung Utilizare ș ț Cuidados y Mantenimiento...
- Página 4 Installation Installation Installation Instalare Caution: • The ceramic hob must be installed by qualifi ed personnel or technicians. Please never conduct the operation by yourself. • The hob must not be installed directly above a dishwasher, fridge, freezer, washing machine or clothes dryer, as the humidity may damage the hob electronics.
- Página 5 the appliance. Do not use silicone sealant or PVA to secure the hob. Doing so will prevent an engineer removing the appliance to facilitate a repair. Attention : • La plaque de cuisson en céramique doit être installée par un personnel qualifi é ou des techniciens. Ne jamais effectuer l'opération par vous-même.
- Página 6 • Si la plaque de cuisson est installée au-dessus d'un tiroir ou d'un placard, une barrière de protection thermique est installée en dessous de la base de la plaque de cuisson. • Il convient de fi xer la plaque de cuisson dans le plan de travail à l'aide des supports de fi xation et du ruban d'étanchéité...
- Página 7 • zapewniono odpowiedni dopływ świeżego powietrza z zewnątrz szafek do podstawy płyty. • Jeśli płyta jest zamontowana nad szufl adą lub szafką, upewnij się, że pod podstawą płyty umieszczono zabezpieczenie termiczne. • Płyta powinna być zamocowana w blacie za pomocą wsporników mocujących i taśmy uszczelniającej dostarczonej wraz z urządzeniem.
- Página 8 Baubehörden in Verbindung und konsultieren Sie weitergehende Vorschriften. • Verwenden Sie hitzebeständige und leicht zu reinigende Oberfl ächen (z. B. Keramikfl iesen) für die Wandfl ächen, die sich um das Kochfeld herum befi nden. Nach Installation des Kochfelds stellen Sie bitte Folgendes sicher: •...
- Página 9 • Соответствующий изолирующий выключатель, обеспечивающий полное обесточивание прибора, подключен к проводке, установлен и расположен в соответствии с местными нормативными требованиями к монтажу электропроводки. Изолирующий выключатель должен быть утвержденного образца с зазором между разомкнутыми контактами 3 мм во всех полюсах сети постоянного тока (или в активных фазных проводах, если местные нормативные...
- Página 10 • Dacă plita este instalată deasupra unui cuptor, cuptorul este echipat cu un ventilator de răcire. • Instalarea este efectuată în conformitate cu toate cerinţele de respectare a spaţiului liber şi toate standardele şi reglementările aplicabile. • În cablajul permanent este integrat un comutator de separare adecvat, care asigură întreruperea completă...
- Página 11 • Si la placa está instalada encima de un horno, este tiene un ventilador integrado. • La instalación deberá cumplir con todos los requisitos de espacio libre y los estándares y normativas aplicables. • Un interruptor de aislamiento adecuado que permite una desconexión completa de la red eléctrica está...
- Página 12 • A superfície de trabalho é feita de um material resistente ao calor. • Se a placa estiver instalada sobre um forno, o forno tem um ventilador incorporado. • A instalação está em conformidade com todos os requisitos relativos a espaço e todas as normas e regulamentações aplicáveis.
- Página 13 • Çalışma yüzeyi ısıya dayanıklı bir malzemeden üretilmiştir. • Ocak bir fırının üzerine monte edilecekse fırının dahili soğutucu fanının olması gerekir. • Montaj, tüm alan gereklilikleri ile standartlar ve yönetmelikler ile uyumlu olarak gerçekleşmelidir. • Kalıcı kablo tesisatına, ana güç kaynağından tamamen ayrılmayı sağlayan uygun bir izolasyon anahtarı...
- Página 14 760mm 150mm >55mm >150mm 520mm 290mm Caution! Before drilling it is extremely important to check the wall for hidden pipes, electrical cables etc using an appropriate detection device. Warning: Good ventilation is required around the appliance for easier dissipation of heat and low power consumption.
- Página 15 Внимание! Перед сверлением обязательно проверьте стену на наличие скрытых труб, электрических кабелей и т. д., используя для этого подходящий детектор. Предупåреждение. Обеспечьте надлежащую вентиляцию вокруг прибора, чтобы обеспечить более эффективный отвод тепла и снизить энергопотребление. Вокруг прибора должно оставаться достаточно свободного пространства. Безопасное расстояние между керамической варочной...
- Página 16 Air exit 50mm 20mm Air intake The ceramic hob must be well ventilated and the air inlet and outlet must not be blocked. Ensure you select a heat-resistant work surface to mount the ceramic hob. La plaque de cuisson en céramique doit être bien ventilée ; l'entrée et la sortie d'air ne doivent pas être bloquées.
- Página 17 60mm Cut an aperture in the worktop using a jigsaw as shown. The worktop should be at least 30mm thick and made of a heat resistant material. Découper une ouverture dans le plan de travail à l'aide d'une scie sauteuse, comme indiqué. Le plan de travail doit être d'au moins 30 mm d'épaisseur et être fabriqué...
- Página 18 Seal the cut edge of the worktop using silicone sealant or PVA adhesive. IMPORTANT: ensure that either product is fully cured as per the manufacturer’s instructions before you commence installation of the hob. This hob MUST NOT be sealed into the worktop. Sceller le bord découpé...
- Página 19 Selle el borde cortado de la encimera con sellador de silicona o pegamento PVA. IMPORTANTE: Asegúrese de que el producto esté completamente seco según las instrucciones del fabricante antes de iniciar la instalación de la encimera. Esta placa NO DEBE quedar sellada en la encimera.
- Página 20 [02] [02] x1 Stretch out and stick the supplied tape along the underside edge of the hob, ensuring the ends overlap. Trim off any excess tape and dispose of it. Étirer et coller la bande fournie sur tout le rebord inférieur de la plaque de cuisson, en assurant le chevauchement des extrémités.
- Página 21 [01] [01] x1 Once the worktop edge has cured, and the tape is fi tted, position the hob into the cutout in the worktop. Apply gentle downwards pressure onto the hob to push it into the worktop ensuring a good seal around the outer edge.
- Página 22 Após a extremidade da bancada estar seca e a fi ta aplicada, posicione a placa encaixando-a no corte existente na bancada. Aplique uma ligeira pressão na placa, no sentido descendente, para que a mesma fi que introduzida na bancada, certifi cando-se de que existe uma boa vedação em torno da extremidade exterior.
- Página 23 Installation All installation must be carried out by a competent person or qualifi ed electrician. Before connecting the mains supply ensure that the mains voltage corresponds to the voltage on the rating plate. Direct Connection The appliance must be connected directly to the mains using an omnipolar circuit breaker with a minimum opening of 3 mm between the contacts.
- Página 24 Installation Toute l'installation doit être effectuée par une personne compétente ou un électricien qualifi é. Avant de raccorder le câble d'alimentation, s'assurer que la tension de secteur correspond à la tension indiquée sur la plaque signalétique. Raccordement direct L'appareil doit être raccordé directement au secteur à l'aide d'un disjoncteur omnipolaire avec une ouverture minimale de 3 mm entre les contacts.
- Página 25 Montaż musi zostać wykonany przez osobę kompetentną lub wykwalifi kowanego elektryka. Przed podłączeniem do sieci upewnić się, czy parametry zasilania odpowiada napięciu podanym na tabliczce znamionowej. Bezpośrednie podłączenie Urządzenie należy podłączyć bezpośrednio do sieci zasilającej, korzystając z wyłącznika wielobiegunowego z minimalnym rozwarciem między stykami wynoszącym 3 mm. Monter musi upewnić...
- Página 26 Installation Die gesamte Installation muss von einer fachkundigen Person oder einem ausgebildeten Elektriker durchgeführt werden. Stellen Sie vor dem Anschließen an die Stromversorgung sicher, dass die Netzspannung zur Spannungsangabe auf dem Typenschild passt. Direkter Anschluss Das Gerät muss mithilfe eines mehrpoligen Leistungsschalters mit einem Mindestabstand zwischen den Kontakten von 3 mm direkt an das Netz angeschlossen werden.
- Página 27 Установка должна выполняться компетентным лицом или квалифицированным электриком. Перед подключением прибора к сети удостоверьтесь, что напряжение сети соответствует напряжению, указанному в паспортной табличке прибора. Прямое подключение Прибор должен быть подключен напрямую к сети через многополюсный автоматический выключатель с минимальным расстоянием между контактами 3 мм. Правильность...
- Página 28 Instalarea Instalarea trebuie să fi e realizată de o persoană competentă sau un electrician califi cat. Înainte de conectarea la reţeaua electrică, asiguraţi-vă că tensiunea reţelei corespunde tensiunii specifi cate pe plăcuţă. Legătură directă Aparatul trebuie conectat direct la reţea cu ajutorul unui disjunctor monopolar cu o deschidere minimă a contactelor de 3 mm.
-
Página 29: Instalación
Instalación Toda la instalación deberá ser realizada por una persona competente o un electricista cualifi cado. Antes de conectar la corriente eléctrica asegúrese de que la tensión de la red se corresponde con la de la placa de características técnicas. Conexión directa El aparato debe conectarse directamente a la red eléctrica mediante un disyuntor omnipolar con una apertura mínima de 3 mm entre los contactos. - Página 30 Instalação A instalação tem de ser efetuada por uma pessoa competente ou por um eletricista qualifi cado. Antes de ligar a rede elétrica, certifi que-se de que a tensão da rede corresponde à tensão na placa de classifi cação. Ligação direta O aparelho tem de ser ligado diretamente à...
- Página 31 Montaj Montajın tamamı, yetkili bir kişi veya uzman bir elektrik tesisatçısı tarafından yapılmalıdır. Ana güç kaynağını bağlamadan önce ana voltajın, anma değeri plakasındaki voltajla uyumlu olduğundan emin olun. Doğrudan Bağlantı Cihaz, omnipolar devre kesici kullanılarak kontaklar arasında minimum 3 mm'lik bir açıklıkla doğrudan ana güç...
-
Página 32: Before You Start
Utilisation Benutzung Utilizare Before you start When the power is switched on at the switched fused spur, the buzzer will sound once, three zeroes will be displayed briefl y on the control panel and go off. The appliance is ready for use. CAUTION: When the ON/OFF key (D) is pressed for three seconds, the ceramic hob returns to off mode if no other operation is carried out within 20 seconds. -
Página 33: Using The Timer
Heating zone operation When the ON/OFF key (D) “ ” is pressed, all the indicators show “---”. 1. Select the cooking zone you wish to use by pressing the “ ” key (A). The display will either show accordingly. 2. Select the power level by pressing the “+” key (C) “ ”... - Página 34 2. Press the Timer key (F) “ ”, the timer indicator fl ashes with a zero for 5 seconds; if you do not select a time within 5 seconds this will be disabled. 3. Using the “+” or “–” buttons, you can adjust the time duration from 1 to 120 minutes. If you press and hold “+”...
- Página 35 ș ț Cuidados y Mantenimiento WARNING: Always switch off the electricity supply before performing maintenance work. In the event of a fault, contact customer services. Damaged power cables should be replaced by a competent person or qualifi ed electrician. For domestic use only. Never place an empty pan on the hob as this will cause the overheat sensor to switch off the appliance automatically.
- Página 36 CAUTION: Avoid rubbing with any abrasive or with the base of the pans, etc, as this will wear the markings on the top of the ceramic hob over time. • Clean the ceramic hob on a regular basis to prevent the build up of food residue. Never use: •...
-
Página 37: Avant De Commencer
Utilisation Benutzung Utilizare Avant de commencer Lors de la mise sous tension sur le boîtier de dérivation avec fusibles et interrupteur, l'alarme retentit une fois, trois zéros s'affi chent brièvement sur le panneau de commande puis s'éteignent. L'appareil est prêt à l'emploi. ATTENTION : lorsque la touche MARCHE/ARRÊT (D) est enfoncée pendant trois secondes, la plaque de cuisson en céramique revient en mode Arrêt si aucune autre opération n'est effectuée dans les 20 secondes. -
Página 38: Mode De Sécurité (Sécurité Enfant)
Fonctionnement de la zone de cuisson Lorsque la touche MARCHE/ARRÊT (D) « » est activée, tous les voyants indiquent « --- ». 1. Sélectionner la zone de cuisson souhaitée en appuyant sur la touche « » (A). s'affi che en conséquence. 2. -
Página 39: Utilisation De La Minuterie
Utilisation de la minuterie Il est possible d'utiliser cette fonction pour éteindre les deux zones de cuisson de manière indépendante. La minuterie peut être réglée jusqu'à 120 minutes. 1. Sélectionner la zone de cuisson à l'aide de la touche (A) « »... - Página 40 ș ț Cuidados y Mantenimiento AVERTISSEMENT : toujours couper l'alimentation électrique avant d'effectuer des opérations de maintenance. En cas de problème, contacter le service client. Les câbles d'alimentation endommagés doivent être remplacés par une personne compétente ou un électricien qualifi é. Pour un usage domestique uniquement.
- Página 41 Type de saleté Méthode de nettoyage Produits de nettoyage Plastique fondu Utiliser un racloir spécial Produit nettoyant vitrocéramique pour retirer pour céramique les résidus ATTENTION : éviter de frotter la surface céramique avec des produits abrasifs ou de faire glisser les casseroles, etc. car, avec le temps, cela pourrait endommager les marquages sur la plaque de cuisson en céramique.
-
Página 42: Przed Rozpoczęciem Użytkowania
Utilisation Benutzung Utilizare Przed rozpoczęciem użytkowania Po włączeniu zasilania za pomocą wyłącznika z bezpiecznikiem rozlegnie się dźwięk brzęczyka, a na panelu sterowania na krótko wyświetlone zostaną trzy zera, po czym zgasną. Urządzenie jest gotowe do użytku. UWAGA: Po wciśnięciu przez trzy sekundy przycisku WŁ./WYŁ. (D), płyta ceramiczna wróci do trybu wyłączenia, jeśli w ciągu 20 sekund nie zostanie wykonana żadna inna czynność. - Página 43 Obsługa strefy grzewczej Gdy przycisk WŁ./WYŁ. (D) „ ” jest naciśnięty, wszystkie wskaźniki wyświetlają „---”. 1. Należy wybrać żądaną strefę grzewczą naciskając przycisk „ ” (A). Na wyświetlaczu pojawi się „ ” lub „ ”. 2. Wybrać poziom mocy, naciskając przycisk „+” (C) „ ”...
- Página 44 Korzystanie z czasomierza (timera) Tej funkcji można użyć do niezależnego wyłączenia obu stref gotowania. Maksymalne ustawienie czasomierza wynosi 120 minut. 1. Wybrać odpowiednią strefę gotowania za pomocą przycisku (A) „ ” oraz odpowiedni poziom mocy za pomocą przycisku (C). 2. Nacisnąć przycisk czasomierza (F) „ ”;...
- Página 45 ș ț Cuidados y Mantenimiento OSTRZEŻENIE: Przed rozpoczęciem prac konserwacyjnych należy zawsze wyłączyć zasilanie elektryczne. W przypadku usterki skontaktować się z działem obsługi klienta. Uszkodzone przewody zasilania powinny zostać wymienione przez kompetentną osobę lub wykwalifi kowanego elektryka. Wyłącznie do użytku w gospodarstwie domowym. Nigdy nie umieszczać...
- Página 46 Typ zabrudzenia Metoda czyszczenia Materiały czyszczące Stopione Użyć skrobaczki do Specjalny środek czyszczący do tworzywo sztuczne powierzchni ceramicznej, aby powierzchni ceramicznych usunąć pozostałości UWAGA: Unikać ocierania urządzenia przy użyciu materiałów ściernych lub spodu patelni itp., ponieważ z czasem może to spowodować powstawanie śladów na powierzchni płyty ceramicznej.
-
Página 47: Vor Dem Start
Utilisation Benutzung Utilizare Vor dem Start Wird der Strom an dem geschalteten Schutzschalter eingeschaltet, ertönt einmal ein akustisches Signal und auf dem Bedienfeld werden kurz drei Nullen angezeigt. Das Gerät ist betriebsbereit. ACHTUNG: Wird die EIN/AUS-Taste (D) drei Sekunden lang gedrückt gehalten, wird das Ceran-Kochfeld in den Aus-Modus versetzt, sofern innerhalb der nächsten 20 Sekunden keine weitere Bedienung erfolgt. - Página 48 Bedienung der Kochstellen Wird die EIN/AUS-Taste (D) „ “ gedrückt, zeigen alle Anzeigen „---“. 1. 1. Wählen Sie die gewünschte Kochstelle durch Drücken der „ “-Taste (A) aus. Auf dem Display werden entweder „ “ oder „ “ angezeigt. 2. Wählen Sie die Leistungsstufe durch Drücken der „+“-Taste (C) „ “...
-
Página 49: Verwendung Des Timers
Verwendung des Timers Diese Funktion kann verwendet werden, um beide Kochstellen unabhängig voneinander auszuschalten. Der Timer kann für eine Dauer von bis zu 120 Minuten eingestellt werden. 1. Wählen Sie die entsprechende Kochstelle über (A) „ “ und die erforderliche Leistung über (C) aus. - Página 50 ș ț Cuidados y Mantenimiento WARNUNG: Schalten Sie vor der Durchführung jeglicher Wartungsarbeiten die Stromversorgung aus. Wenden Sie sich bei einer Störung an den Kundendienst. Beschädigte Stromkabel sollten durch eine fachkundige Person bzw. einen ausgebildeten Elektriker ersetzt werden. Nur für den Hausgebrauch. Niemals eine leere Pfanne auf dem Kochfeld platzieren.
- Página 51 Schmutzart Reinigungsmethode Reinigungsmaterialien Leichte Verschmutzungen Mit einem feuchten Tuch Reinigungsschwamm säubern und mit einem weichen Tuch trockenwischen. Geschmolzene Kunststoffe Einen für Cerankochfelder Spezieller geeigneten Kratzer verwenden, Cerankochfeld-Reiniger um die Ablagerungen zu entfernen ACHTUNG: Vermeiden Sie die Verwendung von Scheuermitteln und das Reiben mit der Unterseite von Pfannen usw., da dies mit der Zeit zur Abnutzung der auf dem Kochfeld angebrachten Markierungen führt.
-
Página 52: Перед Началом Эксплуатации
Utilisation Benutzung Utilizare Перед началом эксплуатации После включения питания в коммутационной коробке, прозвучит один звуковой сигнал и на панели управления на короткий промежуток времени отобразятся три нуля. Прибор готов к работе. ВНИМАНИЕ! При нажатии и удержании кнопки включения/выключения (D) в течение трех... - Página 53 Использование конфорок При нажатии кнопки включения/выключения (D) " " на всех индикаторах отобразится символ "---". 1. Выберите необходимую конфорку с помощью кнопок (A) " ". На дисплее отобразится символ " " или " " соответственно. 2. Выберите необходимый уровень мощности, увеличив его с помощью кнопки (C) " "...
-
Página 54: Использование Таймера
Использование таймера Эту функцию можно использовать для выключения обеих конфорок независимо друг от друга. Максимальное время установки таймера — 120 минут. 1. Выберите конфорку с помощью кнопки (А) " " и необходимый уровень мощности с помощью кнопки (С). 2. Нажмите кнопку таймера (F) " ";... - Página 55 ș ț Cuidados y Mantenimiento ПРЕДУПРЕЖДЕНИЕ. Всегда отключайте электропитание перед проведением работ по техническому обслуживанию. При обнаружении неполадок обратитесь в Центр обслуживания клиентов. Замена поврежденных кабелей питания должна производиться компетентным лицом или квалифицированным электриком. Только для бытового использования. Никогда не ставьте на варочную панель пустую кастрюлю, так как в этом случае датчик...
- Página 56 Вид загрязнения Способ очистки Моющее средство Светлые пятна Очистите с помощью влажной Губка для очистки ткани, а затем протрите насухо мягкой тканью Расплавившийся пластик Используйте специальный Специальное скребок для стеклокерамических моющее средство для поверхностей, чтобы удалить керамических поверхностей остатки пластика ВНИМАНИЕ! Не...
- Página 57 Соответствует всем требуемым Техническим регламентам Таможенного союза . Производитель \ продавец товара не несет ответственности за причинение ущерба здоровью или имуществу вследствие эксплуатации товара по истечению срока службы. Дата изготовления (месяц.год) см. на упаковке. Данный прибор не предназначен для использования детьми, а так же лицами, имеющими физические, нервные...
-
Página 58: Înainte De A Începe
Utilisation Benutzung Utilizare Înainte de a începe Când alimentarea este pornită de la întrerupătorul comutat cu siguranţă, se va emite un semnal sonor, se afi şează trei zerouri pentru puţin timp pe panoul de control, după care dispar. Aparatul este gata de utilizare. - Página 59 Operarea zonei de gătit Când tasta ON/OFF (Pornire/Oprire) (D) „ ” este apăsată, toate indicatoarele afi şează „---”. 1. Selectaţi zona de gătit pe care doriţi să o utilizaţi apăsând tasta „ ” (A). Prin urmare, afi şajul va indica fi e „ ”, fi...
- Página 60 Utilizarea temporizatorului Puteţi folosi această funcţie pentru a opri cele două zone de gătit în mod independent. Temporizatorul se poate seta până la 120 de minute. 1. Selectaţi zona de gătit dorită cu (A) „ ” şi selectaţi nivelul de putere necesar cu tasta (C). 2.
- Página 61 ș ț Cuidados y Mantenimiento AVERTISMENT: Deconectaţi întotdeauna alimentarea electrică înainte de a efectua lucrări de întreţinere. În caz de defecţiune, contactaţi serviciul clienţi. Cablurile de alimentare deteriorate trebuie înlocuite de persoane sau electricieni califi caţi. Numai pentru uz domestic. Nu puneţi o tigaie goală...
- Página 62 Tip de murdărie Metodă de curăţare Soluţii de curăţenie Plastic topit Folosiţi o racletă potrivită pentru Soluţie specială de curăţat sticlă sau ceramică pentru a materiale ceramice îndepărta resturile ATENȚIE: Evitaţi frecarea cu materiale abrazive sau cu fundul tigăilor, etc., pentru că astfel vor rămâne semne pe suprafaţa plitei ceramice în timp.
-
Página 63: Antes De Empezar
Utilisation Benutzung Utilizare Antes de empezar Al encender el interruptor con fusible, el zumbador sonará una vez, y se mostrarán tres ceros brevemente en el panel de control. El aparato está listo para su uso. PRECAUCIÓN: Cuando la tecla de encendido/apagado (D) se mantiene pulsada durante tres segundos, la placa cerámica vuelve al modo apagado si no se efectúa ninguna otra operación en los siguientes 20 segundos. -
Página 64: Modo De Seguridad (Bloqueo Infantil)
Funcionamiento de la zona de cocción Al pulsar la tecla de encendido/apagado (D) " ", todos los indicadores muestran "---". 1. Seleccione la zona de cocción que desea utilizar pulsando la tecla " " (A). En la pantalla aparecerá " "... -
Página 65: Uso Del Temporizador
Uso del temporizador Puede utilizar esta función para apagar ambas zonas de cocción de forma independiente. Puede ajustar el temporizador hasta a 120 minutos. 1. Seleccione la zona de cocción pulsando (A) " " y seleccione el nivel de potencia requerido pulsando (C). - Página 66 ș ț Cuidados y Mantenimiento ADVERTENCIA: Desconecte siempre la alimentación eléctrica antes de efectuar tareas de mantenimiento. En caso de avería, póngase en contacto con el servicio de atención al cliente. Los cables de alimentación dañados debe sustituirlos un electricista cualifi cado o un técnico competente.
-
Página 67: Línea De Atención Al Cliente (Número Gratuito)
Tipo de suciedad Método de limpieza Materiales de limpieza Plásticos fundidos Use un raspador adecuado para Limpiador especial de cerámica vidrio cerámico para eliminar los residuos PRECAUCIÓN: Evite frotar con cualquier abrasivo o con la base de las ollas y similares, ya que esto hará... -
Página 68: Antes De Começar
Utilisation Benutzung Utilizare Antes de começar Quando a alimentação é ligada na tomada derivada com fusível e interruptor, o alarme sonoro emite som uma vez e são apresentados momentaneamente três zeros no painel de controlo que desaparecem em seguida. O aparelho está pronto para ser utilizado. CUIDADO: quando a tecla para LIGAR/DESLIGAR (D) é... - Página 69 Funcionamento da zona de aquecimento Quando a tecla para Ligar/Desligar (D) " " é pressionada, todos os indicadores apresentam "---". 1. Selecione a zona de confeção que pretende utilizar premindo a tecla " " (A). O ecrã indica " " ou " "...
-
Página 70: Utilizar O Temporizador
Utilizar o temporizador Pode utilizar esta função para desligar ambas as zonas de confeção de forma independente. Pode defi nir o temporizador até 120 minutos. 1. Selecione a zona de confeção relevante utilizando (A) " " e selecione o nível de potência pretendido utilizando (C). - Página 71 ș ț Cuidados y Mantenimiento AVISO: Desligue sempre a alimentação elétrica antes de realizar a manutenção. Em caso de problemas, entre em contacto com o serviço de atendimento ao cliente. Os cabos de alimentação danifi cados devem ser substituídos por uma pessoa competente ou por um eletricista qualifi...
-
Página 72: Linha De Atendimento Ao Cliente (Gratuita)
Tipo de sujidade Método de limpeza Materiais de limpeza Plásticos derretidos Utilizar um raspador adequado Produto de limpeza especial para vidro cerâmico para remover para cerâmica os resíduos CUIDADO: evite esfregar com qualquer abrasivo ou com a base de panelas e outros, pois tal irá... -
Página 73: Çalıştırmadan Önce
Utilisation Benutzung Utilizare Çalıştırmadan önce Cihaz, anahtarlamalı sigortalı destek aracılığıyla çalıştırıldığında zil bir kez çalar ve kontrol panelinde kısa bir süreliğine üç adet sıfır rakamı görüntülenip kapanır. Cihaz kullanıma hazırdır. DİKKAT: AÇMA/KAPAMA tuşu (D) üç saniye basılı tutulduğunda, 20 saniye içerisinde herhangi bir işlem yapılmazsa seramik ocak kapalı... - Página 74 Isıtma alanının çalıştırılması AÇMA/KAPAMA tuşu (D) " " basılı olduğunda tüm göstergeler "---" sembolünü görüntüler. 1. " " tuşuna (A) basarak kullanmak istediğiniz pişirme alanını seçin. Ekranda duruma göre " " veya " " görüntülenir. 2. Güç seviyesini, "+" tuşunu (C) " "...
- Página 75 Zamanlayıcının kullanımı Bu işlevi, iki pişirme alanını birbirinden bağımsız olarak kapatmak için kullanabilirsiniz. Zamanlayıcı 120 dakikaya kadar ayarlayabilirsiniz. 1. (A) " " tuşunu kullanarak ilgili pişirme alanını, (C)'yi kullanarak ise gerekli güç seviyesini seçin. 2. Zamanlayıcı tuşuna (F) " " bastığınızda zamanlayıcı göstergesinde 5 saniyeliğine sıfır rakamı yanıp söner.
- Página 76 ș ț Cuidados y Mantenimiento UYARI: Bir bakım işlemi gerçekleştirmeden önce her zaman güç kaynağını kapatın. Bir arıza durumunda müşteri hizmetleriyle iletişime geçin. Hasar görmüş güç kabloları, yetkili bir kişi veya elektrik tesisatçısı tarafından değiştirilmelidir. Sadece evsel kullanıma yöneliktir. Aşırı ısınma sensörünün cihazı otomatik olarak kapatmasına sebep olacağı için ocağın üzerine asla içi boş...
- Página 77 DİKKAT: Seramik ocak üzerindeki işaretlerin zaman içerisinde aşınmasına sebep olacağı için herhangi bir aşındırıcı maddeyi veya tava tabanlarını ocak yüzeyine sürtmeyin. • Yemek artıklarının birikmesini önlemek için seramik ocağı düzenli olarak temizleyin. Asla kullanılmaması gerekenler: • Seyreltilmemiş yıkama sıvıları • Bulaşık makinesi deterjanları •...
- Página 78 Distribuidor: Distributor: Distribuidor: Manufacturer, Fabricant, Hersteller, Producator, Fabricante: Distributeur: Dystrybutor: Distribuitor:...