Tabla de contenido
Publicidad
Idiomas disponibles
Idiomas disponibles
Enlaces rápidos
All manuals and user guides at all-guides.com
1. 7 L M AX
1. 5 L
1. 5 L
1 L
1 L
.5 L
.5 L
MODELS/MODÈLE
MODELS/MODÈLE
MODELOS
MODELOS
SPILLGUARD™ ELECTRIC KETTLE
READ ALL INSTRUCTIONS BEFORE USING THIS APPLIANCE
Manuel d'Instructions
BOUILLOIRE ÉLECTRIQUE SPILLGUARD™
LIRE TOUTES LES INSTRUCTIONS AVANT D ' UTILISER CET APPAREIL
Manual de Instrucciones
HERVIDOR ELECTRICO SPILLGUARD™
LEA TODAS LAS INSTRUCCIONES ANTES DE USAR ESTE APARATO
Manual de Instruções
JARRA ELÉTRICA PARA FERVER ÁGUA SPILLGUARD™
LEIA TODAS AS INSTRUÇÕES ANTES DE USAR ESTE APARELHO
1. 7 L M AX
1. 5 L
1. 5 L
1 L
.5 L
5960
5960
5961
5961
Instruction Manual
1 L
.5 L
Publicidad
Tabla de contenido

Manuales relacionados para Oster 5960


Resumen de contenidos para Oster 5960
- Página 1 1. 7 L M AX 1. 5 L 1. 5 L 1. 7 L M AX 1. 5 L 1. 5 L .5 L .5 L .5 L .5 L 5960 5960 MODELS/MODÈLE MODELS/MODÈLE 5961 5961 MODELOS MODELOS Instruction Manual SPILLGUARD™ ELECTRIC KETTLE READ ALL INSTRUCTIONS BEFORE USING THIS APPLIANCE Manuel d’Instructions...
-
Página 2: Important Safeguards
• DO NOT operate any appliance with a damaged cord or plug or after the appliance malfunctions, or has been damaged in any manner. Return this appliance to the nearest Oster® Authorized Service Center for examination, repair or adjustment • The use of accessory attachments not recommended by the manufacturer may cause hazards or injuries •... - Página 3 All manuals and user guides at all-guides.com SAVE THESE INSTRUCTIONS POWER CORD SPECIAL INSTRUCTIONS A short power supply cord is provided to reduce the hazards resulting from becoming entangled in or tripping over a longer cord If a longer detachable power-supply cord or extension cord is used, the marked electrical rating of the extension cord should be the same as that of your product.
-
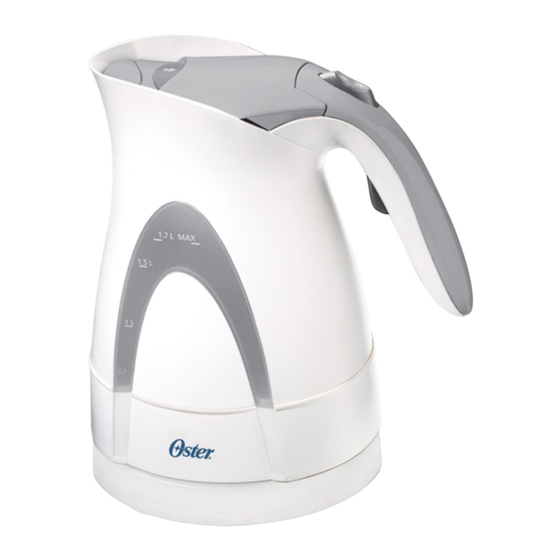
Página 4: Description Of The Appliance
All manuals and user guides at all-guides.com DESCRIPTION OF THE APPLIANCE 1. 7 L M A X 1. 5 L 1. 5 L .5 L .5 L 1. Lid Release Button 2. Removable Mesh Filter 3. On/Off (I/O) Switch 4. Ergonomic Handle 5. Water Release Button 6. Water Window 7. Power Base... - Página 5 All manuals and user guides at all-guides.com INSTRUCTIONS FOR USE BEFORE USING YOUR KETTLE WARNING: TO AVOID SCALDING, handle this kettle with care as water is heating, boiling, and cooling. The lid must remain in place during use to avoid steam burns. Keep spout away from persons as scalding can result from steam.
- Página 6 2. Lift kettle. 3. Press water release button in and pour. 4. When finished pouring, release the button. USING YOUR OSTER® ELECTRIC KETTLE 1. Position the power base on a flat, heat resistant surface, as close as possible to a power outlet.
- Página 7 All manuals and user guides at all-guides.com FILTER REMOVAL/CLEANING/REFITTING Important: The kettle must be switched off “O”, disconnected from the power outlet and allowed to cool down completely prior to removing or refitting the filter. Do not use exces- sive force, as this might damage the filter or the lid. 1.
- Página 8 Keep the original sales receipt. Proof of purchase is required to obtain warranty performance. OSTER® dealers, service centers, or retail stores selling OSTER® products do not have the right to alter, modify, or any way change the terms and conditions of this warranty.
- Página 9 • Ne vous servez pas d’un appareil dont le cordon, la fiche ou la prise est abîmée, qui a mal fonctionné ou qui a été endommagé. Retournez l’appareil au Centre de Service Après-Vente Oster® agréé pour lui faire subir les contrôles, les réparations ou les réglages requis •...
- Página 10 All manuals and user guides at all-guides.com CONSERVER CES INSTRUCTIONS CONSIGNES IMPORTANTES Cet appareil comprend un cordon court afin de ne pas risquer de faire trébucher, comme pourrait le faire un cordon plus long. Une rallonge peut être utilisé si les précautions voulues sont adoptées. Lors de l’utilisation d’une rallonge, les caractéristiques électriques de celle-ci doivent être d’au moins 15 ampères et de 120 volts.
-
Página 11: Description De L'appareil
All manuals and user guides at all-guides.com DESCRIPTION DE L’APPAREIL 1. 7 L M A X 1. 5 L 1. 5 L .5 L .5 L 1. Bouton d’ouverture du couvercle 2. Filtre amovible en fine maille 3. Interrupteur MARCHE-ARRÊT 4. Poignée ergonomique 5. Gâchette pour verser 6. Hublot de niveau 7. Socle chauffant... - Página 12 All manuals and user guides at all-guides.com MANUEL D’INSTRUCTIONS AVANT D’UTILISER VOTRE BOUILLOIRE ÉLECTRIQUE OSTER® AVERTISSEMENT: POUR NE PAS VOUS ÉCHAUDER, manipulez prudemment la bouilloire quand l’eau chauffe, bout et refroidit. Gardez toujours le couvercle bien fermé et n’orientez pas le bec verseur vers qui que ce soit, sans quoi la vapeur risquerait de brûler et d’échauder.
- Página 13 All manuals and user guides at all-guides.com COMMENT VERSER 1. Tenez fermement la poignée, de façon à pouvoir accéder à la gâchette du bout du doigt. 2. Levez la verseuse. 3. Appuyez sur la gâchette puis versez. 4. Relâchez la gâchette lorsque vous avez fini de verser. MODE D’EMPLOI DE LA BOUILLOIRE ELECTRIQUE SANS-FIL 1.
- Página 14 All manuals and user guides at all-guides.com RETRAIT, NETTOYAGE ET REMISE EN PLACE DU FILTRE Important : Réglez la bouilloire à l’arrêt, débranchez-la et attendez qu’elle ait complète- ment refroidi avant de retirer le filtre ou de le remettre en place. N’usez pas de force, vous pourriez abîmer le filtre ou le couvercle.
- Página 15 être transféré. Conservez le reçu d ‘achat original. Une preuve d’achat est requise pour que la garantie puisse appliquer. Les revendeurs, centres de service ou magasins Oster® n’ont pas le droit de transformer, modifier ou de changer, de quelque façon que ce soit, les termes et conditions de cette garantie.
-
Página 16: Precauciones Importantes
• NO opere ningún artefacto con un cable o enchufe dañado, después de que el arte facto haya fallado o si se cae al suelo o se daña de cualquier otra manera. Regrese el artefacto al Centro de Servicio Oster® Autorizado más cercano para examinarlo, repararlo o para ajustarlo mecánica o eléctricamente •... -
Página 17: Instrucciones Especiales Del Cable Electrico
All manuals and user guides at all-guides.com CONSERVE ESTAS INSTRUCCIONES INSTRUCCIONES ESPECIALES DEL CABLE ELECTRICO El artefacto cuenta con un cable eléctrico corto como medida de seguridad para prevenir el riesgo de tropezar, tirar o enredarse con un cable más largo. Si se utiliza un cable de extensión (1) la capacidad nominal eléctrica del cable de exten- sión debe ser el mismo del producto. -
Página 18: Descripcion Del Artefacto
All manuals and user guides at all-guides.com DESCRIPCION DEL ARTEFACTO 1. 7 L M A X 1. 5 L 1. 5 L .5 L .5 L 1. Tapa con botón dispensador 2. Filtro de malla removible 3. Interruptor de encendido/apagado (I/O) 4. Mango ergonómico 5. Botón dispensador del agua 6. Ventanilla del agua 7. Base de Poder... -
Página 19: Antes De Utilizar Su Hervidor De Agua
All manuals and user guides at all-guides.com INSTRUCCIONES DE USO ANTES DE UTILIZAR SU HERVIDOR DE AGUA ADVERTENCIA: PARA EVITAR SERIAS QUEMADURAS, sostenga este hervidor de agua con cuidado cuando el agua esté calentándose, hirviendo y enfriándose. La tapa debe estar bien colocada en su lugar durante su uso para evitar quemaduras. Mantenga la boquilla fuera del alcance de las personas, ya que podrían quemarse por causa del vapor. - Página 20 4. Cuando termine de servir, suelte el botón. UTILIZANDO SU HERVIDOR DE AGUA ELECTRICO OSTER® 1. Coloque la base de poder de su hervidor de agua en una superficie lisa, resistente al calor y tan cerca como sea posible de un tomacorriente eléctrico.
-
Página 21: Removiendo/Limpiando/ Volviendo A Colocar El Filtro
All manuals and user guides at all-guides.com REMOVIENDO/LIMPIANDO/ VOLVIENDO A COLOCAR EL FILTRO Importante: El hervidor de agua debe estar en la posición de apagado “O”, desconecta- do del tomacorriente. Además, debe permitirse que esté completamente frío antes de remover el filtro o volverlo a colocar. No use fuerza excesiva, ya que esto podría dañar el filtro o la tapa. - Página 22 Centro de Servicio OSTER® Autorizado. Además, esta garantía no cubre: actos de la naturaleza, tales como incendios, inundaciones, huracanes o tornados.
-
Página 23: Precauções Importantes
• NÃO opere nenhum eletrodoméstico com o fio ou plugue danificados, se o eletro doméstico falhou, se caiu no chão ou foi danificado de qualquer outra maneira. Leve o eletrodoméstico ao um Centro de Serviço Autorizado Oster® mais próximo para ser examinado e reparado •... - Página 24 All manuals and user guides at all-guides.com GUARDE ESTAS INSTRUçõES INSTRUCCIONES ESPECIALES DEL CABLE ELECTRICO O aparelho conta com um fio elétrico curto como medida de segurança para impedir o risco de tropeços ocasionados por um fio mais longo. Caso seja necessário usar um fio de extensão (1) a capacidade nominal elétrica do mesmo deve ser igual ao do produto.
-
Página 25: Descrição Do Produto
All manuals and user guides at all-guides.com DESCRIçÃO DO PRODUTO 1. 7 L M A X 1. 5 L 1. 5 L .5 L .5 L 1. Tampa com botão dispensador 2. Filtro de tela que pode ser removido 3. Interruptor de ignição para ligar e desligar (I/O) 4. Alça ergonômica 5. Botão para dispensar a água 6. Visor do nível de água 7. Base de força... - Página 26 All manuals and user guides at all-guides.com INSTRUçõES DE USO ANTES DE UTILIZAR SUA JARRA ELÉTRICA PARA FERVER ÁGUA CUIDADO: A FIM DE EVITAR QUEIMADURAS SÉRIAS, manuseie com cuidado quando a jarra de água estiver esquentando, fervendo água ou estiver esfriando. A tampa deve estar bem colocada em seu devido lugar durante o uso, para evitar queimaduras.
- Página 27 4. Ao terminar de servir, solte o botão. USANDO SUA JARRA ELÉTRICA PARA FEVER ÁGUA OSTER® 1. Coloque a base da jarra de água em uma superfície lisa, resistente ao calor e o mais próximo possível de uma tomada elétrica.
- Página 28 All manuals and user guides at all-guides.com REMOVENDO/LIMPANDO E COLOCANDO O FILTRO DE VOLTA Importante: A jarra elétrica para ferver água deve estar na posição com o botão para ligar/desligar na posição de desligada “O” e desconectada da tomada elétrica. Certifique- se de que a mesma esteja completamente fria antes de remover o filtro ou de colocar de volta em seu lugar.
- Página 29 às instruções operacionais, desmonte, conserto ou alterações efetuadas por outrem que não a Sunbeam ou Centro de Serviço Oster® Autorizado. Além disso, a garantia não cobre casos de força maior, tais como incêndios, enchentes, furacões e tornados.
- Página 30 All manuals and user guides at all-guides.com ©2006 Sunbeam Products, Inc., doing business as Jarden Consumer Solutions. All rights reserved. Distributed by Sunbeam Products, Inc., doing business as Jarden Consumer Solutions, Boca Raton, Florida 33431. One year limited warranty – please see inside for details. ©2006 Sunbeam Products, Inc., faisant affaires sous le nom de Jarden Consumer Solutions.Tout droit réservé.