Publicidad
CONTACT US FIRST
CONTACT US FIRST
sauder.com
sauder.com
sauder.com
BEFORE MAKING ANY RETURNS TO THE STORE.
BEFORE MAKING ANY RETURNS TO THE RETAILER.
sauder.com/service
Visit
Prefer the phone? Give us a ring at
Customer Service is available Monday-Friday - 9 a.m. to 5:30 p.m. EST (except holidays)
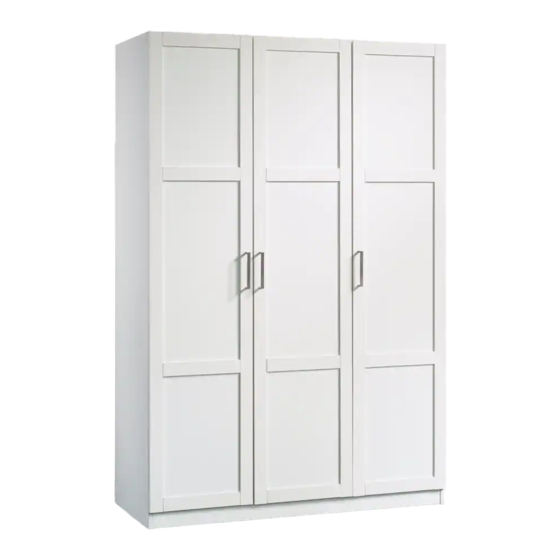
Wardrobe/Storage Cabinet
Model 430083
Sauder.com
Share your journey!
to order replacement parts, view video assembly tips, or chat with a live rep.
1-800-445-1527
.
Store behind
closed doors.
NOTE: THIS INSTRUCTION
BOOKLET CONTAINS IMPORTANT
SAFETY INFORMATION.
PLEASE READ AND KEEP FOR
FUTURE REFERENCE.
English pg 1-24
Français pg 25-28
Español pg 29-32
Lot # 558975
Purchased: __________________
01/06/21
Publicidad
Tabla de contenido

Manuales relacionados para Sauder 430083


Resumen de contenidos para Sauder 430083
- Página 1 Store behind closed doors. NOTE: THIS INSTRUCTION BOOKLET CONTAINS IMPORTANT SAFETY INFORMATION. Wardrobe/Storage Cabinet PLEASE READ AND KEEP FOR FUTURE REFERENCE. Model 430083 Sauder.com English pg 1-24 Français pg 25-28 Español pg 29-32 Lot # 558975 01/06/21 Share your journey!
- Página 2 Hardware Identifi cation Tip Shown Actual Size Hardware Usage Guide Assembly Steps 6-24 Hammer Not actual size Français 25-28 Español 29-32 Pencil Safety 33-34 Electric drill with 1/8" or 3/8" bit (ONLY in indicated step) Warranty Page 2 www.sauder.com/service 430083...
-
Página 3: Part Identifi Cation
LARGE SHELF (1) BRACE (1) RIGHT END (1) BASE (2) ADJUSTABLE SHELF (2) UPRIGHT (1) LEFT DOOR (1) BACK (1) TOP (1) RIGHT DOOR (1) SMALL SHELF (1) BOTTOM (1) CENTER DOOR (1) TOP MOLDING (1) 430083 www.sauder.com/service Page 3... - Página 4 ROD - 1 NAIL - 51 CARD - 5 RESTRAINT KIT - 2 2" FLAT HEAD SCREW - 21 5/8" MACHINE SCREW - 6 1/2" PAN HEAD SCREW - 12 1/2" FLAT HEAD SCREW - 22 Page 4 www.sauder.com/service 430083...
- Página 5 The arrow in the HIDDEN CAM must point Arrow toward the hole in the edge of the board. Hidden Cam Hole Insert the CAM SCREW or CAM DOWEL into the HIDDEN CAM. Tighten the HIDDEN CAM. 430083 www.sauder.com/service Page 5...
- Página 6 Look for this icon. It means a video assembly tip is Step 1 available at www.sauder.com/service/tips Find the numbered video or scan the QR code. Assemble your unit on a carpeted fl oor or on the empty å carton to avoid scratching your unit or the fl oor.
- Página 7 Insert six WOOD DOWELS (1) into the BOTTOM (E). å Fasten the ANGLE BRACKETS on the BASES (G) to å the BOTTOM (E). Use four 1/2" PAN HEAD SCREWS (14). NOTE: Be sure the WOOD DOWELS in the BOTTOM å insert into the BASES. 430083 www.sauder.com/service Page 7...
- Página 8 NOTE: Be sure the WOOD DOWELS in the UPRIGHT å insert into the BOTTOM. NOTE: You should start each SCREW a few turns before å completely tightening any of them. Notch 2" FLAT HEAD SCREW (2 used in this step) Page 8 www.sauder.com/service 430083...
- Página 9 Tighten two HIDDEN CAMS. NOTE: Be sure the WOOD DOWELS in the UPRIGHT å insert into the SMALL SHELF. Arrow Arrow Notch Finished edge S u r f a c H I D D E N i t h 430083 www.sauder.com/service Page 9...
- Página 10 å completely tightening any of them. NOTE: Be sure the WOOD DOWELS in the UPRIGHT å insert into the TOP. 2" FLAT HEAD SCREW (2 used in this step) (2 used) These holes must be here. Page 10 www.sauder.com/service 430083...
- Página 11 Insert a WOOD DOWEL (1) into the UPRIGHT (C). å Push the TOP MOLDING (P) onto the WOOD DOWEL in å the UPRIGHT (C). NOTE: The TOP MOLDING should fi t into the notch of å the UPRIGHT. 430083 www.sauder.com/service Page 11...
- Página 12 Fasten the TOP MOLDING (P) to the TOP (D). Use three å 2" FLAT HEAD SCREWS (12). NOTE: You should start each SCREW a few turns before å completely tightening any of them. 2" FLAT HEAD SCREW (3 used in this step) Page 12 www.sauder.com/service 430083...
- Página 13 LEFT END (A). Use two 1/2" FLAT HEAD SCREWS (15) though the outer holes in the ROD HANGER. Turn fi ve CAM SCREWS (3) into the ENDS (A and B) å exactly as shown. 1/2" FLAT HEAD SCREW (2 used in this step) 430083 www.sauder.com/service Page 13...
- Página 14 å insert into the TOP, BOTTOM, BASES, SMALL SHELF, and TOP MOLDING. Fasten the SMALL SHELF (O) to the RIGHT END (B). å Tighten two HIDDEN CAMS. 2" FLAT HEAD SCREW (7 used in this step) Page 14 www.sauder.com/service 430083...
- Página 15 Step 10 Push six HIDDEN CAMS (2) into the LARGE SHELF (F) å and BRACE (L). Arrow Arrow 430083 www.sauder.com/service Page 15...
- Página 16 NOTE: Be sure the WOOD DOWEL in the UPRIGHT å inserts into the BRACE. i t h Unfi nished edge f a c S u r D E N H I D Surface with HIDDEN CAMS Page 16 www.sauder.com/service 430083...
- Página 17 NOTE: Be sure the WOOD DOWELS in the LEFT END insert into the TOP, BOTTOM, BRACE, BASES, LARGE SHELF, and å TOP MOLDING. Fasten the LARGE SHELF (F) and BRACE (L) to the LEFT END (A). Tighten three HIDDEN CAMS. å 2" FLAT HEAD SCREW (7 used in this step) 430083 www.sauder.com/service Page 17...
- Página 18 NOTE: Be sure to tap NAILS into the holes that line up å over the SHELVES (F and O). NAIL (51 used in this step) These holes must line up over the SHELVES (F and O). 1/2" PAN HEAD SCREW (4 used in this step) Page 18 www.sauder.com/service 430083...
- Página 19 Carefully stand your unit upright. å Insert the SHELF RESTS (6) into the hole locations of your å choice in the RIGHT END (B) and UPRIGHT (C). Set the ADJUSTABLE SHELVES (M) onto the SHELF RESTS. (8 used) 430083 www.sauder.com/service Page 19...
- Página 20 Step 15 Fasten the HINGES (5) to the DOORS (H, J, and K). Use å eighteen 1/2" FLAT HEAD SCREWS (15). 1/2" FLAT HEAD SCREW (18 used in this step) Page 20 www.sauder.com/service 430083...
- Página 21 Fasten the RIGHT DOOR (J) to the RIGHT END (B). Use å the SCREWS in the HINGES. Fasten the PULLS (8) to the DOORS (H, J, and K). Use six å 5/8" MACHINE SCREWS (13). 5/8" MACHINE HEAD SCREW (6 used in this step) 430083 www.sauder.com/service Page 21...
- Página 22 Place the ROD (11) onto the ROD HANGERS (7) inside å the cabinet. Peel APPLIQUES from the APPLIQUE CARDS (10) and stick å them onto each visible HIDDEN CAM and SCREW head. 25 lbs. SMALL SHELF 25 lbs. each ADJUSTABLE SHELF (5 used) Page 22 www.sauder.com/service 430083...
- Página 23 å Repeat this step for the remaining Safety Strap or go to the next step to use the Wall Anchor. å Electric drill with 1/8" bit Mark and drill a 1/8" hole into the wall stud. 430083 www.sauder.com/service Page 23...
- Página 24 NOTE: Please read the back pages of the instruction booklet for important safety information. å This completes assembly. Clean with a damp cloth. Wipe dry. å And to celebrate, why not share your success story at sauder.com or Mark and drill a 3/8" hole Electric drill with 3/8" bit into the wall.
-
Página 25: Armoire/Meuble De Rangement
Modèle 430083 Armoire/Meuble de Rangement Utilisez les instructions d’ a ssemblage en français avec les NOUS CONTACTER EN PREMIER schémas étape par étape du manuel d’instruction en anglais. AVANT D'EFFECTUER TOUT RETOUR AU MAGASIN. Chaque étape en français correspond à la même étape en Nous faisons de notre mieux pour nous assurer que votre meuble anglais. - Página 26 REMARQUE : S’ a ssurer d’insérer les CHEVILLES EN BOIS dans le MONTANT dans le DESSOUS. REMARQUE : Il est préférable de donner quelques tours de tournevis à chaque VIS avant de les serrer toutes à bloc. Page 26 www.sauder.com/service 430083...
- Página 27 BOIS de l'EXTRÉMITÉ GAUCHE dans le DESSUS, le DESSOUS, l’ENTRETOISE, la BASE, la GRANDE TABLETTE et la MOULURE DE DESSUS. Fixer la GRANDE TABLETTE (F) et l’ENTRETOISE (L) à l'EXTRÉMITÉ GAUCHE (A). Serrer trois EXCENTRIQUES ESCAMOTABLES. 430083 www.sauder.com/service Page 27...
- Página 28 SANGLE DE SÉCURITÉ et dans le trou de 3 mm. Répéter cette étape pour l’ a utre sangle de sécurité ou passer à l'étape suivante pour utiliser le dispositif d’ a ncrage mural. Page 28 www.sauder.com/service 430083...
-
Página 29: Ropero/Armario De Almacenamiento
EXTREMO IZQUIERDO ..........1 PASADOR DE MADERA ........35 su referencia futura. Si necesita ponerse en EXTREMO DERECHO ..........1 EXCÉNTRICO ESCONDIDO ......10 contacto con Sauder en PARAL ...................1 BIELA DE EXCÉNTRICO ........10 cuanto a esta unidad, PANEL SUPERIOR ............1 SOPORTE ANGULAR ..........4 refi... - Página 30 CABEZA PERDIDA de 51 mm (12). NOTA: Asegúrese de que los PASADORES DE MADERA en el PARAL se inserten en el FONDO. NOTA: Debe apretar cada TORNILLO unas vueltas antes de apretar cualquier tornillo fi rmemente. Page 30 www.sauder.com/service 430083...
- Página 31 EXTREMO IZQUIERDO se introduzca en el PANEL SUPERIOR, el FONDO, la RIOSTRA, la BASE, el ESTANTE GRANDE y la MOLDURA DE PANEL SUPERIOR. Fije el ESTANTE GRANDE (F) y la RIOSTRA (L) al EXTREMO IZQUIERDO (A) Apriete tres EXCÉNTRICOS ESCONDIDOS. 430083 www.sauder.com/service Page 31...
- Página 32 3-Fije la unidad a la pared. Utilice el TORNILLO LARGO a través el otro extremo de la CORREA DE SEGURIDAD y en el agujero de 3 mm. Repita este paso para la otra correa de seguridad o vaya al siguiente paso para usar el anclaje de pared. Page 32 www.sauder.com/service 430083...
- Página 33 TOUJOURS décharger les tablettes et les tiroirs, en commençant par les surface supérieures, avant de déplacer le meuble. NE JAMAIS pousser ou tirer un meuble sur de la moquette. Demander à une autre personne de le soulever correctement pour le déplacer et/ou le repositionner. 430083 www.sauder.com/service Page 33...
- Página 34 SIEMPRE descargue los estantes y cajones, empezando con las superfi cies superiores, antes de moverlo. NUNCA empuje ni tire de los muebles sobre una alfombra. Obtenga que un amigo le ayude a levantarlo correctamente para moverlo y/o reposicionarlo. Page 34 www.sauder.com/service 430083...
-
Página 35: Garantie Limitée De 5 Ans
à compter de la date d'achat la première fois et qui sont signalés à Sauder dans les limites de couverture de la contre tout défaut de matériaux ou de fabrication des composantes de mobilier Sauder. - Página 36 BEFORE MAKING ANY RETURNS TO THE RETAILER. Dear Valued Customer: So, how did it go? Thanks so much for choosing Sauder® furniture. I hope the Set a world record for speed? purchase and assembly process was a positive experience Feeling good about yourself? and you feel good about the furniture you just built.