
Manuales relacionados para GreenWorks Pro ULTRA POWER 60V LMC05


Resumen de contenidos para GreenWorks Pro ULTRA POWER 60V LMC05
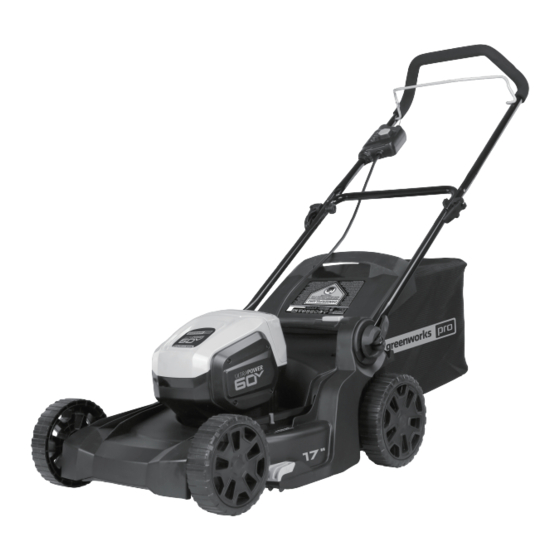
- Página 1 LMC05 LMC415 LAWN MOWER OPERATOR MANUAL MANUAL DEL OPERADOR CORTACÉSPED www.greenworkstools.com...
-
Página 3: Tabla De Contenido
English Install the mulch plug........9 Description......... 4 Set the cutting height........10 Purpose.............. 4 Install the battery pack........10 Overview............4 Remove the battery pack......... 10 Packing list............4 Operation......... 10 Read all instructions......4 Start the machine..........10 Children and Bystanders........4 Stop the machine..........11 General Operation..........4 Empty the grass catcher........ -
Página 4: Description
English DESCRIPTION READ ALL INSTRUCTIONS DANGER PURPOSE This machine was built to be operated according to the rules This machine is used for domestic lawn mowing. The cutting for safe operation included in this manual. As with any type blade must be approximately parallel to the ground. All four of power equipment, carelessness or error on the part of the wheels must touch the ground while you mow. - Página 5 English handle immediately and the blade will stop rotating • Release the bail switch to disengage the motor. within three seconds. • Remove the battery. • Thoroughly inspect the area where the equipment is to be • Inspect for damage. used and remove all stones, sticks, wires, bones, and •...
-
Página 6: Service/Maintenance
English • Do not dispose of the battery in a fire. The cells could • Clean the blade thoroughly and check its balance by catch fire or explode. Check with local codes and waste supporting it horizontally on a thin nail through its center management for proper disposal instructions. -
Página 7: Symbols On The Product
English SYMBOLS ON THE PRODUCT Symbol Name Explanation DANGER --- All visitors should be kept Some of the following symbols may be used on this tool. Keep By- at a distance from work Please study them and learn their meaning. Proper standers Away area. -
Página 8: Proposition 65
English INSTALLATION WARNING Discard all toxic materials in a specified manner to prevent WARNING contamination of the environment. Before discarding damaged or worn out Li-ion battery, contact your local Do not change or make accessories that are not waste disposal agency, or the local Environmental recommended by the manufacturer. -
Página 9: Install The Upper Handle
English INSTALL THE GRASS CATCHER 2. Tighten the lower handle (4) with the quick-release levers (8) on the two sides. NOTE Make sure that the two handles are in the same position. WARNING Do not make damage to the cables when you fold or unfold the handle. -
Página 10: Set The Cutting Height
English SET THE CUTTING HEIGHT WARNING • If the battery pack or charger is damaged, replace the The machine can be set to different cutting heights. battery pack or the charger. • Stop the machine and wait until the engine stops before you install or remove the battery pack. -
Página 11: Stop The Machine
English MAINTENANCE 3. While you hold the start button, pull the bail switch (1) in the direction of the handle bar. WARNING 4. Release the start button to start the machine. Remove the safety key and battery pack from the machine STOP THE MACHINE before maintenance. -
Página 12: Replace The Blade
English REPLACE THE BLADE • Tighten the bolts. • Speak to a person of an approved service center. • Store the machine in a dry area. • Make sure that children cannot come near the machine. You may lower the handle(s) before you put the machine into the storage. -
Página 13: Technical Data
English LIMITED WARRANTY Problem Possible cause Solution There is a high vi- The blade is un- Replace the blade. bration in the ma- balanced and chine. worn. The motor shaft is 1. Stop the mo- bent. tor. 2. Remove the safety key and battery pack. -
Página 14: Exploded View
English EXPLODED VIEW Part No. Qty. Description R0200928-00 7” Wheel assembly R0200929-00 8” Wheel assembly RB341041559 Mulch plug R0200930-00 Safety key kit R0200931-00 Grass catcher assembly R0200932-00 Upper handle assembly R0200933-00 PCBA R0200934-00 Blade assembly R0200935-00 Motor R0200936-00 Handle cam lock assembly... - Página 15 Español Instalación del tapón de mulching....22 Descripción........16 Ajuste de la altura de corte......22 Finalidad ............16 Instalación de la batería........22 Perspectiva general.......... 16 Retirada de la batería........23 Lista de embalaje..........16 Funcionamiento ......23 Lea todas las instrucciones .... 16 Puesta en marcha de la máquina......23 Niños y transeúntes .........16 Detención de la máquina ........
-
Página 16: Descripción
Español DESCRIPCIÓN LEA TODAS LAS INSTRUCCIONES FINALIDAD PELIGRO Esta máquina se utiliza para el corte de césped doméstico. La Esta máquina se ha construido para utilizarse de acuerdo cuchilla de corte debe estar aproximadamente paralela al con las normas para un funcionamiento seguro que se suelo. - Página 17 Español • No se estire, mantenga en todo momento una postura • Los objetos golpeados por la cuchilla del cortacésped adecuada y el equilibrio. Numerosas lesiones se producen pueden producir lesiones graves a las personas. El césped como resultado del paso del cortacésped sobre el pie siempre debe examinarse detenidamente y deben durante una caída debida a resbalones o tropiezos.
-
Página 18: Servicio/Mantenimiento
Español SERVICIO/MANTENIMIENTO cuchilla se detenga por completo, posteriormente retire la batería. La cuchilla de corte sigue girando durante unos • Compruebe la cuchilla y los pernos de montaje del motor segundos después de apagar el motor. Nunca realice estas (de la máquina) a intervalos frecuentes para verificar que funciones hasta que esté... -
Página 19: Funcionamiento En Pendientes
Español • Nunca utilice el cortacésped sin las protecciones, placas u Símbolo Nombre Explicación otros dispositivos de protección de seguridad adecuados Voltios Tensión en su posición. Amperios Corriente El intervalo de temperatura ambiente recomendado: Frecuencia (ciclos por se- Elemento Temperatura Hertzios gundo) Intervalo de temperatura de... -
Página 20: Niveles De Riesgo
Español AVISO Símbolo Nombre Explicación Deseche todos los materiales tóxicos de una manera PELIGRO --- No corte el césped cuando especificada para evitar la contaminación del medio Mantenga ale- haya niños u otras personas ambiente. Antes de desechar una batería de ion de litio jados a los cerca. -
Página 21: Propuesta 65
Español PROPUESTA 65 DESPLIEGUE Y AJUSTE DEL ASA INFERIOR AVISO Este producto contiene una sustancia química conocida en el estado de California como causante de cáncer, defectos de nacimiento u otros daños reproductivos. El polvo generado por el lijado eléctrico, el serrado, el esmerilado, la perforación y otras actividades de construcción contiene sustancias químicas que se sabe que son causantes de cáncer, defectos de nacimiento u otros daños reproductivos. -
Página 22: Instalación Del Recogehierba
Español 2. Introduzca los cierres de leva (11) por los orificios. 2. Abra la puerta de descarga trasera (5) y sujétela. 3. Apriete los mandos (12) en los cierres de leva. 3. Sujete el tapón de mulching (10) por su asa y colóquelo en el conducto de descarga. -
Página 23: Retirada De La Batería
Español 2. Pulse y mantenga pulsado el botón de puesta en marcha AVISO (2). • Si la batería o el cargador ha sufrido daños, sustituya la 3. Mientras mantiene pulsado el botón de puesta en marcha, batería o el cargador. tire del interruptor de seguridad (1) en la dirección del •... -
Página 24: Consejos De Funcionamiento
Español CONSEJOS DE SUSTITUCIÓN DE LA CUCHILLA FUNCIONAMIENTO • No intente anular el funcionamiento del botón de puesta en marcha o el interruptor de seguridad. • No incline la máquina cuando la ponga en marcha. • No ponga las manos ni los pies cerca o debajo de las piezas giratorias. -
Página 25: Solución De Problemas
Español • Sustituya las piezas dañadas. Problema Posible causa Solución • Apriete los pernos. Hay una vibración La cuchilla está Sustituya la cu- • Hable con una persona de un centro de servicio elevada en la má- desequilibrada y chilla. aprobado. -
Página 26: Garantía Limitada
Español P.O. Box 1238 Modelo de car- CAC801/CH60DP01/ gador CH60R00/60DPC10A y otras series CAC Mooresville, NC 28115 GARANTÍA LIMITADA Por la presente Greenworks garantiza este producto, al comprador original con el comprobante de compra, durante un periodo de cuatro (4) años frente a defectos en materiales, piezas o mano de obra. -
Página 27: Vista Despiezada
Español VISTA DESPIEZADA Nº Nº pieza Cant. Descripción R0200928-00 Conjunto de rueda de 7” R0200929-00 Conjunto de rueda de 8” RB341041559 Tapón de mulching R0200930-00 Kit de llaves de seguridad R0200931-00 Conjunto de recogehierba R0200932-00 Conjunto de asa superior R0200933-00 PCBA R0200934-00 Conjunto de cuchilla...