Hansgrohe Axor Starck 10970 1 Serie Instrucciones De Montaje
Ocultar thumbs
Ver también para Axor Starck 10970 1 Serie:
- Instrucciones de instalación/garantía (20 páginas)
Tabla de contenido

Manuales relacionados para Hansgrohe Axor Starck 10970 1 Serie


Resumen de contenidos para Hansgrohe Axor Starck 10970 1 Serie
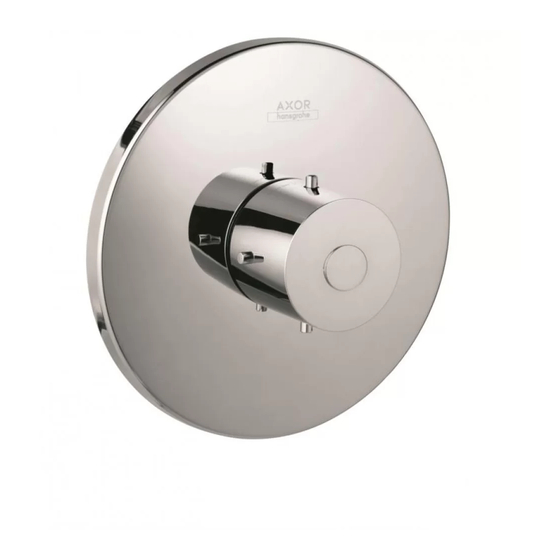
- Página 1 EN Installation / User Instructions / Warranty FR Instructions de montage / Mode d'emploi / Garantie ES Instrucciones de montaje / Manejo / Garantía Starck Starck X 10970xx1 10974001 Bouroullec Bouroullec 19971001 19972001 Massaud 18974001...
-
Página 2: Installation Considerations
English Français Installation Considerations À prendre en considération pour l’installation • For best results, Hansgrohe recommends that this unit be installed by a licensed, professional • Pour de meilleurs résultats, Hansgrohe recom- plumber. mande que ce produit soit installé par un plom- bier professionnel licencié. • Please read over these instructions thoroughly be- fore beginning installation. Make sure that you • Ce dispositif requiert une pièce intérieure have all tools and supplies needed to complete 15974181 ou 15977181. the installation. • La pièce intérieure doit être installée et la surface • This trim kit is for use with volume control roughs murale doit être complètement finie et étanche 15974181, 15977181. avant l’installation de ce dispositif. • The rough valve must be installed, and the • Veuillez lire attentivement ces instructions avant finished wall completed and made watertight de procéder à l’installation. Assurez-vous de dis- before installation of this trim kit. -
Página 3: Instalación
Español Consideraciones para la Tools Required / Outiles Utiles / instalación Herramientas Útiles • Para obtener mejores resultados, Hansgrohe re- comienda que la instalación de esta unidad esté a cargo de un plomero profesional matriculado. • Antes de comenzar la instalación, lea estas instrucciones detenidamente. Asegúrese de tener las herramientas y los insumos necesarios para completar la instalación. • Utilice este dispositivo con pieza interior 15974181 o 15977181. • La pieza interior debe estar instalada y la super- ficie mural debe estar completamente acabada y estanco antes de la instalaciуn de este disposi- tivo. • Al prevnent escalda herida, la temperatura de salida máxima de la válvula de chaparrón no debe ser más alto que 120°F. En Massachusetts: la temperatura de salida máxima de la válvula no puede ser más alto que 112°F. • Mantenga este folleto y el recibo (u otra prueba de la fecha y el lugar de compra) para este pro- ducto en un lugar seguro. El recibo es requerido lo debe es necesario para solicitar partes de garantía. - Página 4 Starck Starck X 10970xx1 10974001 2⅜" 2½" ⅜" ⅜" Massaud Bouroullec Bouroullec 18974001 19971001 19972001 2¼" 2¼" 2¼" ¾" ¾" ¾"...
- Página 5 Installation / Installation / Instalación - 10970xx1 English Français Español Remove the cap. Coupez le protecteur de façon à Corte el protector de yeso de ce qu’une partie de ¹⁄₁₆ po soit à modo que sobresalga ¹⁄₁₆" de la Cut the plaster shield so that it l’extérieur de la surface du mur superficie de la pared terminada. extends ¹⁄₁₆" outside the surface of fini. Selle la pared the finished wall. Scellez le mur alrededor del Seal the wall autour du pro- protector de yeso around the plas- tecteur à...
- Página 6 Installation / Installation / Instalación - 10970xx1 English Français Español Cut the slip coupling so that it Coupez le raccord à glissement Corte el acoplamiento deslizante extends ¼" outside the surface of de façon à ce qu’une partie de ¼ de modo que sobresalga ¼" de la the finished wall. po soit à l’extérieur de la surface superficie de la pared terminada. du mur fini. Install the extension spindle. Instale el husillo de extensión. Installez la tige d’extension. Cut the extension spindle so that it Corte el husillo de extensión de extends ⅝" outside the surface of Coupez la tige d’extension de modo que sobresalga ⅝" de la the finished wall. façon à ce qu’une partie de ⅝ po superficie de la pared terminada. soit à l’extérieur de la surface du mur fini.
- Página 7 Installation / Installation / Instalación - 10970xx1 English Français Español Install the escutcheon, sealing ring, Installez l’écusson, le joint, et Instale el escudo, la junta, y la and nut. l’écrou. tuerca. Install the handle. Poussez la poignée sur l’arbre. Coloque el mando a presión en el eje. Install the handle screw. Serrez la vis. Apriete el tornillo. Install the screw cover. Installez le cache-vis. Instale la tapa del tornillo.
- Página 8 Installation / Installation / Instalación - 10974001 English Français Español Remove the cap. Coupez le protecteur de façon à Corte el protector de yeso de ce qu’une partie de ¹⁄₁₆ po soit à modo que sobresalga ¹⁄₁₆" de la Cut the plaster shield so that it l’extérieur de la surface du mur superficie de la pared terminada. extends ¹⁄₁₆" outside the surface of fini. Selle la pared the finished wall. Scellez le mur alrededor del Seal the wall autour du pro- protector de yeso around the plas- tecteur à...
- Página 9 Installation / Installation / Instalación - 10974001 English Français Español Cut the slip coupling so that it Coupez le raccord à glissement Corte el acoplamiento deslizante extends ¹¹⁄₁₆" outside the surface de façon à ce qu’une partie de de modo que sobresalga ¹¹⁄₁₆" of the finished wall. ¹¹⁄₁₆ po soit à l’extérieur de la de la superficie de la pared surface du mur fini. terminada. Install the extension spindle. Installez la tige d’extension. Instale el husillo de extensión. Cut the extension spindle so that it extends¹³⁄₁₆" outside the surface Coupez la tige d’extension de Corte el husillo de extensión de of the finished wall. façon à ce qu’une partie de ¹³⁄₁₆ modo que sobresalga ¹³⁄₁₆" de la po soit à l’extérieur de la surface superficie de la pared terminada. du mur fini.
- Página 10 Installation / Installation / Instalación - 10974001 English Français Español Install the escutcheon, sealing ring, Installez l’écusson, le joint, et Instale el escudo, la junta, y la and nut. l’écrou. tuerca. Install the handle. Poussez la poignée sur l’arbre. Coloque el mando a presión en el eje. Install the handle screw. Serrez la vis. Apriete el tornillo. Install the screw cover. Installez le cache-vis. Instale la tapa del tornillo.
- Página 11 Installation - 18974001, 19971001, 19972001 English Français Español Remove the cap. Coupez le protecteur de façon à Corte el protector de yeso de ce qu’une partie de ¹⁄₁₆ po soit à modo que sobresalga ¹⁄₁₆" de la Cut the plaster shield so that it l’extérieur de la surface du mur superficie de la pared terminada. extends ¹⁄₁₆" outside the surface of fini. Selle la pared the finished wall. Scellez le mur alrededor del Seal the wall autour du pro- protector de yeso around the plas- tecteur à l’aide con un sellador ter shield with wa- d’un agent...
- Página 12 Installation - 18974001, 19971001, 19972001 English Français Español Cut the slip coupling so that it Coupez le raccord à glissement Corte el acoplamiento deslizante extends ½" outside the surface of de façon à ce qu’une partie de ½ de modo que sobresalga ½" de la the finished wall. po soit à l’extérieur de la surface superficie de la pared terminada. du mur fini. Install the extension spindle. Instale el husillo de extensión. Installez la tige d’extension. Cut the extension spindle so that it Corte el husillo de extensión de extends ¾" outside the surface of Coupez la tige d’extension de modo que sobresalga ¾" de la the finished wall. façon à ce qu’une partie de ¾ po superficie de la pared terminada. soit à l’extérieur de la surface du mur fini.
- Página 13 Installation - 18974001, 19971001, 19972001 Massaud 2 mm Bouroullec English Français Español Install the escutcheon, sealing ring, Installez l’écusson, le joint, et Instale el escudo, la junta, y la and nut. l’écrou. tuerca. Install the handle snap connector. Installez le connecteur à encliquet- Instale el conector a presión. er et la vis et serrez la vis. Apriéte el tornillo. Tighten the snap connector screw using a screwdriver. Poussez la poignée sur le con- Coloque el mando sobre el conec- necteur à encliqueter. tor a presión. Press the handle over the snap connector. Serrez la vis. Apriete el tornillo. Tighten the handle screw. Bouroullec seulement: Bouroullec solamente: Instale Installez le cache-vis. el tapón. Bouroullec only: Install the screw cover.
- Página 14 Replacement Parts / Pièces détachées / Repuestos 10970xx1 94353xx0 97358xx0 96392000 10993xx1 33x1.5 94354xx0 96540xx1 10974001 96392000 96489000 10991001 95627000 96540001...
- Página 15 18974001 98676000 96392000 94184000 18096001 97737000 96364000 98677000 97667000 19971001/19972001 98498001 94184000 96392000 97667000 95181000 95714001 98677000 95713000 97667000 95181000...
- Página 16 • Damage to the product caused by improper care or the use of improper cleaning agents is not covered by the warranty. • If a component of the product is damaged, replace it, as there is risk of injury. Recommandations pour le nettoyage des produits Hansgrohe Les robinetteries modernes de lavabo, de cuisine et de douche utilisent des matériaux très différents pour répondre aux besoins du marché en termes de conception et de fonctionnalité. Certaines règles de base doivent être respectées lors du nettoyage de ces produits afin d’éviter de les endommager ou d’avoir à les retourner.
-
Página 17: Recomendación De Limpieza Para Los Productos De Hansgrohe
Les composants dont la surface est endommagée devraient être remplacés sous peine d’entraîner des blessures. Les dommages dus à un mauvais traitement ne sont pas couverts par la garantie. Recomendación de limpieza para los productos de Hansgrohe Hoy en día, las griferías de baño y de cocina así como duchas modernas se componen de materiales muy distintos para satisfacer las exigencias del mercado respecto al diseño y la functionalidad. Para evitar daños y reclamaciones hay que tener en cuenta ciertos aspectos tanto en el uso como en su limpieza posterior. - Página 18 WHAT IS COVERED BY THE WARRANTY The warranty covers only your Hansgrohe manufactured product. Hansgrohe warrants this product against defects in material or workmanship as follows: Hansgrohe will replace at no charge for parts only or, at its option, replace any product or part of the product that proves defective because of improper workmanship and/or material, under normal installation, use, service and maintenance. If Hansgrohe is unable to provide a replacement and repair is not practical or cannot be made in timely fashion, Hansgrohe may elect to refund the purchase price in exchange for the return of the product. LENGTH OF WARRANTY Replacement or repaired parts of products will be covered for the term of this warranty, as stated in the following two sentences. If you are a consumer who purchased the product for use primarily for personal, family or household purposes, this warranty extends for as long as you own the product and the home in which the product is originally installed. If you purchased the product for use primarily for any other purpose, including, without limitation, a commercial purpose, this warranty extends only (i) for 1 year, with respect to Hansgrohe & Commercial products, and (ii) for 5 years, with respect to Axor products. THIS WARRANTY DOES NOT COVER, AND HANSGROHE WILL NOT PAY FOR: A. Conditions, malfunctions or damage not resulting from defects in material or workmanship. B. Conditions, malfunctions or damage resulting from (1) normal wear and tear, improper installation, improper maintenance, misuse, abuse, negligence, accident or alteration; (2) the use of abrasive or caustic cleaning agents or “no- rinse” cleaning products, or the use of the product in any manner contrary to the product instructions; or (3) conditions in the home such as excessive water pressure or corrosion. C.Labor and other expenses for disconnection, deinstallation, or return of the product for warranty service (including but not limited to proper packaging and shipping costs), or for installation or reinstallation of the product. D. Accessories, connected materials and products, or related products not manufactured by Hansgrohe. E. Any Hansgrohe or Axor product sold for display purposes. F. Rubbed Bronze finish is subject to a 3-year limited warranty. Chrome and all PVD finishes are covered by the limited lifetime warranty. G. Hansgrohe Water Filtration System is subject to a 1-year limited warranty. Warranty does not include replacement filters.
-
Página 19: Exclusions And Limitations
NEITHER ASSUMES NOR AUTHORIZES ANY PERSON TO CREATE FOR IT ANY OTHER OBLIGATION OR LIABILITY IN CONNECTION WITH THIS PRODUCT. HANSGROHE SHALL NOT BE LIABLE TO PURCHASER OR ANY OTHER PERSON FOR ANY INCIDENTAL, SPECIAL OR CONSEQUENTIAL DAMAGES, ARISING OUT OF BREACH OF THIS WARRANTY OR ANY IMPLIED WARRANTY (INCLUDING BUT NOT LIMITED TO ANY IMPLIED WARRANTY OF MERCHANTABILITY). - Página 20 Hansgrohe, Inc. • 1490 Bluegrass Lakes Parkway • Alpharetta, GA 30004 Tel. 770-360-9880 • Fax 770-360-9887 www.hansgrohe-usa.com...