
Manuales relacionados para Vortice HRI MINI CB


Resumen de contenidos para Vortice HRI MINI CB
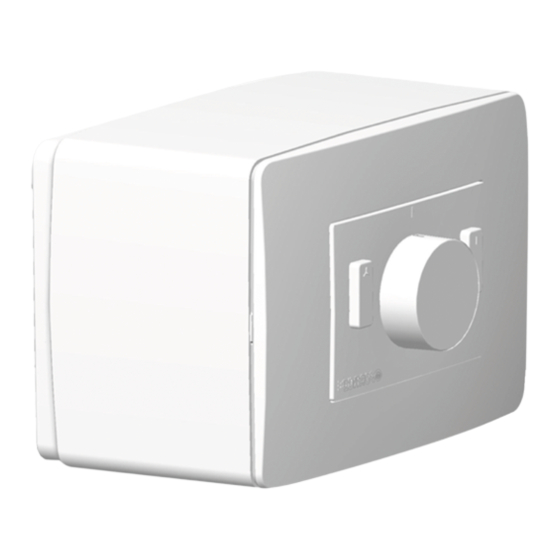
- Página 1 Libretto istruzioni Instruction booklet Manual de instrucciones HRI MINI CB COD. 5.571.084.227 11/04/2019...
-
Página 2: Tabla De Contenido
Descrizione ......3 Vortice non potrà essere ritenuta responsabile Sicurezza ....... . 3 per eventuali danni a persone o cose causati Installazione . - Página 3 • In caso di cattivo funzionamento e/o guasto dell'apparecchio, rivolgersi subito ad un Centro Assistenza Tecnica autorizzato Vortice e richiedere, per l’eventuale riparazione, l'uso di ricambi originali Vortice. • Spegnere l’interruttore generale dell’impianto quando: si rileva un’anomalia di funzionamento; si decide di eseguire una manutenzione di pulizia esterna;...
-
Página 4: Messa In Servizio
ITALIANO Installazione La scatola è installabile ad incasso o a parete. Installazione ad incasso - estrarre il supporto circuito dalla scatola (fig.2); - il supporto circuito è adattabile a placche diverse, per mezzo dei due adattatori laterali e dei quattro denti laterali staccabili (fig.3,4);... -
Página 5: Manutenzione E Pulizia
ITALIANO D) IMPOSTAZIONE VELOCITÀ MEDIA (2) Vedi figura 19 Procedura da eseguirsi su accessorio (Scatola comandi) - dopo aver impostato il flusso richiesto di Velocità minima (1) (AUTO), ruotare il commutatore in posizione 2; - assicurarsi che l’unità non sia in modalità installatore e che l’interruttore di boost (Fig.17) sia OFF; - ruotare il potenziometro MID (sul lato posteriore del commutatore) nella posizione richiesta per ottenere il flusso richiesto (Vedi figura 19). -
Página 6: Description
• Connect the appliance to the electrical power supply/socket only if the rated power of the supply is compatible with the maximum rated power of the appliance. If not, contact a professional electrician without delay. • Should the appliance be dropped or suffer a heavy blow, have it checked immediately by your Vortice Service Centre. -
Página 7: Installation
ENGLISH Installation The unit can be flush wall mounted, or surface wall mounted. Flush mounting - remove the circuit support from the box (fig.2) - the circuit support is adaptable to different cover plates, using the two side adapters and the 4 removable side tabs (fig.3,4) - make the electrical connections;... -
Página 8: Use
ENGLISH D) MID AIRFLOW ADJUSTMENT (2) See picture 19 Apply this procedure on the optional (wired remote control) - After setting the required Minimum airflow (1) (AUTO), turn the switch to position 2. - Ensure unit is out of installer mode and boost switch (Pict. 17) is OFF; - Rotate the MID potentiometer (on reverse side of the switch) to the required position to provide the required airflow (See picture 19). -
Página 9: Descripción
• En caso de mal funcionamiento y/o avería del aparato, consultar inmediatamente con el Centro de Asistencia técnica autorizado de Vortice y solicitar, para la reparación, el uso de repuestos originales Vortice. • Apagar el interruptor general de la instalación cuando: se detecta una anomalía de funcionamiento, se decide realizar un mantenimiento de limpieza externa, se decide no utilizar el aparato por períodos breves o... -
Página 10: Instalación
ESPAÑOL Instalación La caja se puede instalar empotrada o en la pared. Instalación empotrada - Quitar el soporte circuito de la caja (fig.2) - El soporte circuito se puede adaptar a distintas placas, por medio de dos adaptadores laterales y de cuatro dientes laterales extraíbles (fig.3,4);... -
Página 11: Uso
ESPAÑOL D) AJUSTE VELOCIDAD MEDIA (2) Véase figura 19 Procedimiento a realizar en el accesorio (Caja de mando) - Después de ajustar el flujo necesario para la Velocidad mínima (1) (AUTO), girar el conmutador a la posición - Asegurarse que el aparato no esté en modo instalador y que el interruptor boost (Fig.17 ) esté en OFF. - Girar el potenciómetro MID (en el lado posterior del conmutador) hasta la posición necesaria para obtener el flujo deseado (Véase figura 19). -
Página 12: Figures
ESPAÑOL Información importante sobre eliminación eco-compatible EN ALGUNOS PAÍSES DE LA UNIÓN EUROPEA ESTE PRODUCTO NO ESTÁ INCLUIDO EN EL ÁMBITO DE APLICACIÓN DE LA LEY NACIONAL QUE TRASPONE LA DIRECTIVA RAEE Y, POR LO TANTO, NO EXISTE OBLIGACIÓN ALGUNA DE RECOGIDA SELECTIVA AL FINALIZAR SU VIDA ÚTIL. Atención Este producto cumple los requisitos de la Directiva EU 2012/19/EC. - Página 13 FIGURE FIGURES FIGURAS...
- Página 15 11 11...
- Página 16 BY PASS ON BY PASS OFF...
- Página 17 7 poles Terminal Block Earth Stud Speed Rotary Switch JS Boost Switch Live 2 poles Switch Fuse Mains ~230V...
- Página 18 BATHROOM EXTRACT WARM FRESH AIR INTO ROOM EXHAUST OUTSIDE FRESH FROM OUTSIDE 19 19 TRIMMER: MID TRIMMER: MAX 100% 100%...
- Página 19 Vortice E lettros ociali S .p.A. res erves the right to make improvements to products at any time and without prior notice. La s ociété Vortice E lettros ociali S .p.A. s e rés erve le droit d'apporter toutes les variations afin d'améliorer s es produits en cours de commercialis ation.
- Página 22 TAGLIANDO INTERVENTO IN GARANZIA CERTIFICATE OF WORK PERFORMED UNDER GUARANTEE COUPON INTERVENTION SOUS GARANTIE DATA INTERVENTO TIMBRO CENTRO ASSISTENZA DATE OF WORK - DATE INTERVENTION STAMP OF TECHNICAL ASSISTANCE CENTRE - CACHET SERVICE APRES-VENTE TAGLIANDO INTERVENTO IN GARANZIA CERTIFICATE OF WORK PERFORMED UNDER GUARANTEE COUPON INTERVENTION SOUS GARANTIE DATA INTERVENTO TIMBRO CENTRO ASSISTENZA...
- Página 23 VORTICE ELETTROSOCIALI SPA, il cui indirizzo è will consider written applications for transfer. Should any disponibile sull’elenco telefonico alfabetico o contattando defect arise in any Vortice product and a claim under il numero verde 800.555.777. guarantee become necessary, the appliance should be...
- Página 24 Per poter usufruire della garanzia il cliente deve compilare e rispedire a GARANZIA - GUARANTEE - GARANTIE VORTICE ELETTROSOCIALI SPA, entro 8 giorni dall’acquisto, la “Parte 2” del tagliando di garanzia, all’indirizzo e con le modalità in tale parte riportate.