Publicidad
Idiomas disponibles
Idiomas disponibles
Enlaces rápidos
BO LE RO COOLM AR KET COMBI 3 22 WHIT E D
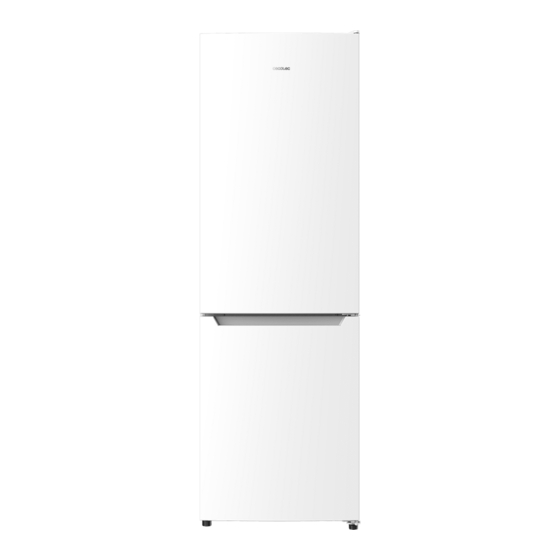
BO LE RO COOLM AR KET COM BI 3 22 INOX D
BO LE RO COOLM AR KET COM BI 3 22 WD INOX D
BO LE RO COOLM AR KET COM BI 3 22 DAR K D
BO LE RO COOLM AR KET COM BI 3 22 GL A SS WH IT E D
BO LE RO COOLM AR KET COM BI 3 22 GL ASS BL ACK D
BO LE RO COOLM AR KET COM BI 3 22 GL A SS GREY D
Frigorífico/ Refrigerator
Manual de instrucciones
Instruction manual
Manuel d'instructions
Bedienungsanleitung
Manuale di istruzioni
Manual de instruções
Handleiding
Instrukcja obsługi
Návod k použití
Publicidad

Manuales relacionados para cecotec BOLERO COOLMARKET COMBI 322 WD INOX D


Resumen de contenidos para cecotec BOLERO COOLMARKET COMBI 322 WD INOX D
- Página 1 BO LE RO COOLM AR KET COMBI 3 22 WHIT E D BO LE RO COOLM AR KET COM BI 3 22 INOX D BO LE RO COOLM AR KET COM BI 3 22 WD INOX D BO LE RO COOLM AR KET COM BI 3 22 DAR K D BO LE RO COOLM AR KET COM BI 3 22 GL A SS WH IT E D BO LE RO COOLM AR KET COM BI 3 22 GL ASS BL ACK D BO LE RO COOLM AR KET COM BI 3 22 GL A SS GREY D...
- Página 2 8. Specifiche tecniche 7. Rozwiązywanie problemów 9. Riciclaggio di apparecchiature elettriche 8. Specyfikacja techniczna ed elettroniche 9. Recykling urządzeń elektrycznych 10. Garanzia e supporto tecnico i elektronicznych 11. Copyright 10. Gwarancja i Serwis techniczny Instrucciones de seguridad SOMMAIRE 11. Copyright Safety instructions ÍNDICE 1.
- Página 3 - ADVERTENCIA: si la iluminación del interior se daña, contacte superficie mojada. con el Servicio de Asistencia Técnica oficial de Cecotec. No - No debe utilizar este frigorífico con un cable alargador o intente repararla por usted mismo.
- Página 4 - No almacene sustancias explosivas como aerosoles o - Para evitar la contaminación de los alimentos, respete las propulsores inflamables en el aparato. siguientes instrucciones: - Este aparato está diseñado exclusivamente para uso - La apertura prolongada de la puerta puede provocar doméstico quedando excluido su uso en bares, restaurantes, un aumento significativo de la temperatura en los granjas, hoteles, moteles y oficinas.
- Página 5 Asegúrese de que la - WARNING: if the interior light is damaged, contact the official tubería del circuito de refrigerante no esté dañada antes de Cecotec Technical Support Service. Do not try to repair it on desecharla correctamente. your own.
- Página 6 - Wait 5 minutes after a power failure before turning the recommended by Cecotec. appliance back on. Otherwise, the compressor may be - WARNING: do not damage the refrigeration circuit.
- Página 7 - The two-star compartments are suitable for storing insulation. The appliance and gases must be disposed of pre-frozen food, storing, or making ice cream and making professionally, as they may cause injuries to eyes or ignition. ice cubes. Make sure the refrigeration-circuit pipe is not damaged - Compartments with one, two, or three stars are not suitable before disposing of it correctly.
- Página 8 Service Après-Vente - Ce réfrigérateur ne doit pas être utilisé avec une rallonge officiel de Cecotec. N’essayez pas de le réparer vous-même. ou une multiprise. Assurez-vous que l’appareil est branché - AVERTISSEMENT : lorsque vous placez l’appareil, veillez directement sur une prise de courant.
- Página 9 - Les aliments congelés peuvent provoquer des brûlures s’ils - Avant l’entretien et le nettoyage, éteignez l’appareil et sont consommés immédiatement après les avoir sortis du débranchez la fiche de la prise de courant. compartiment congélateur. - Il est conseillé d’attendre au moins quatre heures avant - Ne retirez pas et ne touchez pas les aliments du compartiment d’allumer l’appareil pour permettre la circulation de l’huile congélateur avec vos mains mouillées ou humides, car cela...
- Página 10 Sie sich bitte an den offiziellen technischen Assurez-vous que le tuyau du circuit frigorifique n’est pas Kundendienst von Cecotec. Versuchen Sie nicht, ihn selbst endommagé avant de vous en débarrasser correctement. zu reparieren.
- Página 11 - Um Verletzungen oder den Tod durch Stromschlag zu - Betreiben Sie das Gerät immer vorsichtig, um Schäden zu vermeiden, sollten Sie das Gerät nicht mit nassen Händen vermeiden. oder auf einer nassen Oberfläche bedienen. - Gefrorene Lebensmittel können Gefrierbrand verursachen, - Dieser Kühlschrank darf nicht mit einem Verlängerungskabel wenn sie unmittelbar nach der Entnahme aus dem oder einer Steckdosenleiste betrieben werden.
- Página 12 - Fächer mit einem, zwei oder drei Sternen sind nicht zum - WARNUNG: Die Geräte enthalten Kältemittel und Gase Einfrieren frischer Lebensmittel geeignet. in der Isolierung. Das Gerät und die Gase müssen auf - Schalten Sie das Gerät vor Reinigungs- und Wartungsarbeiten eine professionelle Weise entsorgt werden, da sie aus und ziehen Sie den Netzstecker aus der Steckdose.
- Página 13 - Per evitare lesioni o morte da scosse elettriche, non utilizzare è danneggiata, contattare il Servizio di Assistenza Tecnica l’apparecchio con le mani bagnate o su una superficie ufficiale di Cecotec. Non cercare di ripararla per conto bagnata. proprio. - Non usare questo frigorifero con una prolunga o una ciabatta.
- Página 14 - Maneggiare con cura l’apparecchio per evitare eventuali - Si consiglia di aspettare almeno quattro ore prima di danni. accendere l’apparecchio per permettere all’olio di fluire nel - Gli alimenti congelati possono causare ustioni da compressore. congelamento se consumati immediatamente dopo la - L’aria deve circolare intorno all’apparecchio;...
- Página 15 Serviço de Assistência Técnica oficial extensão ou um terminal de alimentação. Certifique-se de da Cecotec Não tente repará-la por si próprio. B O LE R O COOLM ARKET COM BI 3 2 2 WH ITE/INOX/ DAR K D...
- Página 16 que o aparelho está ligado directamente à tomada principal. - Nunca utilizar a base, gavetas ou porta como suporte. - Ao posicionar o aparelho, certifique-se de que há espaço - Não sobrecarregue as prateleiras das portas ou coloque livre na parte de trás, uma vez que esta é a principal saída demasiados alimentos nas gavetas para evitar que os de calor.
- Página 17 - WAARSCHUWING: als de lamp in het toestel beschadigd is, ou incêndios. Certifique-se de que o tubo do circuito de neem dan contact op met de Technische Dienst van Cecotec. refrigeração não tenha sido danificado antes de o eliminar Probeer het niet zelf te repareren.
- Página 18 - Dit apparaat heeft een ingebouwde geaarde stekker. Zorg niet door Cecotec worden aanbevolen. ervoor dat het stopcontact in uw huis goed geaard is. - WAARSCHUWING: beschadig het koelcircuit niet.
- Página 19 stekkers of meerdere voedingen aan de achterkant van het - Zorg ervoor dat de stekker toegankelijk is na de installatie apparaat. van het toestel. - Neem de volgende instructies in acht om verontreiniging - Alle elektrische werkzaamheden die nodig zijn voor het van voedsel te voorkomen: onderhoud van dit toestel moeten worden uitgevoerd door - Langdurig openen van de deur kan een aanzienlijke...
- Página 20 środków do przyspieszenia procesu rozmrażania, - Sprawdź, czy napięcie sieci elektrycznej w Twoim domu jest które nie są zalecane przez Cecotec. takie samo, jak wskazane na etykiecie charakterystyki tego - UWAGA: nie uszkodzić układu chłodzenia.
- Página 21 - To urządzenie jest przeznaczone wyłącznie do użytku - Regularnie czyść powierzchnie, które mogą mieć kontakt z domowego i jest wyłączone z użytku w barach, restauracjach, żywnością i dostępne systemy odwadniające. gospodarstwach rolnych, hotelach, motelach i biurach. - Wyczyść zbiornik na wodę, jeśli nie był używany przez 48 - OSTRZEŻENIE: uniknąć...
- Página 22 Nie wystawiaj go na działanie płomieni. - UPOZORNĚNÍ: pokud je vnitřní osvětlení poškozeno, obraťte - OSTRZEŻENIE: Urządzenia zawierają czynnik chłodniczy i se na oficiální technickou asistenční službu Cecotec. gazy w izolacji. Urządzenie i gazy należy utylizować w sposób Nepokoušejte se to opravit vlastními silami.
- Página 23 - VAROVÁNÍ: Uvnitř chladničky nepoužívejte elektrické - Se spotřebičem zacházejte vždy opatrně, aby nedošlo k jeho spotřebiče. poškození. - Doporučujeme pravidelně kontrolovat napájecí kabel, - Zmrazené potraviny mohou způsobit popáleniny v mrazničce, zda nejeví známky poškození, pokud je kabel poškozený, pokud je zkonzumujete ihned po vyjmutí...
- Página 24 VAROVÁNÍ: nebezpečí požáru. Pokud je poškozen faltara alguno o no estuviera en buen estado, contacte de forma inmediata con el Servicio chladicí okruh: de Atención Técnica oficial de Cecotec. - Vyhněte se otevřenému ohni a zdrojům vznícení. Nivelado - Místnost, ve které je spotřebič umístěn, důkladně vyvětrejte.
- Página 25 ESPAÑOL ESPAÑOL nivelado, el rendimiento del frigorífico se verá afectado, o incluso puede provocar un fallo Preparación para el uso de funcionamiento. Después de instalar el frigorífico, espere 4 horas antes de utilizarlo, para permitir que el Tiempo de espera refrigerante se estabilice.
- Página 26 ESPAÑOL ESPAÑOL Fig. 5 Fig. 13 A. Herramientas no suministradas 15. Tope derecho de la puerta superior Llave de tubo de 8 mm 16. Taco derecho de la puerta superior 2. Destornillador plano 17. Tornillo autorroscante 3. Espátula 18. Tope izquierdo de la puerta superior 4.
- Página 27 ESPAÑOL ESPAÑOL en la cubierta de la bisagra superior izquierda (5) (incluida en la bolsa de plástico). Guarde bolsa de plástico) asegurándose de que la puerta inferior esté asegurada en el lugar. Fig. la cubierta de la bisagra superior derecha (2). Fig. 8 Desconecte los conectores (A) y (B).
- Página 28 ESPAÑOL ESPAÑOL 10. Botón “Confirmar OK” ECO) empiece a parpadear, después presione el botón Confirmar OK durante 5 segundos para confirmar su elección. La función Smart se desactivará. Cuando conecte el frigorífico a la red eléctrica por primera vez, todos los iconos de la Si activa la función Vacaciones, Congelación rápida o Enfriamiento rápido, la función Smart pantalla se iluminan durante 2 segundos.
- Página 29 Si E0, E1, E2, EH o EC aparecen en la pantalla, se ha producido un fallo en el frigorífico. Contacte a 14 ºC. con el Servicio de Asistencia Técnica de Cecotec. Cuando esté fuera durante un periodo de tiempo prolongado, puede activar la función Vacaciones para mantener el compartimento frigorífico en funcionamiento con un bajo...
- Página 30 ESPAÑOL ESPAÑOL con firmeza y manipúlelos con cuidado para evitar daños. aconsejable almacenar los alimentos que quiera conservar durante un periodo largo de Cajón para frutas y verduras: tire del cajón para frutas y verduras para acceder a la comida. tiempo en el compartimento congelador, respetando siempre el tiempo de almacenamiento Tras utilizar o limpiar el estante inferior del frigorífico (la cubierta del cajón), colóquelo de indicado en el envase del alimento.
- Página 31 Con respecto a las siguientes pequeñas averías, intente solucionar el problema usted mismo Retire todos los estantes, el cajón de frutas y verduras, etc., y límpielos con un paño suave antes de contactar con el Servicio de Asistencia Técnica de Cecotec. o una esponja humedecida en agua tibia o detergente neutro.
- Página 32 ESPAÑOL ESPAÑOL 8. ESPECIFICACIONES TÉCNICAS Poca eficacia La comida introducida está caliente Introduzca la comida en el frigorífico frigorífica o hay demasiada comida. cuando esté a temperatura Abre la puerta con demasiada ambiente. Bolero Bolero Producto Bolero Bolero Bolero Bolero Bolero frecuencia.
- Página 33 Si detecta una incidencia con el producto o tiene alguna consulta, póngase en contacto con el Note: Servicio de Asistencia Técnica oficial de Cecotec a través del número de teléfono +34 96 321 The graphics in this manual are schematic representations and may not exactly match the 07 28.
- Página 34 ENGLISH ENGLISH After installing the refrigerator, wait 4 hours before using it to allow the refrigerant to Cleaning stabilise. Check the placement of the interior accessory parts and clean the inside with a soft cloth. 3. INSTALLATION Connect the plug into a power socket to switch on the compressor. After one hour, open the freezer door: if the temperature inside the freezer compartment has clearly dropped, the cooling system is operating normally.
- Página 35 ENGLISH ENGLISH B. Additional parts (included in the plastic bag) Right-hand lower door dowel Upper-left hinge 22. Self-tapping screw 14. Upper-left hinge cover 23. Left-hand lower door stop Right-hand screw gap cover 24. Left-hand lower door dowel Middle-left hinge Left unblocker *2 Fig.
- Página 36 ENGLISH ENGLISH upper-right side door cover (13) and place the connector (14) inside. Replace the upper Fig. 24 side door covers (11 and 13) Fig. 12 Handle covers On the upper door’s right side, unscrew the screw (15) and remove the dowel (16) from Special screws the door stop (17).
- Página 37 ENGLISH ENGLISH Press the Freezer button until the freezer temperature digits start flashing. Press it again If the Fast Freeze function is activated, the freezer compartment temperature cannot be to set the temperature and finally press OK to confirm the temperature setting. adjusted.
- Página 38 If the display shows E0, E1, E2, EH, or EC, it means there’s a fault in the refrigerator. Contact the of the vegetables. Technical Support Service of Cecotec. If you slide the humidity regulator to the right, more gaps will be exposed, and the drawer will have a lower humidity level.
- Página 39 ENGLISH ENGLISH Use of the freezer compartment 6. CLEANING AND MAINTENANCE The temperature of the freezer compartment is kept at -18ºC, so it is advisable to store food that you wish to keep for a long period of time in the freezer compartment, always If the refrigerator is not to be used for a long period of time: respecting the storage time indicated on the food packaging.
- Página 40 For the following minor malfunctions, please try to solve the problem yourself before 8. TECHNICAL SPECIFICATIONS contacting Cecotec Technical Support Service. Fault Possible causes Possible solutions The refrigerator is not connected to Plug the refrigerator into the mains.
- Página 41 Le modèle 02422 ne comprend pas de balconnet porte-bouteilles. Cecotec shall be liable to the end user or consumer for any lack of conformity that exists at the time of delivery of the product under the terms, conditions, and deadlines established by the applicable regulations.
- Página 42 FRANÇAIS FRANÇAIS causer un mauvais fonctionnement. Une fois le réfrigérateur correctement installé et nettoyé, ne le mettez pas en marche Après avoir installé le réfrigérateur, attendez 4 heures avant de l’utiliser, pour permettre immédiatement. Assurez-vous de mettre le réfrigérateur en marche après plus d’une heure au réfrigérant de se stabiliser.
- Página 43 FRANÇAIS FRANÇAIS Tournevis plat 18. Butée gauche de la porte supérieure 10. Spatule Bouchon gauche de la porte supérieure Tournevis cruciforme Clé à molette Img. 15 Clé de 8 mm 20. Butée droite de la porte inférieure Bouchon droit de la porte inférieure B.
- Página 44 FRANÇAIS FRANÇAIS les connecteurs (A) et (8) dans le trou comme indiqué sur l’image 9. Après ce processus, la pas. Img. 21 porte du réfrigérateur sera instable, veillez à la soutenir pour ne pas l’endommager. Img. 9 17. Retirez les connecteurs 31 et 32 du côté supérieur gauche du réfrigérateur. Connectez le 5.
- Página 45 FRANÇAIS FRANÇAIS Lorsque toutes les portes sont fermées, l’écran s’éteint automatiquement si aucun bouton Réfrigération rapide n’est appuyé dans les 3 minutes (environ). Lorsque cette fonction est activée, la température du réfrigérateur est automatiquement Lorsque l’écran est éteint, il s’allumera si vous ouvrez une porte ou appuyez sur un bouton. ajustée à...
- Página 46 Si E0, E1, E2, EH ou EC apparaît sur l’écran, cela indique qu’une erreur s’est produite dans le d’énergie, tout en veillant à ce qu’il soit exempt d’odeurs indésirables et que le compartiment réfrigérateur. Contactez le Service Après-Vente Officiel de Cecotec. congélateur fonctionne normalement.
- Página 47 FRANÇAIS FRANÇAIS Gardez le bord arrière des clayettes orienté vers le haut, pour éviter que les aliments Utilisation du compartiment congélateur n’entrent en contact avec le mur. Lorsque vous retirez et placez les clayettes et balconnets, La température du compartiment congélateur est conservée à -18 ºC, il est donc conseillé tenez-les fermement et manipulez-les avec soin pour éviter de les endommager.
- Página 48 éponge humidifiée avec de l’eau tiède ou un produit de Pour les problèmes mineurs suivants, veuillez essayer de résoudre le problème vous-même nettoyage neutre. avant de contacter le Service Après-Vente Officiel de Cecotec. Nettoyez régulièrement la poussière qui s’accumule sur le panneau arrière et les plaques latérales du réfrigérateur.
- Página 49 FRANÇAIS FRANÇAIS Note Panne Possibles causes Possibles solutions Si aucune de ces situations ne correspond à votre problème, n’essayez pas de Le réfrigérateur n’est pas branché Branchez le réfrigérateur sur le démonter ou de réparer l’appareil vous-même. Les réparations effectuées par des personnes réfrigérateur au secteur.
- Página 50 Die Grafiken in diesem Handbuch sind schematische Darstellungen und stimmen möglicherweise nicht genau mit dem Produkt überein. Cecotec est responsable envers l’utilisateur final ou le consommateur de tout défaut de conformité existant au moment de la livraison du produit dans les termes, conditions et délais Hinweis: établis par la réglementation applicable.
- Página 51 DEUTSCH DEUTSCH Nivellierung Vorbereitung für den Einsatz Achten Sie darauf, den Kühlschrank mit den vorderen Nivellierfüßen auszurichten. Wenn sie nicht waagerecht ist, wird die Leistung des Kühlschranks beeinträchtigt oder kann Wartezeit sogar eine Fehlfunktion verursachen. Wenn der Kühlschrank ordnungsgemäß installiert und gereinigt ist, schalten Sie ihn nicht Warten Sie nach dem Aufstellen des Kühlschranks 4 Stunden, bevor Sie ihn benutzen, sofort ein.
- Página 52 DEUTSCH DEUTSCH Abb. 5 Abb. 13 A. Werkzeuge nicht mitgeliefert Rechter oberer Türstopper Steckschlüssel 8 mm Rechter oberer Türblock Schlitzschraubendreher Selbstschneidende Schraube Teigschaber 18. Rechter oberer Türstopper 10. Kreuzschlitzschraubendreher Linker oberer Türblock Verstellbarer Schraubenschlüssel Schlüssel 8 mm Abb. 15 20. Linker unterer Türstopper B.
- Página 53 DEUTSCH DEUTSCH die obere linke Scharnierabdeckung (5) ein (Inkl. in der Plastiktüte). Heben Sie die rechte Sie sie teilweise. Abb. 19 obere Scharnierabdeckung (2) auf. Abb. 8 Stellen Sie den Kühlschrank in eine aufrechte Position und setzen Sie die untere Tür Trennen Sie die Verbinder (A) und (B).
- Página 54 DEUTSCH DEUTSCH Taste „Kühlschrank“ drücken Sie dann innerhalb von 5 Sekunden die OK-Taste, um Ihre Wahl zu bestätigen. Taste „Gefrierfach“ Wenn Sie die Bestätigen/OK-Taste nicht innerhalb von 5 Sekunden drücken, wird die Taste „Funktion“ Funktion nicht aktiviert. 10. Taste „Bestätigen/OK“. Smart-Funktion deaktivieren Drücken Sie bei aktivierter Smart-Funktion die „Function“-Taste, bis das Smart-Symbol Wenn Sie den Kühlschrank zum ersten Mal an das Stromnetz anschließen, leuchten alle...
- Página 55 Wenn E0, E1, E2, EH oder EC auf dem Display erscheint, bedeutet dies, dass ein Fehler im sicherzustellen, dass es frei von unerwünschten Gerüchen ist und das Gefrierfach normal Kühlschrank aufgetreten ist. Kontaktieren Sie den Kundendienst von Cecotec. funktioniert. Vergewissern Sie sich, dass Sie alle Lebensmittel aus dem Kühlfach entfernen, bevor Sie Einstellung des Kühlschrankluftreglers (Feuchtigkeit)
- Página 56 DEUTSCH DEUTSCH werden müssen, gekochte Speisen, Bier, Eiern, einigen kühl zu haltende Gewürze, Milch, Aufbewahrung von Lebensmitteln nach Kategorien: Legen Sie die Lebensmittel des Fruchtsaft usw. Das Obst-/ Gemüsefach ist der beste Platz, um Obst und Gemüse täglichen Bedarfs in den vorderen Teil der Ablage, um die Öffnungszeit der Tür zu verkürzen aufzubewahren.
- Página 57 DEUTSCH DEUTSCH oder den Funktion Schnelles Kühlen, und nach einer bestimmten Zeit können Sie kaltes Innen- und Außenreinigung Wasser zum Trinken ausgeben. Siehe Abb. 25. Lebensmittelreste im Kühlschrank können unerwünschte Gerüche verursachen, daher Wenn Sie den Wasserspender benutzen, kann etwas Wasser abtropfen und sich am sollten Sie den Kühlschrank regelmäßig reinigen.
- Página 58 Bei den folgenden kleineren Störungen versuchen Sie bitte, das Problem selbst zu lösen, bevor eingestellt Einfrieren auf dem Bedienfeld nicht dann die Temperatur ein (siehe Sie sich an den technischen Kundendienst von Cecotec wenden. werden aktiviert sind. Abschnitt “Funktionen” für weitere Fehler Mögliche Ursache...
- Página 59 50/60 Hz 11. COPYRIGHT Nennstrom 1,2 A Die geistigen Eigentumsrechte an den Texten in dieser Bedienungsleitung liegen bei CECOTEC Klimaklasse SN/N/ST/T* INNOVACIONES, S.L. Alle Rechte vorbehalten. Der Inhalt dieser Veröffentlichung darf weder ganz noch teilweise ohne vorherige Genehmigung von CECOTEC INNOVACIONES, S.L. vervielfältigt, in Kühlmittel...
- Página 60 Servizio di paglia o cloruro di polivinile, è necessario collocare delle piastre di supporto solide sotto il Assistenza Tecnica ufficiale di Cecotec. frigorifero per evitare che il colore dello stesso cambi a causa della dissipazione del calore.
- Página 61 ITALIANO ITALIANO Preparazione per l’uso Fig. 5 A. Attrezzi non forniti Tempo di attesa Giratubi di 8 mm Una volta installato e pulito bene il frigorifero, evitare di accenderlo immediatamente. Cacciavite piatto Accertarsi di avviare il frigorifero dopo più di un’ora di inattività per garantirne il normale Spatola funzionamento.
- Página 62 ITALIANO ITALIANO Fig. 13 nella guarnizione della cerniera superiore sinistra (5) (incluso nel sacchetto di plastica). Fermo destro dello sportello Riposizionare la guarnizione della cerniera superiore destra (2). Fig. 8 Blocco destro dello sportello Scollegare i connettori (A) e (B). Poi, svitare le viti (6) con un trapano da 8 mm o una chiave Vite autofilettante e rimuovere la cerniera superiore destra (7).
- Página 63 ITALIANO ITALIANO posizione. Fig. 20 Posizionare l’anta superiore sul lato sinistro e inserire l’asse della cerniera centrale nel Quando si collega il frigorifero alla rete elettrica per la prima volta, tutte le icone sul display foro inferiore dell’anta superiore. Installare la cerniera superiore sinistra (29) (inclusa si accendono per 2 secondi.
- Página 64 Se sul display appare E0, E1, E2, EH o EC, si è verificato un guasto nel frigorifero. Contattare il Vacanze Servizio di Assistenza Tecnica di Cecotec. Quando si attiva la funzione Vacanze, la temperatura del vano frigorifero viene impostata su 14°C.
- Página 65 ITALIANO ITALIANO gradualmente spostando il regolatore dell’aria dalla posizione MIN. alla posizione MAX. Se si fa scorrere il regolatore di umidità verso destra, saranno esposti più fori e il cassetto Fig. 4 avrà un livello di umidità inferiore. Se si fa scorrere il regolatore di umidità verso sinistra, saranno esposti più fori e il cassetto avrà...
- Página 66 ITALIANO ITALIANO Dividere il cibo in piccole porzioni. 6. PULIZIA E MANUTENZIONE Gli alimenti dovrebbero essere confezionati o coperti con materiali adatti che siano solidi, insapori, impermeabili all’aria e all’acqua, non tossici e non inquinanti, per evitare la Se non viene utilizzato il dispositivo per un lungo periodo di tempo: contaminazione incrociata e il trasferimento di odori.
- Página 67 Per i seguenti malfunzionamenti minori, provare a risolvere il problema da soli prima di temperatura. attive sul pannello di controllo. sezione Funzioni per i dettagli). contattare il Servizio di Assistenza Tecnica di Cecotec. La temperatura Controllare che l’alimentazione non Premere un tasto qualsiasi per...
- Página 68 Si raccomanda che le riparazioni siano effettuate da personale qualificato. Se si riscontra un problema con il prodotto o in caso di dubbi, si prega di contattare il Servizio Voltaggio 220-240 V~ di Assistenza Tecnica ufficiale di Cecotec al numero +34 96 321 07 28. nominale Frequenza 50/60 Hz 11.
- Página 69 Serviço ocorrerão vibrações e ruídos. Quando o frigorífico é colocado sobre um tapete, tapete de palha, de Assistência Técnica oficial da Cecotec. cloreto de polivinil, devem ser colocadas placas de apoio sólidas debaixo do frigorífico para evitar a mudança de cor devido à...
- Página 70 PORTUGUÊS PORTUGUÊS Preparação para a utilização A. Ferramentas não fornecidas Chave de tubo de 8 mm Tempo de espera Chave de parafusos plana Assim que o frigorífico estiver devidamente instalado e limpo, não o ligue imediatamente. Espátula Certifique-se de que liga o frigorífico após mais de uma hora de inatividade para garantir o 10.
- Página 71 PORTUGUÊS PORTUGUÊS Batente direito da porta superior Desligue os conectores (A) e (B). A seguir, desaperte os parafusos (6) usando uma broca Tapa direita da porta superior de 8 mm ou uma chave-inglesa e remova a dobradiça superior direita (7). Depois, encaixe Parafuso autorroscante os conectores (A) e (8) no orifício, como mostrado na figura 9.
- Página 72 PORTUGUÊS PORTUGUÊS saco de plástico) e aparafuse-a com os parafusos retirados no passo 9 (6). Neste ponto a Quando todas as portas estão fechadas, o ecrã desliga-se automaticamente se nenhum porta não estará unida ao frigorífico, pelo que tem de ser segurada firmemente para que botão for premido em 3 minutos (aprox.) não caia.
- Página 73 Se aparecer E0, E1, E2, EH ou EC no ecrã, ocorreu uma falha no frigorífico. Contacte com o Quando estiver ausente por um longo período de tempo, pode ativar a função Férias para Serviço de Assistência Técnica da Cecotec. B O LE R O COOLM ARKET COM BI 3 2 2 WH ITE/INOX/ DAR K D...
- Página 74 PORTUGUÊS PORTUGUÊS Ajuste do regulador do ar (humidade) do frigorífico Regulação da humidade da gaveta O ar frio que entra no compartimento de armazenamento de alimentos frescos aumentará O seletor de humidade na gaveta é criado para manter a humidade e frescura dos legumes. gradualmente à...
- Página 75 PORTUGUÊS PORTUGUÊS Permita que os alimentos quentes arrefeçam à temperatura ambiente antes de os colocar 6. LIMPEZA E MANUTENÇÃO no compartimento do congelador. Não coloque um recipiente de vidro com líquido ou líquido enlatado selado no Se o frigorífico não for utilizado durante um longo período de tempo: compartimento do congelador para evitar que explodam devido à...
- Página 76 Para as seguintes avarias menores, por favor tente resolver o problema você mesmo antes de A temperatura Verifica que a alimentação elétrica Pressione qualquer botão para contactar com o Serviço de Assistência Técnica da Cecotec. não tenha sido cortada antes. ativar o alarme (ver secção sobre compartimento...
- Página 77 220-240 V~ Se deteta uma ocorrência com o produto ou tem alguma consulta, entre em contacto com o nominal Serviço de Assistência Técnica oficial da Cecotec através do número de telefone +34 96 321 07 28. Frequência 50/60 Hz nominal 11.
- Página 78 Controleer of alle onderdelen en componenten aanwezig en in goede staat zijn. Als een door warmteafvoer te voorkomen. van deze ontbreekt of niet in goede staat is, neem dan onmiddellijk contact op met de Technische Dienst van Cecotec. Voorbereiding van het gebruik Waterpas zetten Zorg ervoor dat de koelkast waterpas staat met de stelpoten aan de voorkant.
- Página 79 NEDERLANDS NEDERLANDS Zodra de koelkast correct is geïnstalleerd en schoongemaakt, mag u hem niet onmiddellijk Platte schroevendraaier inschakelen. Start de koelkast na meer dan een uur inactiviteit om een normale werking te Spatel garanderen. 10. Kruiskopschroevendraaier Moersleutel Schoonmaken 8 mm sleutel Controleer de plaatsing van de accessoires in de koelkast en maak de binnenkant schoon met een zachte doek.
- Página 80 NEDERLANDS NEDERLANDS Zelftappende schroef boormachine van 8 mm of een steeksleutel en verwijder het bovenste rechter scharnier 18. Linker bovenste deurstop (7). Plaats vervolgens aansluiting (A) en (8) in het gat zoals aangegeven in figuur 9. Na Linker bovenste deurblok dit proces zal de deur van de koelkast instabiel zijn;...
- Página 81 NEDERLANDS NEDERLANDS gat van de bovendeur. Installeer het linker bovenscharnier (29) (bijgeleverd in de plastic Wanneer u de koelkast voor het eerst op het lichtnet aansluit, lichten alle pictogrammen zak) en schroef het vast met de in stap 9 verwijderde schroeven (6). De deur zit nu nog op het display gedurende 2 seconden op.
- Página 82 Als E0, E1, E2, EH of EC op het display verschijnt, betekent dit dat er een storing in de koelkast ingesteld op 14°C. is opgetreden. Neem contact op met de Technische Dienst van Cecotec. Wanneer u voor langere tijd weg bent, kunt u de Holiday-functie activeren om het...
- Página 83 NEDERLANDS NEDERLANDS Afstelling van de lucht(vochtigheids)regelaar van de koelkast Vochtigheidsregeling van de lade De koude lucht die het vershoudvak binnenstroomt zal geleidelijk toenemen naarmate de De keuzeschakelaar voor de vochtigheid in de lade is ontworpen om de vochtigheid en de luchtregelaar van de MIN.
- Página 84 NEDERLANDS NEDERLANDS Plaats geen glazen met vloeistof of verzegelde vloeistof in blik in het vriesvak om te Verwijder al het voedsel. voorkomen dat deze explodeert door volume-expansie na bevriezing van de vloeistof. Reinig en droog de binnenkant grondig. Om schimmelvorming of onaangename geuren te Verdeel het voedsel in kleine porties.
- Página 85 Probeer bij de volgende kleine storingen het probleem zelf op te lossen voordat u contact Kan de Controleer of de Smart of snelle Deactiveer de speciale functies en opneemt met de Technische Dienst van Cecotec. temperatuur invries functies niet actief zijn op stel vervolgens de temperatuur in...
- Página 86 Het wordt aanbevolen reparaties te laten uitvoeren door gekwalificeerd personeel. spanning Als u ooit een incident met het product ontdekt of vragen hebt, neem dan contact op met de officiële Technische Assistentie van Cecotec via het telefoonnummer +34 96 321 07 28. Nominale 50/60 Hz frequentie 11.
- Página 87 Upewnij się, że wszystkie części i komponenty są dołączone i są w dobrym stanie. Jeśli Przygotowanie do użycia któregoś z nich brakuje lub jest w złym stanie, natychmiast skontaktuj się z oficjalnym Serwisem Pomocy Technicznej Cecotec. Czas oczekiwania Poziomowa nie Gdy lodówka jest dobrze zainstalowana i czysta, nie włączaj jej od razu.
- Página 88 POLSKI POLSKI Czyszczenie Osłona zawiasu lewego górnego Sprawdź rozmieszczenie akcesoriów wewnątrz lodówki i wyczyść wnętrze miękką ściereczką. Zaślepka prawego otworu na śrubę Lewy środkowy zawias Włączony 18. Lewy mechanizm odblokowujący *2 Podłącz wtyczkę do gniazdka ściennego, aby włączyć sprężarkę. Godzinę później otwórz drzwi Ogranicznik lewych drzwi *2 zamrażarki, jeśli temperatura w komorze zamrażarki wyraźnie spadła, system chłodzenia 20.
- Página 89 POLSKI POLSKI 23. Dolny ogranicznik drzwi lewych prawych bocznych drzwi (13) i umieścić złącze (14) w środku. Założyć górne osłony 24. Sruba lewych dolnych drzwi bocznych drzwi (11 i 13) Rys. 12 Po prawej stronie górnych drzwi odkręcić śrubę (15) i wyjąć zaślepkę (16) z ogranicznika Rys.
- Página 90 POLSKI POLSKI wyjąć i przełożyć na prawą stronę. Wkręć śruby z powrotem i załóż osłony. Rys. 24 OFF odnosi się do odłączenia lodówki, gdy ta funkcja jest aktywna, lodówka przestanie chłodzić. Rys. 24 Okładki klamek Ustawienie temperatury komory zamrażarki Specjalne śruby Naciśnij przycisk „Zamrażarka”, aż...
- Página 91 Jeśli na wyświetlaczu pojawi się E0, E1, E2, EH lub EC, w lodówce wystąpiła usterka. Skontaktuj zamrażania zacznie migać, a następnie naciśnij przycisk Potwierdź OK, aby potwierdzić i się z oficjalnym serwisem pomocy technicznej Cecotec. wyłączyć funkcję szybkiego zamrażania. Jeśli włączysz funkcję Smart, funkcja Quick Freeze zostanie automatycznie wyłączona.
- Página 92 POLSKI POLSKI Komora zamrażarki nadaje się do przechowywania lodów, mrożonej żywności i żywności, Przechowywanie owoców i warzyw która powinna być przechowywana przez dłuższy czas. Należy mieć świadomość, że niektóre rodzaje świeżych owoców i warzyw są wrażliwe na zimno i dlatego nie nadają się do przechowywania w szufladzie lodówki. Korzystanie z komory chłodniczej (pojemnik na Crisper/pojemnik na wilgoć) Półki: Aby wyjąć...
- Página 93 W przypadku poniższych drobnych usterek, spróbuj rozwiązać problem samodzielnie przed Czyszczenie z zewnątrz i wewnątrz skontaktowaniem się z Serwisem Pomocy Technicznej Cecotec. Resztki jedzenia w lodówce mogą powodować niepożądane zapachy, dlatego należy Awaria Prawdobodobna przyczyna Możliwe rozwiązania...
- Página 94 POLSKI POLSKI Niska Włożona żywność jest gorąca lub Włóż jedzenie do lodówki, gdy ma 8. SPECYFIKACJA TECHNICZNA wydajność jest za dużo żywności. temperaturę pokojową. chłodzenia Zbyt często otwierasz drzwi. Sprawdź i zamknij drzwi. Bolero Bolero Produkt Bolero Bolero Bolero Bolero Bolero Uszczelka drzwi ma przedmioty, Wyjmij lodówkę...
- Página 95 Dávkovač vody Jeśli wykryjesz incydent z produktem lub masz jakiekolwiek pytania, skontaktuj się z oficjalnym Serwisem Pomocy Technicznej Cecotec pod numerem telefonu +34 96 321 07 28. Poznámka: Grafika v této příručce je schematickým znázorněním a nemusí přesně odpovídat Grafika v této příručce je schematická...
- Página 96 ČEŠTINA ČEŠTINA Po instalaci chladničky počkejte 4 hodiny, než ji začnete používat, aby se chladivo Čištění stabilizovalo. Zkontrolujte umístění součástí příslušenství uvnitř chladničky a vyčistěte vnitřek měkkým hadříkem. 3. INSTALACE Zapnutí Zapojte zástrčku do elektrické zásuvky a zapněte kompresor. O hodinu později otevřete dveře mrazničky, pokud teplota uvnitř...
- Página 97 ČEŠTINA ČEŠTINA levý horní pant 22. Samořezný šroub 14. Kryt levého horního závěsu 23. Levá spodní zarážka dveří Kryt pravého otvoru pro šroub 24. Levý spodní blok dveří Levý středový závěs Odblokování vlevo *2 Obr. 17 18. Levá zarážka dveří *2 25.
- Página 98 ČEŠTINA ČEŠTINA horních dvířek (13) a vložte do něj konektor (14). Nasaďte horní kryty bočních dveří (11 a Kryty rukojetí 13) Obr. 12 Speciální šrouby Na pravé straně horních dveří vyšroubujte šroub (15) a vyjměte zátku (16) ze zarážky dveří Klika dveří...
- Página 99 ČEŠTINA ČEŠTINA stisknutím nastavte teplotu a nakonec stisknutím tlačítka OK potvrďte nastavení teploty. Aktivace funkce Quick Freeze Cykly nastavení mrazicí teploty jsou následující: Stiskněte tlačítko „Function“, dokud nezačne blikat příslušná ikona, a do 5 sekund potvrďte -18 ºC →-17 ºC →-16 ºC →-24 ºC →-23 ºC →-22 ºC →-21 ºC →-20 ºC →-19 ºC →-18 ºC volbu stisknutím tlačítka Confirm OK.
- Página 100 Pokud se na displeji zobrazí E0, E1, E2, EH nebo EC, znamená to, že v chladničce došlo k poruše. Pokud posunete volič vlhkosti doprava, odkryje se více otvorů a zásuvka bude mít nižší Kontaktujte Asistenční technický servis Cecotec. úroveň vlhkosti.
- Página 101 ČEŠTINA ČEŠTINA vloženy do mrazicích sáčků. 6. ČIŠTĚNÍ A ÚDRŽBA Před vložením horkých potravin do mrazicího oddílu je nechte vychladnout na pokojovou teplotu. Pokud se chladnička nebude delší dobu používat: Do mrazicího oddílu neumisťujte skleněné nádoby s tekutinou nebo uzavřené konzervy s Vypněte chladničku a odpojte zástrčku ze zásuvky.
- Página 102 Obraťte se na místní prodejnu, kde jste zboží zakoupili. Opravu musí provádět autorizovaný technik a musí být použity pouze originální náhradní díly. V případě následujících drobných poruch zkuste problém vyřešit sami, než se obrátíte na technickou podporu společnosti Cecotec. Problém Možné příčiny Možná...
- Página 103 Nominální 1,2 A Práva duševního vlastnictví k textům v této příručce patří společnosti CECOTEC INNOVACIONES, proud S.L. Všechna práva jsou vyhrazena. Obsah této publikace nesmí být vcelku ani po částech reprodukován, ukládán do vyhledávacího systému, přenášen nebo šířen jakýmkoli způsobem Klimatická...
- Página 104 Fig./Img./Abb./Afb./ Rys./Obr. 1.1 Fig./Img./Abb./Afb./ Rys./Obr. 1 B O LE R O COOLM ARKET COM BI 3 2 2 WH ITE/INOX/ DAR K D B OLERO COO LMA RKET COMB I 322 W HITE/ IN OX/DA RK D B O LE R O COOLM ARKET COM BI 3 2 2 WD INOX D BOLERO COOLMARKET COMBI 322 WD IN OX D B O LE R O COOLM ARKET COM BI 3 2 2 GLASS WH ITE/BL ACK/GREY D BOL ERO CO OLMARKET CO MBI 322 GLAS S W HITE/B LACK/GREY D...
- Página 105 Fig./Img./Abb./Afb./ Rys./Obr. 2 Fig./Img./Abb./Afb./ Rys./Obr. 5 Fig./Img./Abb./Afb./ Rys./Obr. 4 Fig./Img./Abb./Afb./ Rys./Obr. 3 Fig./Img./Abb./Afb./ Rys./Obr. 6 B O LE R O COOLM ARKET COM BI 3 2 2 WH ITE/INOX/ DAR K D B OLERO COO LMA RKET COMB I 322 W HITE/ IN OX/DA RK D B O LE R O COOLM ARKET COM BI 3 2 2 WD INOX D BOLERO COOLMARKET COMBI 322 WD IN OX D B O LE R O COOLM ARKET COM BI 3 2 2 GLASS WH ITE/BL ACK/GREY D...
- Página 106 Fig./Img./Abb./Afb./ Rys./Obr. 7 Fig./Img./Abb./Afb./ Rys./Obr. 10 Fig./Img./Abb./Afb./ Rys./Obr. 11 Fig./Img./Abb./Afb./ Rys./Obr. 12 Fig./Img./Abb./Afb./ Rys./Obr. 8 Fig./Img./Abb./Afb./ Rys./Obr. 13 Fig./Img./Abb./Afb./ Rys./Obr. 14 Fig./Img./Abb./Afb./ Rys./Obr. 9 B O LE R O COOLM ARKET COM BI 3 2 2 WH ITE/INOX/ DAR K D B OLERO COO LMA RKET COMB I 322 W HITE/ IN OX/DA RK D B O LE R O COOLM ARKET COM BI 3 2 2 WD INOX D BOLERO COOLMARKET COMBI 322 WD IN OX D...
- Página 107 Fig./Img./Abb./Afb./ Rys./Obr. 20 Fig./Img./Abb./Afb./ Rys./Obr. 16 Fig./Img./Abb./Afb./ Rys./Obr. 15 Fig./Img./Abb./Afb./ Rys./Obr. 21 Fig./Img./Abb./Afb./ Rys./Obr. 17 Fig./Img./Abb./Afb./ Rys./Obr. 18 Fig./Img./Abb./Afb./ Rys./Obr. 22 Fig./Img./Abb./Afb./ Rys./Obr. 19 Fig./Img./Abb./Afb./ Rys./Obr. 23 Fig./Img./Abb./Afb./ Rys./Obr. 24 B OL E RO COO LMARKET CO MBI 3 2 2 W H IT E /IN OX/ DA R K D B O LER O CO O LMA R KET CO MBI 3 22 WHI TE/I N OX /DA R K D B OL E RO COO LMARKET CO MBI 3 2 2 W D I N OX D B O LER O CO O LMA R KE T CO MB I 3 22 W D I N OX D...
- Página 108 Fig./Img./Abb./Afb./ Rys./Obr. 25 Fig./Img./Abb./Afb./ Rys./Obr. 26 B O LE R O COOLM ARKET COM BI 3 2 2 WH ITE/INOX/ DAR K D B O LE R O COOLM ARKET COM BI 3 2 2 WD INOX D B O LE R O COOLM ARKET COM BI 3 2 2 GLASS WH ITE/BL ACK/GREY D...
- Página 109 Cecotec Innovaciones S. L. Av. Reyes Católicos, 60, 46910, Alfafar (Valencia) SPAIN...