Tabla de contenido
Publicidad
Idiomas disponibles
Idiomas disponibles
Enlaces rápidos
DE
Anleitung für den Einbau einer Biomatic-
Kläranlage. Betrieb und Wartung
>> Seite 1-32
EN
Installation Guide for a Biomatic Sewage
Treatment Plant – Operation and
Maintenance
>> Page 33-64
ES
Instrucciones de montaje, funcionamiento y mantenimiento de una
depuradora Biomatic
>> Página 65-96
Biomatic
Publicidad
Capítulos
Tabla de contenido

Manuales relacionados para Graf Biomatic


Resumen de contenidos para Graf Biomatic
- Página 1 Biomatic Anleitung für den Einbau einer Biomatic- Kläranlage. Betrieb und Wartung >> Seite 1-32 Installation Guide for a Biomatic Sewage Treatment Plant – Operation and Maintenance >> Page 33-64 Instrucciones de montaje, funcionamiento y mantenimiento de una depuradora Biomatic >> Página 65-96...
-
Página 2: Tabla De Contenido
Anleitung für den Einbau einer Biomatic-Kläranlage, Betrieb und Wartung Kläranlage BIOMATIC 6 EW Kläranlage BIOMATIC 12 EW Die in dieser Anleitung beschrie- Inhaltsübersicht benen Punkte sind unbedingt zu beachten. Bei Nichtbeachtung er- lischt jeglicher Garantieanspruch. ALLGEMEINES Für alle über GRAF bezogenen... - Página 3 Sehr geehrte Damen, sehr geehrte Herren, wir freuen uns, dass Sie sich für den Erwerb einer modernen Kläranlage BIOMATIC entschieden haben. BIOMATIC ist ein Qualitätsprodukt, das als Komplettanlage die Forderungen der EN 12566-3+ A2 als Kleinkläranlage erfüllt. Wir möchten Ihnen im Folgenden ein paar wichtige Hinweise für einen langlebigen und sicheren Betrieb geben: Die Kläranlage ist ausgelegt für die Einleitung des gesamten häuslichen Schmutzwassers oder...
-
Página 4: Allgemeines
1. Allgemeines Allgemeines Grundsätze: Planung, Ausführung, Instandhaltung Planung Die Anfertigung eines Entwurfs durch einen Fachmann. • Ein Bodengutachten. • Eine auf die jeweilige Situation abgestimmte Auslegung. • Beachten der Bemessungsgrundlage: • Anzahl der Bewohner Nominale tägliche Abwassermenge 0,90 m /Tag 1,8 m /Tag Ausführung... - Página 5 1. Allgemeines Leistungserklärung 4 / 96...
-
Página 6: Sicherheitshinweise
2. Sicherheitshinweise Sicherheitshinweise Dieses Kapitel beinhaltet Angaben zu Sicherheitsmaßnahmen und Restrisiken. Lesen Sie dieses Kapitel gut durch, bevor Sie die Anlage benutzen, um einen weitestgehend sicheren Umgang mit der Anlage zu gewährleisten. Erklärung von Warnhinweisen und Verboten Warnung vor Gefahr Warnung vor Absturzgefahr Warnung vor Handverletzungen Warnung vor explosiven Atmosphären... - Página 7 2. Sicherheitshinweise Falls der Gebrauch von persönlicher Schutzausrüstung (Sicherheitsschuhe, Schutzbrille, Handschu- he, Gehörschutz, etc.) vorgeschrieben ist, ist darauf zu achten, dass diese auch benutzt wird. Feh- lerhafte oder beschädigte Schutzausrüstung ist unverzüglich gegen einwandfrei funktionsfähige Schutzausrüstung auszutauschen. Alle Sicherheits- und Gefahrenhinweise an der Maschine sind stets in gut lesbarem Zustand zu hal- ten.
-
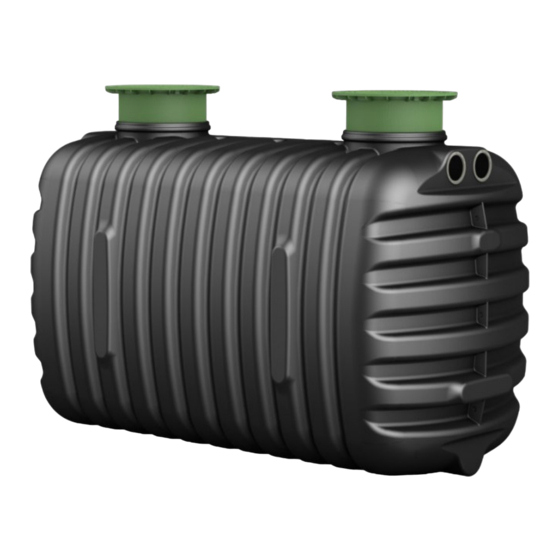
Página 8: Lieferumfang
3. Lieferumfang Lieferumfang Die Kläranlage besteht grundsätzlich aus einer Faulgrube (Septic Tank 3000 L, Carat XL), einem Stoß- beschicker (50 L, 100 L), drei Schächten, sechs bzw. zwölf BIOMATIC Modulen. Faulgrube Septic 3000 (6 EW) oder Carat RS 3750 (6 EW) Carat RS 6500 (12 EW) Stoßbeschicker 50 L (6 EW) - Página 9 3. Lieferumfang Verteilerschacht H: 450 mit Schikane zur gleichmäßigen Abwasserverteilung Kontrollschacht H: 450 ohne Schikane BIOMATIC-Modul mit Trägermaterial Kontrollschacht H: 1100 Weitere Bestandteile: Rohre, Drainagerohre, PVC Folie, Geotextil, Geogitter, Foliendurchführung 8 / 96...
-
Página 10: Einbaubedingungen
4. Einbaubedingungen Einbaubedingungen Baugrund Vor dem Einbau müssen folgende Punkte unbedingt abgeklärt werden: Die bautechnische Eignung des Bodens nach nationalen sowie harmonisierten Normen. • Maximal auftretende Grundwasserstände bzw. Sickerfähigkeit des Untergrundes • Auftretende Belastungsarten, z. B. Verkehrslasten • Baugrube Damit ausreichend Arbeitsraum vorhanden ist, muss die Grundfläche der Baugrube die Behältermaße auf jeder Seite um >... - Página 11 4. Einbaubedingungen Der Abstand zwischen einem Fundament eines Bauwerks und der Anlage muss größer als 5 m sein. > 5 m Wird die Anlage neben Verkehrsflächen installiert, entspricht > H der Mindestabstand zu diesen Flächen mindestens der Grubentiefe „H“. Bei der Positionierung der Kläranlage ist ebenfalls auf aktuellen oder geplanten Baumbestand zu achten.
- Página 12 4. Einbaubedingungen Einbauplan 6 EW Anlage: 11 / 96...
- Página 13 4. Einbaubedingungen 6 EW Anlage: Rohrplan 12 / 96...
- Página 14 4. Einbaubedingungen 12 EW Anlage: Dreireihig 13 / 32...
- Página 15 4. Einbaubedingungen 12 EW Anlage: Rohrplan 1000 1100 2500 2500 1490 2500 2500 1490 1000 14 / 96...
- Página 16 4. Einbaubedingungen Entlüftung 0,4 m min. 1 m min. 10 m max Folgende Legende ist zur Entlüftung der Anlage einzuhalten: 1. Zuleitung häuslicher Abwässer (min. 2%, max. 4% Gefälle) 2. Inspektionsschacht. 3. Septic 3000 L / Carat XL 4. Ablaufrohr für vorbehandeltes Abwasser (min. 0,5% Gefälle) 5.
-
Página 17: Funktion Der Anlage
Verteilerschacht H:450: Hier wird das Abwasser durch einen Verteilerschacht aufgeteilt. ⑤ BIOMATIC Modul: Das vorgefilterte Abwasser wird hier durch eine Verrohrung, welche auf der Unterseite aufgebohrt ist, auf die einzelnen Biomaticmodule verteilt und gefiltert. In dem darunter liegendem Sandfilter werden die restlichen Schwebstoffe aus dem Abwasser herausgefiltert. In einer darunter befindlichen Drainageschicht wird das nun geklärte Abwasser in einem... -
Página 18: Einbauanleitungen Der Anlage
6. Einbauanleitungen der Anlage Einbauanleitungen der Anlage Der Einbau des Fettabscheiders, der Sammelgrube, des Stoßbeschicker und der Schächte wird nach der den Komponenten beiliegenden Einbauanleitung vorgenommen. Hier finden Sie auch weitere Angaben zu den Einbaubedingungen der Komponenten Einbauanleitung der Sammelgrube Septic 3000 L Zulauf DN 100 Ablauf DN 100... - Página 19 6. Einbauanleitungen der Anlage Carat XL Zulauf DN 100 Ablauf DN 100 Filtergehäuse Standrohr 3500 Der Einbau der Sammelgrube wird nach der dem Behälter beiliegenden Einbauanleitung vorgenommen. Hier finden Sie auch weitere Angaben zu den Einbaubedingungen des Behälters.. 18 / 96...
- Página 20 6. Einbauanleitungen der Anlage Einbauanleitung des Stoßbeschickers Stoßbeschicker 50 L Zulauf DN 100 Ablauf DN 75 Der Einbau des Stoßbeschickers wird nach der dem Stoßbeschicker beiliegenden Einbauanleitung vorgenommen. Hier finden Sie auch weitere Angaben zu den Einbaubedingungen des Behälters. Stoßbeschicker 100 L Zulauf DN 100 Ablauf DN 75 1560...
- Página 21 6. Einbauanleitungen der Anlage Einbauanleitung BIOMATIC Module Schritt 1. Die Sohle der Sickergrube muss in Fließrichtung ein Gefälle zwischen 1 und 2 % aufweisen. Die Wände der Sickergrube müssen senkrecht sein. Als Unterbau wird eine Schicht verdichteter Rundkornkies (max. Körnung 8/16 mm, Dicke 100 – 150 mm) aufgetragen.
- Página 22 6. Einbauanleitungen der Anlage Schritt 4. Zwischen Endschacht und Kollektorschacht wird eine Foilendurchführung angebracht. 3. Mit einem Cutter wird der innerhalb des 1. Der Umriss des Rohrs wird mit einem Rundflansches befindliche Teil der Folie Markierstift auf die Folie übertragen. Die ausgeschnitten.
- Página 23 6. Einbauanleitungen der Anlage Schritt 5. Kiesschicht100 mm Auf die Folie wird das Drainagerohr verlegt, welches auf der einen Seite in das Entlüftungsrohr und auf der gegenüberliegenden Seite in das Ablaufrohr gesteckt wird. Umlagert wird das Drainagerohr mit einer Schicht Kies (Korngröße 10 – 40 mm) diese muss das Drainagerohr bedecken. Schritt 6.
- Página 24 X = Siebgröße in mm, Y = % Siebgut, 1 = Maschenweite der Siebe Schritt 8. 1. Auf der Sandschicht werden die BIOMATIC Module nach dem jeweiligen Einbauplan (6 EW & 12 EW) angeordnet. 2. Über die BIOMATIC Module wird die Verrohrung gelegt. Bitte hier auf die Bohrungen der Verrohrung achten.
- Página 25 4. Mutterboden 80 - 100 1. Sand: Der Raum zwischen den BIOMATIC Modulen wird mit Sand aufgefüllt bis über die darüber verlegte Verrohrung. 2. Kies: Über der Sandschicht wird ein Lage aus Kies mit einer Dicke von 80 – 100 mm aufgebracht.
-
Página 26: Inbetriebnahme
7. Inbetriebnahme Inbetriebnahme 1. Die Faulgrube wird mit Wasser befüllt. 2. Den Deckel der Faulgrube mit dem Verriegelungssystem verschlissen. 3. Die Kläranlage ist ohne weitere Einstellungen betriebsbereit 25 / 96... -
Página 27: Wartung Der Anlage
Person nachgestiegen werden, sondern es ist schnellstmöglich Hilfe zu holen. Wartungsintervalle: Anlagenkomponente Kontrolle und Reinigung Sammelgrube Einmal jährlich Anaerobixfilter Alle 6 bis 12 Monate Stoßbeschicker Alle 6 Monate Verrohrung Einmal jährlich Schächte Einmal jährlich Austausch im Falle einer BIOMATIC Module Verstopfung 26 / 96... - Página 28 8. Wartung der Anlage Wartung der Sammelgrube und des Anaerobix Filter Sobald die Sammelgrube zur Hälfte gefüllt ist muss diese entleert werden. Die Entsorgung des Klärschlamms muss von einem zugelassenen Betreib durchgeführt werden. Wartungsvorgang: 1) Sicherheitsschraube entfernen und den Deckel abnehmen– Weisen Sie auf die Öffnung des Behälters hin.
- Página 29 8. Wartung der Anlage Wartungsprotokoll Name des Betreibers: ___________________ Standort der Anlage: _________________ Fabrikat: ___________________ Ausbaugröße: _________________ Angeschlossene Einwohner: ______ Datum: ________________ Uhrzeit: __________ Anlagenteil / Funktion Kontrolle Mangel Bemerkung nein nein Fettabscheider (optional) ⃝ ⃝ ⃝ ⃝ Ist die Funktionssicherheit gegeben? ⃝...
- Página 30 8. Wartung der Anlage Anlagenteil / Funktion Kontrolle Mangel Bemerkung nein nein Weitere Bestandteile ⃝ ⃝ ⃝ ⃝ Sind die Belüftungseinrichtungen in Ordnung? ⃝ ⃝ ⃝ ⃝ Sind sonstige Mängel vorhanden Abwasseranalyse (Parameter, soweit von der Aufsichtsbehörde gefordert) Tag der Probenahme org.- Stickstoff mg/L Uhrzeit der Probenentnahme...
-
Página 31: Betriebshinweise
9. Betriebshinweise Betriebshinweise Grundsätzlich sind der Anlage nur Stoffe zuzuführen, welche in ihrer Charakteristik häuslichem Schmutz- wasser entsprechen. Biozide, toxisch wirkende oder biologisch nicht verträgliche oder abbaubare Stoffe dürfen nicht in die Anlage gelangen, da sie zu biologischen Prozessproblemen führen. Insbesondere dürfen nicht eingeleitet werden: Niederschlagswasser von Dach- und Hofflächen, •... - Página 32 9. Betriebshinweise Im Folgenden sind noch mal einzelne Stoffe aufgeführt, welche nicht über die Kläranlage entsorgt wer- den dürfen: Feste oder flüssige Stof- fe, die nicht in den Aus- Wo sie gut aufgehoben Was sie anrichten: guss bzw. in die Toilette sind: gehören: Asche...
- Página 33 Mülltonne WC-Steine Vergiften das Abwasser Nicht verwenden Windeln Verstopfen die Rohre Mülltonne Zementwasser Lagert sich ab, verbetoniert Fachfirma besorgen Wir danken Ihnen für Ihr Vertrauen. Ihre Otto Graf GmbH, Teningen Stand 09/2017 Technische Änderungen vorbehalten. www.graf.info 32 / 96 11-2017...
- Página 34 Installation Guide for a Biomatic Sewage Treatment Plant- Operation & Maintenance BIOMATIC 6 EW Sewage Treatment Plant BIOMATIC 12 EW Sewage Treatment Plant All the instructions in this guide are Contents mandatory. Failing to heed these instructions will invalidate your warranty.
- Página 35 Dear Sir/Madam, We are very pleased you have chosen the modern sewage treatment plant BIOMATIC. BIOMATIC is a quality product. As a small-scale sewage treatment plant, it meets all requirements of EN 12566-3+ A2. In the following section, we would like to give you some important tips concerning how to ensure the long,...
-
Página 36: General Information
1. General Information General Information Principles: Planning, Implementation, Maintenance and Repair Planning Expert draws up a draft. • Geological survey. • Layout adapted to current situation. • Basic assessment taken into account: • Number of inhabitants Nominal daily amount of sewage 0.90 m /day 1.8 m... -
Página 37: Declaration Of Performance
1. General Information Declaration of Performance 36 / 96... -
Página 38: Hazard Information
2. Safety Information Safety Information This chapter provides you with information about safety measures and residual risks. In order to ensure safe-as-possible work with the plant, please read through this chapter thoroughly before you begin work- ing with the plant. Declaration of Warning Information and Prohibitions Hazard warning Warning: Risk of falling... - Página 39 2. Safety Information 9th Hot parts must not be allowed to come into contact with potentially-explosive or highly-flammable chemicals. 38 / 96...
-
Página 40: Scope Of Supply
3. Scope of Supply Scope of Supply This sewage treatment plant comprises the septic tank 3000 L, Carat XL, a batch feeding tank (50 L, 100 L), three shafts, six/twelve BIOMATIC modules. Septic tank Septic 3000 (6 EW) or Carat RS 3750 (6 EW) - Página 41 3. Scope of Supply Distribution shaft H: 450 with baffle for even waste water distribution Inspection shaft H: 450 without baffle BIOMATIC module with support materi- Inspection shaft H: 1100 Additional components: Pipes, drainage pipes, PVC film, geotextile, geogrid, film guide...
-
Página 42: Installation Conditions
4. Installation Conditions Installation Conditions Foundation Important: The following needs to be clarified before installation: The ground must be technically suitable based on national and harmonised standards. • Maximum groundwater levels/percolation characteristics of the substrate • Types of applicable loads, e.g. traffic loads •... - Página 43 4. Installation Conditions The clearance between a foundation of a structure and the plant must be greater than 5 m. > 5 m If the plant is installed next to a traffic > H route, the minimum clearance to these surfaces must be the depth of the pit “H”...
- Página 44 4. Installation Conditions Installation Plan 6 EW plant: 43 / 96...
- Página 45 4. Installation Conditions 6 EW plant: Piping diagram 44 / 96...
- Página 46 4. Installation Conditions 12 EW plant: Three-layer 13 / 32...
- Página 47 4. Installation Conditions 12 EW plant: Piping diagram 1000 1100 2500 2500 1490 2500 2500 1490 1000 46 / 96...
- Página 48 4. Installation Conditions Venting 0,4 m min. 1 m min. 10 m max The following legend must be observed when venting the plant: 1. Supply line domestic sewage water (min. 2%, max. 4% slope) 2. Inspection shaft. 3. Septic 3000 L / Carat XL 4.
-
Página 49: Function Of The Unit
Distribution shaft H:450: Here, the waste water is distributed through a distribution shaft. ⑤ BIOMATIC module: The prefiltered waste water is distributed to the separate Biomatic modules and filtered through a pipeline which is opened up by drilling on the undersurface. The remaining suspended matter is filtered from the waste water via the sand filter, positioned underneath. -
Página 50: Installation Instructions For The Plant
6. Installation Instructions for the Plant Installation Instructions for the Plant The grease trap, collection pit, the batch feeding tank and shafts are installed according to the installation instructions enclosed with the components. These instructions also have additional information concern- ing the installation instructions of the components Installation Instructions for the Collecting Pit Septic 3000 L... - Página 51 6. Installation Instructions for the Plant Carat XL Supply line DN Drain line DN 100 Filter encl. Surface pipe 3500 The collecting Pit is installed based on the installation instructions enclosed with the tank. Here you can fund additional information concerning the conditions for installing the tank. 50 / 96...
- Página 52 6. Installation Instructions for the Plant Installation Instructions for the Batch Feeding Tank Batch Feeding Tank 50 L Supply line DN Drain line DN 75 The batch feeding tank is installed based on the installation instructions enclosed with the shock loader. Here you can fund additional information concerning the conditions for installing the tank.
- Página 53 6. Installation Instructions for the Plant Installation Instructions for BIOMATIC Modules Step 1. The base of the drainage pit must have a slope of between 1 and 2 % in the direction of flow. The walls of the drainage put must be vertical. A layer of compacted round-grain gravel (max. grain size 8/16 mm, thickness 100 –...
- Página 54 6. Installation Instructions for the Plant Step 4. A film guide is installed between the exit shaft and the distribution shaft. 3. The part of the film inside the round flange 1. The outline of the pipe is applied to the film is trimmed using a cutter.
- Página 55 6. Installation Instructions for the Plant Step 5. Layer of gravel100 The drainage pipe is installed onto the film which is inserted on one side into the venting pipe and into the drain pipe on the opposite side. The drainage pipe is surrounded with a layer of gravel (grain size 10 – 40 mm).
- Página 56 1. The BIOMATIC modules are arranged on the layer of sand based on the particular installation plans (6 EW & 12 EW). 2. The piping is installed above the BIOMATIC modules. Please pay attention to the bore holes of the unit. These bore holes must face downwards towards the BIOMATIC modules. There is a marking on the pipes as a positional aid.
- Página 57 4. Topsoil 80 - 100 1. Sand: The space between the BIOMATIC modules is filled in with sand up to the piping installed above it. 2. Gravel: A layer of gravel is applied above the layer of sand with a thickness of 80 – 100 mm.
-
Página 58: Commissioning
7. Commissioning Commissioning 1. The septic tank is filled with water. 2. The cover of the septic tank is shut using the locking system. 3. The sewage treatment plant is now ready for use. 57 / 96... -
Página 59: Maintaining The Plant
Plant component Inspection and cleaning Collecting pit Once annually Anaerobix filter Every 6 to 12 months Batch feeding tank: Every 6 months Pipework Once annually Shafts Once annually Replace in the case of a BIOMATIC modules blockage 58 / 96... - Página 60 8. Maintaining the Plant Maintaining the Collecting Pit and Anaerobix Filter Once the collecting put is half-filled, this must be emptied. A certified firm must dispose of the sewage sludge. Maintenance process: 1) Remove the safety screw and take off the cover -View the opening of the tank. 2) Be mindful of any toxic gases which can escape from the walk-on opening to the collecting pit (methane, hydrogen sulphide) - Do not smoke.
- Página 61 8. Maintaining the Plant Maintenance Report Name of the Owner/Operator ___________________ Location of the plant: _________________ Make: ___________________ Capacity: _________________ Connected inhabitants: ______ Date: ________________ Time: __________ Machine part/function Inspection Deficiency Remark Grease trap (optional) ⃝ ⃝ ⃝ ⃝ Is functional reliability assured? ⃝...
- Página 62 8. Maintaining the Plant Machine part/function Inspection Deficiency Remark Additional components ⃝ ⃝ ⃝ ⃝ Are the ventilation devices OK? ⃝ ⃝ ⃝ ⃝ Are there are any other deficien- cies? Waste water analysis (Parameters if required by the supervisory authorities) Day of sample Org.
-
Página 63: Operating Instructions
9. Operating Instructions Operating Instructions As a general rule, only add substances which have the same characteristics of domestic waste water. Biocides, toxic or non-biocompatible substances or non-biodegradable substances must not be allowed to get into the plant as they may lead to problems with the biological processes. In particular, the following must not be added: Precipitation from roof and yard surfaces, •... - Página 64 9. Operating Instructions The following section shows particular substances which must not be disposed of with this sewage treatment plant: Solid of fluid substances Where they are better that do not belong in the What they cause: suited: sink or toilet: Ashes Do not decompose Rubbish bin...
- Página 65 Do not use Nappies Block the pipes Rubbish bin Cement water Gets deposited, concretes up Must be removed by specialist firm We appreciate your custom. From everyone at Otto Graf GmbH Update 09/2017 Subject to change. www.graf.info 64 / 96 11-2017...
- Página 66 Instrucciones de montaje, funcionamiento y mantenimiento de una depuradora Biomatic Depuradora BIOMATIC 6 habitantes Depuradora BIOMATIC 12 habitantes Los puntos descritos en estas Índice de contenido instrucciones deben respetados obligatoriamente. Si no observan instrucciones OBSERVACIONES GENERALES prescribe todo derecho garantía Recibirá adjuntas en el...
- Página 67 Celebramos que haya decidido adquirir una moderna depuradora BIOMATIC. Esta depuradora BIOMATIC es un producto de calidad que, como instalación completa, cumple los requisitos de la normativa ES 12566-3+ A2 como depuradora compacta. En este manual queremos facilitarle algunas indicaciones importantes para un funcionamiento duradero y seguro del equipo: La depuradora está...
-
Página 68: Observaciones Generales
1. Observaciones generales Observaciones generales Principios básicos: Planificación, ejecución y mantenimiento Planificación La elaboración de un esquema técnico por parte de un profesional. • Un estudio geológico. • Un dimensionado adaptado a la situación respectiva. • Hay que respetar la base de dimensionado: •... - Página 69 1. Observaciones generales Leistungserklärung 68 / 96...
-
Página 70: Indicaciones De Seguridad
2. Indicaciones de seguridad Indicaciones de seguridad Este capítulo incluye indicaciones sobre medidas de seguridad y posibles riesgos. Lea este capítulo detenidamente antes de utilizar el equipo, con el fin de garantizar un manejo lo más seguro posible de la misma. - Página 71 2. Indicaciones de seguridad Si se prescribe la utilización de equipos de protección individual (calzado de seguridad, gafas de seguridad, protección auditiva etc.) hay que usarlos. El equipo de protección defectuoso o dañado debe ser sustituido de inmediato por un equipo de protección en perfectas condiciones de funcionamiento.
-
Página 72: Artículos Suministrados
Artículos suministrados La depuradora está compuesta básicamente por una fosa filtro (Septic 3000, Carat RS ó Carat XL), un alimentador intermitente (50 l 100 l), tres arquetas y seis o doce módulos BIOMATIC Fosa filtro Septic 3000 (6 habitantes) ó... - Página 73 Arqueta distribuidora 450 con desviador para la distribución uniforme del agua residual Arqueta de control altura 450 sin desviador Módulo BIOMATIC con sustrato Arqueta de control altura 1100 Otros componentes: Tubos, tubos de drenaje, lámina de PVC, geotextil y geomalla 72 / 96...
-
Página 74: Excavación
4. Condiciones para el montaje Condiciones para el montaje Terreno Antes de proceder a la instalación hay que clarificar sin falta los puntos siguientes: La idoneidad del suelo para la obra según las normas nacionales vigentes • Niveles máximos de aguas subterráneas que pueden producirse o capacidad de infiltración del •... - Página 75 4. Condiciones para el montaje Cuando se instala el equipo en las inmediaciones (< 5 m) de una pendiente, de una montaña de tierra o de un talud, se deberá levantar un muro de contención, del que se habrá realizado el cálculo estático correspondiente, para absorber la presión del terreno.
- Página 76 4. Condiciones para el montaje Planos de montaje Equipo para 6 habitantes: 75 / 96...
- Página 77 4. Condiciones para el montaje Equipo para 6 habitantes: Plano de tuberías 76 / 96...
- Página 78 4. Condiciones para el montaje Equipo para 12 habitantes: De tres filas 13 / 32...
- Página 79 4. Condiciones para el montaje Equipo para 12 habitantes: Plano de tuberías 1000 1100 2500 2500 1490 2500 2500 1490 1000 78 / 96...
-
Página 80: Aireación
4. Condiciones para el montaje Aireación 0,4 m min. 1 m min. 10 m max Hay que tener en cuenta los siguientes puntos para airear el equipo: 1. Introducción de las aguas residuales domésticas (pendiente min. 2 %, pendiente máx. 4 %) 2. -
Página 81: Funcionamiento Del Equipo
Módulo BIOMATIC: Aquí el agua residual previamente filtrada se distribuye entre los distintos módulos Biomatic y se filtra con ayuda de una tubería con agujeros taladrados en la parte inferior. En el filtro de arena que se encuentra debajo se eliminan las restantes substancias en suspensión del agua residual mediante el filtrado. -
Página 82: Instrucciones De Montaje Para El Equipo
6. Instrucciones de montaje para el equipo Instrucciones de montaje para el equipo El montaje del separador de grasas, de la fosa filtro, del alimentador intermitente y de las arquetas se realiza según las instrucciones de montaje adjuntas a los componentes. Aquí encontrará también más indicaciones acerca a de las condiciones de montaje del depósito Instrucciones de montaje de la fosa filtro Septic 3000 L... - Página 83 6. Instrucciones de montaje para el equipo Carat XL Entrada DN 100 Salida DN 100 Cuerpo del filtro Tubo de soporte 3500 El montaje de la fosa filtro se realiza siguiendo las instrucciones de montaje entregadas junto con el depósito. Aquí encontrará también más indicaciones acerca a de las condiciones de montaje del depósito.
- Página 84 6. Instrucciones de montaje para el equipo Instrucciones de montaje del alimentador intermitente Alimentador intermitente 50 l Entrada DN Salida DN 75 110 El montaje del alimentador intermitente se realiza siguiendo las instrucciones de montaje incluidas con el mismo. Aquí encontrará también más indicaciones acerca a de las condiciones de montaje del depósito. Alimentador intermitente 100 l Entrada DN 100 Salida DN 75...
- Página 85 6. Instrucciones de montaje para el equipo Instrucciones de montaje módulos BIOMATIC Paso 1. La generatriz inferior de la fosa de infiltración debe tener en el sentido de flujo una pendiente entre 1 y 2 %. Las paredes de la fosa de infiltración deben ser verticales. Como base se aplica una base de grava redonda compactada (tamaño de grano máximo 8/16 mm, espesor 100 –...
- Página 86 6. Instrucciones de montaje para el equipo Paso 4. Entre la arqueta final y la arqueta del colector se inserta una lámina. 3. Recortar la lámina que se encuentra 1. Hay que dibujar el contorno del tubo sobre dentro de la brida redonda con ayuda de la lámina con ayuda de un lápiz de marcar.
- Página 87 6. Instrucciones de montaje para el equipo Paso 5. Tender el tubo de drenaje sobre la lámina e insertarlo en un lado en el tubo de aireación y en el lado opuesto en el tubo de desagüe. Hay que rodear el tubo de drenaje con una capa de grava (tamaño del grano 10-40 mm) que tiene que cubrir el tubo de drenaje.
- Página 88 (6 habitantes y 12 habitantes). 2. Tender la tubería sobre los módulos BIOMATIC. Hay que prestar atención a los agujeros taladrados en la tubería. Estos agujeros tienen que estar dirigidos hacia abajo en dirección a los módulos BIOMATIC.
- Página 89 4. Mantillo 80 - 100 1. Arena: Rellenar el espacio entre los módulos BIOMATIC con arena hasta la tubería tendida encima de ellos. 2. Grava: Extender sobre la capa de arena una capa de grava de un espesor de 80 - 100 ms.
-
Página 90: Puesta En Marcha
7. Puesta en marcha Puesta en marcha 1. Llenar la fosa filtro con agua. 2. Cerrar la tapa de la fosa filtro con el sistema de bloqueo. 3. La depuradora está a punto de funcionamiento sin más ajustes. 89 / 96... -
Página 91: Mantenimiento Del Equipo
Control y limpieza equipo Fosa filtro Una vez al año Filtro Anaerobix Cada 6 ó 12 meses. Alimentador Cada 6 meses intermitente Tubería Una vez al año Arquetas Una vez al año Sustituir en caso de Módulos BIOMATIC obstrucción 90 / 96... -
Página 92: Mantenimiento De La Fosa Filtro Y Del Filtro Anaerobix
8. Mantenimiento del equipo Mantenimiento de la fosa filtro y del filtro Anaerobix Hay que vaciar la fosa filtro cuando está llena hasta la mitad. El lodo de la depuradora tiene que ser eliminado por una empresa autorizada. Proceso de mantenimiento: 1) Desenrosque el tornillo de seguridad y retire la tapa - Avise que el depósito está... -
Página 93: Protocolo De Mantenimiento
8. Mantenimiento del equipo Protocolo de mantenimiento Nombre operario: ______________ Ubicación equipo: _________________ Fecha fabricación: ___________________ Tamaño equipo: _________________ Habitantes: ______ Fecha: ________________ Hora: __________ Parte del equipo / función Control Deficiencia Observación sí sí Separador de grasas (opcional) ⃝ ⃝... - Página 94 8. Mantenimiento del equipo Parte del equipo / función Control Deficiencia Observación sí sí Otros componentes ⃝ ⃝ ⃝ ⃝ ¿Están las instalaciones de aireación en correcto estado? ⃝ ⃝ ⃝ ⃝ ¿Existen otras deficiencias? Análisis del agua residual (parámetros si son exigidos por la autoridad inspectora) Día toma Nitrógeno org.
-
Página 95: Indicaciones Para El Buen Funcionamiento
9. Indicaciones para el buen funcionamiento Indicaciones para el buen funcionamiento Por principio sólo se deberán introducir en el equipo sustancias con características equivalentes a las de las aguas negras y grises domésticas. No deben introducirse en el equipo biocidas, sustancias con efecto tóxico, biológicamente incompatibles o no degradables, porque provocan problemas biológicos en el proceso. - Página 96 9. Indicaciones para el buen funcionamiento En lo que sigue volvemos a indicar algunas sustancias que no se deben eliminar a través de la depuradora: Sustancias sólidas o líquidas que no se deben Lo que provocan estas Dónde se deben tirar al desagüe o al sustancias: eliminar:...
- Página 97 Cubo de basura Agua con contenido en Acudir a una empresa Sedimenta, se endurece cemento especializada Les agradecemos su confianza. Otto Graf GmbH, Teningen Última actualización 09/2017 ¡Nos reservamos el derecho de introducir modificaciones técnicas! www.graf.info 96 / 96 11-2017...
- Página 98 Notizen / Notes / Notas...