Blaupunkt Hamburg MP57 Instrucciones De Manejo E Instalación
Ocultar thumbs
Ver también para Hamburg MP57:
- Instrucciones de manejo (64 páginas) ,
- Instrucciones de instalación (15 páginas)
Tabla de contenido
Publicidad
Idiomas disponibles
Idiomas disponibles
Enlaces rápidos
Publicidad
Capítulos
Tabla de contenido

Manuales relacionados para Blaupunkt Hamburg MP57


Resumen de contenidos para Blaupunkt Hamburg MP57
- Página 1 Car Radio CD MP3 Hamburg MP57 7 647 643 310 Operating and installation instructions Mode d’emploi et de montage Instrucciones de manejo e instalación Instruções de serviço e de montagem...
- Página 2 Contents ENGLISH .......... 3 - 59 Installation instructions ....345 FRANÇAIS ........60 - 116 Notice de montage ......345 ESPAÑOL ......... 117 - 173 Instrucciones de instalación ....345 PORTUGUÊS ........174 - 230 Instruções de montagem ....345 ..........
-
Página 3: Tabla De Contenido
Contents Contents Switching the device on/off ..... 16 Adjusting the volume ....... 16 Muting the device ......17 About these instructions ....6 Changing the switch-off time Symbols used ........6 (OFF TIMER) ........17 Use as directed ........6 Resetting the device (NORMSET) ..17 Declaration of conformity ....6 Overview of the operation.... - Página 4 Contents CD/USB mode (MP3/WMA) ... 28 Answering/rejecting a phone call ..39 Starting the CD/USB mode ....28 Making a call (DIAL NEW) ....39 The MP3 display ......28 Ending a call ........40 The Browse mode ......29 Storing and calling up a phone number ..........
- Página 5 Contents Changing volume presettings for phone and mute ......47 Activating/deactivating the signal tone (BEEP ON/OFF) ..48 Setting the speed-dependent volume increase (AUTO SOUND) .. 48 Changing display settings (DISPLAY MENU)......49 Adjusting the display viewing angle (ANGLE ADJ) ..49 Changing the day/night brightness (DIM DAY/DIM NIGHT) ....
-
Página 6: About These Instructions
Declaration of conformity Symbols used The Blaupunkt GmbH declares that the These instructions employ the following Hamburg MP57 device complies with the symbols: basic requirements and the other relevant regulations of the directive 1999/5/EG. DANGER! -
Página 7: Safety Notes
In operation • For the front AUX-IN socket, use only the angled jack plug from Blaupunkt (7 607 001 535). All protruding parts, incl. straight plugs or adapters, can lead to an increased injury risk in case of an ac-... -
Página 8: Cleaning Notes
For your safety Cleaning notes Solvents, cleaning and scouring agents as well as dashboard spray and plastics care product may contain ingredients that will damage the surface of the device. • Use only a dry or slightly moistened cloth for cleaning the device. •... -
Página 9: Scope Of Delivery
Scope of delivery Scope of delivery The scope of delivery includes: 1 Hamburg MP57 1 Operating instructions 1 Case for the control panel 1 Support frame 2 Disassembly bar 1 USB connecting cable 1 Microphone for Bluetooth phone calls 1 Remote control RC 12H... -
Página 10: Device Description
Device description Device description • Either a CD changer or an external au- dio source, e.g. MiniDisc or MP3 player, via the rear AUX socket (REAR-AUX-IN What can the device do? socket) In addition to the tuner, the device features •... - Página 11 Device description Rocker switches and button Tuner: Tuning into stations manually for folding out the control panel CD, USB: Selecting previous/next track BAND button X-BASS button Tuner: Selecting a waveband/memory Switching X-BASS on/off and adjusting it bank (press short), starting Travelstore MENU/OK button <...
-
Página 12: Theft Protection
Theft protection Theft protection Detaching/attaching the control panel Device card You can detach the control panel to protect against theft. In case of a theft, the device card on the back of these instructions together with CAUTION! the purchase receipt is your proof of own- Damage to the control panel ership. -
Página 13: Startup
(WMA version 9, without DRM copy protec- ing features: tion only). File system FAT16 or FAT32, Note: no NTFS! Blaupunkt cannot guarantee the proper functioning of all USB media available on ID3 tags Version 1 or 2 the market! Only MP3 or WMA fi les,... -
Página 14: Selecting The Usb As Audio Source
32 GB, it may result in read errors for additional partitions. Note: If a large number of fi les is stored on your Blaupunkt cannot guarantee the proper USB medium, the speed of the fi le search functioning of copy-protected CDs! may be reduced. -
Página 15: What Features Do Mp3 Or Wma Cds Have To Have
Startup What features do MP3 or WMA CDs have Inserting and removing a CD to have? CAUTION! The device can only play and display MP3 or WMA CDs with the following features: Damaging the CD drive Labelled or shaped CDs can damage the CD ISO 9660 (Level 1 or 2) or drive. -
Página 16: Selecting The Cd As Audio Source
Startup Note: The display briefl y shows "READING DISC". Next, the following appears: To protect the vehicle battery if the igni- tion is switched off, the device automati- • The audio CD display if an audio CD is cally switches off after one hour. inserted. -
Página 17: Muting The Device
Startup tails, please read the chapter "Sound You can adjust the switch-off times from 15 settings", section "Volume". to 30 seconds. Muting the device Resetting the device (NORMSET ) Press the On/Off button You can reset the device to the factory set- tings (see appendix A1). -
Página 18: Overview Of The Operation
Overview of the operation Overview of the operation To change a setting: • In the menus, the rocker switch The following information was compiled to is used to change the setting of provide you with an overview of how to op- a menu item. -
Página 19: The Functions Of The Audio Sources
Overview of the operation The functions of the audio sources Some functions during the playback of music, such as forward or reverse music, are activat- ed with the rocker switches and as well as Audio source MP3/ Button Tuner SOURCE Tuner CD (CD-R) CDC/... -
Página 20: The Displays Of The Audio Sources
Overview of the operation The displays of the audio sources • display indicates whether a CD·C CD is in the CD slot (CD display) or a CD If you select an audio source, the corre- changer is connected (CD•C display). sponding display appears. -
Página 21: Track Name
Overview of the operation The MP3 display The CD changer display 01:23 TRACK NAME Track ROCK ROCK CD·C CD·C CLAS CLAS Disc 02 06:17 MP3 INFO 01:23 REPEAT REPEAT Display for CD Display for CD changer Track name (fi le name) Track number Sound presetting (PRESET) Playing time... -
Página 22: Tuner Mode
Tuner mode Tuner mode Starting the tuner mode (BAND) Press the BAND button to directly This device can receive radio stations in the call up the tuner display. FM and AM frequency ranges. Set the device to the region Press the SOURCE button >... -
Página 23: Tuning Into A Station
Tuner mode In the "TUNER" menu, press the BAND Tuning into stations manually button to switch between the wave- To change the frequency in increments of bands or memory banks: 100 kHz: Press the rocker switch or Selecting stored stations You can now perform the following actions in this waveband/memory bank : Select the desired waveband or memo-... -
Página 24: Searching And Storing Stations Automatically (Travelstore)
Tuner mode Searching and storing stations Press the rocker switch automatically (TRAVELSTORE ) peatedly until "SENSITIVITY" appears on the display. You can automatically search for and store the fi ve FM and AM stations offering the Press the rocker switch to open strongest reception in the region in the FMT the menu. - Página 25 Tuner mode You can do the following at any time: • Store the currently scanned station (press any station button for approx. two seconds) • Cancel the scan (briefl y pressing the MENU/OK button <...
-
Página 26: Cd Mode (Audio)
CD mode (audio) CD mode (audio) The audio CD display Audio CDs are played in the CD mode (au- dio). How to insert and remove CDs is de- 01:23 01:23 Track Track scribed in the chapter "Startup". ROCK CD·C CD TEXT CD TEXT 06:17 06:17... -
Página 27: Functions In The Cd Mode (Audio)
CD mode (audio) Functions in the CD mode (audio) Function Action Display/description Press the 5 Interrupt- "PAUSE": Pauses the playback. Press again: ing playback button Continues the playback (PAUSE) Selecting Press the rocker switch : Playing the next track tracks : Repeats the track. -
Página 28: Cd/Usb Mode (Mp3/Wma)
CD/USB mode (MP3/WMA) CD/USB mode The MP3 display (MP3 /WMA ) In CD/USB mode, you can play CD-Rs or TRACK NAME ROCK CD·C CD-RWs or a USB medium with MP3 or CLAS 01:23 MP3 INFO REPEAT WMA tracks. The chapter "Startup" describes what you must observe when connecting and discon- Display for CD necting USB media. -
Página 29: The Browse Mode
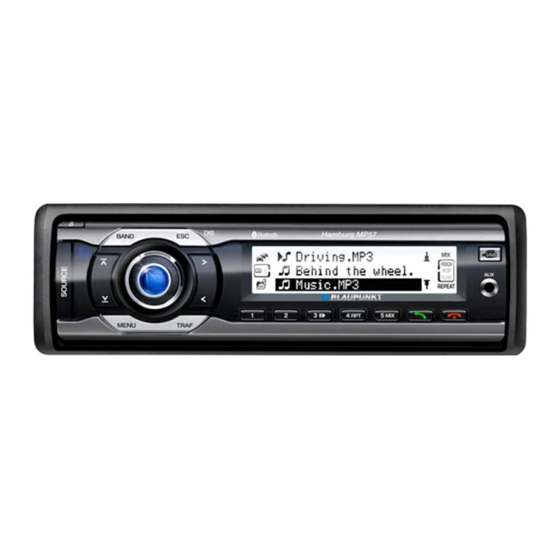
CD/USB mode (MP3/WMA) The Browse mode Selecting a track in the playlist During MP3/WMA playback, press the ESC/DIS button repeatedly un- The advantage.MP3 til Browse mode or the playlist is dis- ROCK In your Car.MP3 CD·C played. CLAS Music.MP3 REPEAT It shows all folders and tracks stored on Currently playing track the data carrier. -
Página 30: Displaying Title Information
CD/USB mode (MP3/WMA) Displaying title information To show all the available information about the current track (artist and album) on the display: Press the MENU/OK button < Press the rocker switch until "VARIOUS MENU" appears on the dis- play. Press the rocker switch to open the menu. -
Página 31: Functions In The Cd/Usb Mode (Mp3/Wma)
CD/USB mode (MP3/WMA) Functions in the CD/USB mode (MP3/WMA) The functions of this table refer to the MP3 displays with playing time or time mode. For the functions in Browse mode, please read the section "Selecting a track in the playlist (Browse mode)". -
Página 32: Cd-Changer Mode
CD-changer mode CD-changer mode The CD changer display You can connect the following CD changers to the device. 01:23 Track ROCK • Blaupunkt CDC A03 CD·C Disc 02 06:17 CLAS REPEAT • Blaupunkt CDC A08 • Blaupunkt IDC A09 How to insert CDs in the CD changer maga-... -
Página 33: Functions In The Cd Changer Mode
CD-changer mode Functions in the CD changer mode Function Action Display/response Press the 5 Interrupting "PAUSE": Pauses the playback. Press again: playback button Continues the playback (PAUSE) Selecting Press the rocker switch : Playing the next track tracks : Repeats the track. Press again: Plays the previous track Fast search Press and hold the rock-... -
Página 34: Aux Mode
The use of straight plugs or adapters can lead to an increased risk of injury. You can connect either a Blaupunkt CD changer or an external audio source to the For this reason, we recommend using REAR-AUX input. A Blaupunkt CD changer is angled jack plugs, e.g. -
Página 35: Confi Guring Audio Inputs (Aux Menu)
AUX mode Confi guring audio inputs • "AUX ON ": The corresponding au- dio input is activated and can be se- (AUX MENU ) lected as audio source using the The following settings can be changed in the SOURCE button >... -
Página 36: Front-Aux Input Adjusting Amplifi Cation (Aux Level)
AUX mode Note: To quit the text input without changing the name, press the ESC/DIS button FRONT-AUX input Adjusting amplifi cation (AUX LEVEL ) You can perform a volume adjustment from 0 to 8 for a connected external device: In the AUX menu, press the rocker switch repeatedly until "AUX LEVEL"... -
Página 37: Bluetooth Phone Call
Bluetooth phone call Bluetooth phone call How is a Bluetooth connection established? The integrated Bluetooth module in your de- First, the cell phone and the car sound sys- vice allows the handsfree use of a phone via tem have to "become acquainted" with each a Bluetooth connection. -
Página 38: Registering The Cell Phone
The cell phone recognises the car sound Press the rocker switch to open system under the name "Blaupunkt". The the menu. car sound system requests a PIN for the Press the rocker switch Bluetooth connection. -
Página 39: Answering/Rejecting A Phone Call
Bluetooth phone call Making a call (DIAL NEW ) Note: The "UNPAIR" function is active only if There are two ways of making a phone call the car sound system is currently con- via the car sound system: nected with the cell phone to be unreg- •... -
Página 40: Ending A Call
Bluetooth phone call Ending a call Calling up phone numbers Press the button to call up the To end a call: Dial Preset menu. Press the button The display shows the previously dialed The display shows "CALL ENDED". phone number and "DIAL PRESET" with You can also end the phone call by switching the corresponding station button. -
Página 41: Changing The Pin (Pin Change)
Bluetooth phone call Changing the PIN (PIN CHANGE ) If you want to register a cell phone with the car sound system, you must enter PIN "00000". This PIN can also be changed: Press the MENU/OK button Press the rocker switch peatedly until "BLUETOOTH MENU"... -
Página 42: Sound Settings (Audio Menu)
Sound settings Sound settings To perform settings: (AUDIO MENU ) In the "AUDIO" menu, press the rocker switch to switch between these menu items: The following sound settings can be changed in the "AUDIO" menu: • "BASS ": Volume of bass between •... -
Página 43: Equaliser Settings (Enhanced Menu)
Sound settings Which equaliser setting is the correct Press the rocker switch to call up one? the menu item. Switch between these sound preset- Measure tings with the rocker switch Centre Level • "POP" Sound impression fre- (dB) • quency "ROCK"... -
Página 44: Changing Equaliser Settings (E-Bass, E-Treble, E-Middle, E-Xbass)
Sound settings Note: The table does not contain all the settings that are possible in the menus "AUDIO" and "ENHANCED". AUDIO MENU ENHANCED MENU E-BASS E-TREBLE E-MIDDLE E-XBASS Level (GAIN) -7 to +7 0 to +3 Frequency 60 Hz, 80 Hz, 100 10 kHz, 12.5 kHz, 500 Hz, 1000 Hz, 50 Hz, 100 Hz... -
Página 45: User Settings
(ON MESSAGE ) button When you switch on the device, an animation Changing the clock settings appears. It is factory set to "BLAUPUNKT". (CLOCK MENU) To change this text, call up the "VARIOUS" menu: The following settings can be changed in the... -
Página 46: Switching Time Display On/Off
User settings Switching time display on/off • "12HR MODE": The 12-hour format (am/pm) is switched on. The time can be displayed while the de- • vice is switched off, if the vehicle ignition "24HR MODE": The 24-hour format is switched on. To switch this time display is switched on. -
Página 47: Changing Volume Presettings (Volume Menu)
User settings Changing volume presettings Switch between the settings with the rocker switch or (VOLUME MENU) • "LAST VOLUME" (power-on volume The following presettings can be changed in same as switch-off) or the Volume menu: • "ON VOLUME" (presetting the pow- •... -
Página 48: Activating/Deactivating The Signal Tone (Beep On/Off)
User settings case, the volume listened to is used In the Volume menu, press the rocker for mute. switch repeatedly until "AUTO SOUND" is displayed. • if the volume currently listened to is higher than the set TEL volume. In Press the rocker switch to display this case, phone calls/navigation an-... -
Página 49: Changing Display Settings (Display Menu)
User settings Changing display settings Press the rocker switch change the display contrast. (DISPLAY MENU) You can adjust the display contrast in 13 In the Display menu, you can change the increments from –6 to +6. following display settings: • Changing the day/night brightness Day/night brightness (DIM DAY/DIM NIGHT ) -
Página 50: Changing The Scan Time (Scantime)
User settings Changing the scan time (SCANTIME ) The scan time of the scan function is pre- set for all audio sources to 10 seconds. The scan function is not available for external au- dio sources. You can change the scan time in the Various menu. -
Página 51: Additional Settings
Additional settings Additional settings Press the rocker switch to call up the menu item. You can perform additional settings: Press the rocker switch • Confi guring the preamplifi er output for change between these menu items: the subwoofer • "GAIN": Amplifi cation (between 0 •... -
Página 52: Remote Control
A steering wheel remote button: control is available as optional equipment. • Muting sound Contact your Blaupunkt specialised deal- er or visit our website on the Internet: www.blaupunkt.com. Functions of the remote control A remote control allows you to operate the basic functions - with the exception of switching on and off. -
Página 53: Specifi Cations
Technical data Specifi cations Weight approx. 1.4 kg Voltage supply Operating voltage: 10.5 - 14.4 V Current consumption In operation: max. 10 A 10 seconds after switch-off: < 3.5 mA Amplifi ers Output power: 25 w RMS x 4 ch @ 14.4 V @ 4 ohm @ 1% THD Preamp Out 4 channels: Input sensitivity... -
Página 54: Statement According To Fcc
B digital device, pursuant to Part 15 of the In case your device has to be sent to FCC Rules. These limits are designed to pro- Blaupunkt for service you can order a pick- vide reasonable protection against harm- up service for your device on the internet. -
Página 55: Glossary
Glossary Glossary Root folder Main folder of a data carrier. The root folder Bluetooth contains all other folders. Bluetooth is a wireless radio communica- Shape CDs tion for short distances. This technology A shape CD is a CD whose form deviates allows for transmitting voice and data be- from the usual circular shape. - Página 56 Index Index CD player Inserting/removing a CD 14, 15 Note: Playing an audio CD 26, 27 Keywords in capital letters refer to menu Playing an MP3/WMA CD 28, 29, 31 items. Selecting 26, 28 Changing the scan time 50 Changing the switch-off time 17 Amplifi...
- Página 57 Index External audio source: see AUX OFF TIMER 17 ON MESSAGE 45 Factory settings: see Resetting ON VOLUME 47 (NORMSET) Operation 10, 18 FADER 42 FM1, FM2, FM3, and FMT 22 FREQ 44 P-EQ OFF 43 Frequency 44 PAIR: see BT ON; see BT OFF PIN CHANGE 41 Playlist 29, 55 GAIN 44...
- Página 58 Index Setting the region 22 Signal tone 48 VOLUME 47 Sound presettings 42 Volume 11, 16 Sound settings 42 Changing presettings 47 Station Increase, speed-dependent 48 Scanning 24 Storing 23 Tuning, calling 23 Waveband 23 SUBOUT 51 Welcome text 45 Subwoofer 51, 55 WMA 13, 28, 30 Switch-off 16...
-
Página 59: Appendix
Sony Ericsson K750i • W800i • CD DISPLAY PLAY TIME Z520i Edition: 12.2006 SENSITIVITY CLOCK You can fi nd out from your Blaupunkt dealer which cell phones are used by this device. CLOCKSET 12:00 CLOCK MODE BEEP DIMMER DIM DAY 15,... - Página 60 Sommaire Sommaire Quelles doivent être les caractéristiques des CD MP3 ou WMA ? ........71 A propos de cette notice ....63 Introduction et retrait des CD ..72 Symboles utilisés ......63 Sélection du CD comme source audio ..........72 Utilisation conforme ......
- Página 61 Sommaire Recherche et mémorisation Activation et désactivation de l'entrée REAR-AUX (AUX ON/OFF) .. 92 automatiques des stations (TRAVELSTORE) ......81 Changement du nom de l'entrée REAR AUX (AUX NAME EDIT) ..92 Modifi cation de la sensibilité Entrée FRONT-AUX Réglage de de la recherche (SENSITIVITY) ..
- Página 62 Sommaire Quel réglage d'égaliseur est Modifi cation de la luminosité le bon ? ........100 pour le jour ou la nuit (DIM DAY/DIM NIGHT) ....106 Modifi cation des réglages de l'égaliseur (E-BASS, E-TREBLE, Modifi cation de la durée d'écoute E-MIDDLE, E-XBASS) ....
-
Página 63: A Propos De Cette Notice
Déclaration de conformité Les symboles suivants sont utilisés dans Blaupunkt GmbH certifi e que l'appareil cette notice : Hamburg MP57 satisfait aux exigences de base et aux exigences des autres disposi- tions applicables de la directive 1999/5/CE. DANGER ! Avertit d'un risque de blessure DANGER ! Avertit d'un risque de détériora-... -
Página 64: Consignes De Sécurité
En fonctionnement • Raccordez uniquement un appareil muni d'un jack coudé Blaupunkt (7 607 001 535) à la prise AUX-IN frontale. Les piè- ces proéminentes, telles qu'une fi che ou un adaptateur droits, peuvent augmenter... -
Página 65: Instructions De Nettoyage
Pour votre sécurité Instructions de nettoyage Les solvants, les produits de nettoyage, les abrasifs et les produits pour l'entretien du poste de conduite et du plastique contien- nent des substances susceptibles d'atta- quer les surfaces de l'appareil. • Pour nettoyer l'appareil, utilisez unique- ment un chiffon sec ou légèrement hu- mide. -
Página 66: Composition De La Fourniture
Composition de la fourniture Composition de la fourniture La fourniture comprend : 1 Hamburg MP57 1 Mode d'emploi 1 Etui pour la face avant 1 Cadre support 2 Etriers de démontage 1 Câble de raccordement USB 1 Microphone pour téléphone Bluetooth... -
Página 67: Description De L'appareil
Description de l'appareil Description de l'appareil • Changeur de CD ou source audio externe, par ex. un lecteur de MiniDisc ou MP3, sur la prise AUX arrière (REAR AUX-IN) Que propose cet appareil ? • Source audio externe sur la prise En plus du tuner, l'appareil est équipé... - Página 68 Description de l'appareil Touches à bascule et Touche Tuner : réglage manuel des stations pour déclencher le basculement vers le CD, USB : sélection du titre précédent bas de la face avant ou suivant Touche BAND Touche X-BASS Tuner : sélection de la gamme d'ondes Activation, désactivation et réglage de ou du niveau de mémoire (pression X-BASS...
-
Página 69: Protection Antivol
Protection antivol Protection antivol Retrait et mise en place de la face avant Certifi cat de l'appareil Vous pouvez retirer la face avant pour proté- ger l'appareil contre le vol. En cas de vol, le certifi cat de l'appareil qui se trouve au dos de cette notice est votre ATTENTION ! certifi... -
Página 70: Mise En Service
DRM). pas de NTFS ! fi chiers Remarque : Balises ID3 Version 1 ou 2 Blaupunkt ne peut pas garantir le fonc- Format Uniquement fi chiers, tionnement irréprochable de l'ensemble dossiers et listes de des supports de données USB disponi- lecture MP3 ou WMA bles sur le marché... -
Página 71: Sélection Du Support De Données Usb Comme Source Audio
être lus) fi chiers (un nombre supérieur de Remarque : caractères est possible Blaupunkt ne peut garantir le bon fonc- au détriment du nombre tionnement de ses appareils avec des max. de fi chiers) CD protégés contre la copie ! Pas de caractères spéciaux... -
Página 72: Introduction Et Retrait Des Cd
Mise en service Introduction et retrait des CD Le CD est ensuite entraîné automatique- ment dans le lecteur. ATTENTION ! Fermez la face avant. Destruction du lecteur de CD « READING DISC » apparaît brièvement sur l'écran, puis : Les CD sur lesquels une étiquette est col- lée ou dont la périphérie n'est pas circulaire •... -
Página 73: Réglage Du Volume Sonore
Mise en service Remarques : Mise en marche manuelle de l'appareil : • Vous pouvez également régler le volu- Appuyez sur la touche Marche/Arrêt me sonore pour les communications Arrêt de l'appareil : téléphoniques ou les instructions vo- Appuyez sur la touche Marche/Arrêt cales du système de navigation au et maintenez-la appuyée pendant 2 se- moment où... -
Página 74: Réinitialisation De L'appareil (Normset)
Mise en service Appuyez sur la touche à bascule VARIOUS MENU autant de fois qu'il est nécessaire pour USER MENU faire apparaître « VARIOUS MENU » sur l'écran. Appuyez sur la touche à bascule VARIOUS MENU pour ouvrir le menu. Appuyez sur la touche à... -
Página 75: Vue D'ensemble De L'utilisation
Vue d'ensemble de l'utilisation Vue d'ensemble de Modifi cation d'un réglage : l'utilisation • Appuyez sur la touche ou pour modifi er le réglage d'une option de menu. Appuyez par exemple sur la touche ( ) Nous avons réuni dans cette section les in- pour augmenter le niveau des graves ou formations suivantes pour vous donner une sur la touche ( ) pour le diminuer. -
Página 76: Fonctions Des Sources Audio
Vue d'ensemble de l'utilisation Fonctions des sources audio Vous pouvez commander certaines fonctions de lecture, par ex. avance ou retour rapide, avec les touches à bascule et ainsi que Source audio Touche Tuner MP3/ Tuner CD (CD-R) CDC/ SOURCE REAR- FRONT- sélection d'une source audio) AUX-IN... -
Página 77: Pages D'affi Chage Des Sources Audio
Vue d'ensemble de l'utilisation Pages d'affi chage des sources • Le symbole indique qu'un CD se CD·C trouve dans le lecteur (affi chage de CD) audio ou qu'un changeur de CD est raccor- dé (affi chage de CD•C). Le symbole ap- Lorsque vous avez sélectionné... -
Página 78: Track Name
Vue d'ensemble de l'utilisation Page d'affi chage MP3 Page d'affi chage changeur de CD 01:23 TRACK NAME Track ROCK ROCK CD·C CD·C CLAS CLAS Disc 02 06:17 MP3 INFO 01:23 REPEAT REPEAT Symbole CD Symbole changeur de CD Titre (nom du fi chier) Numéro du titre Préréglage de tonalité... -
Página 79: Mode Tuner
Mode tuner Mode tuner Appuyez sur la touche SOURCE > autant de fois qu'il est nécessaire pour Cet appareil vous permet de recevoir le sta- faire apparaître la page d'affi chage tu- tions radio dans les gammes d'ondes FM et ner. -
Página 80: Sélection Des Stations
Mode tuner Réglage manuel des stations Dans le menu « Tuner », appuyez sur la touche BAND pour sélectionner Modifi cation de la fréquence par pas de la gamme d'ondes ou le niveau de mé- 100 kHz : moire : Appuyez sur la touche à... -
Página 81: Recherche Et Mémorisation Automatiques Des Stations (Travelstore)
Mode tuner Recherche et mémorisation Appuyez sur la touche MENU/OK < automatiques des stations Appuyez sur la touche à bascule (TRAVELSTORE ) autant de fois qu'il est nécessaire pour Vous pouvez chercher automatiquement les faire apparaître « TUNER MENU » sur 5 stations FM et AM les plus puissantes de l'écran. - Página 82 Mode tuner Appuyez sur la touche MENU/OK < maintenez-la appuyée pendant 2 secon- des environ. « SCAN » apparaît sur l'écran. Le tuner recherche les stations. Dès qu'il en a trouvé une, il la retransmet pendant le temps réglé. Une fois que la bande de fréquence a été complètement explorée, le balayage s'arrête.
-
Página 83: Mode Cd (Audio)
Mode CD (audio) Mode CD (audio) Page d'affi chage CD audio Le mode CD (audio ) vous permet de lire les CD audio. L'introduction et le retrait des CD 01:23 01:23 Track Track sont décrits dans la section « Mise en servi- ROCK CD·C CD TEXT... -
Página 84: Fonctions Dans Le Mode Cd (Audio)
Mode CD (audio) Fonctions dans le mode CD (audio) Fonction Manipulation Affi chage/description Interruption Appuyez sur la touche « PAUSE » : interruption momentanée de la lec- de la lecture ture. Nouvelle pression : reprise de la lecture (PAUSE) Sélection d'un Appuyez sur la touche à... -
Página 85: Mode Cd/Usb (Mp3/Wma)
Mode CD/USB (MP3/WMA) Mode CD/USB Page d'affi chage MP3 (MP3 /WMA ) Le mode CD/USB permet de lire les CD-R ou TRACK NAME ROCK CD·C CD-RW ainsi que les supports de données CLAS 01:23 MP3 INFO REPEAT USB avec des titres MP3 ou WMA. Ce dont vous devez tenir compte lorsque vous branchez ou débranchez un support Symbole CD... -
Página 86: Mode « Parcourir
Mode CD/USB (MP3/WMA) Mode « Parcourir » Sélection d'un titre dans une liste de lecture Pendant la lecture des fi chiers MP3/ The advantage.MP3 WMA, appuyez sur la touche ESC/DIS ROCK In your Car.MP3 CD·C CLAS autant de fois qu'il est néces- Music.MP3 REPEAT saire pour faire apparaître le mode... -
Página 87: Affi Chage D'informations Sur Le Titre
Mode CD/USB (MP3/WMA) Affi chage d'informations sur le titre Affi chage de toutes les informations dispo- nibles sur le titre (interprète et album) : Appuyez sur la touche MENU/OK < Appuyez sur la touche à bascule autant de fois qu'il est nécessaire pour faire apparaître «... -
Página 88: Fonctions Dans Le Mode Cd/Usb (Mp3/Wma)
Mode CD/USB (MP3/WMA) Fonctions dans le mode CD/USB (MP3/WMA) Les fonctions indiquées dans ce tableau se rapportent à la page d'affi chage MP3 avec affi - chage de la durée de lecture ou de l'heure. Pour les fonctions dans le mode « Parcourir », voir la section «... -
Página 89: Mode Changeur De Cd
Pour sélectionner un CD, appuyez sur la Vous pouvez raccorder les changeurs de CD touche à bascule suivants à l'appareil : « CD LOADING » apparaît brièvement • Blaupunkt CDC A03 sur l'écran. La lecture du CD sélection- • Blaupunkt CDC A08 né commence. •... -
Página 90: Fonctions Dans Le Mode Changeur De Cd
Mode changeur de CD Fonctions dans le mode changeur de CD Fonction Manipulation Affi chage/réaction Interruption Appuyez sur la touche « PAUSE » : interruption momentanée de la lec- de la lecture ture. Nouvelle pression : reprise de la lecture (PAUSE) Sélection d'un Appuyez sur la touche à... -
Página 91: Mode Aux
L'entrée REAR-AUX vous permet de raccorder que de blessure élevé. un changeur de CD Blaupunkt ou une source audio externe. Un changeur de CD Blaupunkt Pour cette raison, nous recommandons est détecté automatiquement et il est ensuite l'utilisation d'un câble muni d'un jack... -
Página 92: Confi Guration Des Entrées Audio (Aux Menu)
Mode AUX Confi guration des entrées audio • « AUX ON » : l'entrée audio est ac- tivée et elle peut être sélectionnée (AUX MENU ) comme source audio avec la touche Vous pouvez effectuer les réglages suivants SOURCE > dans le menu AUX : •... -
Página 93: Entrée Front-Aux Réglage De L'amplifi Cation (Aux Level)
Mode AUX Appuyez sur la touche MENU/OK < pour terminer l'entrée du texte et mé- moriser le nom entré. Remarque : Pour terminer l'entrée du texte sans modifier le nom, appuyez sur la touche ESC/DIS Entrée FRONT-AUX Réglage de l'amplifi cation (AUX LEVEL ) Vous pouvez adapter le volume sonore pour un appareil externe raccordé... -
Página 94: Téléphone Bluetooth
Téléphone Bluetooth Téléphone Bluetooth Comment une liaison Bluetooth est-elle établie ? Le module Bluetooth intégré dans l'appareil Le téléphone mobile et l'autoradio doivent permet de téléphoner avec les mains libres d'abord « apprendre à se connaître », c'est- grâce à une liaison Bluetooth. Le téléphone à-dire qu'ils doivent être couplés. -
Página 95: Connexion D'un Téléphone Portable
Le téléphone portable détecte l'autora- « BLUETOOTH MENU » sur l'écran. dio sous la désignation « Blaupunkt ». Appuyez sur la touche à bascule Pour que la liaison Bluetooth puisse être pour ouvrir le menu. -
Página 96: Prise D'appel/Refus D'appel
Téléphone Bluetooth Pour démarrer le processus de décon- La voix de votre correspondant est transmi- nexion, appuyez sur la touche à bascu- se par les haut-parleurs du véhicule. Pendant la communication téléphonique, Le processus de déconnexion est confi r- vous pouvez adapter le volume sonore à mé... -
Página 97: Fin De Communication
Téléphone Bluetooth Mémorisation d'un numéro de téléphone Appuyez sur la touche à bascule pour affi cher la page d'entrée du numé- Entrez le numéro de téléphone dans le ro de téléphone. menu « Dial New » comme décrit dans la Vous pouvez à... -
Página 98: Renvoi D'une Communication Téléphonique Sur Le Téléphone Portable
Téléphone Bluetooth Renvoi d'une communication Appuyez sur la touche à bascule pour ouvrir le menu. téléphonique sur le téléphone portable Appuyez sur la touche à bascule autant de fois qu'il est nécessai- La voix de votre correspondant est norma- re pour faire apparaître « PIN NUMBER » lement retransmise par les haut-parleurs du sur l'écran. -
Página 99: Réglages Du Son (Audio Menu)
Réglages du son Réglages du son pour chaque source audio séparément . Les réglages du X-BASS et de la répartition du (AUDIO MENU ) volume sonore sont valables pour toutes les sources audio. Dans le menu « AUDIO », vous pouvez effec- Réglage : tuer les réglages suivants : •... -
Página 100: Réglages De L'égaliseur (Enhanced Menu)
Réglages du son Quel réglage d'égaliseur est le bon ? qu'il est nécessaire pour faire apparaître « ENHANCED MENU » sur l'écran. Mesure Appuyez sur la touche à bascule Fré- Niveau Impression pour ouvrir le menu. quence (dB) sonore Le menu « Enhanced » s'ouvre. centrale (Hz) Dans le menu «... -
Página 101: Modifi Cation Des Réglages De L'égaliseur (E-Bass, E-Treble, E-Middle, E-Xbass)
Réglages du son Remarque : Le tableau n'indique pas tous les réglages possibles dans les menus « AUDIO » et « ENHANCED ». AUDIO MENU ENHANCED MENU E-BASS E-TREBLE E-MIDDLE E-XBASS Niveau (GAIN) -7 à +7 0 à +3 Fréquence 60 Hz, 80 Hz, 10 kHz, 12.5 kHz, 500 Hz, 1000 Hz,... -
Página 102: Réglages Utilisateur
Elle est ré- Remarque : glée d'usine sur « Blaupunkt ». Vous pouvez Pour terminer l'entrée du texte sans mo- modifi er ce texte dans le menu « VARIOUS » :... -
Página 103: Activation Et Désactivation De L'affi Chage De L'heure
Réglages utilisateur Sélection du format d'affi chage de Appel du menu « Clock » : l'heure 12h/24h (12HR/24HR MODE ) Appuyez sur la touche MENU/OK L'heure peut être affi chée au format 12 ou Appuyez sur la touche à bascule 24 heures. -
Página 104: Modifi Cation Des Préréglages Du Volume Sonore (Volume Menu)
Réglages utilisateur Remarque : Modifi cation du préréglage du volume sonore à la mise en marche Pour quitter l'entrée de l'heure sans mo- (ON VOLUME /LAST VOLUME ) difier celle-ci, appuyez sur la touche ESC/DIS L'appareil est réglé d'usine de manière à ce que le volume sonore à... -
Página 105: Activation Et Désactivation Du Bip (Beep On/Off)
Réglages utilisateur Dans le menu « VOLUME », appuyez sur dans un menu ou lors de l'affectation de sta- la touche autant de fois qu'il tions aux touches de présélection. est nécessaire pour faire apparaître une Dans le menu « VOLUME », appuyez sur des options de menu suivantes : la touche à... -
Página 106: Modifi Cation Des Réglages De L'écran (Display Menu)
Réglages utilisateur Modifi cation des réglages de Appuyez sur la touche à bascule pour appeler le réglage. l'écran (DISPLAY MENU) Appuyez sur la touche à bascule Le menu « DISPLAY » vous permet d'effec- pour modifi er le contraste de tuer les réglages de l'écran suivants : l'écran. -
Página 107: Modifi Cation De La Durée D'écoute Lors Du Balayage Des Stations Ou Des Titres (Scantime)
Réglages utilisateur Modifi cation de la durée d'écoute lors du balayage des stations ou des titres (SCANTIME ) Le préréglage de la durée d'écoute lors du balayage des stations ou des titres (fonction SCAN) est de 10 secondes pour toutes les sources audio. -
Página 108: Autres Réglages
Autres réglages Autres réglages Appuyez sur la touche à bascule pour ouvrir le menu. Vous pouvez effectuer d'autres réglages : Appuyez sur la touche à bascule • Confi guration de la sortie du préamplifi - autant de fois qu'il est nécessai- cateur pour les graves profondes re pour faire apparaître «... -
Página 109: Télécommande
Touche de de volant. Adressez-vous à votre reven- • Coupure du son deur Blaupunkt ou visitez notre site Inter- net: www.blaupunkt.com. Fonctions de la télécommande Vous pouvez commander les principales fonctions de l'autoradio - à l'exception de la mise en marche et de l'arrêt - avec la té-... -
Página 110: Caractéristiques Techniques
Caractéristiques techniques Caractéristiques techniques Poids approx. 1,4 kg Alimentation électrique Tension de service : 10,5 - 14,4 V Consommation de courant En fonctionnement : 10 A max. 10 secondes après l'arrêt : < 3,5 mA Amplifi cateur 25 W RMS x 4 ch @ 14.4 V @ 4 ohms @ 1% THD Puissance de sortie (Output power) : Sortie du préamplifi... -
Página 111: Service
Internet au servi- ce d'enlèvement. Vous pouvez consulter les conditions de ga- rantie sur le site www.blaupunkt.com ou les Vous pouvez contrôler si ce service est demander directement auprès de : disponible dans votre pays à l'adresse www.blaupunkt.com. -
Página 112: Glossaire
Glossaire Glossaire Répertoire racine Répertoire principal d'un support de don- Bluetooth nées. Le répertoire racine contient tous les autres dossiers. Bluetooth est une liaison radio (donc sans fi l) sur de courtes distances. Cette techno- Shape CD logie permet de transmettre la parole ou des Un Shape CD est un CD dont la forme diffère données entre des appareils, par exemple du cercle habituel. - Página 113 Index alphabétique Index alphabetique CD (audio, CD-R, CD-RW) 71, 72, 76, 112 Remarque : Certifi cat de l'appareil 69 Les mot-clés en majuscules renvoient aux Changeur de CD 76, 89, 90 options de menu. CLOCK, CLOCK MODE, CLOCK SET 102, CLOCK ON, CLOCK OFF 103 Amplifi...
- Página 114 Index alphabétique FM1, FM2, FM3 et FMT 79 FREQ 101 Nettoyage 65 Fréquence 101 Niveau de mémoire 79 NORMSET 74 Numéro de série, affi chage 69 GAIN 101 Gamme d'ondes 80 Graves profondes 108 OFF TIMER 73 ON MESSAGE 102 ON VOLUME 104 LAST VOLUME 104 Lecteur de CD...
- Página 115 Index alphabétique SCAN 81 UNPAIR 95 SCANTIME 107 UNPAIR ALL 95 Sécurité 63, 64 USB, support de données 76, 112 Sensibilité de la recherche 81 Exigences 70 SENSITIVITY 81 Raccordement 70 Son, réglages 99 Sélection 71, 85 Source audio externe: voir AUX Utilisation 67, 75 Sources audio 67 Fonctions 76...
-
Página 116: Annexe
PLAY TIME Z520i Situation en 12.2006 SENSITIVITY CLOCK Pour connaître les téléphones portables ac- tuellement reconnus par cet appareil, adres- CLOCKSET 12:00 sez-vous à votre revendeur Blaupunkt. CLOCK MODE BEEP DIMMER DIM DAY 15, DIM NIGHT 12 TURN ON BLAUPUNKT MESSAGE... - Página 117 Contenido Contenido Selección del CD como fuente de sonido ........130 Encender/apagar el equipo.... 130 En cuanto a este manual ....120 Regular el volumen ......130 Símbolos utilizados ....... 120 Modo silencio del equipo ....131 Uso según las normas ....120 Modifi...
- Página 118 Contenido Modifi car la sensibilidad de Activar/desactivar la entrada REAR AUX (AUX ON/OFF) ... 149 respuesta a la detección de emisoras (SENSITIVITY) ....138 Cambiar el nombre de la entrada REAR AUX (AUX NAME EDIT) ..149 Explorar todas las emisoras que Entrada FRONT AUX ajustar la se pueden sintonizar (SCAN) ..
- Página 119 Contenido Ajustes de usuario ......159 Otros ajustes ......... 165 Modifi car el texto de bienvenida Confi gurar la salida del (ON MESSAGE) ......159 preamplifi cador para graves profundos (SUBOUT) ..... 165 Modifi car los ajustes del reloj (CLOCK MENU) ......159 Activar/desactivar el modo de demostración .........
-
Página 120: En Cuanto A Este Manual
Declaración de conformidad Símbolos utilizados Por la presente, Blaupunkt GmbH declara En este manual se utilizan los siguientes que el equipo Hamburg MP57 cumple los símbolos: requisitos básicos y otras prescripciones relevantes de la Directiva 1999/5/UE. ¡PELIGRO! Peligro de lesiones ¡PELIGRO! -
Página 121: Advertencias De Seguridad
• Para la entrada frontal AUX IN utilice únicamente la clavija hembra curva de Blaupunkt (7 607 001 535). Todas las partes salientes, entre otras, el conec- tor o adaptador recto, pueden implicar un riesgo más elevado de sufrir lesiones... -
Página 122: Indicaciones De Limpieza
En cuanto a su seguridad Indicaciones de limpieza Los disolventes, detergentes y abrasivos, así como los sprays para el salpicadero y los productos de limpieza para plásticos pue- den contener productos que pueden dañar la superfi cie del equipo. • Para la limpieza del equipo, utilice úni- camente un paño seco o ligeramente humedecido. -
Página 123: Volumen De Suministro
Volumen de suministro Volumen de suministro El volumen de suministro incluye: 1 Hamburg MP57 1 Manual de instrucciones 1 Estuche para la unidad de mando 1 Marcos de sujeción 2 Horquilla de desmontaje 1 Cable de conexión USB 1 Micrófono para llamadas Bluetooth... -
Página 124: Descripción Del Equipo
Descripción del equipo Descripción del equipo • Un cambiadiscos o una fuente de soni- do externa, por ejemplo, un reproductor de MiniDisc o MP3, mediante la entrada ¿De qué funciones dispone el trasera AUX (entrada REAR AUX IN) equipo? • Fuente de sonido externa a través de El equipo dispone, además del sintonizador, la entrada frontal AUX (entrada FRONT... - Página 125 Descripción del equipo Teclas basculantes y Tecla Sintonizador: ajuste manual de la para la extracción de la unidad de emisora CD, USB: selección del título mando anterior/siguiente Tecla BAND Tecla X-BASS Sintonizador: selección de la banda Activar, desactivar y ajustar X-BASS de ondas/nivel de memoria (pulsar Tecla MENU/OK <...
-
Página 126: Seguro Antirrobo
Seguro antirrobo Seguro antirrobo Retirar/colocar la unidad de mando Puede retirar la unidad de mando como pro- Identifi cación del equipo tección antirrobo. En caso de robo, la identifi cación del equipo en el dorso de este manual servirá de certifi - ¡PRECAUCIÓN! cado de propiedad junto con el comproban- te de compra. -
Página 127: Puesta En Funcionamiento
Etiquetas Versión 1 o 2 tección contra copia DRM). Nota: Formato Sólo archivos MP3 o Blaupunkt no puede garantizar el funcio- WMA, carpetas, listas de namiento correcto de todos los medios reproducción USB que pueden adquirirse en el mer- Cantidad Máx. -
Página 128: Seleccionar Usb Como Fuente De Sonido
USB de más de 32 GB y crea particiones adicionales pueden producirse Nota errores de lectura. Blaupunkt no puede garantizar el buen Si en el medio USB se memoriza una gran funcionamiento de los CD con protec- cantidad de archivos, puede disminuir la ve- ción contra copia. -
Página 129: Cómo Deben Crearse Los Cd De Archivos Mp3 O Wma
Puesta en funcionamiento ¿Cómo deben crearse los CD de archivos Introducción y extracción de CD MP3 o WMA? El equipo sólo puede reproducir y visualizar ¡PRECAUCIÓN! correctamente los CD de MP3 o WMA que Avería de la unidad de CD presentan las siguientes características: Los CD con adhesivos o con formas pueden averiar la unidad de CD. -
Página 130: Selección Del Cd Como Fuente De Sonido
Puesta en funcionamiento Cierre la unidad de mando. Mantenga pulsada la tecla On/Off rante aproximadamente dos segundos. En la pantalla aparece brevemente "READING DISC". A continuación, se muestra: Nota: • La pantalla de CD de audio, en el caso de Para proteger la batería del vehículo con que haya introducido un CD de audio. -
Página 131: Modo Silencio Del Equipo
Puesta en funcionamiento Durante llamadas telefónicas/una in- Pulse la tecla basculante para vi- • dicación de navegación es posible sualizar el ajuste. ajustar la distribución del volumen Se visualiza el tiempo de desconexión para la llamada o la indicación. Con- actual. -
Página 132: Vista General Del Manejo
Vista general del manejo Vista general del manejo Para modifi car un ajuste: • En los menús puede modifi carse el ajus- Para ofrecerle una vista general del manejo te de una opción con la tecla basculante de los menús del equipo, hemos reunido la . -
Página 133: Las Funciones De Las Fuentes De Sonido
Vista general del manejo Las funciones de las fuentes de sonido Durante la reproducción de música, como por ejemplo el avance o retroceso de la misma, algu- nas funciones pueden manejarse con las teclas basculantes y también con Fuente de audio Sinto- CD de Tecla... -
Página 134: Las Pantallas De Las Fuentes De Sonido
Vista general del manejo Las pantallas de las fuentes de • La indicación muestra si hay un CD·C CD en la bandeja de CD (indicación CD) sonido o si un cambiadiscos está conectado Una vez ha seleccionado una fuente de so- (indicación CD•C). -
Página 135: Track Name
Vista general del manejo La pantalla del MP3 La pantalla del cambiadiscos 01:23 TRACK NAME Track ROCK ROCK CD·C CD·C CLAS CLAS Disc 02 06:17 MP3 INFO 01:23 REPEAT REPEAT Indicación para CD Indicación para cambiadiscos Nombre del título (nombre del archivo) Número de título Ajuste predeteminado de sonido Tiempo de reproducción... -
Página 136: Modo Sintonizador
Modo sintonizador Modo sintonizador Activar el modo de sintonizador (BAND) Con este equipo puede recibir emisoras de Pulse la tecla BAND para activar di- radio en las gamas de frecuencia FM y AM. rectamente la pantalla del sintonizador. Ajustar el equipo para la región Europa, EE.UU. -
Página 137: Sintonizar Emisoras
Modo sintonizador con 5 ubicaciones de emisoras cada uno: Sintonización manual de emisoras FM1, FM2 y FMT . Para modifi car la frecuencia en intervalos Pulse en el menú "TUNER" la tecla de 100 kHz: BAND para cambiar entre las ban- Pulse la tecla basculante o das de ondas o los niveles de memoria: Selección de una emisora memorizada... -
Página 138: Búsqueda Y Memorización Automática De Emisora (Travelstore)
Modo sintonizador Pulse la tecla basculante hasta Búsqueda y memorización automática de emisora (TRAVELSTORE ) que en la pantalla aparezca la indicación "TUNER MENU". Puede buscar las cinco emisoras FM y AM más fuertes de la región de forma automá- Pulse la tecla basculante para tica y memorizarlas en los niveles de memo-... - Página 139 Modo sintonizador Una vez se ha buscado por toda la banda de frecuencia, se detiene la exploración. Se re- produce la última emisora ajustada. Ahora puede realizar en todo momento los siguientes pasos: • memorizar la emisora que se está repro- duciendo (pulsar cualquier tecla de es- tación durante aprox.
-
Página 140: Modo De Cd (Audio)
Modo de CD (audio) Modo de CD (audio) La pantalla de CD de sonido En el modo de CD (audio) se reproducen CD de audio. Si desea más información sobre la 01:23 01:23 colocación y extracción de CD consulte el Track Track ROCK... -
Página 141: Funciones En El Modo De Cd (Audio)
Modo de CD (audio) Funciones en el modo de CD (audio) Función Acción Pantalla/Descripción Interrumpir . "PAUSE": interrumpe la reproducción. Si se Pulse la tecla 5 la reproducción pulsa de nuevo: continúa la reproducción (PAUSE) Seleccionar Pulse la tecla bascu- : reproduce el título siguiente títulos lante o... -
Página 142: Modo De Cd/Usb (Mp3/Wma)
Modo de CD/USB (MP3/WMA) Modo de CD/USB La pantalla del MP3 (MP3 /WMA ) En el modo de CD/USB se reproducen los TRACK NAME ROCK CD-R o CD-RW, o bien un medio USB con tí- CD·C CLAS 01:23 MP3 INFO REPEAT tulos MP3 o WMA. -
Página 143: El Modo De Exploración
Modo de CD/USB (MP3/WMA) El modo de exploración Seleccionar el título en la lista de reproducción Durante la reproducción de MP3/WMA The advantage.MP3 pulse la tecla ESC/DIS hasta que ROCK In your Car.MP3 CD·C aparezca el modo de exploración o la lis- CLAS Music.MP3 REPEAT... -
Página 144: Mostrar La Información De Los Títulos
Modo de CD/USB (MP3/WMA) Mostrar la información de los títulos Para mostrar toda la información disponible sobre el título actual (intérprete y álbum): Pulse la tecla MENU/OK < Pulse la tecla basculante hasta que en la pantalla aparezca la indicación "VARIOUS MENU". -
Página 145: Funciones En El Modo De Cd/Usb (Mp3/Wma)
Modo de CD/USB (MP3/WMA) Funciones en el modo de CD/USB (MP3/WMA) Las funciones de esta tabla hacen referencia a la pantalla de MP3 con tiempo de reproduc- ción o modo de hora. Para obtener más información sobre las funciones del modo de ex- ploración lea el apartado "Seleccionar el título en la lista de reproducción (modo de explo- ración)". -
Página 146: Modo De Cambiadiscos
Modo de cambiadiscos Modo de cambiadiscos La pantalla del cambiadiscos Puede conectar los siguientes cambiadis- cos al equipo: 01:23 Track ROCK • Blaupunkt CDC A03 CD·C Disc 02 06:17 CLAS REPEAT • Blaupunkt CDC A08 • Blaupunkt IDC A09 En el manual del cambiadiscos encontrará... -
Página 147: Funciones En El Modo De Cambiadiscos
Modo de cambiadiscos Funciones en el modo de cambiadiscos Función Acción Pantalla/Reacción Interrumpir Pulse la tecla 5 "PAUSE": interrumpe la reproducción. Si se la reproducción pulsa de nuevo: continúa la reproducción (PAUSE) Seleccionar Pulse la tecla basculan- : reproduce el título siguiente títulos te o : repite el título. -
Página 148: Modo Aux
INPUT". sita un cable adaptador. Este cable El volumen de la fuente FRONT AUX puede (Blaupunkt n.º: 7 607 897 093) se pue- adecuarse al de las otras fuentes de sonido de adquirir en el proveedor Blaupunkt. (sintonizador, CD, etc.). Para obtener infor-... -
Página 149: Confi Gurar Las Entradas De Audio (Menu Aux)
Modo AUX Confi gurar las entradas de audio "AUX ON ": la entrada de audio • está activada y puede seleccionar- (MENU AUX ) se como fuente de sonido con la tecla En el menú AUX puede modifi car los siguien- SOURCE >... -
Página 150: Entrada Front Aux Ajustar La Amplifi Cación (Aux Level)
Modo AUX Nota: Para fi nalizar la entrada de texto sin mo- difi car el nombre, pulse la tecla ESC/DIS Entrada FRONT AUX ajustar la amplifi cación (AUX LEVEL ) Puede ajustar el volumen de un equipo ex- terno conectado de 0 a 8: En el menú... -
Página 151: Llamadas Telefónicas Bluetooth
Llamadas telefónicas Bluetooth Llamadas telefónicas ¿Cómo se crea una conexión Bluetooth? Bluetooth En primer lugar, el teléfono móvil y la radio El módulo Bluetooth integrado en el equipo del automóvil deben acoplarse. Al acoplar le permite mantener llamadas telefónicas los equipos, se establecerá una conexión manos libres mediante la conexión Bluetoo- Bluetooth. -
Página 152: Acoplar Un Teléfono Móvil
Busque equipos Bluetooth en el teléfono. ción "BLUETOOTH MENU". El teléfono móvil detecta la radio con la Pulse la tecla basculante para denominación "Blaupunkt". Para la co- abrir el menú. nexión Bluetooth la radio solicita un có- Pulse la tecla basculante has- digo PIN. -
Página 153: Aceptar/Rechazar Llamadas
Llamadas telefónicas Bluetooth otro. Esto se debe a las diferencias de Nota: software entre los teléfonos móviles. La función "UNPAIR" sólo está activa, cuando la radio está conectada con el te- Realizar una llamada (DIAL NEW ) léfono móvil que desea desacoplar. Existen dos posibilidades para realizar una Aceptar/rechazar llamadas llamada a través de la radio del automóvil:... -
Página 154: Finalizar Una Llamada
Llamadas telefónicas Bluetooth Si se equivoca, puede borrar el carácter +919886933322 manteniendo pulsada la tecla basculan- DIAL PRESET 1 te o Pulse la tecla para realizar la lla- Se ha memorizado el número de teléfono. mada. Activar un número de teléfono En la pantalla se visualiza "CALLING"... -
Página 155: Modifi Car El Pin (Pin Change)
Llamadas telefónicas Bluetooth Se apaga la radio y se desvía el interlocu- tor al teléfono móvil. Modifi car el PIN (PIN CHANGE ) Si desea acoplar un teléfono móvil a la ra- dio del automóvil, debe introducir el PIN "00000". También es posible modifi car este PIN: Pulse la tecla MENU/OK Pulse la tecla basculante... -
Página 156: Ajustes De Sonido (Audio Menu)
Ajustes de sonido Ajustes de sonido Los ajustes de X-BASS y de la distribución del volumen se utilizan para todas las fuen- (AUDIO MENU ) tes de sonido. Para realizar los ajustes: En el menú "AUDIO" puede modifi car los si- guientes ajustes de sonido: En el menú... -
Página 157: Ajustes Del Ecualizador (Enhanced Menu)
Ajustes de sonido El menú Enhanced se abre. ¿Cuál es el ajuste de ecualizador correcto? En el menú Enhanced pulse la tecla bas- culante hasta que en la pan- Solución Percepción talla aparezca la indicación "PRESETS". Frecuencia Nivel del sonido Pulse la tecla basculante para ac- central (Hz) -
Página 158: Modifi Car Los Ajustes Del Ecualizador (E-Bass, E-Treble, E-Middle, E-Xbass)
Ajustes de sonido Nota: La tabla no incluye todos los ajustes posibles de los menús "AUDIO" y "ENHANCED". AUDIO MENU ENHANCED MENU E-BASS E-TREBLE E-MIDDLE E-XBASS Nivel (GAIN) -7 a +7 0 a +3 Frecuencia 60 Hz, 80 Hz, 10 kHz, 12,5 kHz, 500 Hz, 1.000 Hz, 50 Hz, 100 Hz (FREQ) -
Página 159: Ajustes De Usuario
Para fi nalizar la entrada de texto sin mo- mación. Ésta viene ajustada de fábrica difi car el texto de bienvenida, pulse la te- como "BLAUPUNKT". Para modifi car este cla ESC/DIS texto, abra el menú "VARIOUS": Pulse la tecla MENU/OK Modifi... -
Página 160: Activar/Desactivar La Indicación Horaria
Ajustes de usuario Pulse la tecla basculante has- Seleccionar la indicación horaria ta que en la pantalla aparezca la indica- 12h/24h (12HR/24HR MODE ) ción "CLOCK MENU". La hora puede mostrarse en formato de Pulse la tecla basculante para 12 horas o de 24. abrir el menú. -
Página 161: Modifi Car Los Ajustes Predeterminados De Volumen (Volume Menu)
Ajustes de usuario Modifi car los ajustes En el menú Volume pulse la tecla bascu- lante hasta que en la pantal la predeterminados de volumen aparezca la indicación "ON VOLUME". (VOLUME MENU) Pulse la tecla basculante para En el menú Volume puede modifi car los si- abrir el menú. -
Página 162: Activar/Desactivar La Señal Acústica (Beep On/Off)
Ajustes de usuario Pulse la tecla basculante para vi- Ajustar la subida de volumen según la sualizar el ajuste. velocidad (AUTO SOUND ) Ajuste el volumen deseado con la tecla Si conduce más rápido, el equipo puede basculante (niveles de 0 a 66). elevar el volumen de forma automática para compensar el ruido del vehículo. -
Página 163: Modifi Car Los Ajustes De La Pantalla (Display Menu)
Ajustes de usuario Modifi car los ajustes de la Pulse la tecla basculante para modifi car el contraste de la pantalla. pantalla (DISPLAY MENU) El contraste de la pantalla puede ajustar- En el menú Display puede modifi car los si- se en 13 niveles desde –6 hasta +6. -
Página 164: Modifi Car El Tiempo De Exploración (Scantime)
Ajustes de usuario Modifi car el tiempo de exploración (SCANTIME ) El tiempo de exploración de la función SCAN está ajustado de forma predeterminada a 10 segundos para todas las fuentes de so- nido. La función SCAN no está disponible para fuentes de sonido externas. -
Página 165: Otros Ajustes
Otros ajustes Otros ajustes Pulse la tecla basculante has- ta que en la pantalla aparezca la indica- Puede realizar otros ajustes: ción "SUBOUT". • Confi gurar la salida del preamplifi cador Pulse la tecla basculante para ac- para los graves profundos ceder a la opción de menú. -
Página 166: Mando A Distancia
Consulte a su proveedor Blau- Tecla punkt o visite nuestra página web en Inter- • Modo silencio net: www.blaupunkt.com. Funciones del mando a distancia El mando a distancia permite controlar las funciones básicas, a excepción de la co- nexión y desconexión. Sostenga el mando a distancia en dirección a la unidad de man-... -
Página 167: Especifi Caciones
Datos técnicos Especifi caciones Peso aprox. 1,4 kg Suministro de corriente Tensión de funcionamiento: 10,5–14,4 V Consumo de corriente máx. 10 A En funcionamiento: 10 segundos tras la desconexión: < 3,5 mA Amplifi cador 25 W RMS x 4 canales @ 14,4 V @ 4 ohmios @ 1 % THD Potencia de salida Preamp Out... -
Página 168: Servicio
Servicio y garantía Servicio Garantía Blaupunkt dispone en algunos países de un Para los productos adquiridos dentro de la servicio de reparación y recogida. Unión Europea, le ofrecemos una garantía del fabricante. Para los productos adqui- Si tuviera que enviar su equipo al servicio de ridos en un país extracomunitario se apli-... -
Página 169: Glosario
Glosario Glosario Carpeta raíz Carpeta principal de un soporte de datos. Bluetooth En la carpeta raíz se encuentran todas las demás carpetas. Bluetooth consiste en una comunicación ina- lámbrica por radio entre distancias cortas. Shape CD Gracias a esta tecnología es posible, transmi- Un Shape CD es un CD, cuya forma difi... - Página 170 Índice alfabético Índice alfabético Cambiadiscos 133, 146, 147 Nota: CD (audio, CD-R, CD-RW) 128, 129, 133, Las entradas de índice en mayúsculas son opciones de menú. CLOCK, CLOCK MODE, CLOCK SET 159, CLOCK ON, CLOCK OFF 160 Acoplar (Bluetooth) 152 Conexión 130 Ajustar la región 136 Conexión, Bluetooth 151, 152...
- Página 171 Índice alfabético MODE, 12HR y 24 HR 160 Modifi car el tiempo de desconexión 131 Factor de calidad 158 Modifi car el tiempo de exploración 164 FADER 156 Modo de demostración 165 FM1, FM2, FM3 y FMT 137 Modo de repetición 133 Frecuencia 158 Modo silencio 131 FREQ 158...
- Página 172 Índice alfabético Reloj, indicación horaria 159, 160 Tecla MENU 132 Reproducción aleatoria 133 TEL VOLUME 161 Reproductor de CD Texto de bienvenida 159 Introducción y extracción de CD 128, TRAVELSTORE 138, 169 TREBLE 156 Reproducción de CD de MP3/WMA 142, 143, 145 Reproducir un CD de audio 140, 141 Unidad de mando 126...
-
Página 173: Anexo
PLAY TIME Sony Ericcsson K750i • W800i • CD DISPLAY PLAY TIME Z520i Versión: 12.2006 SENSITIVITY CLOCK Consulte con su proveedor Blaupunkt qué teléfonos móviles son compatibles con este CLOCKSET 12:00 equipo. CLOCK MODE 12 H BEEP DIMMER DIM DAY 15,... - Página 174 Índice Índice Ligar/desligar o aparelho ....187 Regular o volume ......187 Silenciar o aparelho ....... 188 Sobre estas instruções ....177 Símbolos utilizados ....... 177 Alterar o tempo de desactivação (OFF TIMER) ........188 Utilização de acordo com as Repor o aparelho (NORMSET) ..
- Página 175 Índice Funções no modo de CD (áudio) ... 198 Acoplar telemóvel ......209 Desacoplar telemóvel ....209 Modo de CD/USB (MP3/WMA) ..199 Atender/rejeitar uma chamada ..210 Iniciar o modo de CD/USB ..... 199 Efectuar uma chamada O visor MP3 ........199 (DIAL NEW) ........
- Página 176 Índice Alterar o pré-ajuste do volume inicial (ON VOLUME/LAST VOLUME) ........218 Alterar os pré-ajustes do volume para telefone e Mute ..218 Activar/desactivar o som de aviso (BEEP ON/OFF) ......219 Regular o aumento do volume em função da velocidade (AUTO SOUND) ........
-
Página 177: Sobre Estas Instruções
Declaração de conformidade Símbolos utilizados A Blaupunkt GmbH confi rma por este meio Nestas instruções foram utilizados os se- que este aparelho Hamburg MP57 está em guintes símbolos: conformidade com as exigências básicas e outras disposições relevantes da directiva... -
Página 178: Indicações De Segurança
Durante o funcionamento • Para a tomada AUX-IN dianteira, utili- ze apenas o jaque angular da Blaupunkt (7 607 001 535). Todas as peças so- bressalientes, entre outras, fi chas rec- tas ou adaptadores, podem dar origem a um maior risco de ferimentos em caso de acidente. -
Página 179: Indicações De Limpeza
Para sua segurança Indicações de limpeza Produtos solventes, de limpeza ou abrasi- vos, bem como spray para cockpits e produ- tos de conservação para plásticos podem conter substâncias corrosivas para a super- fície do aparelho. • Para a limpeza do aparelho, utilize ape- nas um pano seco ou ligeiramente hú- mido. -
Página 180: Fornecimento
Fornecimento Fornecimento Estão incluídos no fornecimento: 1 Hamburg MP57 1 instruções de serviço 1 estojo para o painel frontal 1 armação de fi xação 2 ganchos de desmontagem 1 cabo de ligação USB 1 microfone para telefonemas com Bluetooth 1 Telecomando RC 12H... -
Página 181: Descrição Do Aparelho
Descrição do aparelho Descrição do aparelho • Um leitor multi-CD ou uma fonte áudio externa, p. ex. leitor de Mini-Disc ou lei- tor de MP3, através da tomada AUX na O que faz o aparelho? traseira (tomada REAR-AUX-IN) Além do sintonizador, o aparelho possui um •... - Página 182 Descrição do aparelho Teclas basculantes e Tecla Sintonizador: sintonizar as estações para abrir o painel frontal manualmente Tecla BAND CD, USB: seleccionar a faixa anterior/ Sintonizador: seleccionar a banda/ní- seguinte vel de memória (premir brevemente), Tecla X-BASS iniciar Travelstore (premir longamente) Ligar/desligar e ajustar X-BASS CD, USB: comutar para sintonizador (premir brevemente)
-
Página 183: Protecção Anti-Roubo
Protecção anti-roubo Protecção anti-roubo Retirar/colocar o painel frontal Pode retirar o painel frontal por uma ques- tão de protecção contra roubo. Cartão de códigos Em caso de roubo, o cartão de códigos no CUIDADO! verso destas instruções, em conjunto com o Danifi... -
Página 184: Colocação Em Funcionamento
DRM). Formato Apenas fi cheiros MP3 ou Nota: WMA, pastas, playlists A Blaupunkt não pode garantir um fun- Quantidade Máx. 1500 fi cheiros (pas- cionamento correcto de todos os supor- tas e faixas) por pasta tes USB disponíveis no mercado! Designação... -
Página 185: Seleccionar Usb Como Fonte Áudio
fi cheiros no seu Suporte USB, a ve- locidade de busca de fi cheiros pode redu- Nota zir-se. A Blaupunkt não pode garantir um fun- cionamento correcto de CDs protegidos Seleccionar USB como fonte áudio contra cópia! Prima as vezes necessárias a tecla SOURCE , até... -
Página 186: Como Devem Criar-Se Os Cds Mp3 Ou Wma
Colocação em funcionamento Como devem criar-se os CDs MP3 ou Inserir e retirar o CD WMA? O aparelho só pode ler e indicar correcta- CUIDADO! mente CDs MP3 ou WMA que apresentem Destruição da unidade de CD as seguintes características: CDs com etiquetas e de contornos realça- dos podem danifi... -
Página 187: Seleccionar Cd Como Fonte Áudio
Colocação em funcionamento Feche o painel frontal. Nota: Para proteger a bateria do automóvel com No visor aparece brevemente "READING a ignição desligada, o aparelho desliga-se DISC". De seguida, aparece: automaticamente passada uma hora. • O visor de CD áudio, se tiver inserido um CD áudio. -
Página 188: Silenciar O Aparelho
Colocação em funcionamento Silenciar o aparelho Prima a tecla basculante para alterar o tempo de desactivação. Prima a tecla de ligar/desligar Pode ajustar tempos de desactivação entre No visor é indicado "MUTE". 15 e 30 segundos. Para anular o silenciador: Repor o aparelho (NORMSET ) Prima novamente a tecla de ligar/des- ligar... -
Página 189: Visão Geral Da Utilização
Visão geral da utilização Visão geral da utilização Para alterar um ajuste: • Nos menus, pode alterar o ajuste de Para lhe dar uma visão geral sobre a forma uma opção de menu com a tecla bascu- de operar os menus do aparelho, reunimos lante . -
Página 190: As Funções Das Fontes Áudio
Visão geral da utilização As funções das fontes áudio Algumas funções durante a reprodução de música, como, p. ex., avançar ou recuar músicas, são operadas com as teclas basculantes e , bem como Fonte áudio Sintoni- Tecla zador MP3/ Entrada (Tuner) Tuner CD (CD-R) -
Página 191: Os Visores Das Fontes Áudio
Visão geral da utilização Os visores das fontes áudio • A indicação informa sobre se CD·C está inserido um CD no compartimento Quando tiver seleccionado um fonte áudio, para CD (indicação CD) ou se está co- é indicado o respectivo visor. As seguintes nectado um leitor multi-CD (indicação imagens apresentam os elementos de infor- CD•C). -
Página 192: Track Name
Visão geral da utilização O visor de MP3 O visor do leitor multi-CD 01:23 TRACK NAME Track ROCK ROCK CD·C CD·C CLAS CLAS Disc 02 06:17 MP3 INFO 01:23 REPEAT REPEAT Indicação para CD Indicação para leitor multi-CD Nome da faixa (nome de fi cheiro) Número da faixa Pré-ajuste do som (PRESET) Tempo de reprodução... -
Página 193: Modo De Sintonizador
Modo de sintonizador Modo de sintonizador Iniciar o modo de sintonizador (BAND) Este aparelho permite-lhe receber as esta- Prima a tecla BAND para chamar di- ções de rádio nas gamas de frequência FM rectamente o visor do sintonizador. e AM. Regular o aparelho para a região Prima as vezes necessárias a tecla Europa, EUA ou Tailândia... -
Página 194: Sintonizar As Estações
Modo de sintonizador No menu "TUNER", prima a tecla BAND Sintonizar as estações manualmente para comutar entre as bandas ou ní- Para alterar a frequência em passos de veis de memória: 100 kHz: Prima a tecla basculante ou Seleccionar estações memorizadas Nesta banda / neste nível de memória, pode, agora : Seleccione a banda ou o nível de memó-... -
Página 195: Sintonização E Memorização Automática De Estações (Travelstore)
Modo de sintonizador Prima as vezes necessárias a tecla bas- Sintonização e memorização automática de estações (TRAVELSTORE ) culante , até "SENSITIVITY" aparecer no visor. Pode procurar automaticamente as cinco estações FM e AM com sinal mais forte na Prima a tecla basculante para abrir região e memorizá-las nos níveis de memó- o menu. - Página 196 Modo de sintonizador Pode, a qualquer momento: • Memorizar a estação reproduzida no mo- mento (premir qualquer tecla de pré-se- lecção durante aprox. dois segundos) • Interromper a função Scan (premir bre- vemente a tecla MENU/OK <...
-
Página 197: Modo De Cd (Áudio)
Modo de CD (áudio) Modo de CD (áudio) O visor de CD áudio No modo de CD (áudio), reproduzem-se CDs áudio. O modo de inserir e retirar os 01:23 01:23 CDs encontra-se descrito no capítulo "Colo- Track Track ROCK CD·C CD TEXT CD TEXT 06:17... -
Página 198: Funções No Modo De Cd (Áudio)
Modo de CD (áudio) Funções no modo de CD (áudio) Função Procedimento Visor/descrição Interromper a "PAUSE": interromper a reprodução. Premir Prima a tecla 5 reprodução novamente: prosseguir a reprodução (PAUSE) Escolher uma Prima a tecla basculan- : reproduzir a faixa seguinte faixa te ou : repetir a faixa. -
Página 199: Modo De Cd/Usb (Mp3/Wma)
Modo de CD/USB (MP3/WMA) Modo de CD/USB O visor MP3 (MP3 /WMA ) No modo de CD/USB, reproduzem-se TRACK NAME ROCK CD-Rs, CD-RWs ou um suporte USB com CD·C CLAS 01:23 MP3 INFO REPEAT faixas MP3 ou WMA. O capítulo "Colocação em funcionamento" descreve aquilo que deve ter em atenção Indicação para CD quando pretende conectar e desconectar... -
Página 200: O Modo De Pesquisa
Modo de CD/USB (MP3/WMA) O modo de pesquisa Seleccionar a faixa na playlist Durante a reprodução MP3/WMA, prima as vezes necessárias a tecla ESC/DIS The advantage.MP3 , até aparecer o modo de pesquisa ROCK In your Car.MP3 CD·C ou a playlist. CLAS Music.MP3 REPEAT... -
Página 201: Indicar Informações Da Faixa
Modo de CD/USB (MP3/WMA) Indicar informações da faixa Para apresentar todas as informações dis- poníveis sobre a faixa actual (artista e ál- bum): Prima a tecla MENU/OK < Prima a tecla basculante até "VARIOUS MENU" aparecer no visor. Prima a tecla basculante para abrir o menu. -
Página 202: Funções No Modo De Cd/Usb (Mp3/Wma)
Modo de CD/USB (MP3/WMA) Funções no modo de CD/USB (MP3/WMA) As funções presentes nesta tabela referem-se ao visor MP3 com tempo de reprodução ou modo do relógio. Para as funções no modo de pesquisa, leia o parágrafo "Seleccionar a fai- xa na playlist (modo de pesquisa)". -
Página 203: Modo De Leitor Multi-Cd
Modo de leitor multi-CD Modo de leitor multi-CD O visor do leitor multi-CD Pode ligar ao aparelho os seguintes leitores multi-CD: 01:23 Track ROCK • Blaupunkt CDC A03 CD·C Disc 02 06:17 CLAS REPEAT • Blaupunkt CDC A08 • Blaupunkt IDC A09 Poderá... -
Página 204: Funções No Modo De Leitor Multi-Cd
Modo de leitor multi-CD Funções no modo de leitor multi-CD Função Procedimento Visor/reacção Interromper a Prima a tecla 5 "PAUSE": interromper a reprodução. Premir reprodução novamente: prosseguir a reprodução (PAUSE) Escolher uma Prima a tecla basculan- : reproduzir a faixa seguinte faixa te ou : repetir a faixa. -
Página 205: Modo Aux
Na entrada REAR-AUX, pode ligar um leitor rimentos. multi-CD Blaupunkt ou uma fonte áudio ex- Por esta razão, recomendamos a uti- terna. Um leitor multi-CD Blaupunkt é auto- maticamente identifi cado, fi cando, depois, lização de jaques angulares, p. -
Página 206: Confi Gurar Entradas Áudio (Aux Menu)
Modo AUX Confi gurar entradas áudio "AUX ON ": a entrada áudio está ac- • tiva e pode ser seleccionada como (AUX MENU ) fonte áudio com a tecla SOURCE > No menu AUX, pode alterar estes ajustes: "AUX OFF": a entrada áudio está •... -
Página 207: Entrada Front-Aux Regular O Aumento (Aux Level)
Modo AUX Nota: Para terminar a introdução de texto sem alterar o nome, prima a tecla ESC/DIS Entrada FRONT-AUX Regular o aumento (AUX LEVEL ) Para um aparelho externo conectado, pode regular uma adaptação do volume de 0 a 8: No menu AUX, prima as vezes necessá- rias a tecla basculante , até... -
Página 208: Telefonemas Com Bluetooth
Telefonemas com Bluetooth Telefonemas com Bluetooth Como é estabelecida a ligação Bluetooth? O módulo Bluetooth integrado no seu apa- Primeiro, o telemóvel e o auto-rádio têm de relho permite-lhe telefonar com mãos livres se "conhecer", isto é, têm de ser acopla- através de uma ligação Bluetooth. -
Página 209: Acoplar Telemóvel
O telemóvel reconhece o auto-rádio sob Prima as vezes necessárias a tecla bas- a designação "Blaupunkt". Para estabe- culante , até "UNPAIR" ou lecer a ligação Bluetooth, o auto-rádio "UNPAIR ALL" aparecer no visor. solicita um PIN. -
Página 210: Atender/Rejeitar Uma Chamada
Telefonemas com Bluetooth fone. O motivo para tal são as diferenças Nota: de software nos telemóveis. A função "UNPAIR" só está activa se o auto-rádio já estiver ligado ao telemóvel Efectuar uma chamada que pretende desacoplar. (DIAL NEW ) Atender/rejeitar uma chamada Tem duas possibilidades de efectuar uma chamada através do auto-rádio: Quando recebe uma chamada telefónica,... -
Página 211: Terminar A Chamada
Telefonemas com Bluetooth Se se engatar a introduzir o dígito, pode +919886933322 apagá-lo mantendo premida a tecla bas- DIAL PRESET 1 culante ou Prima a tecla para efectuar a O número de telefone foi memorizado. chamada. Chamar números de telefone No visor aparece "CALLING"... -
Página 212: Telefonemas Com Bluetooth
Telefonemas com Bluetooth O auto-rádio é desligado e a chamada do Nota: seu interlocutor é desviada para o seu Para terminar a introdução do PIN sem o telemóvel. alterar, prima a tecla ESC/DIS Alterar o PIN (PIN CHANGE ) Se pretender acoplar um telemóvel ao auto- rádio, tem de introduzir o PIN "00000". -
Página 213: Valores Para O Som (Audio Menu)
Valores para o som Valores para o som tribuição do som são utilizados em todas as fontes áudio. (AUDIO MENU ) Para efectuar os ajustes: No menu "AUDIO", pode alterar os seguintes No menu "AUDIO", prima a tecla bascu- valores para o som: lante para comutar entre es- •... -
Página 214: Ajustes Do Equalizador (Enhanced Menu)
Valores para o som No menu Enhanced, prima as vezes ne- Qual é o ajuste certo do equalizador? cessárias a tecla basculante Resolução até "PRESETS" aparecer no visor. Impressão Frequência Nível acústica Prima a tecla basculante para cha- central (Hz) (dB) mar a opção de menu. -
Página 215: Alterar Os Ajustes Do Equalizador (E-Bass, E-Treble, E-Middle, E-Xbass)
Valores para o som Nota: A tabela não inclui todos os ajustes possíveis nos menus "AUDIO" e "ENHANCED". AUDIO MENU ENHANCED MENU E-BASS E-TREBLE E-MIDDLE E-XBASS Nível (GAIN) -7 a +7 0 a +3 Frequência 60 Hz, 80 Hz, 10 kHz, 12.5 kHz, 500 Hz, 1000 Hz, 50 Hz, 100 Hz (FREQ) -
Página 216: Ajustes Do Utilizador
(ON MESSAGE ) Quando liga o aparelho, surge uma ani- mação. Ela está regulada de fábrica como Alterar os ajustes do relógio "BLAUPUNKT". Para alterar este texto, cha- (CLOCK MENU) me o menu "VARIOUS": No menu Clock, pode alterar os seguintes... -
Página 217: Ligar/Desligar A Indicação Das Horas
Ajustes do utilizador Prima a tecla basculante para abrir Prima a tecla basculante ou o menu. para comutar entre estes ajustes: Surge o menu Clock. "12HR MODE": está ligado o forma- • to de 12 horas (am/pm). Ligar/desligar a indicação das horas "24HR MODE": está... -
Página 218: Alterar Os Pré-Ajustes Do Volume (Volume Menu)
Ajustes do utilizador Alterar os pré-ajustes do volume Prima a tecla basculante para abrir o menu. (VOLUME MENU) Com a tecla basculante ou No menu Volume, pode alterar os seguintes mude entre os ajustes: pré-ajustes: "LAST VOLUME" (volume inicial tal •... -
Página 219: Activar/Desactivar O Som De Aviso (Beep On/Off)
Ajustes do utilizador Notas: ículo. Experimente qual o ajuste ideal para o seu veículo. Pode seleccionar um valor en- O volume por si pré-ajustado não é uti- tre 0 (nenhum aumento) e, no máx. 5. lizado, No menu Volume, prima as vezes neces- se o volume actual for inferior ao nível •... -
Página 220: Alterar Os Ajustes Do Visor (Display Menu)
Ajustes do utilizador Alterar os ajustes do visor Prima a tecla basculante para alterar o contraste do visor. (DISPLAY MENU) Pode ajustar o contraste do visor em 13 No menu Display, pode alterar os seguintes escalões de –6 a +6. ajustes do visor: •... -
Página 221: Alterar O Tempo De Leitura (Scantime)
Ajustes do utilizador Alterar o tempo de leitura (SCANTIME ) O tempo de leitura da função SCAN está pré-ajustado para 10 segundos para todas as fontes áudio. A função SCAN não está disponível para fontes áudio externas. No menu Various, pode alterar o tempo de leitura. -
Página 222: Outros Ajustes
Outros ajustes Outros ajustes Prima as vezes necessárias a tecla bas- culante , até "SUBOUT" apa- Pode efectuar outros ajustes: recer no visor. • Confi gurar a saída do pré-amplifi cador Prima a tecla basculante para cha- para graves fundos mar a opção de menu. -
Página 223: Telecomando
RC 12H. Como equipamento extra, pode • CD/USB: seleccionar a faixa anterior/ adquirir um telecomando para o volante. seguinte Consulte o seu revendedor da Blaupunkt Tecla ou visite a nossa página web na internet: • Silenciar o som www.blaupunkt.com. -
Página 224: Especifi Cações
Dados técnicos Especifi cações Peso aprox. 1,4 kg Alimentação eléctrica Tensão de funcionamento: 10,5 - 14,4 V Consumo de corrente Durante o funcionamento: máx. 10 A 10 segundos após a desactivação: < 3,5 mA 25 W RMS x 4 ch @ 14.4 V @ 4 ohm @ Amplifi... -
Página 225: Serviço
Serviço e Garantia Serviço Garantia Em alguns países, a Blaupunkt disponibiliza Concedemos uma garantia relativamente a um serviço de reparação e recolha. todos os produtos comprados na União Eu- ropeia. Para aparelhos comprados fora da Caso tenha de enviar o seu aparelho à Blau- União Europeia, são válidas as condições... -
Página 226: Glossário
Glossário Glossário Pasta raiz Pasta principal de um suporte de dados. Na Bluetooth pasta raiz, encontram-se todas as restantes pastas. Bluetooth é uma ligação via sinal de rádio sem fi os de curta distância. Através desta tecno- "Shape-CDs" logia, é possível transmitir voz e dados entre Um "shape-CD"... - Página 227 Índice Índice Cartão de códigos 183 Nota: CD (áudio, CD-R, CD-RW) 185, 186, 190, Palavras-chave com letra inicial maiúscula remetem para opções de menu. CLOCK, CLOCK MODE, CLOCK SET 216, CLOCK ON, CLOCK OFF 217 Acoplar (Bluetooth) 209 Confi gurar entradas áudio 206, 207 Ajustar a região 193 Ajustes de fábrica: consultar Repor (NORMSET)
- Página 228 Índice Fontes áudio 181 Modos pré-ajustados 213 Funções 190 MP3 184, 199, 201 Visores 191 MUTE: consultar Silenciar FREQ 215 MUTE LEVEL 218 Frequência 215 Nível de memória 193 GAIN 215 NORMSET 188 Graves fundos 222 OFF TIMER 188 Indicar informação da faixa 201 ON MESSAGE 216 Indicar o número de série 183 ON VOLUME 218...
- Página 229 Índice Saudação 216 Valores para o som 213 SCAN 195 Visor SCANTIME 221 Confi gurações 220 Segurança 177, 178 Fontes áudio 191 Sensibilidade da busca 195 VOLUME 218 SENSITIVITY 195 Volume 182, 187 Silenciar 188 Alterar os pré-ajustes 218 Sintonizador 190, 193, 226 Aumento em função da velocidade 219 Seleccionar a banda 193 Seleccionar a região 193...
-
Página 230: Anexo
Z520i Versão: 12/2006 SENSITIVITY CLOCK Para saber quais os telemóveis que são ac- tualmente suportados por este aparelho, CLOCKSET 12:00 contacte o seu revendedor da Blaupunkt. CLOCK MODE BEEP DIMMER DIM DAY 15, DIM NIGHT 12 TURN ON BLAUPUNKT MESSAGE... - Página 231 ......... 244 ........245 OFF TIMER ....245 ........234 NORMSET ....245 ........234 ........234 ......... 246 ......... 234 ....... 246 ........247 ......... 235 ........248 ......235 ......235 ......... 250 ......... 236 ..........250 ........236 BAND ....
- Página 232 ......... 256 ......... 268 ......... 257 ....268 ....... 268 ..... 257 ....... 268 ......258 ....... 268 CD USB MP3 WMA ..259 ....269 PIN CHANGE ........260 AUDIO MENU ......260 ....... 270 CD ........... 260 ......270 .......
- Página 233 AUTO SOUND ......276 DISPLAY MENU ..277 ANGLE ADJ ..277 DIM DAY DIM NIGHT ....277 SCAN MENU .... 278 ......... 279 SUBOUT ........279 ......279 ..........280 ......... 280 ..........280 ..........281 ..........282 ..........282 ..........
- Página 234 • • • • Blaupunkt GmbH Hamburg MP57 1999/5/EG...
- Página 235 • • • Travelstore CD • • Blaupunkt 7 607 001 535...
- Página 236 • •...
- Página 237 1 Hamburg MP57 1 USB 1 RC 12H...
- Página 238 • REAR-AUX-IN • FRONT-AUX- MP3 WMA • •...
- Página 239 CD USB BAND X-BASS X-BASS Travelstore MENU/OK < Travelstore CD USB SOURCE > ESC/DIS FRONT AUX-IN R P T...
- Página 240 4 RPT MENU/OK <...
-
Página 241: Usb
• • 800 mA • FAT16 FAT32 NTFS Blaupunkt 1,500 .wma .mp3... -
Página 242: Usb
MP3 32 320 kbps WMA 32 192 kbps • 2000/XP FAT32 32GB 32GB Blaupunkt • CD-R CD-RW WMA SOURCE > R E A D I N G CD USB MP3 WMA CD-R/CD-RW • •... -
Página 243: Mp3 Wma Cds
WMA CD WMA CD ISO 9660 Joliet 12cm .wma .mp3 320 kbps 192 kbps... -
Página 244: Cd Usb
READING DISC • • WMA CD SOURCE > CD/USB MP3/WMA • MENU/OK < •... -
Página 245: Off Timer
MUTE NORMSET MENU/OK < OFF TIMER VARIOUS MENU VARIOUS MENU USER MENU MENU/OK < NORMSET VARIOUS MENU VARIOUS MENU NORMSET OK USER MENU TIMER... - Página 246 • • • • • MENU/OK < MENU/OK < • • MENU/OK < • • •...
- Página 247 MP3/ Tuner Tuner CD (CD-R) CDC/ SOURCE REAR- FRONT- AUX-IN AUX-IN BAND X-BASS X-BASS X-BASS MENU/OK SCAN PAUSE PLAY 4 RPT DISC TRACK 5 MIX...
- Página 248 • CD·C CD CD CD•C • ROCK 92.1 01:23 01:23 ROCK Track Track ROCK CD·C CLAS 06:17 CLAS CD TEXT CD TEXT 06:17 06:17 REPEAT PRESET PRESET ESC/DIS NO CD TEXT...
-
Página 249: Track Name
01:23 TRACK NAME Track ROCK ROCK CD·C CD·C CLAS CLAS Disc 02 06:17 MP3 INFO 01:23 REPEAT REPEAT PRESET PRESET MP3 WMA CD ESC/DIS ESC/DIS... -
Página 250: Band
BAND BAND SOURCE > 3 MIX 92.1 ROCK CLAS 06:17 MENU/OK < PRESET... - Página 251 TUNER BAND 100 kHz BAND • • • • • • •...
-
Página 252: Travelstore
TRAVELSTORE SENSITIVITY SENSHI6 TUNER BAND SENS-LO1 FM - TRAVELSTORE SCAN SENSITIVITY MENU/OK < MENU/OK < SCAN TUNER MENU... - Página 253 • • MENU/OK <...
- Página 254 01:23 01:23 Track Track ROCK CD·C CD TEXT CD TEXT 06:17 06:17 CLAS REPEAT SOURCE > PRESET ESC/DIS NO CD TEXT...
- Página 255 PAUSE PAUSE MENU/OK SCAN < REPEAT TRK 4 RPT REPEAT OFF 3 MIX MIX ALL MIX OFF X-BASS X-BASS X-BASS...
-
Página 256: Cd/Usb Mp3 /Wma
CD/USB MP3 /WMA CD/USB TRACK NAME ROCK CD-R CD-RW CD·C CLAS 01:23 MP3 INFO REPEAT CD/USB PRESET CD-R CD-RW SOURCE > > ESC/DIS • • • • USB/CD MP3/WMA CD... - Página 257 MP3 /WMA ESC/ The advantage.MP3 ROCK In your Car.MP3 CD·C CLAS Music.MP3 REPEAT...
- Página 258 MENU/OK < VARIOUS MENU MP3 INFO ON/OFF MP3 INFO ON • MP3 INFO OFF •...
-
Página 259: Mp3 Wma
CD/USB MP3/WMA PAUSE PAUSE MENU/OK SCAN CD/USB < REPEAT TRK 4 RPT REPEAT DIR REPEAT OFF 3 MIX MIX ALL CD/USB MIX DIR MIX FOLDER MIX OFF X-BASS X-BASS X-BASS... - Página 260 • Blaupunkt CDC A03 01:23 Track ROCK • CD·C Blaupunkt CDC A08 Disc 02 06:17 CLAS REPEAT • Blaupunkt IDC A09 PRESET SOURCE > MAGAZINE SCAN CD LOADING CD ESC/DIS...
- Página 261 PAUSE PAUSE SCAN MENU/OK < 4 RPT REPEAT TRACK REPEAT DISC REPEAT OFF 3 MIX MIX ALL MIX DISC MIX OFF X-BASS X-BASS X-BASS...
-
Página 262: Aux
FRONT-AUX AUX-IN REAR-AUX FRONT-AUX REAR-AUX BLAUPUNKT REAR-AUX Blaupunkt 7 607 001 BLAUPUNKT FRONT-AUX-IN REAR-AUX SOURCE > AUX ON AUX INPUT FRONT-AUX REAR AUX Blaupunkt Blaupunkt 607 897 093 REAR-AUX SOURCE > CDC/AUX REAR- NORMSET AUXILIARY1... -
Página 263: Aux On Off Aux
AUX ON • SOURCE > AUX MENU AUX OFF • REAR-AUX SOURCE > • REAR-AUX • AUX NAME EDIT REAR-AUX AUX NAME EDIT REAR-AUX AUXILIARY1 FRONT-AUX • AUX LEVEL AUX NAME EDIT AUX MENU USER MENU AUX ON MENU/OK < AUXILIARY1 AUX MENU REAR-AUX... -
Página 264: Aux Level Aux
ESC/ FRONT- AUX AUX LEVEL AUX AUX LEVEL MENU/OK <... -
Página 265: Bt On
• • BT ON MENU/OK BLUETOOTH MENU P A I R BLUETOOTH BT ON... - Página 266 00000 PAIRED Mobile 1 Mobile 2 Mobile 3 Mobile 4 Mobile 5 Mobile 6 • Mobile 1 Mobile 2 • Mobile 3 Mobile 4 Mobile 5 Mobile 6 BT ON • UNPAIR • UNPAIR ALL Blaupunkt MENU/OK BLUETOOTH MENU...
-
Página 267: Dial New
UNPAIR UNPAIR ALL UNPAIRED UNPAIR DIAL NEW • INCOMING CALL • MENU/OK BLUETOOTH MENU CALL ENDED DIAL NEW I N - C A L L... - Página 268 DIAL PRESET +919886933322 DIAL PRESET 1 CALLING DIAL PRESET CALL ENDED DIAL NEW...
-
Página 269: Pin Change
MENU/OK < ESC/DIS PIN CHANGE 00000 MENU/OK BLUETOOTH MENU PIN CHANGE... -
Página 270: Audio Menu
AUDIO MENU AUDIO BASS • AUDIO TREBLE • • • BALANCE • • • FADER • X-BASS X- • B A S S TREBLE AUDIO MENU USER MENU Audio PRESETS MENU/OK < AUDIO MENU ENHANCED MENU B A S S TREBLE X-BASS PRESETS... -
Página 271: Enhanced Menu
• ROCK • 125–400 –4 CLASSIC • P-EQ OFF • 1000– –4 2500 –6 8000– 12500 50–100 ENHANCED MENU ENHANCED E-BASS... -
Página 272: E-Bass E-Treble E-Middle E-Xbass
AUDIO ENHANCED AUDIO MENU ENHANCED MENU E-BASS E-TREBLE E-MIDDLE E-XBASS GAIN 60 Hz 80 Hz 10 kHz 12.5 kHz 500 Hz 1000 Hz 50 Hz 100 Hz FREQ 100 Hz 200 Hz 15 kHz 17.5 kHz 1500 Hz 2500 Hz 200 Hz 1.25 0.75... -
Página 273: On Message
• MENU/OK < • • • ESC/ • ON MESSAGE CLOCK MENU • B L A N P U N K T CLOCK ON/OFF VARIOUS • 12h/24h 12HR 24HR MENU/OK < • CLOCK SET VARIOUS MENU CLOCK MENU VARIOUS MENU USER MENU USER MENU MENU/OK... -
Página 274: 12H
12HR MODE • am/pm 24HR MODE • CLOCK ON/OFF CLOCK SET CLOCK ON • CLOCK • CLOCK ON MENU/OK < • • ESC/DIS 12HR/24HR 12HR 24HR... -
Página 275: Volume Menu
VOLUME MENU LAST VOLUME • ON VOLUME • • ON VOLUME • VOLUME ON VOLUME • BEEP ON/OFF • AUTO SOUND VOLUME MENU USER MENU VOLUME MENU/OK VOLUME MENU MUTE LEVEL • TEL VOLUME • ON VOLUME/ LAST VOLUME • ON VOLUME... -
Página 276: Beep On Off
• AUTO SOUND BEEP ON/OFF BEEP ON/OFF BEEP OFF • BEEP ON • A U T O SOUND... -
Página 277: Display Menu
DISPLAY MENU –6 • DIM DAY/DIM NIGHT • ANGLE ADJ DISPLAY MENU ROCK CD·C CLAS USER MENU MENU/OK DIM NIGHT • DIM DAY • DISPLAY MENU ANGL E ADJ ANGLE ADJ... -
Página 278: Scan Menu
SCAN MENU MENU/OK < VARIOUS MENU SCAN TIME... -
Página 279: Subout
• GAIN • • FREQ 0 Hz 80 Hz • 120 Hz 160 Hz SUBOUT MENU/OK < AUDIO MENU AUDIO MENU USER MENU ENHANCED MENU ENHANCED MENU AUDIO MENU SUBOUT... - Página 280 • Tuner RC-12H • CD/USB • www.blaupunkt.com • • • Tuner • CD /USB • CD changer...
- Página 281 10.5 - 14.4 V 10 A < 3.5 mA 25 w RMS x 4 ch @ 14.4 V @ 4 ohm @ 1% THD 2 V / 6 kΩ 500 mV / 6 kΩ 10 V / 1 kΩ FM 87.7 - 107.9 MHz 200 kHz AM 530 - 1710 kHz 10 kHz FM 87.5 - 108 MHz 100 kHz 50 kHz...
- Página 282 Blaupunkt GmbH Hotline Robert-Bosch-Str. 200 D-31139 Hildesheim...
- Página 283 X-BA SS X X-BASS WIN/AMP...
- Página 284 247 260 261 CD 242 243 CD 254 255 MP3 WMA CD 256 254 256 ANGLE ADJ 277 AUDIO 270 CLOCK CLOCK MODE CLOCK SET 273 274 CLOCK ON CLOCK OFF 274 AUTO SOUND 276 263 264 AUX 247 263 265 266 AUX INPUT 263 AUX LEVEL 264...
- Página 285 EDIT AUXILIARY 263 ENHANCE ENHANCED SETTINGS 271 OFF TIMER 245 ON MESSAGE 273 ON VOLUME 275 238 246 NORMSET FADER 270 P-EQ OFF 271 FM1 FM2 FM3 FMT 250 PAIR: BT ON BT OFF FREQ 272 PIN CHANGE 269 257 283 PRESETS 270 GAIN 272 QUALITY 272...
- Página 286 239 244 WMA 241 256 258 SUBOUT 279 279 283 X-BASS 247 270 283 TEL VOLUME 275 TRAVELSTORE 252 283 TREBLE 270 247 250 283 Travelstore 252 UNPAIR 266 UNPAIR ALL 266 265 266 247 283 VOLUME 275...
- Página 287 CDC DISPLAY PLAY TIME Z520i CD DISPLAY PLAY TIME 12.2006 SENSITIVITY CLOCK CLOCKSET 12 00 CLOCK MODE BEEP DIMMER DIM DAY 15 DIM NIGHT 12 TURN ON BLAUPUNKT MESSAGE OFF TIMER TUNER DISPLAY FREQUENCY MP3 DISPLAY FILE NAME CD TEXT...
- Página 288 ........301 ........302 ......291 OFF TIMER ..........302 ..........291 NORMSET ......302 ........291 ..........303 ..........291 ........303 ........292 ..........304 ....292 ..........305 ........292 ..........307 .........293 ........293 ............307 ..........294 BAND ....307 ..........295 ..........307 ' ....295 ..307 ..........295 ........308 ........308 ..........297 ....308 ..........297 ....308 ....297 ........308 ....297 ....308 ..........298 TRAVELSTORE .........309...
- Página 289 ...........313 ........325 ........314 ....325 ......325 ....314 ......325 ....315 CD/USB MP3/WMA ..316 ........325 ........317 PIN CHANGE ....326 ....317 AUDIO MENU ........317 .......317 PRESETS 327 ......318 ENHANCED MENU ..........319 REAR-AUX....319 (E-BASS, FRONT-AUX E-TREBLE, E-MIDDLE, E-XBASS) ..329 ..........319 ON MESSAGE ...330 AUX MENU ...........320 REAR-AUX CLOCK MENU ..330 AUX ON/OFF ........320...
- Página 290 AUTO SOUND ........333 DISPLAY MENU ........334 ANGLE ADJ ........334 DIM DAY/DIM NIGHT ......334 SCANTIME ..335 SUBOUT ..........339 ............339 ............340 ............344 ......344 ..344...
- Página 291 12 V Blaupunkt GmbH Hamburg MP57 1999/5/EG...
- Página 292 AUX-IN Blaupunkt (7 607 001 535)
- Página 294 1 Hamburg MP57 1 USB 1 Bluetooth RC 12H...
- Página 295 REAR-AUX-IN FRONT-AUX-IN MP3/WMA CD • Bluetooth...
- Página 296 BAND X-BASS X-BASS MENU/OK < CD USB function SCAN ESC/DIS CD USB SOURCE > AUX-IN...
- Página 297 4 RPT MENU/OK <...
-
Página 298: Usb Usb Usb Usb
• • 800 mA • FAT16 FAT32, NTFS Blaupunkt 1,500 .wma / .mp3... -
Página 299: Usb
MP3: 32 320 kbps WMA: 32 192 kbps Under Windows 2000/XP FAT32 • CompactDisc 32 GB 32 GB Blaupunkt • CD-R CD-RW WMA 9 DRM SOURCE > READING USB MP3/WMA CD-R/CD-RW... -
Página 300: Cd Cd
WMA CD WMA CD ISO 9660 Joliet 8 cm 12-cm .wma / .mp3 MP3: 32 320 kbps WMA: 32 192 kbps... - Página 301 READING DISC WMA CD SOURCE > MP3/WMA • MENU/ < •...
-
Página 302: Off Timer
(NORMSET ) MUTE MENU/OK < VARIOUS MENU (OFF TIMER ) VARIOUS MENU USER MENU MENU/OK NORMSET < VARIOUS MENU VARIOUS MENU NORMSET OK USER MENU OFF TIMER... - Página 303 MENU/OK < MENU/OK < MENU/OK • <...
- Página 304 MP3/ Tuner CD (CD-R) CDC/ SOURCE REAR- FRONT- AUX-IN AUX-IN BAND X-BASS X-BASS X-BASS MENU/OK SCAN PAUSE PLAY 4 RPT DISC TRACK 5 MIX...
- Página 305 • CD·C CD•C Presets ROCK 92.1 01:23 01:23 ROCK Track Track ROCK CD·C CLAS 06:17 CLAS CD TEXT CD TEXT 06:17 06:17 REPEAT PRESET PRESET ESC/DIS 2 CD NO CD TEXT...
-
Página 306: Track Name
01:23 TRACK NAME Track ROCK ROCK CD·C CD·C CLAS CLAS Disc 02 06:17 MP3 INFO 01:23 REPEAT REPEAT PRESET PRESET 3 MP3/WMA CD ESC/DIS 4 MP3 5 MP3 ESC/DIS 6 CD... -
Página 307: Band
BAND BAND SOURCE > 92.1 3 MIX ROCK CLAS 06:17 MENU/OK < PRESET FM1 .M2... - Página 308 100 kHz BAND BAND...
-
Página 309: Travelstore
TRAVELSTORE SENSITIVITY BAND TUNER SENSHI6 FM - TRAVELSTORE SENS-LO1 SCAN SENSITIVITY MENU/OK < MENU/OK < TUNER MENU SCAN... - Página 310 MENU/OK <...
- Página 311 01:23 01:23 Track Track ROCK CD·C CD TEXT CD TEXT 06:17 06:17 CLAS REPEAT SOURCE > PRESET ESC/DIS 2 CD NO CD TEXT...
- Página 312 PAUSE PAUSE MENU/OK SCAN < 4 RPT REPEAT TRK REPEAT OFF 3 MIX MIX ALL MIX OFF X-BASS X-BASS X-BASS...
-
Página 313: Cd/Usb (Mp3/Wma)
CD/USB (MP3 /WMA ) CD/USB CD-R CD-RW TRACK NAME ROCK CD·C CLAS 01:23 MP3 INFO REPEAT PRESET CD/USB CD-R CD-RW SOURCE > ESC/DIS USB/ 1 MP3/WMA CD 2 MP3... - Página 314 MP3/WMA The advantage.MP3 ESC/DIS ROCK In your Car.MP3 CD·C CLAS Music.MP3 REPEAT WinAmp Microsoft Media Player M3U PLS WPL ASX MIX RPT...
- Página 315 MENU/OK < VARIOUS MENU MP3 INFO ON/OFF • MP3 INFO ON • MP3 INFO OFF ROOT DIRECTORY...
-
Página 316: Cd/Usb
CD/USB MP3/WMA PAUSE PAUSE MENU/OK < SCAN CD/USB 4 RPT REPEAT TRK REPEAT DIR REPEAT OFF 3 MIX MIX ALL CD/USB MIX DIR FOLDER MIX OFF X-BASS X-BASS X-BASS... - Página 317 01:23 Track ROCK • Blaupunkt CDC A03 CD·C Disc 02 06:17 CLAS REPEAT • Blaupunkt CDC A08 • Blaupunkt IDC A09 PRESET SOURCE > MAGAZINE SCAN ESC/DIS CD LOADING 1 CD...
- Página 318 PAUSE PAUSE MENU/OK < SCAN 4 RPT REPEAT TRACK REPEAT DISC REPEAT OFF 3 MIX MIX ALL MIX DISC MIX OFF X-BASS X-BASS X-BASS...
-
Página 319: Aux
FRONT-AUX AUX- REAR-AUX FRONT-AUX FRONT-AUX-IN REAR-AUX Blaupunkt CD REAR-AUX Blaupunkt CD Blaupunkt 7 607 001 535 REAR-AUX FRONT-AUX-IN SOURCE > INPUT FRONT-AUX REAR AUX Blaupunkt 7 607 897 093 Blaupunkt SOURCE > REAR CDC / AUX NORMSET AUXILIARY1... -
Página 320: Aux Menu
• AUX ON SOURCE AUX MENU > • AUX OFF REAR-AUX SOURCE • > REAR-AUX (AUX ON/OFF) AUX NAME EDIT REAR-AUX AUX NAME EDIT REAR-AUX AUXILIARY1 AUX NAME EDIT FRONT-AUX AUX LEVEL AUX MENU USER MENU MENU/OK < AUX MENU AUXILIARY1 REAR-AUX AUX ON/OFF... -
Página 321: Front-Aux Aux Level
ESC/DIS FRONT-AUX AUX LEVEL AUX LEVEL MENU/OK <... -
Página 322: Bluetooth
Bluetooth Bluetooth Bluetooth Bluetooth Bluetooth BT ON MENU/OK BLUETOOTH MENU PAIR BLUETOOTH BT ON... - Página 323 00000 PAIRED Mobile 1 Mobile 2 Mobile 3 Mobile 4 Mobile 5 Mobile 6 • Mobile 1 Mobile 2 Mobile 3 • Mobile 4 Mobile 5 Mobile 6 BT ON UNPAIR UNPAIR ALL Blaupunkt MENU/OK BLUETOOTH MENU...
- Página 324 UNPAIR UNPAIR ALL UNPAIRED UNPAIR DIAL NEW INCOMING CALL MENU/OK < BLUETOOTH MENU CALL ENDED DIAL NEW IN-CALL...
- Página 325 DIAL PRESET +919886933322 DIAL PRESET 1 Dial Preset DIAL PRESET CALLING Dial Preset CALL ENDED Dial New...
-
Página 326: Pin Change
MENU/OK < ESC/DIS PIN CHANGE PIN 00000 MENU/OK BLUETOOTH MENU “PIN NUMBER... -
Página 327: Audio Menu
AUDIO MENU AUDIO AUDIO • BASS • TREBLE • BALANCE • FADER BASS TREBLE • X-BASS AUDIO MENU USER MENU Audio MENU/OK < AUDIO MENU PRESETS ENHANCED MENU BASS TREBLE X-BASS PRESETS... -
Página 328: Enhanced Menu
• • ROCK 125–400 –4 • CLASSIC • P-EQ OFF 1000– –4 2500 –6 8000– 12500 ENHANCED MENU 50–100 AUDIO E-BASS ENHANCED... -
Página 329: E-Treble, E-Middle, E-Xbass)
AUDIO ENHANCED AUDIO MENU ENHANCED MENU E-BASS E-TREBLE E-MIDDLE E-XBASS GAIN 60 Hz 80 Hz, 100 10 kHz 12.5 kHz 500 Hz 1000 Hz 50 Hz 100 Hz FREQ Hz 200 Hz 15 kHz 17.5 kHz 1500 Hz 2500 Hz 200 Hz 1.0 1.25 1.5 0.5 0.75 1.0... -
Página 330: On Message
MENU/OK < ESC/DIS ON MESSAGE CLOCK MENU BLAUPUNKT VARIOUS MENU/OK VARIOUS MENU CLOCK ON/OFF • 12h/24h 12HR/24HR MODE VARIOUS MENU CLOCK SET USER MENU CLOCK MENU USER MENU ON MESSAGE MENU/OK CLOCK MENU... -
Página 331: 12Hr/24Hr Mode
• 12HR MODE am/pm • 24HR MODE CLOCK ON/OFF CLOCK SET • CLOCK ON • CLOCK OFF MENU/OK < CLOCK ON • Goodbye ESC/DIS • 12h/24h (12HR/24HR MODE ) 12HR/24HR MODE... -
Página 332: Volume Menu
VOLUME MENU • LAST VOLUME • ON VOLUME ON VOLUME ON VOLUME TEL VOLUME MUTE LEVEL BEEP ON/OFF AUTO SOUND VOLUME MENU USER MENU VOLUME MENU/OK VOLUME MENU • MUTE LEVEL • TEL VOLUME ON VOLUME /LAST VOLUME ON VOLUME •... -
Página 333: Beep On/Off
AUTO SOUND • BEEP ON/OFF BEEP ON/OFF • BEEP OFF • BEEP ON AUTO SOUND... -
Página 334: Display Menu
DISPLAY MENU –6 DAY/NIGHT DIMMER LEVEL DIM DAY/DIM NIGHT (ANGLE ADJ) DISPLAY MENU ROCK CD·C CLAS USER MENU MENU/OK < DISPLAY MENU • DIM NIGHT • DIM DAY ANGLE ADJ ANGLE... -
Página 335: Scantime
(SCANTIME ) MENU/OK < VARIOUS MENU SCAN TIME... -
Página 336: Subout
• GAIN • FREQ (0 Hz 80 Hz 120 Hz 160 Hz SUBOUT MENU/OK < AUDIO MENU AUDIO MENU USER MENU ENHANCED MENU ENHANCED MENU AUDIO MENU SUBOUT... - Página 337 RC 12H CD/USB Blaupunkt www.blaupunkt.com CD/USB...
- Página 338 1.4 kg 10.5 - 14.4 V 10 A < 3.5 mA 25 w RMS x 4 ch @ 14.4 V @ 4 ohm @ 1% THD 2 V / 6 kΩ 500 mV / 6 kΩ Tel./Navi 10 V / 1 kΩ FM: 87.7 - 107.9 MHz (200 kHz AM: 530 - 1710 kHz (10 kHz FM: 87.5 - 108 MHz (100kHz...
- Página 339 Blaupunkt Blaupunkt www.blaupunkt.com www.blaupunkt.com Blaupunkt GmbH Hotline Robert-Bosch-Str. 200 D-31139 Hildesheim...
- Página 340 Bluetooth MP3 WMA USB – X-BASS WinAmp Windows Media Player X-BASS...
- Página 341 299 300 311 312 MP3/WMA CD 313 314 316 311, 313 ANGLE ADJ 334 CLOCK CLOCK MODE CLOCK SET 330 331 AUDIO 327 330 331 CLOCK ON CLOCK OFF 331 320 321 AUTO SOUND 333 322 323 AUX 304 320 AUX INPUT 320 AUX LEVEL 321 AUX ON AUX OFF 320...
- Página 342 OFF TIMER 302 ON MESSAGE 330 ON VOLUME 332 295, 303 (NORMSET) FADER 327 FM1 FM2 FM3 P-EQ OFF 328 FREQ 329 PAIR: BT ON BT OFF PIN CHANGE 326 314 340 PRESETS 327 GAIN 329 QUALITY 329 315 340 LAST VOLUME 332 322 323 (NORMSET) 302...
- Página 343 WMA 298 313 315 SUBOUT 336 336 340 X-BASS 304 327 340 TEL VOLUME 332 TRAVELSTORE 309 340 TREBLE 327 304 307 340 UNPAIR 323 UNPAIR ALL 323 304 340 299 313 VOLUME 332 296 301...
- Página 344 Samsung SGH-D 600 CDC DISPLAY PLAY TIME Sony Ericsson K750i • W800i • CD DISPLAY PLAY TIME Z520i 2006 SENSITIVITY CLOCK Blaupunkt CLOCKSET 12:00 CLOCK MODE BEEP DIMMER DIM DAY 15, DIM NIGHT 12 TURN ON BLAUPUNKT MESSAGE OFF TIMER...
-
Página 345: Installation Instructions
Blaupunkt dealer, your vehicle connexion et en cas de dommages manufacturer or our telephone hot- consécutifs. -
Página 346: Normas De Seguridad
Line In ou Line Out. hículo, póngase en contacto con su Les masses des appareils externes ne proveedor de artículos Blaupunkt o doivent pas être raccordées à la mas- con el fabricante del vehículo, o lla- me a nuestro teléfono de atención al se de l'autoradio (boîtier). - Página 347 Caso as presentes instruções não se- jam adequadas para a montagem no seu veículo, dirija-se ao revendedor • da Blaupunkt, ao fabricante do seu veículo ou à nossa linha verde. No caso de montagem de um amplifi ca- dor ou leitor multi-CD, é imprescindível ligar primeiro os aparelhos à...
- Página 348 • • • 1.5 mm • BLAUPUNKT • Blaupunkt...
- Página 349 Supplied Mounting Hardware Materiel de montage fourni Ferretería de montaje suministrada Elementos de fi xação fornecidos USB cable RC 12H...
- Página 350 Available as an optional accessory Disponible en option De venta como accesorios especiales Disponíveis como acessórios opcionais 7 607 621 . . . Installation kits Kits de montage Juegos de montaje Kits de montagem 7 608 ..
- Página 351 Safety instructions / Consignes de sécurité / Normas de seguridad / Instruções de segurança / ≈150º C Hamburg MP 57 7 647 633 310...
- Página 352 1 2 V ca. 10 mm 0°- 30° +/– 10° +/– 10°...
- Página 353 Mikrofon black, noir, negro, preto, red, rouge, rojo, vermelho, Hamburg MP 57 Pin 9 MIC GND Pin 10 MIC INPUT...
- Página 354 6. Removal / Démontage / Desmontaje / Desmontagem / USB connection antenna connection 8 613 150 002 1-20 1 2 V...
- Página 355 Aut. antenna FB +12V / RC +12V 7 10 13 16 19 9 12 15 18 +12V Amplifier 8 11 14 17 20 Somme 10 Ampere Suma 300 mA Soma Gala Speaker out RR+ Radio Mute Speaker out RR- Sub-out Speaker out RF+ Permanent +12V Speaker out RF-...
- Página 356 Preamp out cable 7 607 893 093 Relais +12V Amplifi er +12V 1 3 5 Kl. 15 +12V Gala 2 4 6 Radio Mute Sub out 4 Ohm 4 Ohm 4 Ohm 4 Ohm 1 2 V Subject to changes! Sous réserve de modifi...
- Página 357 MEMO • LE MÉMO • EL MEMORÁNDUM • MEMORANDO • •...
- Página 358 MEMO • LE MÉMO • EL MEMORÁNDUM • MEMORANDO • •...
- Página 359 (Documentation for toxic and hazardous substances or element of product) SJ/T 11364-2006 (Product (Toxic and Hazardous Substances and Elements) name) (Lead - Pb) (Mercury - Hg) (Cadmium (Hexavalent (Polybromina- (PBDE) - Cd) Chromium - ted Biphenyls (Polybromina- Cr6+) - PBB) ted Diphenyl ethers-PBDE) Car Radio...
- Página 360 (USA) 800-950-2528 708-6817188 Brasil (Mercosur) (BR) 0800 7045446 +55-19 3745 2773 Malaysia (Asia Pacifi c) (MAL) +604-6382 474 +604-6413 640 Passport Hamburg MP57 Name: ..............7 647 643 310 Type: ..............BP ..............Serial no.: Blaupunkt GmbH, Robert-Bosch-Straße 200, D-31139 Hildesheim...