Tabla de contenido
Publicidad
Idiomas disponibles
Idiomas disponibles
Enlaces rápidos
Publicidad
Tabla de contenido

Manuales relacionados para Aventics ECS10 Serie


Resumen de contenidos para Aventics ECS10 Serie
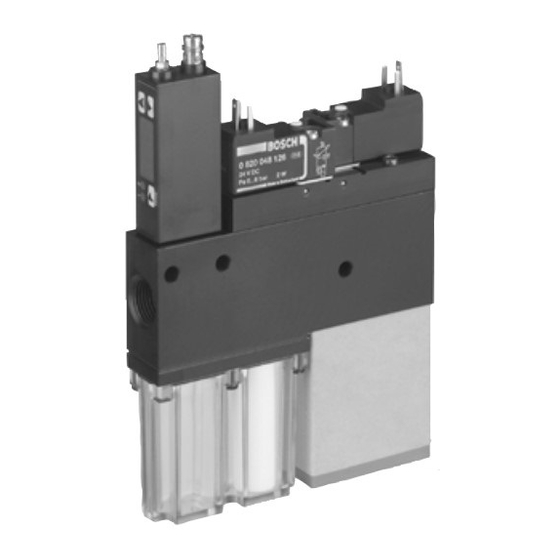
- Página 1 Betriebsanleitung | Operating instructions | Mode d’emploi | Istruzioni per l’uso | Instrucciones de servicio | Bruksanvisning Kompaktejektor Compact ejector Ejecteur compact Eiettore compatto Eyector compacto Kompaktejektor R412004317/09.2014, Replaces: 08.2012, DE/EN/FR/IT/ES/SV...
-
Página 2: Zu Dieser Dokumentation
O Beachten Sie auch die Anleitungen der übrigen Anlagenkomponenten. Umweltschutz im Verwenderland und am Arbeitsplatz. O Beachten Sie außerdem folgende Anleitungen: Verwenden Sie AVENTICS-Produkte nur in technisch einwandfreiem Zustand. – Anlagendokumentation des Anlagenherstellers Prüfen Sie das Produkt auf offensichtliche Mängel, wie beispielsweise Risse im –... - Página 3 AVENTICS | ECS | R412004317–BDL–001–AE | Deutsch Weitere Funktionen: Symbole Über ein Magnetventil (9) kann das Vakuum geschaltet werden. Über ein Magnetventil (10) kann der Abstoßimpuls geschaltet werden. Ejektor Ein Drucksensor (2) ermöglicht es, das Anliegen von Vakuum zu erkennen und NO = Ruhestellung, Magnetventil „Vakuum“, stromlos offen...
-
Página 4: Instandhaltung Und Instandsetzung
AVENTICS | ECS | R412004317–BDL–001–AE | Deutsch 7. Testen Sie die Funktionsfähigkeit der Magnetventile und des Drucksensors. Achten Sie auf die korrekte Verbindung (gleiche Farbmarkierung) von 8. Stellen Sie den Drucksensor ein. Magnetventilen und Industriesteckern/Leitungsdosen. Weitere Informationen finden Sie in den entsprechenden BDLs: 2. -
Página 5: Demontage Und Austausch
10.Setzen Sie das Filtergehäuse (11) mit Filtereinsatz (12) an den Ejektor (9). umbauen. Prüfen Sie den korrekten Sitz des Filtereinsatzes (12). Die Gewährleistung von AVENTICS gilt nur für die ausgelieferte Konfiguration 11.Ziehen Sie die Befestigungsschrauben (1) an (M = 0,8 Nm). -
Página 6: Fehlersuche Und Fehlerbehebung
Observe the applicable local regulations to protect the environment in the working with the product. country of use and to avoid workplace accidents. Only use AVENTICS products that are in perfect working order. Examine the Additional documentation product for obvious defects, such as cracks in the housing or missing screws, O Follow the instructions for the other system components. -
Página 7: Delivery Contents
AVENTICS | ECS | R412004317–BDL–001–AE | English Lay cables and lines so that they cannot be damaged and no one can trip over them. ECS... RD Before commissioning, make sure that all seals and caps for the screwed The device transmits a digital auxiliary signal for processing in an external control connections are correctly installed and undamaged to prevent fluids and foreign (e.g. -
Página 8: Commissioning And Operation
AVENTICS | ECS | R412004317–BDL–001–AE | English 1. Before commissioning, make sure that all the connections on the ejector are Pressure sensor: connecting the exhaust proper and all of the tubing is firmly fitted. ECS...E ejector: The exhaust tube (1) can only be connected after setting the 2. -
Página 9: Service And Repairs
(3). O Replace the wear parts if contaminated. 4. Connect the wires. O Use the part numbers listed in this table to order wear parts from AVENTICS. Exchanging the CN1 electrical connector (only ECS...20/30) – form C Wear parts Part number 1. -
Página 10: Extension And Conversion
, 3). Ejector 6. Connect the new plug ( , 1) of the CN1 connecting cable to the pressure Technical data can be found on the Internet at www.aventics.com/pneumatics-catalog. sensor ( , 3). 7. Tighten the tube nut ( , 2). -
Página 11: A Propos De Ce Produit
Afin d’empêcher une évacuation inefficace en cas d’aspiration simultanée, les deux Utiliser les produits AVENTICS uniquement lorsque leur état technique est électrodistributeurs en tension d’alimentation doivent être alimentés simultanément irréprochable. -
Página 12: Mise En Service / Fonctionnement
AVENTICS | ECS | R412004317–BDL–001–AE | Français Raccordement pneumatique de l’éjecteur Raccordement des électrodistributeurs ECS...20/30 1. Mettre la partie concernée de l’installation hors pression. (vide / commande d’éjection) 2. Poser les tuyaux de manière à éviter les coudes et les écrasements. -
Página 13: Entretien Et Maintenance
O Remplacer les pièces d’usure en cas d’encrassement. O S’assurer que personne ne se trouve dans la zone de transport sous la charge O Pour passer des commandes de pièces d’usure auprès de AVENTICS, utiliser les utile. références indiquées dans ce tableau. -
Página 14: Transformation Et Extension
Il est possible de transformer et d’étendre l’éjecteur pour l’adapter à ses besoins. 13.Serrer l’écrou d’accouplement (3). La garantie de AVENTICS n’est valable que pour la configuration livrée et les 14.Enficher le tuyau d’échappement (4) dans le bouchon d’échappement (5). -
Página 15: Caractéristiques Techniques
AVENTICS | ECS | R412004317–BDL–001–AE | Français 12 Caractéristiques techniques Ejecteur O Les données techniques sont disponibles sur le site Internet www.aventics.com/pneumatics-catalog. Manostat Voir Mode d’emploi, manostat PE3-P2 (2 x PNP), R412004321 Mode d’emploi, manostat PE3-PV (1 x PNP + 1 x analogique), R412004326 ou... -
Página 16: Sulla Presente Documentazione
O Leggere queste istruzioni e in particolar modo il capitolo 2 “Indicazioni di Utilizzare i prodotti AVENTICS esclusivamente in condizioni tecniche perfette. Verificare eventuali anomalie del prodotto, come per esempio fessure nel corpo sicurezza”... - Página 17 AVENTICS | ECS | R412004317–BDL–001–AE | Italiano ECS... NO ... = mit Drucksensor PE3-P2 ( 2 x PNP) – Displayanzeige Per evitare uno scarico inefficiente con contemporanea aspirazione, per raggiungere = mit Drucksensor PE3-PV (2 x PNP, 1 x analog) – LED Anzeige lo stato “Impulso di scarico ON”...
-
Página 18: Manutenzione E Riparazione
AVENTICS | ECS | R412004317–BDL–001–AE | Italiano 2. Collegare le elettrovalvole ECS...10/15 Ulteriori informazioni sono disponibili nelle istruzioni corrispondenti: a) Inserire i connettori industriali fino a quando la leva di arresto si blocca in Istruzioni, pressostato PE3-P2 (2 x PNP), R412004321 posizione nelle elettrovalvole. -
Página 19: Smontaggio E Sostituzione
L’eiettore può essere ampliato e trasformato in base alle proprio esigenze. 10.Applicare il corpo del filtro (11) con relativa cartuccia (12) all’eiettore (9). La garanzia di AVENTICS è valida esclusivamente per la configurazione Accertarsi che la cartuccia del filtro sia posizionata correttamente (12). -
Página 20: Ricerca E Risoluzione Errori
– Documentación de la instalación del fabricante de la misma trabajo. – Instrucciones de servicio, sensor de medición de presión PE3-P2 Utilice los productos AVENTICS solo si no presentan problemas técnicos. (2 x PNP), R412004321 Compruebe si el producto presenta algún defecto visible como, por ejemplo, –... -
Página 21: Volumen De Suministro
AVENTICS | ECS | R412004317–BDL–001–AE | Español Coloque los cables y los conductos de manera que no resulten dañados y que conmutación relativamente elevada que apenas contribuye al ahorro de aire, pero nadie pueda tropezar con ellos. que, en cambio, puede someter al aparato a un elevado esfuerzo de desgaste. -
Página 22: Puesta En Servicio Y Funcionamiento
AVENTICS | ECS | R412004317–BDL–001–AE | Español 2. Conexión de las válvulas de accionamiento eléctrico ECS...10/15 Eyector: conexión de aire comprimido y vacío a) Inserte los conectores industriales en las válvulas de accionamiento eléctrico 1. Monte los racores (2) (por parte del cliente) en las conexiones de aire hasta que enclave la palanca de encastre. -
Página 23: Conservación Y Reparación
AVENTICS | ECS | R412004317–BDL–001–AE | Español Conservación y reparación 6. Compruebe si se ha alcanzado el vacío necesario (p. ej., con un manómetro). 7. Compruebe la capacidad de funcionamiento de las válvulas de accionamiento eléctrico y del sensor de medición de presión. -
Página 24: Eliminación De Residuos
Tornillos de fijación (1) (DIN EN 7045): ECS...10/15: 2 M3 x 12; ECS...20/30: 4 M3 x 12 12.Inserte el conector (2) en el sensor de medición de presión (6). La garantía de AVENTICS es válida exclusivamente para la configuración 13.Apriete la tuerca de racor (3). -
Página 25: Om Denna Dokumentation
Denna bruksanvisning innehåller viktig information om hur man monterar produkten på ett korrekt och säkert sätt. AVENTICS-produkter får endast användas om de är i ett tekniskt felfritt skick. O Du bör läsa igenom hela anvisningen noga, särskilt kapitel 2 Kontrollera att produkten inte uppvisar tydliga defekter eller brister, som exempelvis sprickor i huset eller avsaknad av skruvar, täckbrickor eller... - Página 26 AVENTICS | ECS | R412004317–BDL–001–AE | Svenska ECS... NO ... Ejektor: Anslut tryckluft och vakuum Koppla till spänningen på båda magnetventilerna samtidigt, för att nå tillståndet 1. Montera snabbanslutningarna (2) (kundens) i tryckluftsanslutningen (3) och "Lossningsimpuls TILL" (blåsa ut). Detta förhindrar en ineffektiv utblåsning när vakuumanslutningen (4).
-
Página 27: Driftstart Och Drift
AVENTICS | ECS | R412004317–BDL–001–AE | Svenska Driftstart och drift 1. Anslut elanslutningarna BN (24 V DC) och GY (0 V) permanent till driftspänningen. 2. Sätt den anslutna sugkoppen på arbetsobjektet som ska sugas fast (endast Första driftstarten lämpligt för applikationer med täta och släta ytor) och koppla till arbetstrycket. -
Página 28: Demontering Och Byte
Ejektorn kan byggas ut och byggas om enligt individuella krav. 7. Ta bort trycksensorn (6) med tätningen (7). Garantin från AVENTICS gäller uteslutande för levererad konfiguration samt 8. Placera den nya trycksensorn (6) med tätningen (7) på ejektorn (9). utbyggnader som beaktats vid konfigurationen. -
Página 29: Tekniska Data
AVENTICS | ECS | R412004317–BDL–001–AE | Svenska Möjlig orsak Åtgärd Luftsparautomatiken Hysteresen högre än Ställ in ett högre kopplar inte till tillslagsläget tillslagsläge eller en mindre vakuumet hysteres Luftsparautomatiken Kablar eller ledare Anslut kablar och ledare fungerar inte förväxlade korrekt (se ”Ansluta... - Página 30 Gerätebeschreibung ECS...10/15 mit Luftsparautomatik / Device overview: ECS...10/15 with air economizer / Description de l’appareil ECS...10/15 avec dispositif automatique d’économie d’air / Descrizione dell’apparecchio ECS...10/15 con dispositivo di economia dell’aria / Descripción del aparato ECS...10/15 con dispositivo economizador de aire / Beskrivning av enheten ECS...10/15 med luftbesparande automatik Gerätebeschreibung ECS...20/30 mit Luftsparautomatik / Device overview: ECS...20/30 with air economizer / Description de l’appareil ESC...20/30 avec dispositif automatique d’économie d’air / Descrizione dell’apparecchio ECS...20/30 con dispositivo di economia dell’aria / Descripción del aparato ECS...20/30 con dispositivo economizador de aire / Beskrivning av enheten ECS...20/30 med...
- Página 31 1 2 3 4 2 5 Pneumatische Anschlüsse / Entlüftung ECS...D/E / Pneumatic connections / ECS...D/E exhaust / Verschleißteile / Wear parts / Pièces d’usure Raccordements pneumatiques Echappement ECS...D/E 24 V DC Elektrischer Anschluss: Magnetventil ECS...10/15 und Verbindungskabel mit Buchse / Electrical connection: ECS...10/15 solenoid valve and connecting cable with socket / Raccordement électrique : électrodistributeur ECS...10/15 et câble de connexion avec prise femelle = 0.4 Nm...
- Página 32 1 2 3 4 2 5 Attacchi pneumatici / Sfiato ECS...D/E / Conexiones neumáticas / Purga ECS...D/E / Parti soggette ad usura / Piezas de desgaste / Slitagedelar Pneumatiska anslutningar Avluftning ECS...D/E 24 V DC Collegamento elettrico: elettrovalvola ECS...10/15 e cavo di collegamento con presa / Conexión eléctrica: válvula de accionamiento eléctrico ECS...10/15 y cable de unión con hembrilla / Elanslutning: magnetventil ECS...10/15 och anslutningskabel med honkontakt = 0.4 Nm...
- Página 33 German language. R412004317–BDL–001–AE/09.2014 Subject to modifications. © All rights reserved by AVENTICS GmbH, even and especially in cases of proprietary rights applications. It may not be reproduced or given to third parties without its consent.