Tabla de contenido
Publicidad
Idiomas disponibles
Idiomas disponibles
Enlaces rápidos
100*85MM
Publicidad
Tabla de contenido

Manuales relacionados para TFA Dostmann 30.3030.IT


Resumen de contenidos para TFA Dostmann 30.3030.IT
- Página 1 100*85MM ...
-
Página 2: Lieferumfang
DRAHTLOSE 868 MHZ TEMPERATURSTATION Bedienungsanleitung Kat. Nr. 30.3030.IT Vielen Dank, dass Sie sich für diese Funk-Temperaturstation aus dem Hause TFA entschieden haben. BEVOR SIE MIT DEM GERÄT ARBEITEN Lesen Sie sich bitte die Bedienungsanleitung genau durch. So werden Sie mit Ihrem neuen Gerät vertraut, lernen alle Funktionen und Bestandteile kennen, erfahren wichtige Details für die Inbetriebnahme und den... -
Página 3: Zu Ihrer Sicherheit
EINSATZBEREICH UND ALLE VORTEILE IHRER NEUEN TEMPERATURSTATION AUF EINEN BLICK: Funkgesteuerte DCF-77-Zeit mit manueller Einstelloption Stunden, Minuten - und Sekundenanzeige Zeitempfang EIN/AUS (ON/OFF) 12/24-Stunden-Zeitanzeigeformat Kalenderanzeige (Monat, Tagesdatum, Wochentag) Zeitzonen-Einstelloption ±12 Stunden Temperaturanzeige in Celsius (°C) oder Fahrenheit (°F) wählbar ... - Página 4 Vorsicht! Verletzungsgefahr: Bewahren Sie das Gerät und die Batterien außerhalb der Reichweite von Kindern auf. Batterien nicht ins Feuer werfen, kurzschließen, auseinander nehmen oder aufladen. Explosionsgefahr! Batterien enthalten gesundheitsschädliche Säuren. Um ein Auslaufen der Batterien zu vermeiden, sollten schwache Batterien möglichst schnell ausgetauscht werden.
- Página 5 BESTANDTEILE Die Temperaturstation Aufhängeöse Batteriefach- deckel LCD- SET-Taste Anzeige Aufsteller MIN/MAX/+ -Taste Der Außentemperatursender Fernübertragung der Außentemperatur zur Temperaturstation per 868 MHz-Signal Spritzwassergeschütztes Gehäuse Gehäuse wandmontierbar (an einem geschützten Ort montieren. Direkten Regen oder Sonnenschein vermeiden)
- Página 6 INSTALLATION UND AUSTAUSCH DER BATTERIEN IM TEMPERATURSENDER: Der Außentemperatursender arbeitet mit zwei 1,5 V-Batterien vom Typ Mignon AA, IEC LR6. Folgen Sie beim Einlegen und Ersetzen der Batterien bitte den Schritten unten: Entfernen Sie den Batteriefachdeckel. Batterien unter Beachtung der korrekten Polarität (siehe Markierung) einlegen.
- Página 7 Batteriewechsel Wechseln Sie die Batterien der Temperaturstation, wenn das Batteriesymbol über der Innentemperatur erscheint. Sind die Batterien des Außensenders verbraucht, erscheint über der Anzeige der Außentemperatur ein Batteriesymbol. Hinweis: Im Falle eines Batteriewechsels bei einer der Einheiten muss bei allen Einheiten eine neue Grundeinstellung vorgenommen werden.
- Página 8 Außenbereichs sowie das Signalempfangssymbol auf der Temperaturstation angezeigt werden. Ist dies nicht innerhalb von 3 Minuten der Fall, so müssen alle Batterien entnommen werden und eine neuerliche Grundeinstellung ab Schritt 1 ist vorzunehmen. Zur Sicherstellung einer ausreichenden 868 MHz-Signalübertragung ist es erforderlich, zwischen den endgültigen Montageorten von Temperaturstation und Außensender eine Entfernung von nicht mehr als 100 Meter einzuhalten (siehe Hinweise unter “Montage”...
- Página 9 Ihre Temperaturstation empfängt dieses Signal, wandelt es um und zeigt Ihnen unabhängig von Sommer oder Winter stets die exakte Zeit. Die Empfangsqualität ist in hohem Maße von den geografischen und baulichen Gegebenheiten abhängig. Im Normalfall sollten jedoch in einem Radius von 1.500 km um Frankfurt keine Empfangsprobleme auftreten.
- Página 10 FUNKTIONSTASTEN: Temperaturstation: Die Temperaturstation besitzt zwei leicht bedienbare Funktionstasten: SET-Taste MIN/MAX/+ -Taste SET -Taste (Einstellung) Drücken Sie die Taste zum Eintritt in die Einstellmodi für folgende Funktionen: manuelle Zeiteinstellung, Einstellung von Jahr, Monat, Tagesdatum, Wochentag, 12/24-Stunden-Zeitanzeigeformat, Zeitzone, Zeitempfang EIN/AUS, sowie °C/°F-Anzeige. ...
-
Página 11: Lcd-Bildschirm
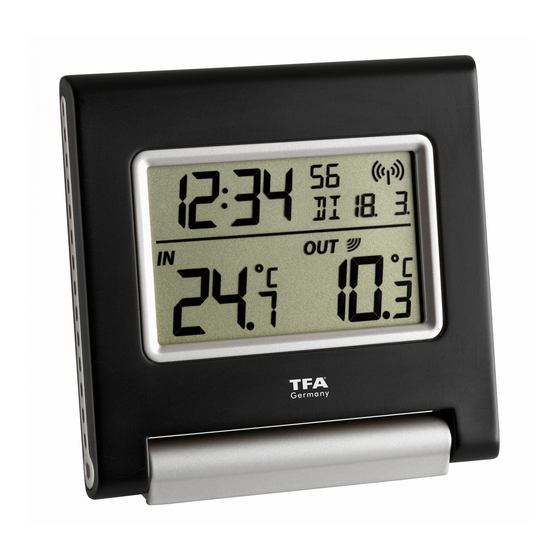
LCD-BILDSCHIRM: DCF77-Symbol (Empfangssymbol für das funkgesteuerte Zeit Zeitsignal) Kalender Batterietiefstands- Batterietiefstands- anzeige für die anzeige für den Temperaturstation Außensender Außentemperatur Innentemperatur Außensignal-Empfangssymbol* * Wenn das Sendesignal des Außensenders von der Temperaturstation erfolgreich empfangen wurde, wird dieses Symbol eingeschaltet (bei Fehlempfang wird das Symbol nicht angezeigt). -
Página 12: Manuelle Zeiteinstellung
Einstellung der Zeitzone Einstellung Zeitempfang ein/aus (ON/OFF) Einstellung Temperaturanzeige °C/°F Drücken und halten Sie die SET-Taste für etwa 3 Sekunden zum Eintritt in den Manuellen Einstellmodus: MANUELLE ZEITEINSTELLUNG: Für den Fall, dass die Temperaturstation kein DCF-Zeitsignal erkennen kann (z. B. Störungen, Sendeentfernung, etc.), ist eine manuelle Zeiteinstellung möglich. - Página 13 KALENDEREINSTELLUNG: Die Datumsvoreinstellung der Temperaturstation ist der 1.1. des Jahres 2008. Wird das funkgesteuerte Zeitsignal empfangen, so wird automatisch auch das Datum auf den aktuellen Stand gebracht. Wurde allerdings kein Zeitsignal empfangen, so kann auch das Datum wie folgt manuell eingestellt werden: Jahr (blinkend) Monat (blinkend) Tagesdatum (blinkend)
- Página 14 Drücken Sie zur Bestätigung und zum Verlassen des Modus “Einstellung 12- /24-Stunden-Anzeigeformat“ die SET-Taste. EINSTELLUNG 12-/24-STUNDEN-ANZEIGEFORMAT Die Uhrenanzeige kann so eingestellt werden, dass die Zeit im 12- oder 24- Stundenformat angezeigt wird (Voreinstellung 24-Stunden-Anzeige): blinkend Benutzen Sie die MIN/MAX/+ -Taste, um zwischen “12H” oder “24H” umzuschalten.
- Página 15 Die Zeitzone beginnt zu blinken. Stellen Sie mit der MIN/MAX/+ -Taste die gewünschte Zeitzone ein. Drücken Sie zur Bestätigung und zum Eintritt in den Modus “Einstellung Zeitempfang ein/aus (on/off)“ die SET-Taste. EINSTELLUNG ZEITEMPFANG EIN/AUS (ON/OFF): In Gegenden, in denen der Empfang des DCF77-Zeitcodes nicht möglich ist, kann die DCF-Zeitempfangsfunktion abgeschaltet werden.
- Página 16 EINSTELLUNG TEMPERATURANZEIGE °C/ °F Die Anzeige der Temperatur ist auf die Einheit °C (Celsius) voreingestellt. Auswahl der Anzeige in °F (Fahrenheit) wie folgt: blinkend Benutzen Sie bei blinkender Anzeige die MIN/MAX/+ -Taste, um zwischen “°F” und “°C” umzuschalten. Ist die gewünschte Anzeigeeinheit gewählt, so drücken Sie zum Verlassen des Einstellmodus die SET- Taste.
- Página 17 Drücken Sie zur Anzeige der maximalen Raumtemperatur und der Zeit und Datum der Speicherung ein weiteres Mal die MIN/MAX/+ -Taste. MIN-Symbol MAX-Symbol Raum- temperatur Drücken Sie zur Rückkehr zur aktuellen Temperaturanzeige noch ein Mal die MIN/MAX/+ -Taste. RÜCKSTELLUNG DER GESPEICHERTEN MIN/MAX- TEMPERATUREN: Hinweis: Alle gespeicherten Raum- und Außenbereichsdaten werden gleichzeitig zurückgestellt.
- Página 18 868 MHz-EMPFANGSTEST Die Temperaturstation sollte die Außenbereichsdaten innerhalb von 2 Minuten nach der Inbetriebnahme empfangen und anzeigen. Werden diese nicht innerhalb von 2 Minute nach der Grundeinstellung angezeigt oder ist der Signalempfang im normalen Anzeigemodus kontinuierlich so gestört, dass die Außenbereichsanzeige nur “- - -”...
- Página 19 MONTAGE DER TEMPERATURSTATION: Die Temperaturstation kann entweder an einer Wand montiert oder frei aufgestellt werden. Wandmontage: Bevor Sie die Temperaturstation an einer Wand montieren, überprüfen Sie bitte, ob die Außentemperaturwerte von den gewünschten Standorten aus empfangen werden können. Schraube (nicht im Lieferumfang) in die vorgesehene Wand einschrauben, dabei den Schraubenkopf ca.
- Página 20 PLATZIERUNG DES AUSSENTEMPERATURSENDERS: Der Außentemperatursender ist mit einem Halter ausgestattet, der mittels zweier mitgelieferter Schrauben an eine Wand montiert werden kann. Nach Aufstecken des Tischständers an der Unterseite des Senders kann dieser auch auf eine ebene Unterlage gestellt werden. Wandmontage Befestigen Sie mithilfe der mitgelieferten Schrauben und Plastikdübel den Wandhalter an der gewünschten Wandstelle.
-
Página 21: Pflege Und Wartung
PFLEGE UND WARTUNG Reinigen Sie das Gerät und den Sender mit einem weichen, leicht feuchten Tuch. Keine Scheuer- oder Lösungsmittel verwenden! Vor Feuchtigkeit schützen. Entfernen Sie die Batterien, wenn Sie das Gerät längere Zeit nicht verwenden. FEHLERBESEITIGUNG Problem Lösungen ... -
Página 22: Technische Daten
ENTSORGUNG Dieses Produkt wurde unter Verwendung hochwertiger Materialen und Bestandteile hergestellt, die recycelt und wiederverwendet werden können. Batterien und Akkus dürfen keinesfalls in den Hausmüll! Als Verbraucher sind Sie gesetzlich verpflichtet, gebrauchte Batterien und Akkus zur umweltgerechten Entsorgung beim Handel oder entsprechenden Sammelstellen gemäß... -
Página 23: Eu-Konformitätserklärung
Die neuesten technischen Daten und Informationen zu Ihrem Produkt finden Sie unter Eingabe der Artikel-Nummer auf unserer Homepage. EU-KONFORMITÄTSERKLÄRUNG Hiermit erklärt TFA Dostmann, dass der Funkanlagentyp 30.3030.IT der Richtlinie 2014/53/EU entspricht. Der vollständige Text der EU-Konformitätserklärung ist unter der folgenden Internetadresse verfügbar: www.tfa-dostmann.de... -
Página 24: Scope Of Supply
WIRELESS 868 MHZ TEMPERATURE STATION Instruction Manual Cat. No. 30.3030.IT Thank you for choosing this wireless temperature station from TFA. BEFORE YOU USE IT Please be sure to read the instruction manual carefully. This information will help you to familiarise yourself with your new device, learn all of its functions and parts, find out important details about its first use and how to operate it, and get advice in the event of faults. -
Página 25: For Your Safety
FIELD OF OPERATION AND ALL OF THE BENEFITS OF YOUR NEW TEMPERATURE STATION AT A GLANCE: DCF-77 Radio controlled time with manual settings Time display (hour, minutes, seconds) Time reception ON/OFF 12/24 hour time format Calendar display (month, date, weekday) ... - Página 26 Caution! Risk of injury: Keep this instrument and the batteries out of reach of children. Batteries must not be thrown into the fire, short-circuited, taken apart or recharged. Risk of explosion! Batteries contain harmful acids. Low batteries should be changed as soon as possible to prevent damage caused by a leaking battery.
- Página 27 ELEMENTS The temperature station Hanging hole Battery compartment display SET key Stand MIN/MAX/+ key THE OUTDOOR TEMPERATURE TRANSMITTER Remote transmission of outdoor temperature to temperature station by 868 MHz signal Wall mounting case Mounting at a sheltered place. Avoid direct rain and sunshine...
- Página 28 INSTALL AND REPLACE BATTERIES IN THE TEMPERATURE TRANSMITTER The temperature transmitter uses 2 x AA, IEC LR6, 1.5V batteries. To install and replace the batteries, please follow the steps below: Remove the battery compartment cover at the back of the transmitter.
- Página 29 Battery replacement Replace the batteries of the temperature station when the battery symbol appears above the indoor temperature display. When the batteries of the transmitter are used up, the low battery icon appears above the outdoor temperature display. Note: In the event of changing batteries in any of the units, all units need to be reset by following the setting up procedures.
- Página 30 In order to ensure sufficient 868 MHz transmission however, this should under good conditions be a distance no more than 100 meters between the final position of the Temperature station and the transmitter (see notes on “Mounting” and “868 MHz Reception”). Once the remote temperature has been received and displayed on the temperature station, the DCF time (radio controlled time) code reception is automatically started.
-
Página 31: Function Keys
to receive it. When the time code is received, the DCF tower becomes permanently lit and the time will be displayed. DCF reception is done twice daily at 02:00 and 03:00 am. If the reception is not successful at 02:00 am, then the next reception takes place the next hour and so on until 06:00am, or until the reception is successful. -
Página 32: Lcd Screen
SET key Press and hold for about 3 seconds to enter the Manual setting modes: manual time, year, date, month, weekday, 12/24 hour time format, time zone, time reception ON/OFF and temperature settings. Press and hold to reset the indoor and outdoor MIN/MAX temperature records MIN/MAX/+ key ... -
Página 33: Manual Time Setting
MANUAL SETTING The following manual settings can be done in the setting mode: Manual time Calendar 12/24 hour time display Time zone Time reception ON/OFF (DCF ON/OFF) Temperature unit °C/°F setting Press and hold the SET key for about 3 seconds to advance to the setting mode: MANUAL TIME SETTING In case the temperature station is not able to detect the DCF-signal (disturbances, transmitting distance, etc.), the time can be manually set. - Página 34 Note: The unit will still try and receive the signal despite it being manually set. When it does receive the signal, it will change the manually set time into the received time. CALENDAR SETTING The date default of the temperature station is 1. 1. in the year 2008. Once the radio- controlled time signals are received, the date is automatically updated.
-
Página 35: Time Zone Setting
Press the SET key to enter the weekday (the weekday digit will be flashing). Use MIN/MAX/+ key to adjust the weekday. Press the SET key to confirm and enter the 12/24 hour time display mode. 12/24 HOUR TIME DISPLAY SETTING To set the time format to 12h or 24h display mode (default 24h): Flashing Use the... - Página 36 Press the SET key to confirm and enter the Time reception ON/OFF setting mode. TIME RECEPTION ON/OFF SETTING In area where reception of the radio-controlled time (DCF time) is not possible, the time reception function can be turned OFF. The clock will then work as a normal Quartz clock.
- Página 37 The “°C” or “F” will be flashing, use the MIN/MAX/+ key to toggle between “°C” and “°F”. Confirm with the SET key and exit the manual setting modes. CHECKING THE MIN/ MAX TEMPERATURES In normal mode display, press the MIN/MAX/+ key to display the outdoor MIN display and the time and date of record.
- Página 38 Press the MIN/MAX/+ to return to current indoor and outdoor temperature display. RESETTING THE MIN/ MAX TEMPERATURE Note: All the indoor and outdoor MIN/MAX records will the reset at the same time. Press the MIN/MAX/+ key once to enter the indoor temperature display. Press the SET key.
- Página 39 Neighbors using electrical devices operating on the 868 MHz signal frequency can also cause interference. Note: When the 868MHz signal is received correctly, do not re-open the battery cover of either the transmitter or Temperature station, as the batteries may spring free from the contacts and force a false reset.
- Página 40 POSITIONING THE TEMPERATURE STATION: The temperature station has been designed to be hang on a wall or free standing. To wall mount Before wall mounting, please check that the outdoor temperature values can be received from the desired locations. To wall mount: Fix a screw (not supplied) into the desired wall, leaving the head extended out the by about 5mm.
-
Página 41: Care And Maintenance
POSITIONING THE OUTDOOR TEMPERATURE TRANSMITTER: The transmitter is supplied with a holder that may be attached to a wall with the two screws supplied. The transmitter can also be positioned on a flat surface by securing the stand to the bottom to the transmitter. To wall mount: Secure the bracket onto a desired wall using the screws and plastic anchors. - Página 42 MALFUNCTION Problems Troubleshooting Ensure batteries polarity are correct No indication on the Change batteries temperature station Check batteries of external transmitter (do not No transmitter reception use rechargeable batteries!) Restart the transmitter and temperature station Display "---" as per the manual ...
-
Página 43: Waste Disposal
WASTE DISPOSAL This product has been manufactured using high-grade materials and components which can be recycled and reused. Never throw flat batteries and rechargeable batteries in household waste. As a consumer, you are legally required to take them to your retail store or to appropriate collection sites according to national or local regulations in order to protect the environment. -
Página 44: Eu Declaration Of Conformity
Maximum radio-frequency power: < 25mW No part of this manual may be reproduced without written consent of TFA Dostmann. The technical data are correct at the time of going to print and may change without prior notice. The latest technical data and information about your product can be found by entering your product number on our homepage. -
Página 45: Contenu De La Livraison
STATION DE TEMPÉRATURE RADIO- PILOTÉE 868 MHz Manuel d'Instructions Cat. No. 30.3030.IT Nous vous remercions d'avoir choisi la station de température radio-pilotée TFA. Avant d'utiliser l'appareil Lisez attentivement le mode d'emploi. Pour vous familiariser avec votre nouvel appareil, découvrez les fonctions et tous les composants, notez les détails importants relatifs à... -
Página 46: Pour Votre Sécurité
APERÇU DU DOMAINE D'UTILISATION ET DE TOUS LES AVANTAGES DE VOTRE NOUVELLE STATION DE TEMPÉRATURE RADIO-PILOTÉE : Heure radio-pilotée (signal horaire DCF) avec option de réglage manuel Affichage de l’heure (heures, minutes, secondes) Activation/désactivation (ON/OFF) de la réception du signal DCF ... - Página 47 Attention! Danger de blessure Tenez l’appareil et les piles hors de la portée des enfants. Ne jetez jamais les piles dans le feu, ne pas les court-circuiter, les démonter ou les recharger. Risques d'explosion! ne les court-circuitez pas, ne les démontez pas et ne les rechargez pas.
-
Página 48: La Station De Température
COMPOSANTS La station de température Encoche de suspension Compartiment des piles Display Touche SET Stand Touche MIN/MAX/+ L'émetteur de température extérieur Transmission à distance de la température extérieure à la station de température par signaux 868 MHz Support mural ... - Página 49 INSTALLATION ET REMPLACEMENT DES PILES DE L’ÉMETTEUR DE TEMPÉRATURE L’émetteur de température fonctionne avec 2 piles AA, IEC LR6, 1.5V. Pour les installer ou les remplacer, suivre les étapes ci- dessous : Ouvrez le compartiment des piles en le faisant glisser. Insérez les piles en respectant les polarités (voir le marquage interne).
- Página 50 Quand les piles de l’émetteur sont usées, l’icône de pile faible apparaît au- dessus de l’affichage de la température extérieure. Remarque : Lors du remplacement des piles de l'un des appareils, tous les appareils (station de base et émetteur) devront être ré-enclenchés en suivant les étapes d'installation. La raison de cette démarche est que le code de sécurité...
- Página 51 Pour assurer une bonne transmission 868 MHz, la distance entre la Station de température et l’émetteur ne doit pas excéder 100m en champs libre (voir les paragraphes “Mise en place” et “ Réception 868 MHz ”). Une fois que la température à distance est reçue et affichée sur la Station de température, la procédure de réception de l’heure DCF (heure radio-pilotée) est lancée automatiquement.
-
Página 52: Touches De Fonction
signal et tente de le réceptionner. Lorsque le code horaire a été reçu, l'icône DCF reste allumée et l'heure est affichée. La réception DCF est captée deux fois par jour à 02h00 et 03h:00 du matin. Si la réception ne réussit pas à 02h00, un nouvel essai a lieu à l’heure suivante et toutes les heures jusqu’à... -
Página 53: Écran Lcd
Touche SET (Réglage) Appuyez sur la touche pendant 3 secondes environ pour passer en mode réglages manuels : réglage manuel de l’heure, année, mois, date, jour, format d'affichage de l’heure 12/24 H, fuseau horaire, activation/désactivation (ON/OFF) de la réception du signal DCF, et réglage de l’unité de température (°C/°F). -
Página 54: Réglage Manuel De L'heure
* Lorsque le signal est réceptionné par la station de température, l’indicateur de réception du signal extérieur reste affiché à l’écran (l’icône ne sera pas affichée si la réception échoue). L’utilisateur peut ainsi s’assurer de la bonne réception du signal (icône affichée) ou de l’échec de réception (icône absente). - Página 55 L'heure clignote à la section heure de l'écran. Réglez l'heure à l'aide de la touche MIN/MAX/+. Appuyez sur la touche SET pour passer au réglage des minutes ; les minutes clignotent. Réglez les minutes à l'aide de la touche MIN/MAX/+. Appuyez de nouveau sur la touche SET pour confirmer et passer au réglage du Calendrier.
- Página 56 Appuyez ensuite sur la touche SET pour passer au réglage la date ; la date clignote. Réglez la date à l'aide de la touche MIN/MAX/+. Jour de la semaine (clignote) Appuyez sur la touche SET pour passer au réglage le jour de la semaine ; le jour de la semaine clignote).
-
Página 57: Fuseau Horaire
Note : Lorsque le format d’affichage 24h est sélectionné, le calendrier est affiché sous la forme jour de la semaine-date-mois. Lorsque le format d’affichage 12h est sélectionné, le format du calendrier est jour de la semaine-mois-date. FUSEAU HORAIRE La plage des fuseaux horaires est comprise entre ± 12 heures (0 par défaut) : Fuseau horaire (clignote) Le fuseau horaire clignote. - Página 58 Désactivez (OFF) la réception du signal horaire à l'aide de la touche MIN/MAX/+. Appuyez sur la touche SET pour confirmer et passer au réglage de l’unité de température en °C/°F. Remarque : Si la fonction de réception du signal DCF est désactivée manuellement, l'horloge ne tentera pas de réceptionner le signal DCF, et ce tant que la fonction de réception de l'heure reste désactivée (OFF).
- Página 59 Indicateur de Icône MIN Icône MAX réception des données extérieures Température extérieure Appuyez trois fois sur la touche MIN/MAX/+ pour afficher la température MIN intérieure avec l’heure et la date de relevé. Appuyez de nouveau sur la touche MIN/MAX/+ pour afficher la température MAX intérieure avec l’heure et la date de relevé.
- Página 60 toutes les données MIN/MAX Appuyez sur la touche SET pour réinitialiser aux valeurs actuelles de température. ÉMETTEUR DE TEMPÉRATURE EXTÉRIEURE La température extérieure est relevée et transmise toutes les 4 secondes. La portée de l'émetteur de température peut être influencée par la température. Les températures froides peuvent réduire le rayon d'émission.
-
Página 61: Positionnement De La Station De Température
Si cela ce produit, réinitialisez tous les appareils (voir le paragraphe « Installation » ci-dessus) et évitez ainsi les problèmes de transmission. Le rayon de transmission de l’émetteur vers la station de température est d’environ 100m, en espace dégagé. Cependant, ceci dépend de l’environnement et des niveaux d’interférence. - Página 62 Position sur une surface : Grâce à son socle rabattable, la station de température peut se poser sur n’importe quelle surface plane. ÉMETTEUR EXTÉRIEUR : L’émetteur est fourni avec un support qui peut se fixer au mur à l’aide des deux vis fournies. On peut aussi le poser sur une surface plane et fixant le support à...
-
Página 63: Entretien Et Maintenance
température. En cas de non-réception du signal, changez l’émetteur de place ou déplacez-le légèrement, ceci pouvant aider à la réception du signal. ENTRETIEN ET MAINTENANCE Pour le nettoyage de l'appareil et de l'émetteur, utilisez un chiffon doux humide. N’utilisez pas de solvants ou d´agents abrasifs! ... -
Página 64: Traitement Des Déchets
Paramétrez la réception du signal Aucune réception DCF « activé » Sélectionnez une autre position pour la station Paramétrez l’heure manuellement Attendez la réception du signal de nuit Remplacez les piles Indication incorrecte TRAITEMENT DES DÉCHETS Ce produit a été... -
Página 65: Caractéristiques Techniques
CARACTÉRISTIQUES TECHNIQUES : Plage de mesure des températures Intérieure -9,9ºC à +59,9ºC à une résolution de 0,1ºC (14,1°F à +139,8°F à une résolution de 0,2°F) (“OF.L” affiché en dehors de cette plage) Extérieure -39,9ºC à +59,9ºC à une résolution de 0,1ºC (-39,8°F à... -
Página 66: Declaration Ue De Conformite
être trouvées en entrant le numéro de l'article sur notre site. DECLARATION UE DE CONFORMITE Le soussigné, TFA Dostmann, déclare que l'équipement radioélectrique du type 30.3030.IT est conforme à la directive 2014/53/UE. Le texte complet de la déclaration UE de conformité est disponible à l'adresse internet suivante: www.tfa-dostmann.de E-Mail: info@tfa-dostmann.de... - Página 67 DRAADLOOS 868 MHz TEMPERATUURSTATION Handleiding Cat. No. 30.3030.IT Hartelijk dank dat u voor dit radiografisch temperatuurstation van de firma TFA hebt gekozen. Voor u met het apparaat gaat werken, leest u a.u.b. de gebruiksaanwijzing aandachtig door. Zo raakt u vertrouwd met uw nieuw apparaat en leert u alle functies en onderdelen kennen, komt u belangrijke details te weten met het oog op het in bedrijf nemen van het apparaat en de omgang ermee en krijgt u tips voor het geval van een storing.
-
Página 68: Voor Uw Veiligheid
HOE U UW NIEUW APPARAAT KUNT GEBRUIKEN EN ALLE VOORDELEN ERVAN IN ÉÉN OOGOPSLAG: Functie atoomtijd (DCF-radiografische tijd) met mogelijkheid tot handmatig instellen LCD –klok (uren, minuten, seconden) Tijdontvangst AAN/UIT (instelbaar) Tijdweergave: 12/24 uur Kalender (weekdag, maand, dag) ... - Página 69 Opgelet! Letselgevaar: Bewaar het apparaat en de batterijen buiten de reikwijdte van kinderen. Batterijen niet in het vuur gooien, niet kortsluiten, niet uit elkaar halen of opladen. Kans op explosie! Batterijen bevatten zuren die de gezondheid schaden. Zwakke batterijen moeten zo snel mogelijk worden vervangen om lekkage van de batterijen te voorkomen.
- Página 70 ONDERDELEN Het temperatuurstation Ophanggaatje Deksel batterijvak LCD- scherm SET-toets Standaard MIN/MAX/+ toets De buitensensor Transmissie van buitentemperatuur naar Temperatuurstation via 868 MHz. Omhulsel voor bevestiging aan muur (ophangen op een beschutte plek. Vermijd rechtstreekse regen en direkt zonlicht)
- Página 71 PLAATSEN EN VERVANGEN VAN BATTERIJEN IN DE TEMPERATUURZENDER De temperatuurzender wordt gevoed door 2 x AA, IEC LR6, 1.5V batterijen. Volg onderstaande stappen voor het plaatsen en vervangen van de batterijen: Verwijder het deksel van het batterijvak. Breng de batterijen erin, daarbij lettend op juiste polariteit (zie markering).
- Página 72 Vervanging batterijen Vervang de batterijen van het temperatuurstation zodra het batterij-symbool boven de binnentemperatuur verschijnt Als de batterijen van de zender leeg zijn, verschijnt het batterij-symbool boven de weergave van de buitentemperatuur. Let op: Bij het herstarten, b.v. als de batterijen in één van de toestellen vervangen moeten worden, dienen alle toestellen te worden herstart.
- Página 73 weergegeven. Als dit na 5 minuten niet het geval is, moeten de batterijen er uitgenomen worden en herstart men vanaf stap 1. Teneinde voldoende ontvangst van het 868 MHz-zendsignaal te verzekeren mag de afstand tussen de sensor en de uiteindelijke positie van het temperatuurstation niet meer bedragen dan 100 meter (zie opmerkingen onder “Ophangen”...
- Página 74 Normaliter zijn er in een straal van 1500 km rond Frankfurt geen ontvangstproblemen. Zodra de buitentemperatuur en de vochtigheidsgraad op het temperatuurstation worden vertoond gaat het DCF-torentje in de rechterbovenhoek van het scherm knipperen. Dit betekent dat de klok het radiosignaal gevonden heeft en het probeert te ontvangen.
- Página 75 FUNCTIETOETSEN: Temperatuurstation: Het temperatuurstation heeft 2 practische functietoetsen: MIN/MAX/+- SET-toets toets SET -toets (Instelling) Ongeveer 3 seconden indrukken om in de handbediende regelstand te komen: handbediende tijd, kalender, 12/24-uur tijdsweergave, tijdzone, tijdontvangst AAN/UIT, en °C/°F temperatuur. Indrukken om alle MIN/MAX temperatuurwaarden vrij te stellen. MIN/MAX/+ -toets (Min/ Max-temperatuur/+) ...
- Página 76 LCD-SCHERM DCF-pictogram Tijd Pictogram Kalender batterij- Pictogram batterij- indicator indicator (zender) (ontvanger) Pictogram Binnen- ontvangst temperatuur buitensignaal* Buitentemperatuur * Als het temperatuurstation erin geslaagd is het signaal te ontvangen, blijft het symbool van signal buitenontvangst op het scherm staan (zoniet dan verdwijnt het). Er kan dus altijd worden afgelezen of ontvangst gelukt is (pictogram aan) of niet (pictogram uit).
- Página 77 Regelstand °C/ °F temperatuur Houd de SET-toets ongeveer 3 seconden ingedrukt om verder te gaan naar de regelstand: HANDBEDIENDE REGELSTAND TIJD In gebieden waar ontvangst van de DCF77- tijd niet mogelijk is, kan de tijd handmatig worden ingesteld. De klok werkt dan als een normale kwartsklok. Zodra het DCF-signaal is gevonden, vervangt de ontvangen zendertijd de handmatig ingevoerde tijd.
- Página 78 REGELSTAND KALENDER Het temperatuurstation is standaard ingesteld op 1. 1. van het jaar 2008. Zodra de zender-bestuurde tijdsignalen ontvangen zijn, wordt de datum automatisch geactualiseerd. Als de signalen echter niet ontvangen worden, kan de datum handmatig worden ingesteld: Jaar knippert Maand (knippert) Dag (knippert) De jaren knipperen.
- Página 79 REGELSTAND TIJDWEERGAVE: 12/24 UUR Bij de urenstand kan gekozen worden tussen tijdweergave in 12 of 24 uur. (standaardinstelling: 24 uur): knippert De “24h” knipperen. Stel met de MIN/MAX/+ toets tussen “12H” of “24H”. Druk opnieuw op de SET-toets om te bevestigen en verder te gaan naar de Regelstand tijdzone.
- Página 80 knippert De letters “ON” gaan knipperen op het scherm. Stel met de + toets de ontvangstfunctie UIT. Druk opnieuw op de SET-toets om te bevestigen en verder te gaan naar de Regelstand temperatuur in °C/°F. Let op: Als de functie van de tijdontvangst handmatig UIT is gezet, zal de klok geen enkele ontvangstpoging doen zolang de functie van de tijdontvangst op OFF staat.
- Página 81 Druk nogmaals op de MIN/MAX/+ toets om de MAX buitentemperatuur en de tijd en datum van registratie weer te geven. Pictogram MIN-icoon MAX-icoon ontvangst buiten- signaal Buiten- temperatuur Druk driemaal op de MIN/MAX/+ toets om de MIN binnentemperatuur weer te geven en de tijd en datum van registratie weer te geven.
- Página 82 Druk de SET-toets. Nu worden de data van de MIN/MAX binnentemperatuur en ook de tijd en de datum waarop de waarden werden vastgelegd, teruggesteld op de huidige waarden. TEMPERATUURZENDER De temperatuur en vochtigheid worden elke 4 seconden gemeten en verzonden. Het bereik van de thermo-hygro buitenzender kan beïnvloedt worden door de temperatuur.
- Página 83 moeten opstarten. Gebeurt dit per ongeluk toch, herstart dan alle toestellen (zie Opstarten boven) anders kunnen zendproblemen ontstaan. Het zendbereik van de zender naar het temperatuurstation is ongeveer 100 meter (in het vrije veld). Dit bereik wordt echter beïnvloedt door omgevingsfactoren en de stoorbronnen.
-
Página 84: Schoonmaken En Onderhoud
POSITIONEREN VAN DE BUITENSENSOR De zender wordt geleverd met een houder die met de twee meegeleverde schroeven aan de muur kan worden bevestigd. De zender kan ook op een vlakke ondergrond gezet worden. De houder moet dan aan de onderkant van de zender bevestigt worden. - Página 85 STORINGSWIJZER Probleem Oplossing Batterijen met de juiste poolrichtingen plaatsen Geen display op het Batterijen vervangen. basisapparaat Batterijen van de buitenzender controleren (geen Geen zender accu’s gebruiken!) ontvangst Indicatie „---“ Zender en basisapparaat opnieuw volgens de handleiding in bedrijf stellen ...
-
Página 86: Specificaties
lokale bepalingen te brengen om een milieuvriendelijk verwijderen te garanderen. De benamingen voor de zware metalen zijn: Cd=cadmium, Hg=kwikzilver, Pb=lood Dit apparaat is gemarkeerd in overeenstemming met de EU-richtlijn (WEEE) over het verwijderen van elektrisch en elektronisch afval. Dit product mag niet met het huisvuil wordt weggegooid. De gebruiker is verplicht om de apparatuur af te geven bij een als zodanig erkende plek van afgifte voor het verwijderen van elektrische en elektronische apparatuur om een milieuvriendelijk... -
Página 87: Eu-Conformiteitsverklaring
De nieuwste technische gegevens en informatie over uw product kunt u vinden door het invoeren van het artikelnummer op onze homepage. EU-CONFORMITEITSVERKLARING Hierbij verklaar ik, TFA Dostmann, dat het type radioapparatuur 30.3030.IT conform is met Richtlijn 2014/53/EU. De volledige tekst van de EU-conformiteitsverklaring kan worden geraadpleegd op het volgende internetadres: www.tfa-dostmann.de... -
Página 88: Prima Di Utilizzare L'apparecchio
STAZIONE DELLA TEMPERATURA WIRELESS 868 MHZ Manuale delle istruzioni Cat. No. 30.3030.IT Vi ringraziamo per aver scelto la stazione radio controllata della TFA. PRIMA DI UTILIZZARE L'APPARECCHIO leggete attentamente le istruzioni per l'uso. Avrete così modo di familiarizzare con il vostro nuovo apparecchio, di scoprire tutte... -
Página 89: Per La Vostra Sicurezza
TUTTE LE APPLICAZIONI E TUTTI I VANTAGGI DEL VOSTRO NUOVO APPARECCHIO: Orario radiocontrollato DCF con possibilità d’impostazione manuale Ricezione dell'ora ON/OFF [attivata / disattivata] (selezionabile dall'utente) Visualizzazione dell'ora (ore, minuti, secondi) Display dell'ora in formato 12/24 ore ... - Página 90 Avvertenza! Pericolo di lesioni: Tenete il dispositivo e le batterie lontano dalla portata dei bambini. Non gettate le batterie nel fuoco, non polarizzatele in maniera scorretta, non smontatele e non cercate di ricaricarle. Pericolo di esplosione! Le batterie contengono acidi nocivi per la salute. Sostituite quanto prima le batterie quasi scariche in modo da evitare che si scarichino completamente.
- Página 91 COMPONENTI Stazione della temperatura Foro per montaggio a muro Coperchio Display Vano batterie Tasto SET Supporto Tasto MIN/MAX/+ Trasmetitore esterno Trasmissione remota della temperatura esterna alla stazione della temperatura con segnale a 868 MHz. Involucro per montaggio a muro (montaggio in un luogo riparato.
- Página 92 COME INSTALLARE E SOSTITUIRE LE BATTERIE NEL TRASMETTITORE DELLA TEMPERATURA Il trasmettitore della temperatura monta 2 batterie tipo AA, IEC LR6, da 1,5V . Per installare e sostituire le batterie, seguire i passaggi descritti qui di seguito. Togliere il coperchio del vano batterie. Inserite le pile seguendo le corrette polarità...
- Página 93 Sostituzione delle batterie Sostituire le batterie della stazione della temperatura quando il simbolo della batteria appare sopra la temperatura interna. Quando le batterie del trasmettitore sono scariche, l'icona corrispondente appare sul display della temperatura esterna. Nota In caso di sostituzione delle batterie in una qualsiasi delle unità, tutte le unità devono essere resettate seguendo le procedure d’impostazione.
- Página 94 Dopo aver inserito le batterie nel trasmettitore, la stazione della temperatura inizia a ricevere i dati dal trasmettitore. Le icone della temperatura esterna e l'icona della ricezione del segnale dovrebbero a questo punto essere visualizzate sulla stazione della temperatura . Se questo non accade dopo circa 5 minuti, le batterie devono essere tolte da entrambe le unità, e si deve effettuare un resettaggio dal passaggio 1.
- Página 95 visualizzare l'ora precisa sia con l'ora legale sia con l'ora solare. La qualità della ricezione dipende molto dalla posizione geografica. In condizioni normali, non dovrebbero esserci problemi di ricezione entro un raggio di trasmissione di 1.500 chilometri da Francoforte. Quando la temperatura esterna è visualizzata sulla stazione della temperatura, l'icona a torre DCF sul display dell'orologio inizia a lampeggiare sull'angolo in alto a sinistra.
-
Página 96: Tasti Di Funzione
TASTI DI FUNZIONE Stazione temperatura La stazione della temperatura dispone di due tasti di funzione facili da usare. Tasto SET Tasto MIN/MAX/+ Tasto SET (impostazione) Tenere premuto per circa 3 secondi, per entrare nella modalità d’impostazione manuale: impostazione dell'ora manuale, calendario, formato della visualizzazione dell'ora 12/24 ore, fuso orario, ricezione del codice orario ON/OFF [attivato/disattivato], e impostazioni della temperatura in °C/°F ... -
Página 97: Schermo Lcd
SCHERMO LCD Icona DCF Calendario Indicatore Indicatore batterie batterie scariche scariche (trasmettitore) (stazione) Segnale della Temperatura trasmissione interna esterna* Temperatura esterna * Quando il segnale proveniente dal sensore è ricevuto con successo dalla stazione della temperatura, si attiva l'icona della ricezione del segnale (se questo non avviene con successo, l'icona non si visualizza sul display a cristalli liquidi LCD). - Página 98 Impostazione del fuso orario Impostazione formato della visualizzazione dell'ora 12/24 Impostazione della ricezione dell’orario DCF ON/OFF [attivato/disattivato] Impostazione della temperatura in °C/ °F Tenere premuto il tasto SET per circa 3 secondi per avanzare alla modalità d’impostazione manuale.
- Página 99 Nota L'apparecchio effettua ad ogni modo un tentativo di ricezione del segnale allo scoccare di ogni ora, anche se è stato impostato manualmente. Quando la ricezione del segnale è avvenuta con successo, l'ora ricevuta si sovrappone all’ora impostata manualmente. IMPOSTAZIONE DEL CALENDARIO La data predefinita della stazione della temperatura è...
-
Página 100: Impostazione Del Fuso Orario
Poi premere il tasto SET per impostare il giorno. Usare il tasto MIN/MAX/+ per regolare il giorno. Premere il tasto SET per confermare, uscire ed entrare nella modalità di Impostazione dell'ora in formato 12/24 ore. IMPOSTAZIONE DELL'ORA IN FORMATO 12/24 ORE La visualizzazione dell'ora può... - Página 101 IMPOSTAZIONE DEL CODICE ORARIO ATTIVATO/DISATTIVATO [ON/OFF] In aree in cui la ricezione del codice orario DCF non è possibile, la funzione di ricezione del codice orario DCF può essere disattivata [OFF]. L'orologio funziona quindi come un normale orologio al quarzo (l'impostazione predefinita per la ricezione del codice orario è...
- Página 102 Lampeggiante “°C” o “F”lampeggia, usare il tasto MIN/MAX/+ per commutare fra “°C” e “°F”. Una volta che l'unità della temperatura desiderata è stata scelta, confermare premendo il tasto SET, per uscire dalla modalità d’impostazione manuale. CONTROLLO DELLA TEMPERATURA MIN/ MAX Premere il tasto MIN/MAX/+ una volta, per visualizzare i dati della temperatura esterna MIN, e la data e l'ora della registrazione.
- Página 103 Icona MIN Icona MAX Temperatura interna Premere il tasto MIN/MAX/+ per tornare alla visualizzazione della temperatura interna e esterna attuale. RESETTAGGIO [DEI DATI] DELLA TEMPERATURA MIN/ MAX Nota: Le registrazioni dei dati interni ed esterni sono resettate allo stesso tempo. Premere il tasto MIN/MAX/+ una volta per visualizzare i dati della temperatura interna.
- Página 104 2 minuti dopo l'impostazione, o in modo normale la ricezione del segnale è continuamente " disturbata", lo schermo dei dati esterni visualizza “- - -”. L'utente deve effettuare i controlli elencati qui di seguito La distanza della stazione della temperatura dovrebbe essere di almeno 1,5 – 2 m da qualsiasi fonte d’interferenza, quali schermi di computer o apparecchi televisivi.
- Página 105 SISTEMAZIONE DELLA STAZIONE DELLA TEMPERATURA La stazione della temperatura è stata studiata per essere appesa al muro o appoggiata a qualche superficie. Montaggio su muro: Prima di effettuare il montaggio a muro, controllare che i dati della temperatura esterna possano essere ricevuti dalle posizioni desiderate.
-
Página 106: Cura E Manutenzione
SISTEMAZIONE DEL TRASMETTITORE DELLA TEMPERATURA Il trasmettitore è fornito di supporto che può essere montato al muro con le due viti in dotazione. Il trasmettitore può anche essere sistemato su una superficie piana assicurando il supporto sulla parte inferiore del trasmettitore. Per eseguire il montaggio a muro: Assicurare la staffa sulla parete usando le viti e i fissaggi di plastica. -
Página 107: Smaltimento
Rimuovete le batterie se non utilizzate l’apparecchio per un periodo prolungato. GUASTI Problema Risoluzione del problema Inserite le batterie con le polarità corretta Nessuna indicazione sulla Sostituite le batterie stazione base Controllate le batterie del trasmettitore Nessuna ricezione del trasmettitore esterno (non utilizzate batterie ricaricabili!) -
Página 108: Specifiche Tecniche
È assolutamente vietato gettare le batterie ricaricabili e non tra i rifiuti domestici. In qualità di consumatori, siete tenuti per legge a consegnare, le batterie usate al negoziante o ad altri enti preposti per il riciclo in conformità alle vigenti disposizioni nazionali o locali, ai fini di uno smaltimento ecologico. -
Página 109: Dichiarazione Di Conformità Ue
DICHIARAZIONE DI CONFORMITÀ UE Il fabbricante, TFA Dostmann, dichiara che il tipo di apparecchiatura radio 30.3030.IT è conforme alla direttiva 2014/53/UE. Il testo completo della dichiarazione di conformità UE è disponibile al seguente indirizzo Internet: www.tfa-dostmann.de... -
Página 110: Antes De Utilizar El Dispositivo
ESTACION DE LA TEMPERATURA RADIO CONTROLADA- 868 MHz Manual de Instrucciones Cat. No. 30.3030.IT Muchas gracias por haber adquirido esta estación de temperatura inalámbrica de TFA. ANTES DE UTILIZAR EL DISPOSITIVO Por favor, lea detenidamente las instrucciones de uso. De este modo se familiarizará con su nuevo dispositivo, conocerá todas las funciones y componentes, así... -
Página 111: Ámbito De Aplicación Y Ventajas De Su Nuevo Dispositivo
ÁMBITO DE APLICACIÓN Y VENTAJAS DE SU NUEVO DISPOSITIVO: Hora radio-controlada DCF-77 con opción de ajuste manual La función de recepción de la hora puede ser encendida/apagada ON/OFF manualmente (el usuario la puede seleccionar) Visualización de la hora (hora, minutos, segundos) ... - Página 112 ¡Precaución: Riesgo de lesiones: Mantenga el dispositivo y las pilas fuera del alcance de los niños. No tire las pilas al fuego, no las cortocircuite, desmonte ni recargue, ya que existe riesgo de explosión. Las pilas contienen ácidos nocivos para la salud. Las pilas con un estado de carga bajo deben combinarse lo antes posible para evitar fugas.
-
Página 113: Componentes
COMPONENTES La estación de temperatura Orificio para colgar Compartimiento Patalla de las pilas Tecla SET Soporte Tecla MIN/MAX/+ El transmisor al aire libre Transmisión inalámbrica de la temperatura en exteriores hasta la estación de la temperatura, vía 868 MHz. ... -
Página 114: Cómo Instalar Y Cambiar Las Pilas En La Estación De Temperatura
CÓMO INSTALAR Y CAMBIAR LAS PILAS EN EL TRANSMISOR DE TEMPERATURA El transmisor a distancia necesita 2 pilas del tipo AA IEC LR6, 1.5V. Para instalar y cambiar las pilas, por favor siga los pasos anotados a continuación: Retire el compartimiento de las pilas, está en la parte inferior del transmisor. -
Página 115: Puesta En Funcionamiento
Cuando las pilas del transmisor exterior estén agotadas, aparecerá el icono de pilas bajas sobre el registro de visualización de la temperatura en exterior. Nota: En caso de cambiar de las pilas en alguna de las unidades, todas las unidades deberán ser reajustadas/reconfiguradas siguiendo los procedimientos para la puesta en funcionamiento. -
Página 116: La Hora Controlada Por Senal De Radio Dcf
Después de instalar las pilas en el transmisor, la estación empezará a recibir los datos del transmisor a distancia. Luego deberán visualizarse en la pantalla de la estación los datos de la temperatura exterior y el icono de la señal de recepción. Si esto no sucede después de 3 minutos, las pilas de ambas unidades deberán ser retiradas y las unidades deberán ser reinstaladas nuevamente desde el paso 1. - Página 117 frecuencia DCF-77 (77.5 Khz.) y tiene un rango o alcance de transmisión de aproximadamente 1,500 Km. Su estación de temperatura controlada por señales de radio recibe esta señal y la convierte para suministrarle la hora precisa en el verano o en el invierno. La calidad de la recepción depende en gran medida de la ubicación geográfica.
-
Página 118: Teclas De Funcionamiento
sola recepción diaria es suficiente para mantener la desviación de la exactitud (margen de error) por debajo de 1 segundo. TECLAS DE FUNCIONAMIENTO: Estación de temperatura: La estación de temperatura tiene 2 teclas de funcionamiento son fáciles de usar. TeclaSET Tecla MIN/MAX/+ Tecla SET (Ajuste) ... -
Página 119: Pantalla Lcd
PANTALLA LCD Icono señal DCF La hora Calendario Indicador de pilas Indicador de bajas (trasmisor) pilas bajas Señal de (estación) transmisión Temperatura al aire libre* interior Temperatura exterior * Cuando la señal sea recibida correctamente, el icono se encenderá. (Si la señal no se recibe correctamente el icono no aparecerá... -
Página 120: Configuracion Manual De La Hora
Pulse la tecla SET durante aprox. 3 segundos para entrar al modo de configuración manual: CONFIGURACION MANUAL DE LA HORA En lugares donde no se pueda recibir la señal de recepción de la hora DCF-77, la hora se puede poner manualmente. El reloj trabajará entonces como un reloj de cuarzo normal. -
Página 121: Ajuste Del Calendario
AJUSTE DEL CALENDARIO La fecha viene preestablecida en la estación en el primer día del primer mes 1. 1. del año 2008. Una vez que se reciban las señales de radio, la fecha será actualizada automáticamente. Sin embargo, si la señal no es recibida, la fecha también se puede poner manualmente: Año (titilando) Día (titilando) -
Página 122: Configuración Del Formato De Visualizacion De La Hora En Las 12/24 Horas
Pulse la tecla SET para confirmar y salir del modo de Ajuste del formato de visualización de la hora en las 12/24 horas. CONFIGURACIÓN DEL FORMATO DE VISUALIZACION DE LA HORA EN LAS 12/24 HORAS: La visualización de la hora puede ser ajustada para ver la hora en el formato de las 12 o /24 horas. -
Página 123: Configuración De La Señal De Recepción De La Hora On/Off
CONFIGURACIÓN DE LA SEÑAL DE RECEPCIÓN DE LA HORA ON/OFF: En áreas donde no es posible recibir la señal de recepción de la hora DCF, la función de recepción de la hora DCF se puede apagar. (Off). El reloj empezará entonces a trabajar como un reloj de cuarzo normal. -
Página 124: Para Chequear Los Min/ Max Registros De La Temperatura
El símbolo “°C/ ºF” empieza a parpadear, use la tecla MIN/MAX/+ para cambiar entre “°F” y “°C”. Una vez que haya seleccionado la unidad de temperatura deseada, confirme con la tecla SET y así puede salir del modo de configuración manual. PARA CHEQUEAR LOS MIN/ MAX REGISTROS DE LA TEMPERATURA Pulse la tecla MIN/MAX/+ una vez para ver la temperatura MIN al aire libre, y... -
Página 125: Reajuste De Datos De La Min/ Max Temperatura
Icono MIN Icono MAX Temperatura interior Pulse la tecla MIN/MAX/+ para devolverse a la visualización de la temperatura actual al aire libre. REAJUSTE DE DATOS DE LA MIN/ MAX TEMPERATURA Nota: Todos los registros de MIN/MAX en exteriores serán reajustadas al mismo tiempo. -
Página 126: La Señal De Recepcion De 868 Mhz
LA SEÑAL DE RECEPCION DE 868 MHz: La estación de la temperatura debe recibir los datos de la temperatura exterior 2 minutos después de la puesta en funcionamiento. Si los datos de la temperatura no son recibidos 2 minutos después de la puesta en marcha (si continuamente no puede recibir la señal de recepción, la sección de datos en exteriores muestra el símbolo “- - -”), por favor verifique los siguientes puntos: La estación de temperatura y el transmisor deberán ser colocados a por lo... -
Página 127: Como Instalar La Estación De Temperatura
de la observación de los factores antes mencionados, todas las unidades del sistema tienen que ser reajustadas o reinstaladas (vea las notas sobre “Poniendo en funcionamiento”) anotadas anteriormente. COMO INSTALAR LA ESTACIÓN DE TEMPERATURA: La estación de temperatura ha sido diseñada para ser colgada en una pared o colocarla libremente sobre una superficie llana. -
Página 128: Como Colocar El Transmisor De Temperatura Al Aire Libre
COMO COLOCAR EL TRANSMISOR DE TEMPERATURA AL AIRE LIBRE: El transmisor viene provisto con un soporte o travesaño que puede ser colgado en una pared con los dos tornillos suministrados. El transmisor también puede ser colocado en una superficie llana asegurando el stand o soporte a la parte baja del transmisor. - Página 129 Extraiga las pilas si no va a usar el dispositivo por un largo período de tiempo. AVERÍAS Problema Solución de problemas Asegúrese de que las pilas se coloquen con Ninguna indicación de estación básica la polaridad correcta Cambiar las pilas ...
-
Página 130: Eliminación
ELIMINACIÓN Este producto ha sido fabricado con materiales y componentes de máxima calidad que pueden ser reciclados y reutilizados. Las pilas y baterías no pueden desecharse en ningún caso junto con la basura doméstica. Como consumidor, está obligado legalmente a depositarlas en el comercio especializado o bien en los centros de recogida y reciclaje previstos para ello según el reglamento nacional o local de manera respetuosa con el medio ambiente. - Página 131 Declaración UE de conformidad Por la presente, TFA Dostmann declara que el tipo de equipo radioeléctrico 30.3030.IT es conforme con la Directiva 2014/53/UE. El texto completo de la declaración UE de conformidad está disponible en la dirección Internet siguiente: www.tfa-dostmann.de E-Mail: info@tfa-dostmann.de...
- Página 132 08/16 TFA Dostmann / Wertheim 30.3159.IT EJIN9090T114 Printed in China...