
Manuales relacionados para Leica V-LUX 30


Resumen de contenidos para Leica V-LUX 30
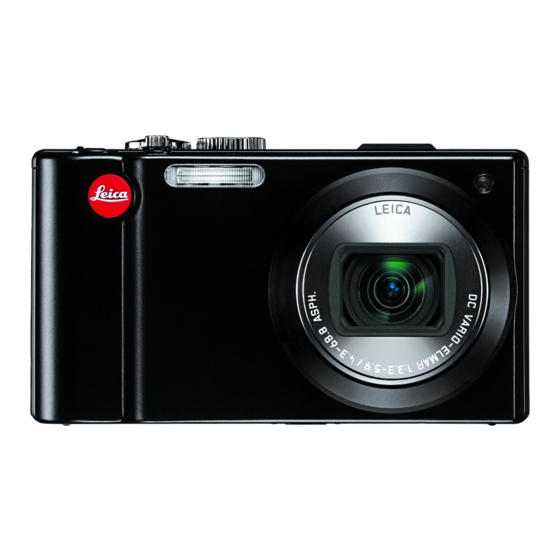
- Página 1 LEICA V-LUX 30 Anleitung / Instructions / Notice d‘utilisation / Istruzioni / Instrucciones...
-
Página 2: Informationen Für Ihre Sicherheit
Sehr geehrte Kundin, Sehr geehrter Kunde, Wir möchten diese Gelegenheit nutzen, Ihnen für den Kauf dieser Leica V-Lux 30 zu danken und Sie zu Ihrer Entscheidung beglückwünschen. Wir wünschen Ihnen viel Freude und Erfolg beim Fotografieren mit Ihrer neuen Kamera. - Página 3 Hinweise zum Akku ACHTUNG Explosionsgefahr bei falschem Einsetzen des Akkus. Ersetzen Sie ihn nur mit dem von der Leica Camera AG empfohlenen Typ. Behandeln Sie gebrauchte Akkus nach den Anweisungen des Herstellers. • Der Akku darf weder erhitzt noch offenen Flammen ausgesetzt werden.
- Página 4 Akku-Entsorgung Deutschland: Als Verbraucher Akkus gehören nicht in den Hausmüll! sind Sie gesetzlich verpflichtet, Bitte bedienen Sie sich bei der gebrauchte Akkus zurückzugeben. Sie Rückgabe verbrauchter Akkus eines können Ihre alten Akkus überall dort in Ihrem Land evtl. vorhandenen unentgeltlich abgeben, wo sie gekauft Rücknahmesystems.
- Página 5 ■ Hinweis zum Akku-Ladegerät WARNUNG! • UM AUSREICHENDE BELÜFTUNG ZU GEWÄHRLEISTEN, DARF DIESES GERÄT NICHT IN EINEM BÜCHERREGAL, EINBAUSCHRANK ODER EINEM SONSTIGEN ENGEN RAUM INSTALLIERT ODER AUFGESTELLT WERDEN. SORGEN SIE DAFÜR, DASS DIE BELÜFTUNG NICHT DURCH VORHÄNGE ODER ANDERE MATERIALIEN BEHINDERT WIRD, UM STROMSCHLAG- ODER FEUERGEFAHR DURCH ÜBERHITZUNG ZU VERMEIDEN.
- Página 6 • Verwenden Sie kein anderes als das mitgelieferte USB-Kabel zum Anschließen (→9). • Verwenden Sie kein anderes Mini-HDMI-Kabel als das für dieses Gerät vorgeschriebene Original Leica Kabel (als Zubehör erhältlich, →9). Sorgen Sie für einen möglichst großen Abstand zwischen der Kamera und Geräten, die elektromagnetische Wellen erzeugen (z.B. Mikrowellenherde, Fernsehgeräte, Videospiele usw.).
- Página 7 Benutzerinformation zur Sammlung und Entsorgung von veralteten Geräten und Verbrauchten Akkus Diese Symbole auf den Produkten, Verpackungen und/ oder Begleitdokumenten bedeuten, dass benutzte elektrische und elektronische Produkte und Akkus nicht in den allgemeinen Hausmüll gegeben werden sollen. Bitte bringen Sie diese alten Produkte und Akkus zur Behandlung, Aufarbeitung bzw.
-
Página 8: Tabla De Contenido
CD-ROM ..26 Menüsteuerung ......20 Technische Daten .....27 Leica Service Adressen ...30 Dieses Produkt ist unter der AVC Patent Portfolio-Lizenz für die private, nichtgewerbliche Nutzung durch einen Verbraucher lizensiert, um (i) Videomaterial gemäß AVC-Norm („AVC-Video“) zu codieren und/oder (ii) AVC-Video zu decodieren, das vom Verbraucher im Zuge einer privaten, nichtgewerblichen Tätigkeit codiert und/oder von einem zur Lieferung von AVC-Video lizensierten... -
Página 9: Lieferumfang
Lieferumfang Zubehör Best.-Nr. Best.-Nr. Akku Ledertasche 18 751 BP-DC7-E 18 701 Weichledertasche 18 714 BP-DC7-U 18 702 HDMI Minikabel 14 491 Ladegerät Ministativ 14 320 BC-DC7-E 423-082.001-012 Tischstativ 14 110 BC-DC7-U 423-082.001-010 Kugelkopf 14 100 BC-DC7-TK 423-083.001-028 Netzkabel 423-068.801-019 423-068.801-020 423-068.801-023 424-025.002-000 423-082.805-004... -
Página 10: Bezeichnung Der Teile
Bezeichnung der Teile Hauptschalter Auslöser Betriebsartenwähler Blitz Selbstauslöser-Anzeige/AF-Hilfslampe Objektivtubus Objektiv Zoomhebel Lautsprecher GPS-Antenne GPS-Statusanzeige Mikrofon LCD-Monitor Video-Auslöser [REC/PLAY]- [EXPOSURE]-Taste Schalter [DISP.]-Taste [Q.MENU]/[ (Löschen/Rückkehr) -Taste Stativgewinde • Vergewissern Sie sich, dass das Stativ stabil steht. Karten-/Akkufachklappe Entriegelungsschieber... -
Página 11: Cursortasten
Die Abbildungen der Monitor-Anzeigen in dieser Anleitung können vom tatsächlichen Erscheinungsbild Ihrer Kamera abweichen. Cursortasten [MENU/SET] Aufwärts-Pfeiltaste (▲) (Menüanzeige/Einstellen/ • Belichtungskorrekturen, Beenden) Belichtungsreihen usw. Links-Pfeiltaste (◄) Rechts-Pfeiltaste (►) • Selbstauslöser • Blitz Abwärts-Pfeiltaste (▼) • Makro-Betrieb usw. ● In dieser Anleitung werden die jeweils zu betätigenden Pfeiltasten mit den Symbolen ▲▼◄►... -
Página 12: Touch-Bedienung
Touch-Bedienung Die druckempfindliche Monitor-Oberfläche reagiert auf Berührungen durch kleinere Gegenstände, wie zum Beispiel die einer Fingerspitze. Berührung Unter einem „Touch-Vorgang“ versteht man eine kurzzeitige Berührung der Monitor-Oberfläche mit der Fingerspitze. Der Berührungsvorgang wird beispielsweise zur Auswahl von Symbolen und Bildern angewandt. •... - Página 13 ● Wenn eine handelsübliche Schutzfolie für LC-Anzeigen verwendet werden soll, sind die der Folie beiliegenden Vorsichtshinweise sorgfältig zu beachten. (Bestimmte Ausführungen von Schutzfolien können die Ablesbarkeit des Monitors beeinträchtigen und die Touch-Bedienung erschweren.) ● Wenn eine handelsübliche Schutzfolie auf dem Monitor der Kamera aufgebracht worden ist oder die Monitor-Oberfläche nicht ohne weiteres auf eine Berührung anspricht, können Sie mit geringfügig stärkerem Druck arbeiten.
-
Página 14: Laden Des Akkus
Beim Gebrauch derartiger nachgemachter Akkus besteht daher akute Gefahr von Brandausbruch und Explosion! Bitte beachten Sie, dass die Leica Camera AG keinerlei Haftung für Unfälle, Sachschäden oder Störungen übernimmt, die auf den Gebrauch eines nachgemachten Akkus zurückzuführen sind. Damit die Sicherheit beim Gebrauch unserer Produkte gewährleistet ist, möchten wir die dringende Empfehlung aussprechen,... - Página 15 Schließen Sie das Ladegerät an eine Netzsteckdose an. ● ● Kabellose Ausführung mit Ladelampe ([CHARGE]) Steckausführung Netzeingang Ein: Ladevorgang findet statt (Dauer ca. 130 Min. bei vollständig entladenem Akku) Aus: Ladevorgang abgeschlossen Entnehmen Sie den Akku nach beendetem Ladevorgang aus dem Ladegerät. ■...
-
Página 16: Speicherkarte Und Akku Einsetzen Und Herausnehmen
Pfeilrichtung. Sie kommt dann ein Stück heraus. Verriegelungsschieber ● Bitte verwenden Sie ausschließlich Original-Akkus von Leica (→9). ● Bei Verwendung von Akkus anderer Fabrikate ist nicht gewährleistet, dass die volle Leistung der Kamera erzielt wird. ●... -
Página 17: Verwendbare Speichermedien (Speicherkarte/Interner Speicher)
Verwendbare Speichermedien (Speicherkarte/interner Speicher) ■ Interner Speicher (ca. 18 MB) ● Wenn die eingesetzte Karte voll ist, kann der interne Speicher als zeitweiliges Speichergerät verwendet werden. ● Der Zugriff auf Daten im internen Speicher kann längere Zeit beanspruchen als die, die auf einer Karte aufgezeichnet sind. ■... -
Página 18: Einstellen Der Uhr
Einstellen der Uhr Bei der Auslieferung ist die eingebaute Uhr dieser Kamera nicht eingestellt. Schalten Sie die Kamera ein ( ). Drücken Sie [MENU/SET] ( ) während die Meldung angezeigt wird. Drücken Sie ▲▼ zur Wahl der gewünschten Sprache, und dann [MENU/SET]. -
Página 19: Hinweise Zu Gps
Drücken Sie [MENU/SET] bei Anzeige von [Bitte wohnort einstellen]. Drücken Sie ◄► zur Einstellung Ihres Heimatgebiets, und dann [MENU/SET]. Die gegenwärtige Uhrzeit und Ihr Heimatgebiet werden eingestellt. • Die Einstellung des Menüpunkts [GPS- Einstel.] wechselt auf [AN]. • Schalten Sie die Kamera erneut ein, und überprüfen Sie die Anzeige der Uhrzeit. -
Página 20: Menüsteuerung
Menüsteuerung Sämtliche Menü-Einstellungen werden wie im Folgenden beschrieben durchgeführt: Beispiel: Ändern der Einstellung des Menüpunkts [AF-Modus] von in der Betriebsart [Programm-AE] Drücken Sie [MENU/SET], um das Menü aufzurufen Umschalten auf das Menü [Aufn.] Wählen Sie [Aufn.], aund drücken Sie dann [MENU/SET]. •... -
Página 21: Aufnahme-Betriebsart
Wahl der Aufnahme-Betriebsart Schalten Sie die Kamera ein ( ). Bringen Sie den [REC/PLAY]- Schalter ( ) in die Stellung Die Betriebsarten werden durch Drehen des Wählrades eingestellt ( ). [Schnappschuss-Betr.] Für das Fotografieren mit erweiterten automatischen Einstellungen. [Programm-AE]-Betrieb Für das Fotografieren mit automatischer Belichtungssteuerung. [Zeitautomatik]-Betrieb Für das Bestimmen der Schärfentiefe durch manuelle Vorwahl der Blende. -
Página 22: Fotografieren Mit Automatischen Einstellungen [Schnappschuss-Betr.]
Fotografieren mit automatischen Einstellungen Nach einfachem Anvisieren des Motivs mit der Kamera werden die jeweils optimalen Einstellungen automatisch auf der Grundlage von Informationen wie „Gesicht“, „Bewegung“, „Helligkeit“ und „Entfernung“ vorgenommen, so dass scharfe Bilder erhalten werden, ohne dass Sie die Einstellungen manuell vornehmen müssen. Auslöser Schalten Sie die Kamera ein ( ). -
Página 23: Af-Verfolgung
[Schnappschuss-Betr.] Betriebsart: ■ Automatische Erkennung von Aufnahmesituationen Wenn die Kamera auf ein Motiv gerichtet wird, erfasst sie die jeweilige Aufnahmesituation und nimmt die optimalen Einstellungen automatisch vor. Das Symbol der jeweils erfassten Aufnahmesituation wird für 2 Sekunden in Blau angezeigt. Personen sind erfasst worden. -
Página 24: Video-Aufnahmen
Video-Aufnahmen Betriebsart: Mit dieser Betriebsart können Sie Videos mit Ton aufnehmen. Die Zoom- Funktion steht dabei ebenfalls verwendet werden. Stellen Sie den [REC/PLAY]-Schalter auf Starten Sie die Aufnahme. drücken Beenden Sie die Aufnahme. verstrichene Aufnahmezeit drücken verbleibende Aufnahmezeit (ungefähr) ■ Aufnahmedauer Im Fall von zusammenhängenden Video-Aufnahmen im Format [Motion JPEG] beträgt die maximale Dateigröße 2GB. -
Página 25: Wiedergabe-Betrieb [Normal-Wdgb.]
Wiedergabe-Betrieb [Normal-Wdgb.] Betriebsart: Stellen Sie den [REC/PLAY]- Schalter ( ) auf Ziehen Sie den Finger über den Monitor, um das Bild auszuwählen, das wiedergegeben werden soll. ● Um eine Video-Aufnahme wiederzugeben, drücken Sie ◄ oder ► zur Wahl eines Bilds, und dann ▲, um die Wiedergabe zu starten. ●... -
Página 26: Verwendung Der Anleitung Auf Der Mitgelieferten Cd-Rom
Verwendung der Anleitung auf der mitgelieferten CD-ROM • Sie haben sich mit den in dieser Anleitung beschriebenen grundlegenden Bedienungsverfahren vertraut gemacht und möchten weiterführende Funktionen Ihrer Kamera nutzen. • Sie benötigen Informationen zur Störungsbeseitigung. In einer solchen Situation schlagen Sie in der Bedienungsanleitung (PDF- Format) nach, die auf der mitgelieferten CD-ROM enthalten ist. -
Página 27: Technische Daten
(wenn i-low light eingesetzt wird, Verschlusszeit dabei: Mit der Modell-Variante 18 162 (wenn i-low light eingesetzt wird, Verschlusszeit dabei: Objektiv LEICA DC VARIO-ELMAR F/3.3 (Weitwinkel) – 5,9 (Tele) 4.3 – 68,8mm ASPH., entspricht bei Kleinbild-Kameras: 24 - 384mm Entfernungs- Einstellbereich... - Página 28 Technische Daten (Fortsetzung) Belichtungs- Programmautomatik (P), Zeitautomatik (A), Betriebsarten Blendenautomatik (S), manuelle Einstellung (M), Belichtungskorrektur (Abstufung: EV-Schritte, Einstellbereich: ±2EV) Belichtungs- Mehrfeld / Mittenbetont / Spot Messmethoden Blitzgerät Eingebaut Blitz-Betriebsarten AUTO, AUTO/Verr. “Roter Augen”, AN (AN/ Verr. “Roter Augen”), AUTO Langzeit-Synchronisierung/ Verr.
- Página 29 Betriebstemperatur / 0°C - 40°C / 10%RH - 80%RH -feuchtigkeit Leistungsaufnahme 5,1V Gleichstrom Bei Aufnahme 1,4W Bei Wiedergabe 0,9W Abmessungen ca. 105 x 58 x 34mm tbd (BxHxT, Objektiv eingefahren) Gewicht ca. 218g / 196g (mit/ohne Speicherkarte und Akku) Akku (Lithium-Ionen) Spannung/ 3,6V / 895mAh Kapazität...
-
Página 30: Leica Service Adressen
Leica Camera AG Leica Akademie Oskar-Barnack-Str. 11 D-35606 Solms Tel.: +49 (0) 6442-208-421 Fax: +49 (0) 6442-208-425 la@leica-camera.com Leica im Internet Aktuelle Informationen zu Produkten, Neuheiten, Veranstaltungen und dem Unternehmen Leica erhalten Sie auf unserer Homepage im Internet unter: http://www.leica-camera.de... - Página 31 Fax: +49 (0) 6442-208-490 info@leica-camera.com / software-support@leica-camera.com Leica Kundendienst Für die Wartung Ihrer Leica Ausrüstung sowie in Schadensfällen steht Ihnen der Customer Service der Leica Camera AG oder der Reparatur- Service einer Leica Landesvertretung zur Verfügung (Adressenliste siehe Garantiekarte). Leica Camera AG...
- Página 32 • Dieses Produkt verwendet “DynaFont” der DynaComware Corporation. DynaFont ist ein eingetragenes Warenzeichen der DynaComware Taiwan Inc. • Leica ist ein eingetragenes Warenzeichen der Leica Microsystems IR GmbH. • Elmar ist ein eingetragenes Warenzeichen der Leica Camera AG. • Bei allen sonstigen in dieser Anleitung erwähnten Firmennamen und...
- Página 33 FÜR NOTIZEN...
-
Página 34: Information For Your Safety
Be sure to retain these instructions as your convenient camera information source. Please note that the actual controls and components, menu items, etc. of your Leica V-Lux 30 may look somewhat different from those shown in the illustrations in these instructions. - Página 35 Declaration of Conformity Trade Name: Leica Model No.: LEICA V-LUX 30 Support Contact: Leica Camera Inc. 1 Pearl Court, Unit A Allendale, New Jersey 07401 LEICA Phone: i1 201 995 0051 232 Fax:...
-
Página 36: Caution For Ac Mains Lead
(U.K. only) Caution for AC mains lead As these colours may not correspond with the coloured markings identifying the For your safety, please read the terminals in your plug, proceed as follows: following text carefully. The wire which is coloured Blue must This appliance is supplied with a be connected to the terminal which is moulded three pin mains plug for your... - Página 37 USER SERVICEABLE PARTS INSIDE. Refer servicing to your Leica dealer, Leica Customer Service station, an authorized Leica service station / the Leica distributer in your country (for addresses, see Warranty Card), or the Leica Customer Service department (for address →62).
- Página 38 • Do not use any other AV cables except the supplied one (→41). • Do not use any other USB connection cables except the supplied one (→41). • Do not use any other HDMI mini cable except the Leica model (available as accessory, →41).
- Página 39 Information for Users on Collection and Disposal of Old Equipment and used Batteries These symbols on the products, packaging, and/or accompanying documents mean that used electrical and electronic products and batteries should not be mixed with general household waste. For proper treatment, recovery and recycling of old products and used batteries, please take them to applicable collection points, in accordance with your national legislation and the Directives 2002/96/EC and...
- Página 40 About GPS ........51 Technical Data ......59 Setting the menu ......52 Leica Service Addresses ..62 This product is licensed under the AVC patent portfolio license for the personal and noncommercial use of a consumer to (i) encode video in compliance with the AVC Standard (“AVC Video”) and/or (ii) decode AVC Video that was encoded...
-
Página 41: Scope Of Delivery
Scope of Delivery Accessories Order No. Order No. Rechargeable Leather case 18 751 battery Soft leather case 18 714 BP-DC7-E 18 701 HDMI mini cable 14 491 BP-DC7-U 18 702 Mini tripod 14 320 Charger Tabletop tripod 14 110 BC-DC7-E 423-082.001-012 Ball and Socket 14 100... -
Página 42: Names Of Components
Names of Components Camera ON/OFF switch Shutter button Mode dial Flash Self-timer indicator/AF Assist Lamp Lens barrel Lens Speaker Zoom lever GPS antenna GPS status indicator Microphone LCD monitor Motion picture button [EXPOSURE] button REC/PLAY switch [DISP.] button [Q.MENU]/[ (Delete/Return) button Tripod thread •... -
Página 43: Cursor Buttons
The illustrations and screens in these instructions may differ from your camera. Cursor buttons [MENU/SET] Up cursor button (▲) (menu display/set/finish) • Exposure Compensation, Auto Bracket etc. Left cursor button (◄) Right cursor button (►) • Self-timer • Flash Down cursor button (▼) •... -
Página 44: Touch Operations
Touch operations This camera’s monitor surface senses pressure that is applied to it. Touch To “touch” is to press the monitor’s surface and then pull the finger back again. Touching is used to select icons or pictures, among other actions. •... - Página 45 ● If you want to use one of the protective foils available on the market on the monitor, observe the precautions that are contained with the foil. (Some types may impair the monitor’s visual recognition and ease of operation.) ● If the camera is used with such a foil resulting in the monitor not being very responsive, apply a little more pressure.
-
Página 46: Charging The Battery
Charging the battery ■ About batteries that you can use with this camera The only battery that can be used with this camera is the Leica battery BP-DC7 (→41). It has been found that counterfeit batteries which look very similar to the genuine products are available in some markets. - Página 47 Connect the charger to the electrical outlet ● ● Plug-in type Cable type Charging light ([CHARGE]) On: Charging in progress (approx. 130 min. if fully depleted) Off: Charging complete Detach the battery after charging is completed ■ Recording capacity guidelines (pictures/recording time) Number of recordable Approx.
-
Página 48: Inserting And Removing The Card/ The Battery
Lever ● Use only the Leica battery BP-DC7 (→41). ● Leica Camera AG cannot guarantee the quality of any other batteries. ● Insert the card fully, otherwise it may be damaged. -
Página 49: Picture Save Destination (Cards And Built-In Memory)
Picture save destination (cards and built-in memory) ■ Built-in memory (approx. 18 MB) ● The built-in memory can be used as a temporary storage device when the card being used becomes full. ● The access time for the built-in memory may be longer than the access time for a card. -
Página 50: Setting The Clock
Setting the clock The clock is not set when the camera is shipped. Turn on the power ( ) Press [MENU/SET] ( ) while the message is displayed Press ▲▼ to select the language, and then [MENU/SET] • The [Please set the clock] message appears. -
Página 51: About Gps
When [Please set the home area] is displayed, press [MENU/SET] Press ◄► to set your home area and then [MENU/SET] The current time and home area are set. • [GPS Setting] turns [ON]. • Turn on power again and check the time display. -
Página 52: Setting The Menu
Setting the menu Refer to the following procedures to operate the menus. Example: Setting [AF Mode] from in the [Program AE] Mode Press [MENU/SET] to display the menu Switching to the [Rec] menu Select [Rec], and press [MENU/SET]. • The menu type can also be selected by touch operations. -
Página 53: Selecting The Recording Mode
Selecting the Recording Mode Turn on the power ( ) Slide the [REC/PLAY] switch ( ) to Switch the mode by rotating the mode dial ( ) [Snapshot Mode] For taking pictures with snapshot mode (with extended automatic settings). [Program AE] Mode For taking pictures with automatic exposure control. -
Página 54: Taking Pictures With [Snapshot Mode]
Taking pictures with [Snapshot Mode] Recording Mode: Optimum settings are made automatically by the camera based on information such as “face,” “movement,” “brightness,” and “distance” just by pointing the camera at the subject. This results in sharp and well- exposed pictures without the need to make settings manually. Shutter button Turn on the power ( ) Slide the [REC/PLAY] switch... -
Página 55: Af Tracking
■ Automatic Scene Detection The camera identifies the scene when pointed at the subject, and makes optimum settings automatically. The type of scene detected is indicated by a blue icon for two seconds. Appears when persons are detected. Appears when a baby is detected. Appears when a distant subject is detected. -
Página 56: Taking Motion Pictures
Taking motion pictures Recording Mode: This records motion pictures with audio. Zoom can also be used during recording. Slide the [REC/PLAY] switch to To start recording Press To end recording Elapsed recording time Press Remaining recording time (approx.) ■ Recording time A single [Motion JPEG]-format motion picture take can be recorded up to a maximum file size of 2GB (Even with more memory capacity available than 2GB, the recording will be terminated when its file size... -
Página 57: Viewing Your Pictures [Normal Play]
Viewing your pictures [Normal Play] Playback Mode: Slide the [REC/PLAY] switch ( ) to Drag your finger across the screen, and select the picture to be played back ● To play back a motion picture, select an image with ◄ or ►, and then press ▲... -
Página 58: Using The Instructions On The Supplied Cd-Rom
Using the instructions on the supplied CD-ROM • You have practised the basic operations introduced in these instructions and want to progress to advanced operations. • You want to check the Troubleshooting. In these kinds of situations, refer to the instructions (PDF format) on the supplied CD-ROM. -
Página 59: Technical Data
(With camera model 18 162: when i-low light is used, the shutter speed is Lens LEICA DC VARIO-ELMAR F/3.3 (wide) – 5.9 (tele) 4.3 - 68.8 mm ASPH. 35 mm camera equivalent: 24 - 384 mm Focus range P/A/S/M 50 cm/1’... - Página 60 Technical Data (Continued) Exposure modes Program AE (P), Aperture priority AE (A), Shutter priority AE (S), Manual setting (M), Exposure compensation (increments: 1/3 EV Steps, range: ±2EV) Metering modes Multiple-field / Center-weighted / Spot Flash Built-in flash unit Flash modes AUTO, AUTO/Red-eye reduction, ON (ON/Red-eye reduction), AUTO Slow sync./Red-eye reduction, OFF Flash range...
- Página 61 Operating 32°F - 104°F / 0°C - 40°C / 10%RH - 80%RH temperature / humidity Power consumption DC 5.1 V When recording 1.4 W When playing 0.9 W back Dimensions approx. 105 x 58 x 34 mm / (WxHxD; ” tbd lens retracted) Weight approx.
-
Página 62: Leica Service Addresses
As well as outstanding high-performance products for taking and viewing photographs, for many years we have also been offering the special services of the Leica Akademie, with practical seminars and training courses, which are intended to share our knowledge about the world of photography, projection and magnification with both beginners and advanced photo graphic enthusiasts. - Página 63 / software-support@leica-camera.com Leica Customer Service Leica AG’s Customer Service center, or the repair service of the Leica national offices (see the Warranty Card for an address list), is available to assist you in maintaining your Leica equipment or in case of damage.
- Página 64 • This product uses “DynaFont” from DynaComware Corporation. DynaFont is a registered trademark of DynaComware Taiwan Inc. • Leica is a registered trademark of Leica Microsystems IR GmbH. • Elmar is a registered trademark of Leica Camera AG. • Other names, company names, and product...
- Página 65 MEMO...
-
Página 66: Pour Votre Sécurité
À notre clientèle, Nous tenons à vous remercier d’avoir choisi cet appareil photo numérique Leica V-Lux 30. Veuillez lire attentivement le présent manuel et le conserver pour référence ultérieure. Veuillez noter que les véritables commandes, composantes, options de menu, etc., de votre appareil photo numérique peuvent avoir une apparence différente de celle des... - Página 67 FRANÇAIS ■ À propos de la batterie MISE EN GARDE Une batterie de remplacement inappropriée peut exploser. Ne remplacez qu’avec une batterie identique ou d’un type recommandé par le fabricant. L’élimination des batteries usées doit être faite conformément aux instructions du manufacturier. •...
- Página 68 • Utilisez exclusivement les câbles AV fournis. • Utilisez exclusivement le câble de connexion USB fourni. • Utilisez exclusivement un mini-câble HDMI Leica authentique (en option, →71). Gardez l’appareil photo le plus loin possible des appareils électromagnétiques (tels que fours à micro-ondes, téléviseurs, consoles de jeu, etc.).
- Página 69 Avis aux utilisateurs concernant la collecte et l’élimination des piles et des appareils électriques et électroniques usagés Apposé sur le produit lui-même, sur son emballage, ou figurant dans la documentation qui l’accompagne, ce pictogramme indique que les piles et appareils électriques et électroniques usagés doivent être séparés des ordures ménagères.
- Página 70 Régler le menu ......82 Données techniques ....89 Adresses de service après-vente Leica .....92 Ce produit est accordé sous licence du portefeuille de brevets AVC pour l’utilisation privée et non commerciale par un consommateur, pour (i) coder du contenu vidéo conformément à la norme AVC (“AVC Vidéo”) et/ou (ii) décoder du contenu AVC Vidéo codé...
-
Página 71: Éléments Livrés
Accessoires en Éléments livrés option № de commande № de commande Batterie Étui de cuir 18 751 rechargeable Étui en cuir souple 18 714 BP-DC7-E 18 701 Mini-câble HDMI 14 491 BP-DC7-U 18 702 Mini-trépied 14 320 Chargeur Trépied de table 14 110 BC-DC7-E 423-082.001-012... -
Página 72: Noms Des Composants
Noms des composants Bouton de marche/arrêt de l’appareil photo Touche d’obturateur Molette de sélection de mode Flash Indicateur de retardateur/ Lampe d’assistance AF Monture de l’objectif Objectif Haut-parleur Commande de zoom Antenne GPS Indicateur d’état Microphone Écran LCD Touche d’images animées Touche [EXPOSURE] Commutateur... -
Página 73: Touche De Curseur
Les illustrations et captures d’écran dans ce mode d’emploi peuvent être différentes du véritable produit. Touche de curseur [MENU/SET] Touche de curseur haut (afficher le menu/valider/ (▲) terminer) • Compensation d’exposition, prises de Touche de curseur vue en rafale, etc. gauche (◄) •... -
Página 74: Opérations Par Toucher
Opérations par toucher Le panneau tactile de cet appareil photo détecte les pressions appliquées sur l’écran. Toucher « Toucher » signifie appuyer sur le panneau tactile puis retirer le doigt. Le toucher sert, entre autres choses, à sélectionner les icônes et les images. •... - Página 75 ● En cas d’utilisation d’une pellicule de protection d’écran LCD disponible dans le commerce, suivez les instructions qui accompagnent la pellicule. (Certaines pellicules de protection peuvent réduire la visibilité de l’écran et sa facilité d’utilisation.) ● Si l’appareil photo est utilisé avec l’écran recouvert d’une pellicule de protection disponible dans le commerce, ou si l’écran ne répond pas bien aux commandes, appliquez une pression légèrement plus forte lorsque vous touchez l’écran.
-
Página 76: Charger La Batterie
• Cet appareil photo est doté d’une fonction permettant de distinguer les batteries qui peuvent être utilisées de manière sûre. La batterie spécifique BP-DC7 de Leica (→71) prend en charge cette fonction. Il n’est pas possible d’utiliser des batteries qui ne prennent pas en charge cette fonction. - Página 77 Branchez le chargeur sur la prise de courant ● ● Témoin de charge À branchement À prise d’entrée direct ([CHARGE]) Allumé : Charge en cours (environ 130 min. si la batterie est complètement épuisée) Éteint : Charge terminée Enlevez la batterie une fois la charge terminée ■...
-
Página 78: Insertion Et Retrait De La Carte/ La Batterie
Bouton ● Utilisez exclusivement la batterie BP-DC7 de Leica (→71). ● Leica Camera AG ne garantit pas la qualité des autres batteries. ● La carte risque d’être endommagée si elle n’est pas insérée à fond. -
Página 79: Destination De Sauvegarde Des Photos (Cartes Et Mémoire Intégrée)
Destination de sauvegarde des photos (cartes et mémoire intégrée) ■ Mémoire interne (environ 18 Mo) ● La mémoire intégrée peut être utilisée comme dispositif de stockage temporaire lorsque la carte utilisée est pleine. ● Le temps d’accès à la mémoire intégrée peut être plus long que celui de l’accès à... -
Página 80: Régler L'horloge
Régler l’horloge L’horloge n’est pas réglée à la sortie d’usine de l’appareil photo. Allumez l’appareil ( ) Appuyez sur [MENU/SET] ( ) pendant que le message s’affiche Appuyez sur ▲▼ pour sélectionner la langue, puis appuyez sur [MENU/SET] • Le message [Veuillez régler l’heure] apparaît. -
Página 81: À Propos De Gps
Lorsque [Régler la zone de départ] s’affiche, appuyez sur [MENU/SET] Appuyez sur ◄► pour régler votre zone de résidence, puis appuyez sur [MENU/SET] L’heure actuelle et la zone de résidence sont réglées. • [Réglage GPS] devient [OUI]. • Remettez l’appareil sous tension et vérifiez l’affichage du temps. -
Página 82: Régler Le Menu
Régler le menu Reportez-vous aux procédures suivantes pour utiliser les menus. Exemple : Réglez [Mode AF] de à en mode [Programme AE] Appuyez sur [MENU/SET] pour afficher le menu Permuter sur le menu [Enr.] Sélectionnez [Enr.], et appuyez sur [MENU/SET]. •... -
Página 83: Sélectionner Le Mode D'enregistrement
Sélectionner le mode d’enregistrement Allumez l’appareil ( ) Faites glisser le commutateur [REC/PLAY] ( ) jusqu’à Changer de mode en tournant la molette de sélection du mode [Mode instantané] Pour prendre des photos en mode Instantané (avec réglages automatiques étendus). Mode [Programme AE] Photographiez avec vos propres réglages. -
Página 84: Prendre Une Photo Avec Les Réglages Automatiques [Mode Instantané]
Prendre une photo avec les réglages automatiques Il suffit de pointer l’appareil photo vers le sujet pour qu’il effectue automatiquement les réglages optimaux sur la base d’informations telles que « visage », « mouvement », « luminosité » et « distance ». Vous obtiendrez ainsi des images nettes et bien exposées sans avoir à... -
Página 85: Recherche Mpa
[Mode instantané] Mode d’enregistrement : ■ Détection de scène automatique L’appareil photo identifie la scène lorsqu’il est pointé vers un sujet, et il effectue automatiquement les réglages optimaux. Le type de scène détectée est indiqué par une icône bleue pendant deux secondes. Les gens sont détectés. -
Página 86: Filmer
Filmer Mode d’enregistrement : Filme avec le son. Il est aussi possible d’utiliser le zoom tout en filmant. Faites glisser le commutateur [REC/PLAY] jusqu’à Lancez l’enregistrement Appuyez Terminez l’enregistrement Temps d’enregistrement Appuyez écoulé Temps d’enregistrement restant (approximatif) ■ À propos du temps d’enregistrement La taille maximale d’enregistrement des images animées de format [Motion JPEG] est de 2 Go par fichier. -
Página 87: Afficher Les Photos [Lect. Normale]
Afficher les photos [Lect. normale] Mode de lecture : Faites glisser le commutateur [REC/PLAY] ( ) jusqu’à Faites glisser votre doigt sur l’écran, et sélectionnez la photo à afficher ● Pour lire des images animées, sélectionnez-les à l’aide de ◄ ou ►, puis appuyez sur ▲... -
Página 88: Lire Le Mode D'emploi (Format Pdf)
Lire le mode d’emploi (format PDF) • Vous vous êtes familiarisé avec les commandes de base présentées dans le présent mode d’emploi et désirez passer aux commandes avancées. • Vous voulez consulter la section Dépannage. Dans ce type de situations, reportez-vous au mode d’emploi (format PDF) enregistré... -
Página 89: Données Techniques
ÉCLAIRAGE, la vitesse d’obturation est de de seconde) Objectif LEICA DC VARIO-ELMAR F/3,3 (grand angle) – 5,9 (téléobjectif) 4,3 - 68,8 mm ASPH. Équivalent sur appareil photo 35 mm : 24 - 384 mm Plage de mise au point P/A/S/M 50 cm (grand angle)/2 m (téléobjectif) à... - Página 90 Données techniques (Suite) Exposition (AE) Programme AE (P)/Priorité ouverture AE (A)/ Priorité obturateur AE (S)/Exposition manuelle (M) Compensation d’exposition (par pas de 1/3 EV, -2 EV à +2 EV) Mode de mesure Multiple/Pondéré au centre/Centré Flash Flash intégré Modes de flash AUTO, AUTO/Réduction des yeux rouges, OUI (OUI/Réduction des yeux rouges), Synchro lente AUTO/Réduction des yeux rouges, NON...
- Página 91 Interface Numérique : USB 2.0 (haute vitesse) Il n’est pas possible d’écrire les données d’un ordinateur sur l’appareil photo au moyen d’un câble de connexion USB. (Avec le modèle d’appareil photo 18 162) Vidéo analogique/Audio Avec les modèles d’appareil photo 18 163 / 18 164 : Composite NTSC Avec le modèle d’appareil photo 18 162 : Composite NTSC/PAL (commutation par menu),...
-
Página 92: Adresses De Service Après-Vente Leica
D-35606 Solms Tél: +49 (0) 6442-208-421 Fax: +49 (0) 6442-208-425 la@leica-camera.com Leica sur Internet De plus amples informations sur nos produits, nos nouveautés, nos manifestations et au sujet de la société Leica vous sont fournies sur notre site Web : http://www.leica-camera.fr... - Página 93 Service-Info Leica Le service d’information Leica se fera un plaisir de répondre par écrit, par téléphone, par fax ou par mail à toutes les questions d’ordre technique se rapportant à la gamme de produits Leica : Leica Camera AG Information-Service / Software-Support...
- Página 94 • Ce produit utilise “DynaFont” de DynaComware Corporation. DynaFont est une marque déposée de DynaComware Taiwan Inc. • Leica est une marque déposée de Leica Microsystems IR GmbH. • Elmar est une marque déposée de Leica Camera AG. • Les autres noms, noms de compagnie et noms de produit qui figurent dans les présentes instructions sont les marques...
- Página 95 NOTE...
-
Página 96: Informazioni Per La Sua Sicurezza
Egregio cliente, Grazie per aver acquistato una fotocamera digitale Leica V-Lux 30. Legga attentamente queste istruzioni per l’uso e le conservi per consultare quando ne avesse bisogno. Tenere presente che i reali controlli e componenti, opzioni dei menu, ecc., della fotocamera digitale potrebbero avere un aspetto diverso da quello mostrato nelle illustrazioni di queste istruzioni per l’uso. - Página 97 ITALIANO ■ Riguardo al battery pack PRECAUZIONE Se la batteria non è sostituita correttamente, potrebbe verificarsi un’esplosione. Per la sostituzione utilizzare solo batterie dello stesso tipo o di tipo equivalente consigliate dal produttore. Per lo smaltimento delle batterie usate attenersi alle istruzioni del produttore. •...
- Página 98 • Non si deve usare alcun cavo AV diverso da quello in dotazione. • Non si devono usare cavi di collegamento USB diversi da quello in dotazione. • Non usare altri cavi all’infuori di un cavo mini HDMI Leica autentico (opzionale, →101).
- Página 99 Informazioni per gli utenti sulla raccolta e l’eliminazione di vecchie apparecchiature e batterie usate Questi simboli sui prodotti, sull’imballaggio, e/o sulle documentazioni o manuali accompagnanti i prodotti indicano che i prodotti elettrici, elettronici e le batterie usate non devono essere buttati nei rifiuti domestici generici. Per un trattamento adeguato, recupero e riciclaggio di vecchi prodotti e batterie usate, vi preghiamo di portarli negli appositi punti di raccolta, secondo la legislazione vigente...
- Página 100 Impostazione dei menu ..112 Dati tecnici ......119 Indirizzi dei Centri di Assistenza Leica.....122 Questo prodotto viene concesso con licenza del portafoglio del brevetto AVC per l’uso personale e non commerciale di un utente per (i) la codifica video conforme allo Standard AVC (“AVC Video”) e/o (ii) la decodifica AVC Video che è stata codificata da un utente che svolge una attività...
-
Página 101: Accessori In Dotazione
Accessori in Accessori dotazione Ordine No. Ordine No. Batteria ricaricabile Custodia in pelle 18 751 BP-DC7-E 18 701 Custodia in pelle 18 714 morbida BP-DC7-U 18 702 Minicavo HDMI 14 491 Caricatore Minitreppiede 14 320 BC-DC7-E 423-082.001-012 Treppiede da 14 110 BC-DC7-U 423-082.001-010 tavolo... -
Página 102: Nome Delle Parti
Nome delle parti Interruttore di accensione/ spegnimento fotocamera Pulsante di scatto Selettore di modalità Flash Spia di autoscatto/Luce assist AF Cilindro obiettivo Obiettivo Leva zoom Altoparlante Antenna GPS Spia di stato GPS Microfono Monitor LCD Pulsante dei filmati Commutatore Pulsante [EXPOSURE] [REC/PLAY] Pulsante [DISP.] Pulsante [Q.MENU]/[... -
Página 103: Pulsante Dei Cursori
Le illustrazioni e le schermate in questo manuale potrebbero essere diverse da quelle reali del prodotto. Pulsante dei cursori [MENU/SET] Pulsante cursore su (▲) (visualizzazione menu/ • Compensazione impostazione/finitura) esposizione, bracketing auto, ecc. Pulsante cursore sinistro (◄) • Autoscatto Pulsante cursore destro (►) •... -
Página 104: Operazioni A Tocco
Operazioni a tocco Il pannello a tocco di questa fotocamera sente la pressione applicata allo schermo. Tocco Il “tocco” è la pressione momentanea del pannello a tocco con il dito. Il tocco serve, tra l’altro, a selezionare le icone o le immagini. •... - Página 105 ● Se si intende usare una pellicola di protezione dello schermo LCD disponibile in commercio, osservare le precauzioni che la accompagnano. (Alcuni tipi di pellicole di protezione potrebbero ostacolare il riconoscimento visivo dello schermo e la facilità di utilizzo.) ● Se si usa la fotocamera con una pellicola di protezione disponibile in commercio attaccata allo schermo, o se lo schermo non risponde subito, toccare lo schermo con una pressione leggermente più...
-
Página 106: Carica Della Batteria
Leica BP-DC7 (→101) supporta questa funzione. non è possibile utilizzare batterie che non supportino questa funzione. Leica Camera AG non può in alcun modo garantire la qualità, le prestazioni o la sicurezza di qualsiasi altra batteria. • La batteria non viene caricata al momento della spedizione dalla fabbrica. - Página 107 Collegare il caricatore alla presa di corrente ● ● Tipo inseribile Tipo collegabile Spia di carica ([CHARGE]) On: Carica in corso (130 min. circa se completamente scarica) Off: Carica completata Rimuovere la batteria al completamento della carica ■ Indicazioni generali della capacità di registrazione (foto/tempo di registrazione) Numero di foto registrabili 260 foto circa...
-
Página 108: Inserimento E Rimozione Della Scheda/Della Batteria
Leva ● Usare soltanto la batteria Leica BP-DC7 (→101). ● Leica Camera AG non può garantire la qualità di qualsiasi altra batteria. ● La scheda potrebbe essere danneggiata se non viene inserita completamente. -
Página 109: Destinazione Di Salvataggio Foto (Schede E Memoria Incorporata)
Destinazione di salvataggio foto (schede e memoria incorporata) ■ Memoria interna (18 MB circa) ● La memoria incorporata può essere usata come dispositivo di memorizzazione temporaneo quando la scheda che si sta usando diventa piena. ● Il tempo di accesso alla memoria incorporata potrebbe essere più lungo del tempo di accesso a una scheda. -
Página 110: Impostazione Dell'orologio
Impostazione dell’orologio L’orologio non viene regolato al momento della spedizione della fotocamera dalla fabbrica. Accendere la fotocamera ( ) Premere [MENU/SET] ( ) mentre è visualizzato il messaggio Premere ▲▼ per selezionare la lingua, e premere poi [MENU/ SET] • Appare il messaggio [Impostare l’orologio]. -
Página 111: Riguardo Al Gps
Quando è visualizzato [Impostare l’area di origine], premere [MENU/SET] Premere ◄► per impostare l’area geografica di origine, quindi premere [MENU/SET] L’ora attuale e l’area di casa vengono impostate. • [Impost. GPS] diventa [ON]. • Riaccendere la fotocamera e controllare l’ora visualizzata. ■... -
Página 112: Impostazione Dei Menu
Impostazione dei menu Per le operazioni con i menu, fare riferimento alle procedure seguenti. Esempio: Impostazione di [Modalità AF] da nella modalità [AE programma]. Premere [MENU/SET] per visualizzare il menu Selezione del menu [Reg] Selezionare [Reg], e premere [MENU/ SET]. •... -
Página 113: Selezione Della Modalità Di Registrazione
Selezione della modalità di registrazione Accendere la fotocamera ( ) Far scorrere il commutatore [REC/PLAY] ( ) su Commutare la modalità facendo ruotare la ghiera delle modalità [Mod. snapshot] Per scattare le foto nella modalità Snapshot (con le impostazioni automatiche estese). Modalità... -
Página 114: Scatto Delle Foto
Scatto delle foto con le impostazioni automatiche Puntando semplicemente la fotocamera sul soggetto, essa esegue automaticamente le impostazioni ottimali in base alle informazioni quali il “viso”, “movimento”, “luminosità” e “distanza”. Si ottengono così delle foto nitide e bene esposte, senza bisogno di fare manualmente le impostazioni. Pulsante di scatto Accendere la fotocamera ( ) Far scorrere il commutatore... -
Página 115: [Mod. Snapshot]
[Mod. snapshot] Modalità di registrazione: ■ Rilevamento automatico scena La fotocamera identifica automaticamente la scena quando viene puntata sul soggetto, ed esegue automaticamente le impostazioni ottimali. Il tipo di scena rilevato viene indicato per due secondi con una icona blu. Vengono rilevate delle persone. -
Página 116: Ripresa Dei Filmati
Ripresa dei filmati Modalità di registrazione: Ciò registra i filmati con l’audio. Durante la registrazione si può anche usare lo zoom. Far scorrere il commutatore [REC/PLAY] su Cominciare la registrazione Premere Terminare la registrazione Tempo di registrazione Premere trascorso Tempo di registrazione restante (approssimativo) ■... -
Página 117: Visione Delle Foto [Ripr. Normale]
Visione delle foto [Ripr. normale] Modalità di riproduzione: Far scorrere il commutatore [REC/PLAY] ( ) su Trascinare il dito lungo lo schermo, e selezionare la foto da riprodurre ● Per riprodurre un filmato, selezionare una immagine con ◄ o ►, e premere poi ▲... -
Página 118: Lettura Delle Istruzioni Per L'uso (Formato Pdf)
Lettura delle istruzioni per l’uso (formato PDF) • Dopo una pratica sufficiente con le operazioni di base presentate come introduzione in queste istruzioni per l’uso, si può procedere con le operazioni avanzate. • Si possono eseguire i controlli della sezione Correzione dei problemi. In questi tipi di situazioni, vedere le istruzioni per l’uso (formato PDF) registrate nel CD-ROM contenente le istruzioni per l’uso (in dotazione). -
Página 119: Dati Tecnici
(Con la fotocamera modello 18 162: quando si usa la bassa luminosità, la velocità di scatto è di º di secondo) Obiettivo LEICA DC VARIO-ELMAR F/3,3 (grandangolo) – 5,9 (teleobiettivo) 4,3 - 68,8 mm ASPH. Fotocamera 35 mm equivalente: 24 - 384 mm... - Página 120 Dati tecnici (Seguito) Esposizione (AE) AE programmata (P)/AE a priorità di diaframma (A)/ AE a priorità di tempi (S)/Esposizione manuale (M) Compensazione dell’esposizione (intervallo 1/3 EV, da −2 EV a +2 EV) Modalità esposimetrica Multipla/Ponderata al centro/Spot Flash Unità flash incorporata Modalità...
- Página 121 Terminale HDMI: MiniHDMI di tipo C AV OUT/DIGITAL: Presa dedicata (8 piedini) Temperatura/ 0 °C a 40 °C / 10 %RH a 80 %RH umidità di esercizio Assorbimento di C.c. 5,1 V corrente Registrazione 1,4 W Riproduzione 0,9 W Dimensioni 105 x 58 x 34 mm circa (L.
-
Página 122: Indirizzi Dei Centri Di Assistenza Leica
Academia Leica Accanto a prodotti di altissime prestazioni per la fotografia, l’osservazione e la riproduzione d’immagine, da tempo Leica offre un servizio speciale di seminari e corsi di formazione, in cui si insegna sia a principianti che a fotoamatori con più esperienza tutto il sapere sul mondo della fotografia, della proiezione e dell’ingrandimento. - Página 123 / software-support@leica-camera.com Assistenza tecnica Leica Per la manutenzione della Vostra attrezzatura Leica e in caso di eventuali anomalie è a Vostra completa disposizione il Customer Service della Leica Camera AG o il Centro Riparazioni Leica Autorizzato del Suo paese (per gli indirizzi vedere il tagliando di garanzia).
- Página 124 • Questo prodotto utilizza “DynaFont”, di DynaComware Corporation. DynaFont è un marchio registrato di DynaComware Taiwan Inc. • Leica è un marchio depositato di Leica Microsystems IR GmbH. • Elmar è un marchio depositato di Leica Camera AG. • Altri nomi, nomi di ditte e nomi di prodotti stampati in queste istruzioni sono marchi o marchi registrati delle relative società.
- Página 125 PROMEMORIA...
-
Página 126: Información Para Su Seguridad
Estimado cliente, Deseamos aprovechar de la ocasión para agradecerle el haber comprado esta Cámara digital Leica V-Lux 30. Le rogamos que lea estas instrucciones de funcionamiento con esmero y las tenga al alcance para futuras referencias. Tenga en cuenta que los controles y los componentes, los elementos de menú, etc. - Página 127 ESPAÑOL ■ Acerca de la batería CUIDADO Hay peligro de explosión por si se sustituye incorrectamente la batería. Sólo sustituya con el mismo tipo recomendado por el fabricante o que sea equivalente. Deseche las baterías usadas según instruye el fabricante. •...
- Página 128 • No use ningún otro cable AV que no sea el suministrado. • No use ningún otro cable de conexión USB que no sea el suministrado. • No utilice ningún otro cable que no sea un minicable HDMI de Leica auténtico (opcional, →131).
- Página 129 Información para Usuarios sobre la Recolección y Eliminación de aparatos viejos y baterías usadas Estos símbolos en los productos, embalajes y/o documentos adjuntos, significan que los aparatos eléctricos y electrónicos y las baterías no deberían ser mezclados con los desechos domésticos. Para el tratamiento apropiado, la recuperación y el reciclado de aparatos viejos y baterías usadas, por favor, observe las normas de recolección aplicables, de acuerdo...
- Página 130 (Formato PDF) ......148 Datos técnicos ......149 Direcciones de los centros de servicio Leica ......152 Este producto cuenta con licencia del portafolio de patentes AVC para que un consumidor pueda hacer uso personal y no comercial para (i) codificar vídeo cumpliendo con la norma AVC (“AVC Video”) y/o (ii) decodificar AVC Video que fue codificado por un consumidor que desempeña una actividad personal y...
-
Página 131: Antes De Usar Esta Cámara
Accesorios Accesorios suministrados opcionales Núm. de pedido Núm. de pedido Batería recargable Estuche de cuero 18 751 BP-DC7-E 18 701 Estuche de cuero 18 714 blando BP-DC7-U 18 702 Minicable HDMI 14 491 Cargador Minitrípode 14 320 BC-DC7-E 423-082.001-012 Trípode de 14 110 BC-DC7-U 423-082.001-010... -
Página 132: Nombres De Las Partes
Nombres de las partes Interruptor ON/OFF de la cámara Disparador Disco de modo Flash Indicador de disparo automático/ Luz de ayuda de AF Tubo del objetivo Objetivo Altavoz Palanca del zoom Antena GPS Indicador de estado del GPS Micrófono Monitor LCD Botón de imagen en movimiento Botón [EXPOSURE]... -
Página 133: Botón Del Cursor
Las ilustraciones y las pantallas en este manual pueden ser diferentes del producto real. Botón del cursor [MENU/SET] Botón de cursor hacia (visualización/ajuste de arriba (▲) menú y fin) • Compensación de exposición, horquillado Botón de cursor a la automático, etc izquierda (◄) •... -
Página 134: Operaciones Táctiles
Operaciones táctiles El panel táctil de esta cámara siente la presión que se aplica a la pantalla. Tocar “Tocar” es presionar el panel táctil y luego retirar el dedo. Tocar, entre otras acciones, se usa para seleccionar iconos o imágenes. •... - Página 135 ● Si va a usar el tipo de hoja que protege las pantallas LCD y que está a la venta en tiendas, tome las precauciones suministradas con la hoja. (Algunos tipos de hojas protectoras pueden afectar al reconocimiento visual y a la facilidad de operación de la pantalla.) ●...
-
Página 136: Carga De La Batería
Carga de la batería ■ Acerca de las baterías que puede utilizar con esta unidad La única batería que se puede usar con esta cámara es la Leica BP- DC7 (→131). Se ha encontrado que en algunos mercados se encuentran a la venta baterías falsificadas muy similares a las genuinas. - Página 137 Conecte el cargador a la toma de corriente. ● ● Tipo para Tipo de entrada Luz de carga ([CHARGE]) enchufar Encendida: Carga en curso (aproximadamente 130 minutos si está completamente agotada) Apagada: Carga terminada Retire la batería después de terminar la carga. ■...
-
Página 138: Insertar Y Quitar La Tarjeta/La Batería
Palanca ● Use sólo la batería Leica BP-DC7 (→131). ● Leica Camera AG no puede garantizar la calidad de ninguna otra batería. ● La tarjeta se puede dañar si no se inserta completamente. -
Página 139: Destino De Almacenamiento De Las Fotografías (Tarjetas Y Memoria Incorporada)
Destino de almacenamiento de las fotografías (tarjetas y memoria incorporada) ■ Memoria incorporada (18 MB aproximadamente) ● La memoria incorporada se puede utilizar como aparato de almacenamiento temporal cuando se llena la tarjeta que está siendo utilizada. ● El tiempo de acceso a la memoria incorporada puede ser más largo que el tiempo de acceso a la tarjeta. -
Página 140: Puesta En Hora Del Reloj
Puesta en hora del reloj El reloj no está puesto en hora cuando la cámara sale de fábrica. Conecte la alimentación ( ). Pulse [MENU/SET] ( ) mientras se visualiza el mensaje. Pulse ▲▼ para seleccionar el idioma y pulse [MENU/SET]. •... -
Página 141: Acerca Del Gps
Cuando se visualiza [Ajustar el área de casa], pulse [MENU/SET]. Pulse ◄► para poner el área de su casa y pulse [MENU/SET]. La hora actual y el área de residencia se establecen. • [Ajuste GPS] se enciende [ON]. • Conecte de nuevo la alimentación y verifique la visualización de la hora. -
Página 142: Ajuste Del Menú
Ajuste del menú Consulte los procedimientos siguientes para utilizar los menús. Ejemplo: Ajuste de [Modo AF] desde en el modo [Programa Pulse [MENU/SET] para visualizar el menú Cambio al menú [Rec] Seleccione [Rec] y presione [MENU/SET]. • El tipo de menú también se puede seleccionar mediante operaciones táctiles. -
Página 143: Selección Del Modo De Grabación
Selección del modo de grabación Conecte la alimentación ( ). Deslice el conmutador [REC/ PLAY] ( ) a Cambie el modo girando el dial de modo ( ). [Modo fot. instant.] Para tomar imágenes con el modo de fotografía instantánea (con los ajustes automáticos extendidos). - Página 144 Toma de fotografías con ajustes automáticos Apuntando simplemente la cámara al motivo, ésta hará automáticamente los ajustes óptimos basándose en información tal como “cara”, “movimiento”, “brillo” y “distancia”. Esto resulta en imágenes bien expuestas sin necesidad de tener que hacer ajustes manualmente. Disparador Conecte la alimentación ( ).
-
Página 145: [Modo Fot. Instant.]
[Modo fot. instant.] Modo de grabación: ■ Detección automática de escena La cámara identifica la escena cuando apunta al motivo y hace automáticamente los ajustes óptimos. El tipo de escena detectado se indica mediante un icono azul durante dos segundos. Se detectan personas. -
Página 146: Toma De Imágenes En Movimiento
Toma de imágenes en movimiento Modo de grabación: Esto graba imágenes en movimiento con audio. El zoom también se puede utilizar durante la grabación. Deslice el conmutador [REC/PLAY] a Inicio de grabación. Pulse Fin de grabación. Tiempo de grabación Pulse transcurrido Tiempo de grabación restante (aproximado) -
Página 147: Para Ver Sus Fotografías [Repr. Normal]
Para ver sus fotografías [Repr. normal] Modo de reproducción: Deslice el conmutador [REC/ PLAY] ( ) a Arrastre su dedo a través de la pantalla y seleccione la imagen que va a reproducir. ● Para reproducir una imagen en movimiento, seleccione una imagen con ◄... -
Página 148: Lectura De Las Instrucciones De Funcionamiento (Formato Pdf)
Lectura de las instrucciones de funcionamiento (Formato PDF) • Usted ha practicado con las operaciones básicas presentadas en estas instrucciones de funcionamiento y ahora quiere avanzar a las operaciones avanzadas. • Usted quiere verificar la solución de problemas. En estos tipos de situaciones consulte las instrucciones de funcionamiento (formato PDF) grabadas en el CD-ROM que contiene las instrucciones de funcionamiento (suministrado). -
Página 149: Datos Técnicos
Objetivo LEICA DC VARIO-ELMAR F/3,3 (gran angular) – 5,9 (teleobjetivo) 4,3 – 68,8 mm ASPH. Equivalente a una cámara de película de 35 mm: 24 – 384 mm Rango de enfoque... - Página 150 Datos técnicos (Continuación) Exposición (AE) Programa AE (P)/AE con prioridad de apertura (A)/ AE con prioridad de obturador (S)/Exposición manual (M) Compensación de la exposición (en pasos de 1/3 EV, de -2 EV a +2 EV) Modo de medición Múltiple/Ponderado en el centro/Punto específico Flash Unidad de flash incorporado Modos del Flash...
- Página 151 Interfaz Digital: USB 2.0 (Alta velocidad) Los datos procedentes del PC no se pueden escribir en la cámara utilizando el cable de conexión USB. (Con modelo de cámara 18 162) Vídeo analógico/Audio Con modelos de cámaras 18 163 / 18 164: NTSC compuesto Con modelo de cámara 18 162: NTSC/PAL compuesto (conmutado mediante menú),...
-
Página 152: Direcciones De Los Centros De Servicio Leica
Junto a los productos de avanzadas prestaciones utilizados para la toma de fotografías, la reproducción y la observación, ofrecemos desde hace muchos años, como servicio especial de la Leica Akademie, seminarios y cursillos de formación prácticos, en los cuales los conocimientos relativos al mundo de la fotografía, de la proyección y de la ampliación se... - Página 153 Servicio de información Leica El Leica Informations-Service le responderá cualquier cuestión técnica práctica sobre el programa Leica por escrito, por vía telefónica o por correo electrónico. Leica Camera AG Information-Service / Software-Support Postfach 1180 D-35599 Solms Tel.: +49 (0) 6442-208-111 / -108 Fax: +49 (0) 6442-208-490 info@leica-camera.com / software-support@leica-camera.com...
- Página 154 • Este producto utiliza “DynaFont” de DynaComware Corporation. DynaFont es una marca registrada de DynaComware Taiwan Inc. • Leica es una marca registrada de Leica Microsystems IR GmbH. • Elmar es una marca registrada de Leica Camera AG. • Otros nombres, nombres de compañías y nombres de productos impresos en estas instrucciones son marcas de fábrica o marcas...
- Página 155 MEMORANDO...
- Página 156 Leica Camera AG / Oskar-Barnack-Straße 11 / D-35606 SOLMS / DEUTSCHLAND Telefon +49 (0) 6442-208-0 / Telefax +49 (0) 6442-208-333 www.leica-camera.com...