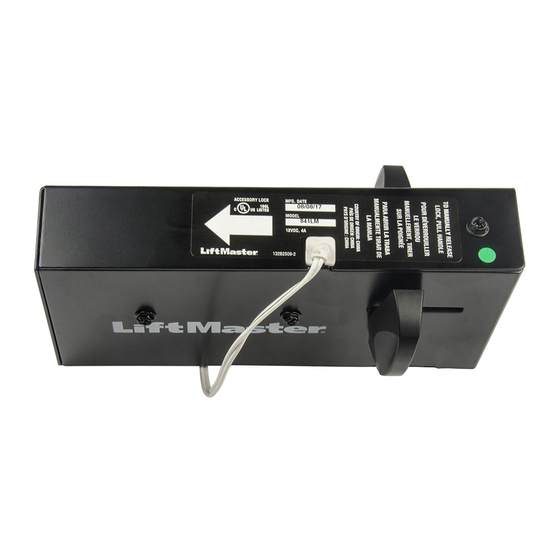
Tabla de contenido
Publicidad
Idiomas disponibles
Idiomas disponibles
Enlaces rápidos
Before you begin
For use on Residential Garages with an Entry Door Only. Install On Sectional Doors with Torsion
Assemblies Only. This product is intended for installation only by trained garage door technicians.
Please read and save these instructions with the instruction manual of the garage door opener.
Up to two locks can be installed per compatible garage door opener.
This automatic garage door lock is compatible with LiftMaster
™
Security Shield.
Carton Inventory: Automatic Garage Door Lock, Template, 1/4"-20x1/2" Screws (2), 33' (10 m) Wire
Tools needed: Stepladder, Drill, 5/16" and 3/4" Drill Bits, Tape Measure, Screwdriver
UNPLUG THE GARAGE DOOR OPENER AND DISCONNECT THE BATTERY (IF APPLICABLE)
BEFORE PROCEEDING. REMOVE ANY MANUAL LOCKS FROM THE GARAGE DOOR.
FOR WALL MOUNT GARAGE DOOR OPENERS CONSULT THE GARAGE
DOOR OPENER MANUAL FOR INSTALLATION STEPS.
Installation
Attach template (provided) to track.
1
TIP: The second roller from the bottom is ideal for
most installations.
2
Drill holes as marked on template.
Fasten automatic garage door lock to the outside of
3
the garage door track with the 1/4"-20x1/2" screws.
Run wire (provided) from automatic garage door
4
lock to garage door opener. Use insulated staples
(not provided) to secure wire in several places.
NOTE: If you are going to cut the wire you will
need to reconnect wire using a wire nut. Do not
tape the ends together. The lock is polarized and
requires you reconnect black to black and white to
white wires.
Plug the connector into one of the lock terminals
5
on the garage door opener.
NOTE: To install a second automatic garage door
lock, repeat installation steps on the opposite side
of the garage door.
®
garage door openers with a
2
1
AUTOMATIC GARAGE DOOR LOCK
To prevent possible SERIOUS INJURY or DEATH from a closing gate or door:
• Automatic Garage Door Lock MUST be installed per the owner's manual.
• Be sure to DISCONNECT ALL ELECTRIC AND BATTERY POWER to the garage door opener
BEFORE installing the garage door lock.
• The door MUST be in the fully opened or closed position BEFORE installing the garage door lock.
• Be sure to DISASSEMBLE and REMOVE any manual door locks that might be currently installed.
WARNING: This product can expose you to chemicals including lead, which are known to
the State of California to cause cancer or birth defects or other reproductive harm. For more
information go to www.P65Warnings.ca.gov
4
3
Approx. 3"
(7.6 cm)
Model 841LM
Lock
terminals
5
Publicidad
Tabla de contenido

Resumen de contenidos para LiftMaster 841LM
- Página 1 Up to two locks can be installed per compatible garage door opener. • Be sure to DISCONNECT ALL ELECTRIC AND BATTERY POWER to the garage door opener BEFORE installing the garage door lock. This automatic garage door lock is compatible with LiftMaster ® garage door openers with a •...
-
Página 2: Typical Operation
ONE YEAR LIMITED WARRANTY release LiftMaster warrants to the fi rst consumer purchaser of this product that it is free from defect in materials and/or workmanship for a period of 1 year from the date of purchase. To Disconnect Trolley... -
Página 3: Avant Que Tu Commences
• S’assurer de DÉCONNECTER TOUTE ALIMENTATION électrique ou par batterie à l’ouvre-porte de garage AVANT de procéder à l’installation de la serrure de porte de garage. Cette serrure automatique de porte de garage est compatible avec les ouvre-portes LiftMaster ®... - Página 4 Garantie GARANTIE LIMITÉE D’UN AN Pour déconnecter le chariot LiftMaster garantit à l’acheteur initial que le produit est exempt de tout défaut de matériaux ou de fabrication pendant une période d’un an à compter de la date d’achat. Poignée de déclenchement...
-
Página 5: Antes De Comenzar
Hasta dos cerrojos pueden instalarse por cada abre-puertas que es compatible. manual. • DESCONECTE toda alimentación eléctrica y la ALIMENTACIÓN de batería al abre-puertas ANTES Este cerrojo automático de puertas de garaje es compatible con los abre-puertas LiftMaster ® de instalar el cerrojo automático. -
Página 6: Operación
4. Para volver a conectar el carro, tire de la manija de apertura manual hacia abajo. El carro se volverá • Llame al distribuidor de LiftMaster para cambiar el cerrojo automático. Si el problema a conectar en la siguiente operación hacia ARRIBA o hacia ABAJO. - Página 8 © 2017, LiftMaster All Rights Reserved Tous droits réservés 114A4997B Todos los derechos reservados...


