Tabla de contenido
Publicidad
Idiomas disponibles
Idiomas disponibles
Enlaces rápidos
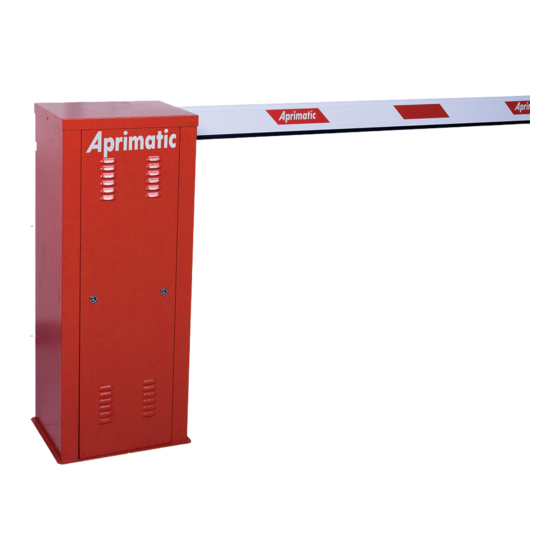
HARRIER
Barriera elettromeccanica per il controllo di traffi co esclusivamente veicolare
Electro-mechanical vehicular traffi c control barrier
Barrière électromécanique pour contrôle de trafi c exclusivement véhiculaire
Elektromechanische Schranken ausschließlich zur Kontrolle des Fahrzeugverkehrs
Barrera electrómecanica para controlar el tráfi co de vehículos
SCOPO DEL MANUALE
Questo manuale è stato redatto dal costruttore ed è parte integrante del prodotto.
Le informazioni in esso contenute sono dirette agli operatori esperti che eseguono l'installazione e la
manutenzione straordinaria. Essi devono possedere competenze specifi che e particolari capacità per eseguire
correttamente ed in sicurezza gli interventi di loro competenza. La costante osservanza delle informazioni
garantisce la sicurezza dell'uomo, l'economia di esercizio ed una piú lunga durata di funzionamento del
prodotto. Al fi ne di evitare manovre errate con il rischio di incidenti, è importante leggere attentamente questo
manuale, rispettando scrupolosamente le informazioni fornite. L'operatore esperto, dopo aver effettuato l'intervento
dovrá constatarne la corretta installazione ed il regolare funzionamento. Successivamente dovrá istruire l'utente
sull'uso corretto del prodotto rilasciando tutta la documentazione prevista dal costruttore.
Le istruzioni, i disegni, le fotografi e e la documentazione contenuti nel presente manuale sono di proprietà
APRIMATIC S.p.a. e non possono essere riprodotti in alcun modo, né integralmente, né parzialmente.
Il logo "APRIMATIC" è un marchio registrato di APRIMATIC S.p.a.
PURPOSE OF THE MANUAL
This manual was drawn up by the manufacturer and is integral part of the product.
The information it contains is addressed to expert operators that carry out the installation and maintenance
operations. They must have the specifi c qualifi cations and training to carry out this work correctly and under the
maximum safety conditions. Strict observance of the instructions contained in the manual will ensure safety,
optimum operation and prolonged functioning of the product. To avoid incorrect manoeuvres and therefore the
risk of accidents, it is essential to read this manual with care and strictly follow all the instructions given. The
expert installer, after completing installation must verify that this has been performed correctly and that the
product functions smoothly. Subsequently, it is necessary to instruct the user on the correct use of the product
providing all the documentation envisaged by the manufacturer.
Instructions, drawings, photos and literature contained herein are exclusive property of APRIMATIC S.p.a. and
cannot be reproduced by any means. The "APRIMATIC" logo is a registered mark of APRIMATIC S.p.a.
BUT DE LA NOTICE
Cette notice a étée réalisée par le constructeur et fait partie intégrante du produit.
Les informations qui y sont contenues s'adressent aux opérateurs spécialisés qui effectuent les opérations
d'installation et d'entretien extraordinaire. Ceux-ci doivent posséder les compétences et les qualités requises
pour effectuer de façon correcte et en toute sécurité les interventions dont ils sont chargés. La constante
observation de ces informations garantit la sécurité des personnes, une économie d'utilisation et une plus
longue durée de vie du produit. Lire attentivement cette notice et en respecter scrupuleusement les informations
pour éviter toute fausse manoeuvre qui pourrait entraîner des accidents. Après en avoir effectué la pose,
l'opérateur devra en vérifi er la bonne installation et le bon fonctionnement .
Il devra ensuite informer l'utilisateur de l'emploi correct du produit et lui remettre toute la documentation
prévue par le fabricant.
Les instructions, les dessins, les photos et la documentation contenus dans ce manuel sont la propriété
de la société APRIMATIC S.p.a et ne peuvent être reproduits sous aucune forme, ni intégralement,
ni partiellement.
Le logo "APRIMATIC" est une marque enregistrée de APRIMATIC S.p.a.
ZWECK DES HANDBUCHS
Dieses Handbuch wurde vom Hersteller verfasst und ist wesentlicher Bestandteil des Produkts. Die darin
enthaltenen Informationen richten sich an erfahrenes Personal, das sowohl für die Montage als auch die
außerordentlichen Wartungen zuständig ist. Dieses Personal muss über die erforderlichen Fähigkeiten
und Fachkenntnisse verfügen, um die Arbeit korrekt und unter sicheren Bedingungen durchführen zu
können. Die strikte Beachtung der Anweisungen gewährleistet Sicherheit, einen wirtschaftlichen Betrieb
und eine längere Lebensdauer der Anlage. Zur Vermeidung von Fehlern, die zu Unfällen führen können,
muss das vorliegende Handbuch aufmerksam durchgelesen werden, wobei die darin enthaltenen
Anweisungen genau zu befolgen sind. Nach dem Aufbau der Schranke muss erfahrenes Fachpersonal
die korrekte Montage und den störungsfreien Betrieb sicherstellen, den Benutzer einweisen und ihm die
Dokumentation des Herstellers aushändigen.
Die in diesem Handbuch enthaltenen Anleitungen, Zeichnungen, Fotos und Dokumentationen sind Eigentum von
APRIMATIC S.p.a. und dürfen auf keine Art ganz oder teilweise reproduziert werden. Das Logo "APRIMATIC"
ist ein eingetragenes Warenzeichen von APRIMATIC S.p.a.
OBJETO DEL MANUAL
Este manual ha sido redactado por el constructor y forma parte integrante del producto.
Las informaciones que contiene van dirigidas a los operadores especializados encargados de las operaciones
de instalación y mantenimiento extraordinario. Dichos operadores deberán poseer la competencia especifi ca y
las capacidades necesarias para llevar a efecto correctamente y en condiciones de seguridad las operaciones
de las que están encargados. El cumplimiento constante de estas instrucciones garantiza seguridad del
personal, economía de uso y un funcionamento más duradero del producto. A fi n de evitar maniobras
incorrectas con el consiguiente riesgo de accidentes cabe leer con atención este manual y respetar
escrupulosamente las instrucciones. El operador especializado, después de realizar la instalación,
deberá comprobar la correcta ejecución de la misma y el buen funciomento del producto. También
deberá enseñar al cliente cómo utilizar correctamente el producto, entregando toda la documentación
facilitada por el constructor.
Las instrucciones, los dibujos, las fotografías y la documentación que contiene este manual son propiedad de
APRIMATIC S.p.a. y no pueden ser reproducidas en ninguna manera, ni integral ni parcialmente. El logotipo
"APRIMATIC" es una marca registrada de APRIMATIC S.p.a.
Istruzioni per Installazione,
Uso e Manutenzione
Installation, use and maintenance
Notice d'installation
Anleitung für Montage, Gebrauch
Instrucciones para la instalación
uso y mantenimiento
instructions
et d'entretien
und Wartung
Publicidad
Capítulos
Tabla de contenido

Manuales relacionados para Aprimatic HARRIER E25


Resumen de contenidos para Aprimatic HARRIER E25
- Página 1 Instructions, drawings, photos and literature contained herein are exclusive property of APRIMATIC S.p.a. and cannot be reproduced by any means. The “APRIMATIC” logo is a registered mark of APRIMATIC S.p.a. BUT DE LA NOTICE Cette notice a étée réalisée par le constructeur et fait partie intégrante du produit.
-
Página 2: Tabla De Contenido
Indice Norme di sicurezza e obblighi dell’installatore ................. 3 Avvertenze per l’utilizzatore ......................3 Terminologia e simboli adottati nel manuale ................4 Caratteristiche delle barriere HARRIER Uso previsto e campo d’impiego ..................... 4 Dati tecnici delle versioni disponibili ....................4 Componenti necessari all’installazione ................... -
Página 3: Norme Di Sicurezza E Obblighi Dell'installatore
Norme di sicurezza e avvertenze per installatore e utilizzatore 1. NORME DI SICUREZZA E OBBLIGHI DELL’INSTALLATORE Per lavorare nel pieno rispetto delle norme di sicurezza occorre: • indossare indumenti di protezione a norma di legge (scarpe antinfortunistiche, occhiali di protezione, guanti ed elmetto);... -
Página 4: Terminologia E Simboli Adottati Nel Manuale
È vietato utilizzare il prodotto per scopi impropri o comunque diversi da quelli previsti. • È vietato manomettere o modifi care il prodotto. • Il prodotto deve essere installato solo con accessori APRIMATIC. DATI TECNICI DELLE VERSIONI DISPONIBILI Versione E25-X25... -
Página 5: Componenti Necessari All'installazione
Microinterruttore di sicurezza su sportello ................fig.1-rif.9 Il presente manuale istruzioni è fornito a corredo del corpo barriera. Inoltre è necessario acquistare separatamente - si veda il catalogo di vendita Aprimatic : Molla di bilanciamento ......................fig.1-rif.10 Flangia di fissaggio asta .....................fig.1-rif.11 Asta a misura ........................fig.1-rif.12... -
Página 6: Dimensioni D'ingombro Del Corpo Barriera
Dimensioni d’ingombro / Operazioni preliminari DIMENSIONI D’INGOMBRO DEL CORPO BARRIERA fig.2 ∅ 80 410 (serie E) 310 (serie E) 355 (serie X) 315 (serie X) ∅ 80 5. INSTALLAZIONE CONTROLLI E AVVERTENZE PRELIMINARI Prima di procedere all’installazione accertare i seguenti requisiti: - L’area interessata dev’essere adeguatamente ampia per l’ingombro della sbarra in apertura e in chiusura (vedi fi... -
Página 7: Ancoraggio Della Barriera Al Suolo
Installazione ANCORAGGIO DELLA BARRIERA AL SUOLO La barriera HARRIER deve essere saldamente fi ssata al suolo che deve essere consistente e piano, perciò occorre realizzare un’apposita fondazione in cemento (fi g.4). Attenzione Sono vietati dal costruttore altri tipi di montaggio con il basamento non in assetto orizzontale. fig.4 REALIZZAZIONE DELLA FONDAZIONE E ANCORAGGIO DELLA BARRIERA Realizzare un plinto di fondazione predisponendo... -
Página 8: Cambio Di Mano Della Barriera
(fi g.5-rif.7). IMPORTANTE: nel caso di barriera sinistra, apparecchiatura Aprimatic T5-SB è necessario posizionare il dip 3 su ON, e quindi disalimentare/rialimentare l’apparecchiatura (non occorre cambiare alcun collegamento). -
Página 9: Impianto Elettrico
Impianto elettrico / Controlli e regolazioni 6. IMPIANTO ELETTRICO fig.7 Terminata l’installazione meccanica, effettuare il collegamento 2x1,50 (230V) elettrico rispettando tutte le indicazioni di seguito fornite. 3x1,5 (24V) Attenzione 4Fx1,5 • L’allacciamento deve essere eseguito secondo le norme vigenti, da personale qualifi cato. •... -
Página 10: Bilanciamento Della Barriera
Bilanciamento della barriera / Messa in esercizio BILANCIAMENTO DELLA BARRIERA Per un corretto bilanciamento fare riferimento alla tabella in fi g.10 che suggerisce i corretti accoppiamenti barriera/asta e per ciascun accoppiamento indica il tipo di molla più adatta e la precarica consigliata (rif. A partire da tale posizione il bilanciamento deve comunque essere verificato ed eventualmente aggiustato osservando il comportamento dell’asta... -
Página 11: Manovra D'emergenza
Manovra d’emergenza da recuperare gli eventuali giochi che potrebbero crearsi fig.11 a causa di un utilizzo intensivo (fi g.11). Procedere come segue: - sbloccare i grani della camma di riscontro; - agire sulla camma per anticipare o posticipare l’intervento dei fi ne corsa di 2° o 3°; - ribloccare i grani nella posizione defi... -
Página 12: Manutenzione
Manutenzione / Smantellamento / Rischi residui 10. MANUTENZIONE 10.1 NOTE PER IL MANUTENTORE Per una corretta manutenzione far eseguire periodicamente le seguenti verifi che, in base al libretto di manutenzione rilasciato dall’installatore. Una volta l’anno: 1. Pulire e lubrifi care le guide del glifo, il cuscinetto a rullini e il tirante della molla; 2. -
Página 13: Dichiarazione Di Conformità
SPAZIO RISERVATO ALL’INSTALLATORE SI PREGA DI CONSEGNARE QUESTA PAGINA ALL’UTENTE - 13 -... - Página 14 Summary Safety regulations and installer’s obligations ................15 Information for the user ......................15 Terminology and symbols used in this manual ................ 16 HARRIER technical specifi cations Intended use and applications ....................... 16 Technical data for available versions ..................... 16 Components require for installation ....................
-
Página 15: Safety Regulations And Installer's Obligations
Safety regulations and installer and user’s obligations 1. SAFETY REGULATIONS AND INSTALLER’S OBLIGATIONS In order to ensure all safety regulations are satisfi ed, when working: • Wear regulation protective clothing (safety shoes, protective goggles, gloves and helmet); • Do not wear any clothes that may become entangled (ties, bracelets, necklaces, etc.). Electro-mechanical barriers must be installed in accordance with the provisions of the applicable laws, standards and regulations. -
Página 16: Terminology And Symbols Used In This Manual
It is forbidden to use the product for any other purpose than the intended one. • It is forbidden to tamper with the product or modify it. • Only APRIMATIC accessories may be used when installing the product. TECHICAL DATA FOR AVAILABLE VERSIONS Version E25-X25... -
Página 17: Components Require For Installation
Protection panel with key ....................fig.1-ref.8 Safety micro-switch mounted on panel ................fig.1-ref.9 This instruction manual is supplied with the barrier body. In addition, the following items must be purchased separately - refer to the Aprimatic sales catalogue: Balancing spring .........................fig.1-ref.10 Barrier mounting flange ......................fig.1-ref.11 Barrier cut to the required length ..................fig.1-ref.12... -
Página 18: Barrier Body External Dimensions
External dimensions / Preliminary operations BARRIER BODY EXTERNAL DIMENSIONS fig.2 ∅ 80 410 (E series) 310 (E series) 355 (X series) 315 (X series) ∅ 80 5. INSTALLATION PRELIMINARY CONTROLS AND PRECAUTIONS Before proceeding with the installation please check the following: - The installation area must be large enough to fully accommodate the barrier in the open and closed positions (see Fig. -
Página 19: Fixing The Barrier To The Ground
Installation FIXING THE BARRIER TO THE GROUND HARRIER must be mounted on a fl at, solid surface; therefore it is necessary to prepare a concrete base for it (fi g.4). Warning The base must be horizontal, do not use any other type of mounting. fig.4 PREPARING THE BARRIER SUPPORT MOUNTING AND BASE Prepare a base plinth, complete with 2 fl... -
Página 20: Changing The Barrier Confi Guration
Installation CHANGING THE BARRIER CONFIGURATION fig.5 The barrier is supplied in the right hand confi guration, to change it to the left hand confi guration, proceed as RIGHT HAND follows. BARRIER n.b.: If it is necessary to change the confi guration, it is best to do so before mounting the barrier and the spring. -
Página 21: Electrical System
Electrical system / Controls and adjustments 6. ELECTRICAL SYSTEM fig.7 Once the mechanical installation procedure has been 2x1,50 (230V) completed, carry out the electrical connections in accordance 3x1,5 (24V) with the following instructions. 4Fx1,5 Warning • These operations must be carried out by qualifi ed personnel, and in accordance with the applicable regulations •... -
Página 22: Balancing The Barrier
Balancing the barrier / Commissioning BALANCING THE BARRIER In order to balance the barrier correctly, refer to the table in fi g.10, which gives the correct barrier combinations and indicates the suggested spring and loading strain for each combination (ref.H). Starting from this point the installer must check that the barrier is balanced correctly and adjust it if necessary, observing how it moves during the opening and closing... -
Página 23: Emergency Operation
Emergency operation by frequent use (fi g.11). Proceed as follows: fig.11 - Loosen the control cam dowels; - Adjust the cam in order to move the limit switch back or forward by 2° or 3 °; - Retighten the dowels in the defi nitive position. Information When adjusting the limit switch for the effects of frequent use, the barrier should be in the normal working condition,... -
Página 24: Maintenance
Maintenance / Uninstalling / Residual hazards 10. MAINTENANCE 10.1 NOTES FOR MAINTENANCE TECHNICIANS Ensure that the barrier is properly maintained by carrying out the following checks periodically, in accordance with the maintenance handbook provided by the installer. Once a year: 1. -
Página 25: Declaration Of Conformity
SPAZIO RISERVATO ALL’INSTALLATORE SI PREGA DI CONSEGNARE QUESTA PAGINA ALL’UTENTE - 25 -... - Página 26 Table des matières Règles de sécurité et obligations de l’installateur ..............27 Instructions pour l’utilisateur ....................27 Terminologie et symboles utilisés dans le manuel ..............28 Caractéristiques techniques des barrières HARRIER Utilisation prévue et champ d’utilisation ..................28 Caractéristiques techniques des versions disponibles ..............28 Composants nécessaires à...
-
Página 27: Règles De Sécurité Et Obligations De L'installateur
Règles de sécurité et instructions pour l’installateur et l’utilisateur 1. REGLES DE SECURITE ET OBLIGATIONS DE L’INSTALLATEUR Pour travailler dans le respect total des règles de sécurité, il est nécessaire de : • porter des vêtements de protection conformes aux dispositions légales (chaussures de sécurité, lunettes de protection, gants et casque);... -
Página 28: Terminologie Et Symboles Utilisés Dans Le Manuel
Il est interdit d’utiliser le produit à des fi ns inadaptées ou différentes des utilisations prévues. • Il est interdit d’altérer volontairement ou de modifi er le produit. • Le produit ne doit être installé qu’avec des accessoires APRIMATIC. CARACTERISTIQUES TECHNIQUES DES VERSIONS DISPONIBLES Version E25-X25... -
Página 29: Composants Nécessaires À L'installation
Carter de protection avec clé d’ouverture ................fig.1-réf.8 Micro-interrupteur de sécurité sur porte ................fig.1-réf.9 Ce manuel d’instructions est fourni avec le corps barrière. Il est nécessaire de se procurer séparément - voir le catalogue de vente Aprimatic : Ressort d’équilibrage ......................fig.1-réf.10 Plaquette de fixation lisse ....................fig.1-réf.11 Lisse à... -
Página 30: Dimensions Du Corps De La Barrière
Dimensions / Opérations préliminaires DIMENSIONS DU CORPS BARRIERE fig.2 Ø 80 (série E) 410 (série E) 355 (série X) (série X) Ø 80 5. INSTALLATION CONTROLES ET OPERATIONS PRELIMINAIRES Avant la pose, l’installateur doit : - Vérifi er si la zone devant recevoir la barrière est suffi samment grande pour contenir la barrière ouverte et fermée (voir fi... -
Página 31: Ancrage De La Barrière Au Sol
Installation ANCRAGE DE LA BARRIERE AU SOL La barrière HARRIER doit être solidement fi xée au sol, qui doit être ferme et plan, il est donc nécessaire de réaliser une fondation adaptée en béton (fi g.4). Attention Tout autre type de montage avec embase non de niveau sur le plan horizontal est interdit par le fabricant . fig.4 REALISATION DE LA FONDATION ET ANCRAGE DE LA BARRIERE Réaliser un massif de fondation en prévoyant 2... -
Página 32: Changement De Sens De La Barrière
Installation CHANGEMENT DE SENS DE LA BARRIERE fig.5 La barrière est fournie en version droite. Pour la transformer en barrière gauche, il est nécessaire de procéder au changement de sens, en suivant les indications BARRIERE suivantes : DROITE remarque : il est conseillé d’effectuer le changement de sens avant de monter le ressort et la lisse. -
Página 33: Installation Électrique
Installation électrique / Contrôles et réglages 6. INSTALLATION ELECTRIQUE fig.7 L’installation mécanique terminée, effectuer le branchement 2x1,50 (230V) électrique en respectant toutes les indications qui suivent. 3x1,5 (24V) Attention 4Fx1,5 • Le branchement doit être effectué conformément aux normes en vigueur, par un personnel qualifi é. •... -
Página 34: Equilibrage De La Barrière
Equilibrage de la barrière / Mise en service EQUILIBRAGE DE LA BARRIERE Pour un bon équilibrage, se référer au tableau en fi g.10 suggérant les couplages barrière/lisse corrects et, pour chaque couplage, indiquant le type de ressort le plus adapté ainsi que la précharge conseillée (réf.H). -
Página 35: Manoeuvre D'urgence
Manœuvre d’urgence d’une utilisation intensive (fi g.11). Procéder comme suit: fig.11 - débloquer les vis de la came étalon; - agir sur la came pour anticiper ou retarder l’intervention des fi ns de course de 2° ou 3°; - bloquer à nouveau les vis en position défi nitive. Informations Le réglage des fins de course sur des barrières à... -
Página 36: Entretien
Entretien / Démolition-élimination / Risques résiduels 10. ENTRETIEN 10.1 INSTRUCTIONS POUR LE TECHNICIEN D’ENTRETIEN Pour un bon entretien, faire effectuer périodiquement les vérifi cations suivantes, sur la base du carnet d’entretien remis par l’installateur. Une fois par an : 1. Nettoyer et lubrifi er les rails de la coulisse, le coussinet à rouleaux et le tendeur du ressort ; 2. -
Página 37: Déclaration De Conformité
SPAZIO RISERVATO ALL’INSTALLATORE SI PREGA DI CONSEGNARE QUESTA PAGINA ALL’UTENTE - 37 -... - Página 38 Inhalt Sicherheitsvorschriften und Pfl ichten des Monteurs .............. 39 Hinweise für den Benutzer ....................... 39 Fachbegriffe und Symbole in diesem Handbuch ..............40 Eigenschaften der HARRIER Schranken Bestimmungszweck und Anwendungsbereich ................40 Technische Daten der zur Wahl stehenden Versionen ..............40 Erforderliche Bauteile zur Montage ....................
-
Página 39: Sicherheitsvorschriften Und Pfl Ichten Des Monteurs
Sicherheitsvorschriften und Hinweise für Monteur und Benutzer 1. SICHERHEITSVORSCHRIFTEN UND PFLICHTEN DES MONTEURS Zum Arbeiten in strikter Erfüllung der Sicherheitsvorschriften gilt Folgendes: • Gesetzlich vorgeschriebene Schutzkleidung tragen (Sicherheitsschuhe, Schutzbrille, Handschuhe und Schutzhelm); * Keine Kleidungsstücke oder Schmucksachen tragen, die hängen bleiben können (Krawatten, Armbänder, Ketten, usw.). -
Página 40: Fachbegriffe Und Symbole In Diesem Handbuch
Ein sachwidriger Einsatz bzw. eine Verwendung zu einem anderen als dem Bestimmungszweck ist verboten. • Unerlaubte Eingriffe oder Änderungen sind untersagt. • Die Montage darf nur mit Zubehörteilen von APRIMATIC erfolgen. TECHNISCHE DATEN DER ZUR WAHL STEHENDEN VERSIONEN Version E25-X25 E40-X40... -
Página 41: Erforderliche Bauteile Zur Montage
Befestigungsplatte für elektronische Steuerung ..............Abb.1-Pos.7 Schutzgehäuse mit Schlüssel ....................Abb.1-Pos.8 Mikrosicherheitsschalter auf Tür ..................Abb.1-Pos.9 Das vorliegende Handbuch wird zum Lieferumfang des Schrankenkörpers. Separat zu besorgen - siehe Verkaufskatalog Aprimatic: Ausgleichsfeder ........................Abb.1-Pos.10 Befestigungsflansch Schrankenbaum ................Abb.1-Pos.11 Schrankenbaum nach Maß ....................Abb.1-Pos.12 Schablone und Fundamentanker zur Bodenbefestigung (Option) ........Abb.1-Pos.13 Elektronische Steuerung (mit Benutzerhandbuch) Abb.1... -
Página 42: Außenmaße Des Schrankenkörpers
Außenmaße / Vorbereitungen AUSSENMASSE DES SCHRANKENKÖRPERS Abb.2 ∅ 80 410 (Baureihe E) 310 (Baureihe E) 355 (Baureihe X) 315 (Baureihe X) ∅ 80 5. MONTAGE KONTROLLEN UND VORBEREITUNGEN Vor Montage prüfen, ob folgende Voraussetzungen gegeben sind: - Der vorgesehene Bereich muss ausreichend breit für die Bewegung des Schrankenbaums (Öffnen und Schließen der Schranke) sein (siehe Abb.2). -
Página 43: Verankerung Der Schranke Am Boden
Montage BEFESTIGUNG DER SCHANKE AM BODEN Die Schranke HARRIER sicher am Boden befestigen, der fest und eben sein muss. Deshalb ein geeignetes Fundament aus Zement erstellen (Abb.4). Achtung Der Hersteller lässt keine anderen Arten von Montage als eine waagrechte Befestigungsunterlage zu. Abb.4 HERSTELLUNG DES FUNDAMENTS UND VERANKERUNG DER SCHRANKE Das Fundament herstellen und 2 Leerrohre... -
Página 44: Seitenwechsel Der Schranke
Montage SEITENWECHSEL DER SCHRANKE Abb.5 Die Schranke wird in rechter Ausführung geliefert. Für einen Wechsel auf die linke Seite, wie folgt vorgehen. RECHTSSEITIGE Hinweis: Den Seitenwechsel am besten vor Montage der SCHRANKE Feder und des Baums vornehmen. 1. Das Verbindungsglied (Abb.5 Pos.1) zwischen Kette und Zugstange der Feder entfernen, um die Zugstange aus der Buchse zu ziehen (Abb.5 Pos.2). -
Página 45: Elektrik
Elektrik / Kontrollen und Einstellungen 6. ELEKTRIK Abb.7 Nach der mechanischen Montage die Elektroanschlüsse unter 2x1,50 (230V) Befolgung aller nachstehenden Hinweise vornehmen. 3x1,5 (24V) Achtung 4Fx1,5 • Die Elektroanschlüsse nach den geltenden Sicherheitsvorschriften von einem Elektrofachmann vornehmen lassen. • Zuvor die Anweisungen für die elektronische Steuerung lesen und diese strikt befolgen. -
Página 46: Ausbalancieren Der Schranke
Ausbalancieren der Schranke / Inbetriebnahme AUSBALANCIEREN DES SCHRANKENBAUMS Als Anhaltspunkt für ein korrektes Ausbalancieren dient die Tabelle in Abb.10. Sie zeigt die korrekten Schranke/Baum- Kombinationen und jeweils dazu den am besten geeigneten Federtyp mit empfohlener Vorspannung (Pos.H). Nach dem Ausbalancieren sollte man jedoch noch das Verhalten des Schrankenbaums bei den Öffnungs- und Schließvorgängen prüfen und eventuell eine Nachjustierung vornehmen. -
Página 47: Notbetätigung
Notbetätigung (Abb.11). Dabei wie folgt vorgehen: Abb.11 - Die Arretierstifte des Schaltnockens lockern. - Den Schaltnocken verstellen, damit die Endschalter der 2. und 3. Stufe früher oder später ansprechen. - Die Arretierstifte in der endgültigen Position festziehen. Informationen Die Einstellung der Endschalter auf Schranken mit Intensivnutzung muss unter normalen Betriebsbedingungen erfolgen, wenn die Anlage “warm”... -
Página 48: Wartung
Wartung / Abbau / Restgefahren 10. WARTUNG 10.1 HINWEISE FÜR DEN WARTUNGSTECHNIKER Für eine korrekte Wartung in regelmäßigen Abständen folgende Kontrollen durchführen lassen, die im Wartungsbuch des Monteurs zu registrieren sind. Einmal jährlich: 1. Die Führungen der Kurbelschleife, das Nadellager und die Federzugstange reinigen und schmieren; 2. -
Página 49: Konformitätserklärung
SPAZIO RISERVATO ALL’INSTALLATORE SI PREGA DI CONSEGNARE QUESTA PAGINA ALL’UTENTE - 49 -... - Página 50 Índice Normas de seguridad y obligaciones del instalador ..............51 Advertencias para el usuario ....................51 Terminología y símbolos adoptados en este manual ..............52 Características de la barreras HARRIER Uso previsto y campo de uso ......................52 Datos técnicos de las versiones disponibles ................. 52 Componentes necesarios para la instalación ................
-
Página 51: Normas De Seguridad Y Obligaciones Del Instalador
Normas de seguridad y advertencias para el instalador y el usuario 1. NORMAS DE SEGURIDAD Y ADVERTENCIAS PARA EL INSTALADOR Para trabajar en el pleno respeto de seguridad hay que: • vestirse según lo dictado por la ley(zapatos contra accidentes, gafas de protección, guantes y casco); •... -
Página 52: Terminología Y Símbolos Adoptados En Este Manual
La barrera electromecánica Harrier se destina al movimiento (apertura y cierre) de una barra; el campo de empleo se limita al control del tráfi co de vehículos. Cualquier otro uso es impropio y peligroso. Cualquier otro uso no está autorizado por Aprimatic. Precaución •... -
Página 53: Componentes Necesarios Para La Instalación
Microinterruptor de seguridad en la portezuela ..............fig.1-ref.9 El presente manual de instrucciones se suministra como parte del material integrante del cuerpo barrera. Además es necesario adquirir (se compra por separado) - véase el catálogo de venta Aprimatic: Muelle de equilibrado ......................fig.1-ref.10 Brida de sujeción barra ......................fig.1-ref.11... -
Página 54: Dimensiones/Operaciones Preliminares
Dimensiones/Operaciones preliminares DIMENSIONES DEL CUERPO BARRERA fig.2 ∅ 80 410 (serie E) 310 (serie E) 355 (serie X) 315 (serie X) ∅ 80 5. INSTALACIÓN CONTROLES Y ADVERTENCIAS PRELIMINARES Antes de efectuar la instalación deben cumplirse los siguientes requisitos: - El área afectada debe ser lo bastante amplia para la barrera en apertura y en cierre (véase fi g.2). - El terreno debe ser sólido y uniforme, en concreto las zonas de instalación de los componentes que se apoyan en el suelo. -
Página 55: Anclaje De La Barrera Al Suelo
Instalación ANCLAJE DE LA BARRERA AL SUELO La barrera HARRIER debe sujetarse solidariamente al suelo que debe ser consistente y plano, por ello hay que realizar un cimiento de cemento (fi g.4). Atención El constructor prohíbe expresamente cualquier tipo de montaje que no sea horizontal. fig.4 REALIZACIÓN DE LA CIMENTACIÓN Y ANCLAJE DE LA BARRERA Ho Realizar una base de cimentación preparando... -
Página 56: Cambio De Mano De La Barrera
Instalación CAMBIO DE MANO DE LA BARRERA fig.5 La barrera se suministra en versión “mano derecha”. Para transformarla en “mano izquierda” hay que BARRERA DE realizar el cambio manualmente tal como se describe a MANO DERECHA continuación. nota: es preferible efectuar el cambio de mano antes de montar el muelle y la barra. -
Página 57: Instalación Eléctrica
Instalación eléctrica / Controles y regulaciones 6. INSTALACIÓN ELÉCTRICA fig.7 Una vez terminada la instalación mecánica, hay que efectuar 2x1,50 (230V) la conexión eléctrica siguiendo las instrucciones. 3x1,5 (24V) Atención 4Fx1,5 • La conexión debe efectuarse según las normas vigentes y debe efectuarla personal cualifi cado. •... -
Página 58: Equilibrado De La Barrera
Equilibrado de la barrea / Puesta a punto EQUILIBRADO DE LA BARREA Para un correcto equilibrado consúltese la tabla de la fi g.10 que indica los acoplamientos correctos barrera/barra y para cada uno de ellos indica el tipo de muelle más indicado y la precarga aconsejada (ref.H). -
Página 59: Maniobra De Emergencia
Maniobra de emergencia intensivo (fi g.11). Proceder de la manera siguiente: fig.11 - desbloquear los prisioneros del excéntrico de contraste; - actuar en el excéntrico para anticipar o retardar la acción de los fi nales de carrera 2° o 3°; - volver a bloquear los prisioneros en la posición defi... -
Página 60: Mantenimiento
Mantenimiento / Eliminación / Riesgos residuales 10. MANTENIMIENTO 10.1 NOTAS PARA EL RESPONSABLE DEL MANTENIMIENTO Para un correcto mantenimiento hay que efectuar periódicamente los controles siguientes según lo indicado en el cuaderno de mantenimiento suministrado por el instalador. Anualmente: 1. Limpiar y lubricar las guías del glifo, el cojinete de rodillos y el tirante del muelle; 2. -
Página 61: Declaración De Conformidad
SPAZIO RISERVATO ALL’INSTALLATORE SI PREGA DI CONSEGNARE QUESTA PAGINA ALL’UTENTE - 61 -... - Página 62 Aprimatic S.p.A. via Leonardo da Vinci, 414 40060 Villa Fontana di Medicina - Bologna - Italy tel. +39 051 6960711 - fax +39 051 6960722 info@aprimatic.com - www.aprimatic.com...
-
Página 63: Schema De Raccordeme T Barriere Harrier Serie E /X Avec Armoire G1 Pro
SCHEMA DE RACCORDEME T BARRIERE HARRIER SERIE E /X AVEC ARMOIRE G1 PRO ARMOIRE G1 PRO Récepteur U ICO SE Fermeture Commun bleu/gris Ouverture Condensateur ̶ ̶ ̶ PC12-E ET20- ER4-... - Página 64 RACCORDEME T HARRIER SERIE E/X AVEC ARMOIRE TRAFFIC 230 Start N.O Gnd - PC12-E Stop N.C Gnd - Photocellule en fermeture N.C Sécurité auxiliaire N.C ̶ + Accessoires ̶ Commande voyant 24V 3 watts max ̶ + 24 Voyant/clignotant ̶ Commande clignotant ARMOIRE ET2- TRAFFIC 230...