Publicidad
Enlaces rápidos
3301 Langstaff Road
Concord, Ontario, Canada
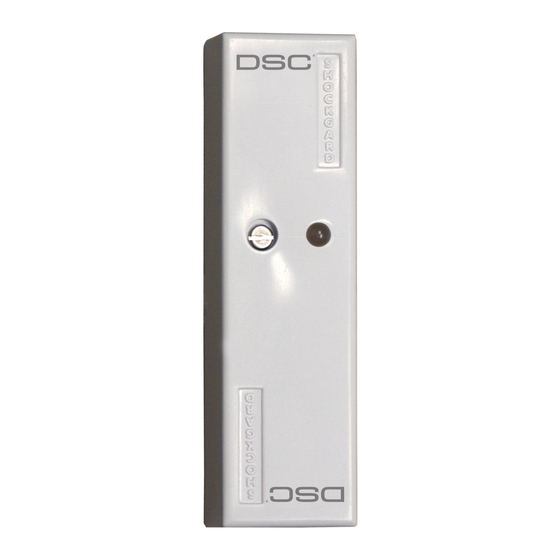
SHOCKGARD SS-101 & SS-102 - Installation Instructions - English
L4K 4L2
Tel: (905) 760 3000
www.dsc.com
DESCRIPTION
The SS-101 and SS-102 electronic shock sensors have been designed utilising the most advanced microchip technology to provide reliable
effective false alarm resistant protection.
The Shockgard series offers a wide range of facilities including remote LED reset, first to latch indication and subsequent to alarm latch informa-
tion. Other features include automatic relay reset and dual stage linear sensitivity adjustment by selection offering a broad band of sensitivity con-
trol. Selectable pulse count and dual colour LED information provides the installer with the flexibility he requires for this type of detector.
Alarm output is provided by a pair of non-latching, normally closed relay contacts, opening for a minimum of 1 second on detection of an alarm.
This relay is normally energized to give fail-safe operation in the event of a power loss.
Indication is provided by a LED situated on the front cover.
On board circuitry allows for the selection of momentary or latching indication. An automatic LED inhibit feature is also included. Latch enable
and reset may be remotely controlled by standard control panel signals.
The unit is fully protected from tampering by a N.C. switch operated by removal of the cover. Moisture repelling rubber grommets are provided
with the Shockgards.
CONNECTION DETAILS Refer to Fig. 1
Terminals
+-
12V power connection, reverse polarity protected.
-/-
N.C. Alarm output contacts, with 10 ohm resistor. In series A/T N.C. Anti-tamper contacts.
L
Connection for +12V remote latch control signal, usually SET+ or SW+ control equipment signal.
(1)
(2)
(3)
(4)
(5)
(5)
(4)
LED
(6)
(7)
(8)
When using the sensor in momentary mode, it will usually be necessary to connect using a 6 conductor cable. If the latch facility is being used
an additional conductor will be required for the connection of the latch terminal.
MODES OF OPERATION
In all modes of operation the N.C. alarm contacts are non-latching. Upon alarm activation the alarm contacts will open circuit momentarily for a
minimum time of 1 second before automatically resetting.
Momentary -latch terminal unconnected.
The LED will illuminate while the alarm contacts are open circuit in response to an input signal.
LED Indication - During the sensitivity test procedure, indication of the green LED denotes alarm and relay operation. Indication of the red LED
denotes vibration detected (pulse) but insufficient to create alarm conditions.
Dual stage linear sensitivity - This facility permits the installer a greater threshold of sensitivity adjustment by selection.
Adjustment of the potentiometer through either a low level or high level adjustment. With the level jumper set,
adjustment of the sensitivity pot permits high level of sensitivity and with the jumper removed allows adjustment in
the low sensitivity area.
Latching - 12V applied to latch terminal. While 12V is applied to the latch terminal the LED is inhibited. Upon removal of the 12V signal the LED
will indicate the status of the latch, i.e. if the unit has detected an alarm the LED will be permanently flashing otherwise the LED will
operate in momentary mode. Reapplication of the 12V signal will reset the latch and extinguish the LED
First to Latch - 12V applied to latch terminal via a 47k resistor. See fig. 2. Operation as in latching mode with the exception that only the first unit
to detect an alarm will latch, with a flashing LED. Any subsequent detector to alarm will indicate with a steady LED.
Latch operation 6 wire (SS-1 1 02) - Should the SS-102 be wired in a 6 wire configuration, latch reset can be achieved by selection of the
fourth switch of the pulse count switch unit. With this switch in the 'ON' position, and the SS-102 activated
in full alarm, the LED will latch on with the LED flashing amber until the supply voltage is interrupted when
the SS-102 will reset.
Alternative latch reset can be achieved by using a seven wire configuration with the latch reset wire connec-
ted with terminal 7 on the main terminal block.
This device complies with Part 15 of the FCC Rules. Operation is subject to the following two conditions:
1) This device may not cause harmful interference, and (2) this device must accept any interference received,
p/n : 5IN06050 rev C
(1)
(2)
(3)
(4)
(5)
(5)
(4)
LED
(6)
(7)
(8)
Fig. 1
1) 12V
2) 0V
3) ALARM CIRCUIT
4) LATCH TERMINAL (12V SET + SW +)
5) ANTI TAMPER
6) SENSITIVITY SELECTION LEVEL JUMPER
7) SENSITIVITY ADJUSTMENT
8) PULSE COUNT SELECTION SWITCHES SS-102 ONLY
including interference that may cause undesired operation.
This Class B digital apparatus meets all requirements of the ICES-003.
Cet appareil numérique de la classe B respecte toutes les exigences du ICES-003.
Pulse count and latch operation (SS-1 1 02)
A series of 4 switches are situated below the main terminal block for pulse count selection and operation of latch when using a six wire configura-
tion. The first three switches, i.e.. 1, 2 and 3 are designated for pulse count. Selection as follows:
A. For pulse count two. Switch No. 1 to 'ON' position. Switches 2 and 3 to 'OFF'.
B. For pulse count four. Switch No. 2 to 'ON' position. Switches 1 and 3 'OFF'.
C. For pulse count six. Switch No. 3 to 'ON' position. Switches 1 and 2 'OFF'.
D. For no pulse count. Switches 1, 2, and 3 in off position.
Testing procedure of pulse count
After selection of number pulse counts required and adjustment of sensitivity level, tap the area of coverage allowing a few seconds between each
tap. After each tap, the LED will indicate red colour mode, confirming receipt of vibration and pulse received, On completion of pulses selected, the
SS-102 will activate the relay and the LED will confirm activation by illumination of a green LED. In the event of gross attack, the unit will disregard
the pulse count memory and activate the relay and illuminate green LED indication.
Multiple Unit Connection Procedure
Fig. 2
DO NOT FIT THIS RESISTOR IF USING ANY TO LATCH
12 VOLT
SWITCH
0 VOLTS
12 VOLT
ALARM
OUTPUT
ANTI
TAMPER
INSTALLATION PROCEDURE
1.
Select the intended position for installation, ensuring the surface is clean and clear of any irregularities.
2.
Remove the cover of the sensor by unscrewing the single captive screw, until the cover can easily be removed from the base.
3.
Carefully lift the printed circuit board from the base.
4.
Present the base to the mounting position and mark the desired fixing holes.
5.
If rear cable entry is required, cables should be threaded through the rear of the base.
6.
Fix the base in position using the screws provided, or pin nails if preferred (some hard surfaces may require pilot drilling).
7.
Carefully push the printed circuit board onto the base.
8.
Make the electrical connections to the Shockgard.
9.
If side cable entry is being used, remove the appropriate knockout from the cover and put in a grommet.
10. Setting up and adjustment: With the unit in momentary operation, (See modes of operation. Dual stage linear sensitivity). Use a terminal screw-
driver to turn the sensitivity control (See fig. 1) fully clockwise to maximum (Position 6). Using a suitable implement, bang or tap the protected
area, observing the LED response. Reduce the sensitivity by a small amount (turn sensitivity control anti-clockwise) and bang or tap the protec-
ted area. Repeat this process until the unit only just responds to the desired impact.
11. Replace the cover of the sensor, tighten the fixing screw and check its response to the desired impact.
DETECTION RANGE*
Surface
Brick Wall
Steel
Wood
Radius
2.5 m
3 m
3.5 m
*) All values quoted are typical and are subject to practical testing which must be made for each installation. In some environments, attenuation may
be very high.
TECHNICAL DATA
SS-1 1 01
Supply Voltage
9V-16V DC
Current - quiescent
15mA Maximum
- a a larm
16mA Maximum Flashing LED 27mA
Temperature limit
-20°C to +60°C
Relative humidity at 30°C
0-90%
Sensitivity Setting
Dual Stage Potentiometer
Latching/Non Latching
1st + Subsequent or Any
Indicator
Two Colour LED
Dimensions (mm)
25x23x85mm
Relay Contact Rating
150mA 24V Resistive 10 Ohm 1/4 Watt
Time Relay Open in Alarm
1 Second Minimum
Pulse Count
N/A
Max No. of units on any Latch
80
Max No of units on 1st to Latch
10
Concrete
Plywood
Gyproc
Glass
1.5 m
4 m
2.5 m
3.5 m
SS-1 1 02
9V-16V DC
15mA Maximum
16mA Maximum Flashing LED 27
-20°C to +60°C
0-90%
Dual Stage Potentiometer
1st + Subsequent or Any + 6 Wire
Two Colour LED
25x23x85mm
150mA 24V Resistive 10 Ohm 1/4 Watt
1Second Minimum
2, 4 or 6
80
10
SHOCKGARD 1 & 2 - Made in Israel
Publicidad

Manuales relacionados para DSC SHOCKGARD SS-101


Resumen de contenidos para DSC SHOCKGARD SS-101
- Página 1 Pulse count and latch operation (SS-1 1 02) Concord, Ontario, Canada SHOCKGARD SS-101 & SS-102 - Installation Instructions - English A series of 4 switches are situated below the main terminal block for pulse count selection and operation of latch when using a six wire configura-...
- Página 2 SHOCKGARD SS-101 & SS-102 - Made in Israel 3301 Langstaff Road Concord, Ontario, Canada SHOCKGARD SS-101 & SS-102 - Instrucciones de instalación - Español A. Para el segundo recuento de pulsos. Interruptor n.º 1 en posición ‘ON’. Interruptores 2 y 3 en ‘OFF’. L4K 4L2 Tel: (905) 760 3000 B.