Tabla de contenido
Publicidad
Idiomas disponibles
Idiomas disponibles
Enlaces rápidos
Publicidad
Tabla de contenido

Manuales relacionados para Look AERODESIGN HANDLEBAR 2


Resumen de contenidos para Look AERODESIGN HANDLEBAR 2
- Página 1 NUAL...
- Página 2 > 69-89 > 4-24 ESPANÕL FRANCAIS > 90-110 DEUTSCH > 26-46 ENGLISH > 48-68 ITALIANO...
- Página 3 En choisissant cet accessoire LOOK, vous bénéficiez d’un produit de haute technologie, de conception française. Comme la grande majorité des produits LOOK, il est identique à ceux fournis aux grandes équipes professionnelles, et est contrôlé durant tout son cycle de fabrication pour vous apporter entière satisfaction.
- Página 4 Nous vous conseillons pour le montage des accessoires de vous adresser à un détaillant agréé LOOK. LOOK se réserve la possibilité de changer les spécifications du produit et sans avis préalable dans le but de l’améliorer.
- Página 5 INFORMATIONS IMPORTANTES Attention : Les produits LOOK sont conçus et optimisés pour être utilisés par des cyclistes ne dépassant pas 100 Kg (220,5 lbs). Avertissement sur les produits de contrefacon : L’utilisation de produits contrefaits est très dangereuse et peut vous causer, ainsi qu’à des tiers, des chutes graves provoquant des blessures importantes voir mortelles.
-
Página 6: Présentation Du Produit
Sa rigidité est en adéquation avec les autres composants du poste de pilotage d’un vélo LOOK telles que la douille de direction, la fourche ou la potence. Ce cintre est compatible avec la plus grande majorité des potences du marché mais il a été... - Página 7 REACH : 75 23,8 31,8 Resp Date Ind. Nature de la modification...
- Página 8 Taille du cintre L (mm) L2 (mm) 38cm 40cm 42cm 44cm...
- Página 9 VUE ÉCLATÉE DE L’ADH2 Left Left...
- Página 10 Molette de frein gauche molette [ 23 ] [ 5 ] Butée filetée droite Bague de guidage dans le cintre Support compteur LOOK pour [ 24 ] [ 6 ] Butée filetée gauche cintre Ø31.8 [ 31 ] [ 7 ] Butée de gaine de cintre ADH2...
- Página 11 ASSEMBLAGE DE L’ADH2 SUR UNE POTENCE Sur une potence look aerostem Pour le montage du cintre sur une potence LOOK AEROSTEM, veuillez-vous reporter à la notice de cette dernière. Sur toute autre potence Veuillez respecter le couple de serrage indiqué sur la potence. Cependant, ce couple ne doit pas excéder les 5Nm.
- Página 12 (si le pneumatique est plus large que l’espace entre les patins de freins). - de rattraper l’usure des patins afin de garder une garde constante aux manettes de frein. Les butées (32) possèdent un marquage qui permet de retrouver facilement le réglage précèdent, après un déréglage.
- Página 13 ROUTAGE DE L’ADH2 Fig.1 DERAILLEUR BRAKE DERAILLEUR Fig.2 Fig. 1 Fig. 2 Fig.1...
- Página 14 ROUTAGE DES FREINS (Fig.1) Avant de réaliser le routage, il est nécessaire de positionner vos tensionneurs à mi- course (15-20mm) et vos manettes de manière définitive. La gaine de frein est en deux parties, une gaine de part et d’autre du tensionneur. Positionner un morceau de gaine de frein (A) de la manette à...
- Página 15 ROUTAGE DES DERAILLEURS (Fig.1 & 2) Groupe mécanique : La gaine de dérailleur rentre par le deuxième trou de la butée de cintre (31) et ressort par le petit trou à côté de la molette de frein (21 & 22). Selon le modèle de manette, la gaine de dérailleur doit passer soit dans la rainure extérieure du cintre (Fig.
- Página 16 MONTAGE SANS LES TENSIONNEURS Fig. 3 Fig.3 Si vous ne souhaitez pas utiliser les tensionneurs, il est possible de les remplacer par les passes-gaines (33). Ils viennent en lieu et place des tensionneurs, le routage reste identique. Positionner un embout de gaine entre la gaine et le passe-gaine (33).
- Página 17 SUPPORT COMPTEUR Fig. 4 Fig. 5 Addition of the camera support - Modification of the rib on the internal clamp. 26/01/2017 Nature of modification Resp Date Material Treatment Black Anodisation fo Aluminium part / Stainless Steel screws aluminium parts...
- Página 18 [ 1 ] [ 6 ] Bride extérieur Vis FHC M3x6 Vis de fixation de la bride – FHC [ 2 ] [ 7 ] Bride intérieur M4x10 [ 3 ] [ 8 ] Bras de support Vis de fixation du bras – M4x16 [ 4 ] [ 9 ] Adaptateur Polar...
- Página 19 Le support compteur LOOK pour cintre Ø31.8 a été spécialement conçu pour le cintre ADH2. Il est compatible avec les compteurs Polar et Garmin. Il est ajustable en rotation autour de l’axe du cintre, et possède 4 possibilités de montage (Fig.5).
- Página 20 SUPPORTS-PROLONGATEURS (Clip-On) cintre LOOK ADH2 permet l’utilisation de prolongateurs. Il est compatible avec l’ensemble Clip-On dont la largeur de fixation ne dépasse pas : (74-Lp)/2. Exemple : avec une AEROSTEM (Lp 31,8 = 44), la largeur de la fixation du Clip- on ne doit pas excéder 15mm...
- Página 21 ENTRETIEN Le contrôle et la maintenance sont importants pour votre sécurité et la durée de vie de votre produit. Un vélo et ses composants mal entretenus, peuvent se casser ou présenter des dysfonctionnements, ce qui pourrait entraîner un accident lors duquel vous pourriez être tué, gravement blessé...
-
Página 22: Service Après-Vente
GARANTIE LOOK, à travers ces agents et distributeurs agréés du pays dans lequel le produit a été acheté, garantie ce produit contre les non-conformités et contre les vices cachés pour une période de deux ans... - Página 23 Les vices cachés ne concernent que la législation Française. (§ 1641 à 1649 du code civil). Certains pays ou états autorisent une limitation de durée supérieure pour une garantie implicite, et/ou pour l’exclusion ou la limitation de dommages directs ou consécutifs, ce qui implique que la limite décrite ci-dessus ne s’appliquerait pas.
- Página 25 CONGRATULATIONS ! You have chosen a LOOK accessory. Thank you for placing your trust in our products. Your choice of this LOOK accessory means that you will benefit from a high-tech product, with French design. Like most LOOK products, it is identical to those supplied to the great professional teams, and is inspected throughout the manufacturing cycle to guarantee your total satisfaction.
- Página 26 To make sure you make the most of this top-quality product, please read the instructions in full before use, and follow the recommendations given. We would advise you to contact an approved LOOK dealer when fitting accessories. LOOK reserves the right to make improvements to this product without prior...
- Página 27 IMPORTANT INFORMATION Please note : LOOK products are designed and optimised for use by cyclists weighing under 100 kg (220.5 lbs). Warning regarding counterfeit products : The use of counterfeit products is very dangerous and may result in falls, causing serious and even fatal injuries to yourself and those around you.
-
Página 28: Product Presentation
Its rigidity matches that of other LOOK cycles equipment, such as the headset, fork, and stem. This handlebar is compatible with the great majority of the stems on the market, but has been especially designed for a perfect match with the LOOK AEROSTEM. - Página 29 REACH : 75 23,8 31,8 Resp Date Ind. Nature de la modification...
- Página 30 Size of handlebar L (mm) L2 (mm) 38cm 40cm 42cm 44cm...
- Página 31 EXPLODED VIEW OF THE ADH2 Left Left...
- Página 32 LH brake adjusting knob Guide ring in knob [ 23 ] [ 5 ] RH threaded end cap Guide ring in handlebar LOOK computer mount [ 24 ] [ 6 ] LH threaded end cap for handlebar Ø31.8 ADH2 handlebar...
- Página 33 ASSEMBLING THE ADH2 ON A BRAKE TENSIONER STEM On a look aerostem When mounting the handlebar on a LOOK AEROSTEM, please read the instructions for the stem. On any other stem Please tighten to the torque indicated on the stem. However, this torque must not be in excess of 5Nm.
- Página 34 - Open the brakes for easier fitting/dismantling of the wheel (if the tyre is bigger than the space between brake shoes). - To recover the wear on the shoes in order to keep the brake handles constant. The end caps (32) are marked so that the previous adjustment is easy to restore. Dismantling / Maintenance : The tensioners can be removed for maintenance.
- Página 35 ROUTING THE ADH2 Fig.1 DERAILLEUR BRAKE DERAILLEUR Fig.2 Fig. 1 Fig. 2 Fig.1...
- Página 36 BRAKE ROUTING (Fig.1) Before routing, your tensioners must be positioned mid-way (15-20mm) and your handles in the final position. The brake support is in two parts, one casing on either side of the tensioner. Pass a section of brake casing (A) from the handle to the handlebar casing cap (31). The casing goes straight into this piece (31) without an end piece.
- Página 37 ROUTING DERAILLEURS (Figs. 1 & 2) Mechanical Unit : The derailleur casing goes in through the last hole of the handlebar end cap (31) and comes out through the small hole beside the brake knob (21 & 22). Depending on the handle model, the derailleur casing must pass either through the outer groove of the handlebar (Fig.
- Página 38 ASSEMBLY WITHOUT THE TENSIONERS Fig. 3 Fig.3 If you do not wish to use the tensioners, you can replace them with the casing supports (33). These replace the tensioners, while the rest of the routing remains unchanged. Align a casing end between the casing and the casing support (33).
- Página 39 COMPUTER SUPPORT Fig. 4 Fig. 5 Addition of the camera support - Modification of the rib on the internal clamp. 26/01/2017 Nature of modification Resp Date Material Treatment Black Anodisation fo Aluminium part / Stainless Steel screws aluminium parts...
- Página 40 [ 1 ] [ 6 ] External flange FHC screws M3x6 Flange fixing screw - FHC [ 2 ] [ 7 ] Internal flange M4x10 [ 3 ] [ 8 ] Support arm Arm fixing screw - M4x16 [ 4 ] [ 9 ] Polar adaptor Removable camera support...
- Página 41 The LOOK computer support for Ø31.8 handlebars has been specially designed for the ADH2 handlebar and is compatible with Polar and Garmin computers. It can be adjusted by rotating it round the axis of the handlebar, and has 4 fitting options (Fig.
- Página 42 EXTENSION SUPPORTS (Clip-On) The LOOK ADH2 handlebar allows for the user of extenders. It is compatible with all Clip-Ons with an attachment width of not more than (74-Lp)/2. E.g. : with an AEROSTEM (Lp=44) the Clip-on attachment width must not 31,8 be in excess of 15mm.
- Página 43 MAINTENANCE Inspection and maintenance are important for your safety and the life of your product. A poorly maintained bicycle and its components can break or malfunction, which could cause in accident in which you might be killed, seriously injured, or paralysed. For further Information on maintenance obligations, please go to the WARRANTY POLICY \ MAINTENANCE section of our website, www.lookcycle.com.
-
Página 44: After-Sales Service
If, in spite of all the care taken in our manufacturing process, a defect appears or a repair is required, contact your official LOOK dealer and take in the faulty product along with your sales receipt, and explain what is wrong. - Página 45 Hidden flaws are only a matter for French legislation. (§ 1641 to 1649 of the Civil Code civil). Some countries or states allow a longer period for an implicit warranty, and/or for the exclusion or limitation of direct or consecutive damages, which implies that the limit described above would not apply.
- Página 47 Hai scelto un accessorio LOOK. Ti ringraziamo per la fiducia nei nostri prodotti. Scegliendo questo accessorio LOOK, beneficerai di un prodotto di alta tecnologia, di progettazione francese. Come la maggior parte dei prodotti LOOK, si tratta di un prodotto identico a quelli forniti alle grandi squadre di professionisti, ed è controllato in ogni fase di produzione, per soddisfarti in tutto e per tutto.
- Página 48 Per il montaggio degli accessori ti consigliamo di rivolgerti ad un rivenditore autorizzato LOOK. LOOK si riserva la possibilità di modificare le caratteristiche tecniche del prodotto senza preavviso nell’ottica di un suo miglioramento.
- Página 49 INFORMAZIONI IMPORTANTI Attenzione : I prodotti LOOK sono progettati e ottimizzati per essere utilizzati da ciclisti di peso non superiore a 100 Kg (220,5 lb). Avvertenza sui prodotti contraffatti : L’utilizzo di prodotti contraffatti è molto pericoloso e può causare a te e a terzi cadute gravi che possono provocare ferimenti gravi o anche mortali.
-
Página 50: Presentazione Del Prodotto
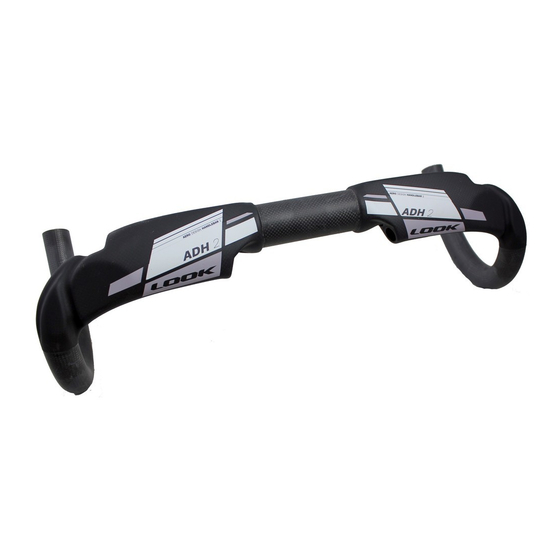
PRESENTAZIONE DEL PRODOTTO Il manubrio LOOK ADH2 (Aerodynamic Design Handlebar) è un manubrio da strada aerodinamico ed ergonomico. La sua aerodinamica è ottimale, grazie al profilo che limita il carico aerodinamico, e all’integrazione dell’insieme delle guaine. - Página 51 REACH : 75 23,8 31,8 Resp Date Ind. Nature de la modification...
- Página 52 Misura del manubrio L (mm) L2 (mm) 38cm 40cm 42cm 44cm...
- Página 53 VISTA ESPLOSA DELL’ADH2 Left Left...
- Página 54 Rotella del freno sinistro Anello di rifermento nella rotella [ 23 ] [ 5 ] Riscontro filettato destro Anello di rifermento nel manubrio Supporto contatore LOOK per [ 24 ] [ 6 ] Riscontro filettato sinistro manubrio Ø31.8 Riscontro della guaina...
-
Página 55: Tensionatore Del Freno
ASSEMBLAGGIO DELL’ADH2 SU DI UN ATTACCO TENSIONATORE DEL FRENO Su un attacco look aerostem Per il montaggio del manubrio su di un attacco LOOK AEROSTEM, fai riferimento alle istruzioni di quest’ultimo. Su qualsiasi altro attacco Rispetta la coppia di serraggio indicata sull’attacco. In ogni caso, la coppia non deve superare 5Nm. - Página 56 (se lo pneumatico è più largo dello spazio tra i pattini dei freni). - di rimediare all’usura dei pattini per mantenere un controllo costante sulle leve dei freni. I riscontri (32) possiedono una marcatura che consente di ritrovare facilmente la regolazione precedente, dopo aver allentato la regolazione.
- Página 57 SMISTAMENTO DELL’ADH2 Fig.1 DERAILLEUR BRAKE DERAILLEUR Fig.2 Fig. 1 Fig. 2 Fig.1...
- Página 58 SMISTAMENTO DEI FRENI (Fig.1) Prima di eseguire lo smistamento, è necessario posizionare i tensionatori a metà corsa (15-20 mm) e le rotelle in modo definitivo. La guaina del freno è composta da due parti, una guaina da una parte e dall’altra del tensionatore. Posizionare un pezzo di guaina del freno (A) della rotella al riscontro della guaina del manubrio (31).
- Página 59 ROUTAGE DES DERAILLEURS (Fig.1 & 2) Gruppo meccanico : La guaina del deragliatore rientra dal secondo foro del riscontro del manubrio (31) ed esce dal piccolo foro sul lato della rotella del freno (21 e 22). In base al modello di rotella, la guaina del deragliatore deve passare nella scanalatura esterna del manubrio (Fig.
- Página 60 MONTAGGIO SENZA TENSIONATORI Fig. 3 Fig.3 Se non desideri utilizzare i tensionatori, puoi sostituirli con i passa-guaina (33). Si utilizzano al posto dei tensionatori, lo smistamento è identico. Posizionare un’estremità della guaina tra la guaina e il passa-guaina (33).
- Página 61 SUPPORTO CONTATORE Fig. 4 Fig. 5 Addition of the camera support - Modification of the rib on the internal clamp. 26/01/2017 Nature of modification Resp Date Material Treatment Black Anodisation fo Aluminium part / Stainless Steel screws aluminium parts...
- Página 62 [ 1 ] [ 6 ] Flangia esterna Vite FHC M3x6 Vite di fissaggio della flangia – [ 2 ] [ 7 ] Flangia interna FHC M4x10 Vite di fissaggio del braccio – [ 3 ] [ 8 ] Braccio di supporto M4x16 [ 4 ] [ 9 ]...
- Página 63 Il supporto contatore LOOK per manubrio Ø31.8 è stato progettato specialmente per il manubrio ADH2. È compatibile con i contatori Polar e Garmin. È regolabile ruotando attorno all’asse del manubrio, e possiede 4 possibilità di montaggio (Fig. 5). In caso di smontaggio/rimontaggio, depositare una goccia di frenafiletto normale (tipo Loctite blu 243) su ciascuna delle viti.
- Página 64 SUPPORTI - PROLUNGHE (Clip-On) Il manubrio LOOK ADH2 consente l’utilizzo delle prolunghe. È compatibile con l’insieme dei Clip- On la cui larghezza di fissaggio non supera: (74-Lp)/2. Esempio: con un AEROSTEM (Lp= 31,8 44), la larghezza di fissaggio del Clip- Fig.
- Página 65 MANUTENZIONE Il controllo e la manutenzione sono importanti per la tua sicurezza e la durata della bicicletta. Una bici e componenti senza adeguata manutenzione possono rompersi o presentare anomalie, il che potrebbe comportare un incidente nel corso del quale potresti perire, essere gravemente ferito o rimanere paralizzato. Per maggiori informazioni sugli obblighi di manutenzione, consulta il nostro sito www.lookcycle.com sezione POLITICA DI GARANZIA \ MANUTENZIONE.
-
Página 66: Servizio Post Vendita
GARANZIA LOOK, attraverso i suoi agenti e distributori autorizzati nel paese in cui il prodotto è stato acquistato, garantisce questo prodotto contro non-conformità e vizi occulti1 per un periodo di due anni2 a partire dalla data di acquisto. - Página 67 I vizi occulti riguardano solo la legislazione francese. (Paragrafi da 1641 a 1649 del codice civile). Alcuni paesi o stati non autorizzano una limitazione di durata superiore per una garanzia implicita e/o per l’esclusione o la limitazione di danni diretti o conseguenti, il che implica che il limite summenzionato non si applicherebbe.
- Página 68 Al elegir este accesorio LOOK, adquiere un producto de alta tecnología de diseño francés. Como la gran mayoría de productos LOOK, es idéntico a los que se suministran a los grandes equipos profesionales, y se controla durante todo su ciclo de fabricación para que le ofrezca una total satisfacción.
- Página 69 Le aconsejamos que para el montaje de los accesorios se dirija a una tienda autorizada LOOK. LOOK se reserva la posibilidad de cambiar sin previo aviso las especificaciones del producto con el fin de mejorarlo.
- Página 70 INFORMACIÓN IMPORTANTE Atención : Los productos LOOK están diseñados y optimizados para su uso por ciclistas que no superen los 100 kg (220,5 lbs). Advertencia sobre productos falsificados : El uso de productos falsificados es muy peligroso y puede causarle a usted y a terceros caídas graves que podrían provocar daños importantes, incluso mortales.
-
Página 71: Presentación Del Producto
Su rigidez se adecua a los otros componentes del puesto de pilotaje de una bicicleta LOOK como el casquillo de dirección, la horquilla o la potencia. Este manillar es compatible con la gran mayoría de potencias del mercado, pero ha sido especialmente estudiado para integrarse a la perfección con la potencia LOOK... - Página 72 REACH : 75 23,8 31,8 Resp Date Ind. Nature de la modification...
- Página 73 Talla del manillar L (mm) L2 (mm) 38cm 40cm 42cm 44cm...
-
Página 74: Despiece Del Adh
DESPIECE DEL ADH 2 Left Left... - Página 75 Casquillo de guiado en la moleta Casquillo de guiado [ 23 ] [ 5 ] Tope fileteado derecho en el manillar Soporte contador LOOK para [ 24 ] [ 6 ] Tope fileteado izquierdo manillar Ø31.8 Tope de vaina [ 31 ]...
-
Página 76: Montaje Del Adh 2 Sobre Una Potencia Tensor De Freno
MONTAJE DEL ADH 2 SOBRE UNA POTENCIA TENSOR DE FRENO Sobre una potencia look aerostem Para el montaje del manillar sobre una potencia LOOK AEROSTEM, consulte el manual de esta última. Sobre cualquier otra potencia Respete el par de apriete indicado en la potencia. No obstante, el par no debe superar los 5 Nm. - Página 77 es más ancho que el espacio entre las pastillas de freno). - controlar el desgaste de las pastillas para mantener una función constante de las manetas de freno. Los topes (32) tienen un marcado que permite recuperar con facilidad el ajuste anterior después de un desajuste.
-
Página 78: Enrutamiento Del Adh2
ENRUTAMIENTO DEL ADH2 Fig.1 DERAILLEUR BRAKE DERAILLEUR Fig.2 Fig. 1 Fig. 2 Fig.1... -
Página 79: Enrutamiento De Los Frenos (Fig. 1)
ENRUTAMIENTO DE LOS FRENOS (Fig. 1) Antes de hacer el enrutamiento es necesario colocar sus tensores a mitad de recorrido (15-20 mm) y las manetas en su posición definitiva. La vaina de freno tiene dos partes, una vaina a cada lado del tensor. Colocar una porción de vaina de freno (A) de la maneta en el tope de vaina manillar (31). -
Página 80: Enrutamiento De Los Desviadores (Fig. 1 Y 2)
ENRUTAMIENTO DE LOS DESVIADORES (Fig. 1 y 2) Grupo mecánico : La vaina de desviador entra por el segundo orificio del tope de manillar (31) y sale por el pequeño orificio al lado de la moleta de freno (21 y 22). Según el modelo de maneta, la vaina del desviador debe pasar o bien por la ranura exterior del manillar (Fig. -
Página 81: Montaje Sin Los Tensores
MONTAJE SIN LOS TENSORES Fig. 3 Fig.3 Si no desea utilizar los tensores, es posible sustituirlos por los pasavainas (33). Sustituyen a los tensores y el enrutamiento es idéntico. Colocar una contera entre la vaina y el pasavaina (33). -
Página 82: Soporte De Contador
SOPORTE DE CONTADOR Fig. 4 Fig. 5 Addition of the camera support - Modification of the rib on the internal clamp. 26/01/2017 Nature of modification Resp Date Material Treatment Black Anodisation fo Aluminium part / Stainless Steel screws aluminium parts... - Página 83 [ 1 ] [ 6 ] Brida exterior Tornillo FHC M3x6 Tornillo de fijación de la brida – [ 2 ] [ 7 ] Brida interior FHC M4x10 Tornillo de fijación del brazo – [ 3 ] [ 8 ] Brazo de soporte M4x16 [ 4 ]...
- Página 84 El soporte de contador LOOK para manillar Ø 31,8 se ha diseñado especialmente para el manillar ADH2. Es compatible con los contadores Polar y Garmin. Puede ajustarse su rotación sobre el eje del manillar y tiene 4 posibilidades de montaje (Fig.5).
-
Página 85: Soportes-Extensores (Clip-On)
SOPORTES-EXTENSORES (Clip-On) El manillar LOOK ADH2 permite el uso de extensores. Es compatible con el conjunto de Clip-on cuya anchura de fijación no supera : (74-Lp)/2. Ejemplo: con una AEROSTEM (Lp= 31,8 44), la anchura de la fijación del Clip- Fig. -
Página 86: Mantenimiento
MANTENIMIENTO El control y el mantenimiento son importantes para su seguridad y la vida útil de su producto. Una bicicleta y sus componentes mal mantenidos pueden romperse o funcionar mal, lo que podría provocar un accidente que podría provocarle la muerte, lesiones graves o parálisis. -
Página 87: Servicio Posventa
GARANTÍA LOOK, a través de sus distribuidores autorizados del país en el que el producto ha sido adquirido, garantiza al primer comprador o usuario del producto contra cualquier vicio oculto (1) por un periodo de dos años(2) a contar desde la fecha de... - Página 88 Los vicios ocultos solo atañen a la legislación francesa. (§ 1641 a 1649 del código civil francés). Algunos países o estados no autorizan limitación alguna de duración para una garantía implícita, o para la exclusión o la limitación de daños directos o indirectos, lo que implica que los límites mencionados anteriormente no se aplicarían en dicho caso.
- Página 89 Sie haben sich für ein Zubehör von LOOK entschieden. Wir danken Ihnen für Ihr Vertrauen in unsere Produkte. Mit Ihrer Entscheidung für dieses Zubehör von LOOK haben Sie ein in Frankreich entwickeltes Hightech-Erzeugnis erworben. Wie die allermeisten LOOK-Produkte ist es identisch mit denen, die den großen Profiteams geliefert werden, und wird während des gesamten Herstellungsprozesses...
- Página 90 Sie sämtliche Hinweise, damit Sie die Vorzüge dieses Qualitätsprodukts voll ausschöpfen können. Für die Montage von Zubehör empfehlen wir Ihnen, sich an einen zugelassenen LOOK-Händler zu wenden. LOOK behält sich das Recht vor, die Produktspezifikationen im Zuge der Produktverbesserung ohne Vorankündigung zu ändern.
-
Página 91: Wichtige Hinweise
WICHTIGE HINWEISE Achtung : Die Produkte von LOOK wurden für Radfahrer bis 100 kg (220,5 lbs) konzipiert und optimiert. Hinweis zu Produktfälschungen : Die Benutzung von gefälschten Produkten ist sehr gefährlich und kann bei Ihnen und ebenso bei Dritten zu schweren Stürzen mit ernsthaften oder gar tödlichen Verletzungen führen. - Página 92 Garantiebestimmungen auch in Papierform über Ihren Händler zukommen lassen. PRODUKTBESCHREIBUNG Der Lenkerbügel ADH2 (Aerodynamic Design Handlebar) von LOOK ist ein aerodynamischer, ergonomischer Straßenlenker. Dank seines Profils, das den zusätzlichen Luftwiderstand begrenzt, und der Integration sämtlicher Brems- und Schaltzüge weist er eine optimale Aerodynamik auf.
- Página 93 REACH : 75 23,8 31,8 Resp Date Ind. Nature de la modification...
- Página 94 Größe des lenkerbügels L (mm) L2 (mm) 38cm 40cm 42cm 44cm...
- Página 95 EXPLOSIONSZEICHNUNG DES ADH2 Left Left...
- Página 96 [ 4 ] Stellrad für Bremse links Führungsring im Stellrad [ 23 ] [ 5 ] Gewindeanschlag rechts Führungsring im Lenkerbügel Halterung für LOOK-Zähler für [ 24 ] [ 6 ] Gewindeanschlag links Lenkerbügel Ø 31,8 mm Zugwiderlager Klemmung [ 31 ] [ 7 ] des Lenkerbügels ADH2...
- Página 97 MONTAGE DES ADH2 AUF EINEM VORBAU BREMSSPANNVORRICHTUNG Auf einem Aerostem-Vorbau von LOOK Zur Montage des Lenkerbügels auf einem Aerostem-Vorbau von LOOK beachten Sie bitte die Anleitung zum Vorbau. Auf einem anderen Vorbau Beachten Sie bitte das auf dem Vorbau angegebene Drehmoment. Das Drehmoment darf jedoch auf keinen Fall mehr als 5 Nm betragen.
- Página 98 - das Öffnen der Bremsen zum leichteren Ein- und Ausbau des Rads (wenn der Mantel breiter ist als der Abstand zwischen den Bremsbelägen); - den Verschleißausgleich der Bremsbeläge, damit die Bremswirkung konstant bleibt. Die Zugwiderlager (32) sind markiert, so dass nach dem Verstellen einfach wieder die vorherige Einstellung gefunden werden kann.
- Página 99 VERLEGUNG DER ZÜGE BEIM ADH2 Fig.1 DERAILLEUR BRAKE DERAILLEUR Fig.2 Abb. 1 Abb. 2 Fig.1...
- Página 100 Verlegung der Bremszüge (Abb. 1) Zum Verlegen der Züge müssen Sie die Spannvorrichtungen mittig (15-20 mm) positionieren und die Bremshebel fest montieren. Die Bremsaußenhülle besteht aus zwei Stücken, jeweils einem Stück auf beiden Seiten der Spannvorrichtung. Verlegen Sie ein Stück der Bremsaußenhülle (A) vom Bremshebel zum Zugwiderlager des Lenkerbügels (31).
- Página 101 Verlegung der schaltzüge (Abb. 1 und 2) Mechanische schaltung : Die Schaltaußenhülle geht in das zweite Loch am Zugwiderlager des Lenkerbügels (31) und kommt durch das kleine Loch seitlich am Bremshebel (21 und 22) wieder heraus. Je nach Hebelmodell muss die Schaltaußenhülle entweder in der Außenrille des Lenkerbügels (Abb.
- Página 102 MONTAGE OHNE SPANNVORRICHTUNGEN Abb. 3 Fig.3 Wenn Sie die Spannvorrichtungen nicht verwenden möchten, können Sie stattdessen Zughüllen-Durchführungen (33) nehmen. Sie werden an derselben Stelle wie die Spannvorrichtung angebracht, die Verlegung ist gleich. Bringen Sie zwischen der Außenhülle und der Zughüllen-Durchführung (33) eine Anschlaghülse an.
- Página 103 ZÄHLER-HALTERUNG Abb. 4 Abb. 5 Addition of the camera support - Modification of the rib on the internal clamp. 26/01/2017 Nature of modification Resp Date Material Treatment Black Anodisation fo Aluminium part / Stainless Steel screws aluminium parts...
- Página 104 [ 1 ] [ 6 ] Schelle außen Senkkopfschraube M3x6 Senkkopf-Schraube zur Befesti- [ 2 ] [ 7 ] Schelle innen gung der Schelle – M4x10 Schraube zur Befestigung des [ 3 ] [ 8 ] Halterungsausleger Auslegers – M4x16 [ 4 ] [ 9 ] Polar-Adapter...
- Página 105 Die Zähler-Halterung von LOOK für Lenkerbügel mit 31,8 mm Durchmesser wurde speziell für den Lenkerbügel ADH2 entwickelt. Sie ist mit den Zählern von Polar und Garmin kompatibel. Sie lässt sich auf der Achse des Lenkerbügels in die gewünschte Position drehen und hat 4 Montagemöglichkeiten (Abb.
- Página 106 VERLÄNGERUNGSHALTERUNG (Clip-On) Der Lenkerbügel ADH2 von LOOK kann mit Verlängerungen verwendet werden. Er ist mit allen Clip-Ons kompatibel, deren Länge nicht mehr als (74-Lp)/2 beträgt, z. B. mit einem Aerostem (Lp = 44). 31,8 Die Befestigung des Clip-Ons darf Abb. 6 Fig.5...
- Página 107 WARTUNG Kontrolle und Wartung sind wichtig für Ihre Sicherheit und die Lebensdauer Ihres Rades. Wenn ein Rad oder dessen Bauteile nicht fachgerecht gewartet werden, kann es zu Beschädigungen, Bruch oder Ausfällen kommen, was zu Unfällen mit schweren Verletzungen, Querschnittslähmung oder Todesfolge führen kann. Weitere Informationen zur Wartungspflicht finden Sie auf unserer Website www.lookcycle.com unter GARANTIEBESTIMMUNGEN \ WARTUNG.
- Página 108 Wenn trotz aller Sorgfalt, die wir auf die Fertigung unserer Produkte verwenden, ein Fehler auftritt oder eine Reparatur erforderlich wird, wenden Sie sich bitte an Ihren zugelassenen LOOK-Händler. Bringen Sie ihm das defekte Produkt zusammen mit Ihrer Kaufrechnung und beschreiben Sie ihm, was genau nicht funktioniert.
- Página 109 Verborgene Mängel ausschließlich im Sinne der gesetzlichen Vorgaben in Frankreich (§ 1641 bis 1649 des Zivilgesetzbuchs). Manche Länder oder Staaten sehen eine längere Frist für die stillschweigende Garantie und/oder den Ausschluss oder die Begrenzung direkter Schäden oder von Folgeschäden vor, so dass die oben genannte Einschränkung nicht gilt. Durch diese eingeschränkte Garantie haben Sie spezifische gesetzliche Rechte, aber eventuell auch andere Rechte, die je nach den örtlich geltenden Rechtsbestimmungen unterschiedlich sind.
- Página 110 lookcycle.com...