
Manuales relacionados para Bresser 52-83100


Resumen de contenidos para Bresser 52-83100
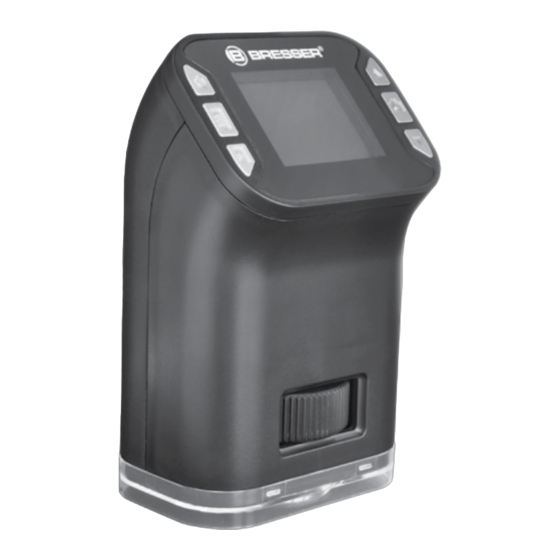
- Página 1 USB Hand Microscope LCD Art. No. 52-83100 Bedienungsanleitung Operating Instructions Mode d’emploi Návod k použití Instrucciones de uso Istruzioni per l’uso...
- Página 2 Bedienungsanleitung ......... 4 Operating Instructions ......18 Mode d’emploi ..........31 Návod k použití ..........46 Instrucciones de uso ........59 Istruzioni per l’uso ........73...
- Página 3 Fig. A Fig. B Fig. D Fig. E 1& Fig. F 1& Fig. C...
-
Página 4: Gefahr Eines Stromschlags
Allgemeine Informationen Allgemeine Warnhinweise Zu dieser Anleitung GEFAHR EINES STROMSCHLAGS! Lesen Sie bitte aufmerksam die Sicherheits- Dieses Gerät beinhaltet Elektroniktei- hinweise in dieser Anleitung. Verwenden Sie le, die über eine Stromquelle (Netzteil dieses Produkt nur, wie in der Anleitung be- und/oder Batterien) betrieben werden. - Página 5 „Konformitätserklärung“ Batterien immer durch einen komplett neuen Übereinstimmung mit den anwendbaren Satz Batterien mit voller Kapazität. Verwen- Richtlinien ist von der Bresser GmbH erstellt den Sie keine Batterien unterschiedlicher worden und kann eingesehen werden. Marken, Typen oder unterschiedlich hoher Kapazität. Entfernen Sie Batterien aus dem Gerät, wenn es längere Zeit nicht benutzt...
- Página 6 Lieferumfang Alle Teile Ihres Mikroskops (Fig. A-C) 1. Handmikroskop 1. LCD-Monitor 2. 4 Stck. Batterien (Typ AAA) 2. POWER-Taste (Ein/Aus) 3. Bedienungsanleitung 3. Menü-Taste 4. USB Kabel 4. Funktionstaste (Play) -Taste (Digitalzoom +) 6. Aufnahme-Taste (OK) Taste (Digitalzoom -) 8. Stellrad (Optischer Zoom) 9.
- Página 7 22. Gesamtanzahl gespeicherter Aufnahmen Hinweis: 23. SD-Speicherkarte* eingelegt Erscheint die Warnung “FULL” auf dem LCD 24. Batteriekapazität Monitor, ist die Speicherkarte* voll. Ersetzen 25. Zoom-Level Sie die Speicherkarte* oder kopieren Sie alle Daten zu Ihrem PC. Anschließend kön- 1. Einsetzen der Batterien: nen Sie alle Daten auf der Speicherkarte* Öffnen Sie den Batteriefachdeckel löschen und diese weiter verwenden.
-
Página 8: Foto Aufnehmen
3. Bedienung dem LCD-Monitor dargestellt. Stellen Sie mit Hilfe des Stellrades (Fig. A, 8) das Bild 3.1 Mikroskop ein-/ausschalten: scharf. Halten Sie die POWER-Taste (Fig. A, 2) Halten Sie das Mikroskop am Gehäuse gedrückt bis das Startbild auf dem LCD- fest und betätigen Sie die Aufnahme-Taste Monitor (Fig. - Página 9 die Aufnahme-Taste nochmals um die Auf- 4. Wiedergabe nahme zu beenden. 4.1 Anzeige einzelner Bilder oder Videos 3.4 Digitalen Zoom verwenden Drücken Sie die Funktionstaste (Fig. A, 4) Bevor Sie ein Foto oder ein Video aufneh- bis das Symbol links oben auf dem LCD- men, können Sie mit oder (Fig.
- Página 10 Drücken Sie die Menü-Taste (Fig. A, 3) Zum Löschen wählen Sie mit den Tasten mehrfach bis das Symbol auf dem Dis- oder das Symbol aus. play angezeigt wird. Drücken Sie die Aufnah- Drücken Sie die Aufnahme-Taste (Fig. A, me-Taste (Fig. A, 6) um die Diashow zu star- 6), um das Löschen des Bildes oder Videos ten.
-
Página 11: Beleuchtung Einstellen
cher zu bestätigen. Alle Dateien werden un- 6.2 Bildauflösung einstellen widerruflich gelöscht! Wählen Sie diesen Menüpunkt, um die Auf- Um das Menü zu verlassen ohne Dateien lösung Ihrer Fotos einzustellen. zu löschen wählen Sie mit den Tasten oder Drücken Sie die Funktionstaste (Fig. A, 4) das Symbol aus und drücken Sie an- mehrfach bis das Symbol... - Página 12 Mit den Tasten oder können Sie die den Tasten oder das Symbol aus und Qualität VGA (640x480 Pixel) oder QVGA drücken Sie dann die Aufnahme-Taste. (320x240 Pixel) auswählen. 4. Drücken Sie die Aufnahme-Taste (Fig. A, 7. Dateien zum PC kopieren 6) um Ihre Eingaben zu bestätigen.
- Página 13 8. Reinigung Achtung: Werfen Sie Elektrogeräte nicht in den Trennen Sie das Gerät vor der Reinigung von Hausmüll! der Stromquelle (Netzstecker ziehen oder Gemäß Europäischen Richtlinie Batterien entfernen)! 2002/96/EG über Elektro- und Elektronik- Altgeräte und deren Umsetzung in nationales Reinigen Sie das Gerät nur äußerlich mit Recht müssen verbrauchte Elektrogeräte ge- einem trockenen Tuch.
- Página 14 10. Problembehebung: Gerät USB-Geräts sowie den Start von Windows wird vom Computer und ist für das Nicht-Erkennen am USB-Port (USB) nicht erkannt verantwortlich! Dieser Umstand tritt vereinzelt bei be- Sie können daher Ihr System-Umfeld „auf- stimmten OEM-Versionen von Windows räumen“ und nicht verwendete Geräte ent- Vista und XP auf! Es liegt kein Defekt des fernen.
- Página 15 die Option AUSGEBLENDETE GERÄTE Service und Garantie ANZEIGEN. Die zuvor ausgeblendeten Für dieses Gerät übernehmen wir eine Ga- „Geistergeräte“ werden nun hellgrau darge- rantie von 3 Jahren ab Kaufdatum. Bitte be- stellt. Kontrollieren Sie die verschiedenen wahren Sie den Kaufbeleg als Nachweis auf. Kategorien wie USB, Speichervolumes, etc.
- Página 16 Mängelbehebung und Retouren Retourenmeldung Wir beheben innerhalb der Garantiezeit Vorgangsnr.**: ........kostenlos alle eventuellen Material- oder Herstellungsfehler. Ausgenommen von der Produktbezeichnung: ......Gewährleistung sind Mängel, die auf Ver- schulden des Benutzers oder unsachge- Kurze Fehlerbeschreibung: mäße Benutzung zurückzuführen sind, wenn ............
-
Página 17: Lcd Monitor
Technische Daten Videoauflösung VGA 640 x 480 Pixel, 30 fps Sensor 2.0MP CMOSSen- QVGA 320 x 240 sor (Farbe), Pixel, 30 fps 5.0MP interpoliert Kompremierung JPEG / MJPEG Beleuchtung LED (nicht aus- (AVI) wechselbar) Digital Zoom 1x - 4 x Digital Unterstützte Microsoft Windows Zoom... -
Página 18: Risk Of Electric Shock
General Information device under adult supervision. Only use the device as described in the manual; About this Instruction Manual otherwise, you run the risk of an electric Please read the safety instructions in this shock. manual carefully. To avoid damage to the unit and the risk of injury, only use this product as RISK OF CHEMICAL BURN! described in the manual. - Página 19 Do not short-circuit EC Declaration of Conformity the device or batteries, or throw them into a fire. Excessive heat or improper handling could trigger a short-circuit, a fire or an Bresser GmbH issued explosion. „Declaration of Conformity“ in accordance with applicable guidelines and corresponding Use only the recommended batteries.
- Página 20 Product Contents The Parts of your Microscope (Fig. A – C) 1. Hand-held microscope 1. LCD monitor 2. 4 batteries (AAA) 2. POWER button (ON / OFF) 3. User Manual 3. Menu button 4. USB cable 4. Function button (Play) button (digital zoom +) 6.
-
Página 21: Switching The Microscope On / Off
22. Total number of images your PC. You can then delete all the data on 23. SD memory card inserted the memory card* and use it again. Only SD 24. Battery level memory cards* will fit the microscope. 25. Zoom level The USB hand held microscope supports 1. -
Página 22: Recording A Video
go off after a brief pause and the device has 3.3 Recording a Video been switched off. Switch the microscope on. Press the Function button (Fig. A, 17) until Caution! icon (Fig. E, 16) is displayed at the Please note that all the settings made revert top left of the LCD monitor. - Página 23 Note: The last image recorded or the video start Depending on the object observed, higher screen will be displayed. optical magnification may result in a blurred Press the Menu button (Fig. A, 3) image. This is due to the design and is not repeatedly until the icon is displayed.
-
Página 24: Deleting All Files
Press the Record button (Fig. A, 6) to 6. User-defined Settings confirm the deletion of the image or video. 6.1 Set Lighting The corresponding file will be permanently Select this menu item to set the brightness of deleted. the LED lighting. To leave the menu without deleting files, Press the Function button (Fig. - Página 25 You can select the image quality using 6.4 Formatting button. You can select from 2M (1600x1200 pixels), 1.3M (1280x 960 Caution: pixels) and 5M (2560x1920 pixels). Formatting will delete all data permanently. 4. Press the Record button (Fig. A, 6) to We recommend first copying the data onto confirm your input.
- Página 26 7. Copying Files to your PC Only use a dry cloth to clean the exterior of the device. To avoid damaging the Caution! electronics, do not use any cleaning fluid. Do not disconnect the USB cable during data transfer. This will result in data being Protect the device from dust and moisture.
- Página 27 European Parliament on waste electrical and not result in a satisfactorily solution it is electronic equipment and its adaptation into recommended to proceed as described German law, used electronic devices must below (the manufacturer takes no liability for be collected separately and recycled in an any loss or damage caused by running this environmentally friendly manner.
- Página 28 ENVIRONMENT VARIABLE). At ‘NAME OF and then reinsert them. Make sure they’re VARIABLES’ enter the following text: correctly inserted and then try again. devmgr_show_nonpresent_devices Service and Guarantee This device is guaranteed for 3 years from the Enter the value ‘1’ in ‘Value of Variables’ date of purchase.
- Página 29 Correction of defects and returns Returns form We will repair any material or manufacturing Transaction no.**: ........defects free of charge during the guarantee period. Excluded from the guarantee are Product name: ........faults due to damage caused by the user, or improper use due to non-authorised Short description of defect: third-party attempted repairs or similar.
- Página 30 Technical Data Video resolution VGA (640 x 480 pixels), 30 fps Sensor CMOS sensor QVGA (320 x 240 (color), (5.0MP pixels), 30 fps interpolated) Compression JPEG / MJPEG Lighting (AVI) (not replaceable) Digital zoom 1x - 4x digital Systems supported Microsoft Windows zoom XP/ Vista / 7...
- Página 31 Informations générales Consignes générales de sécurité A propos de ce manuel RISQUE D’ELECTROCUTION ! Veuillez lire attentivement les consignes de Cet appareil contient des pièces sécurité présentées dans ce manuel. N’uti- électroniques raccordées à une sour- lisez ce produit comme décrit dans ce ma- ce d’alimentation électrique (par bloc d’ali- nuel, afin d’éviter tout risque de blessure ou mentation et/ou batteries).
- Página 32 parties du corps concernées en utilisant de ries disposant de toute sa capacité. N’utilisez pas de batteries de marques, de types ou de l’eau claire et consultez un médecin dans les capacités différentes. Les batteries doivent meilleurs délais. être enlevées de l’appareil lorsque celui-ci est destiné...
- Página 33 Déclaration de conformité CE Eléments fournis 1. Microscope manuel 2. 4 piles (de type AAA) Bresser GmbH a émis une « déclara- 3. mode d’emploi tion de conformité » conformément aux li- 4. câble USB gnes directrices applicables et aux normes correspondantes.
- Página 34 Toutes les pièces de votre microscope 22. Nombre total des prises enregistrées (Fig. A-C) 23. Carte mémoire SD insérée 1. Ecran LCD 24. Capacité de la pile 2. Touche POWER (Marche/Arrêt) 25. Niveau d’agrandissement 3. Touche Menu 1. Mise en place des piles 4.
-
Página 35: Prise De Clichés
Remarque : 3. Utilisation Lorsque l’écran LCD affiche l’avertissement « FULL“, la carte mémoire* est pleine. Rem- 3.1 Mise en marche / arrêt du micros- placez la carte mémoire* ou copiez toutes les cope : données sur votre PC. Ensuite, vous pourrez Maintenez la touche POWER (Fig. -
Página 36: Utilisation Du Zoom Numérique
un document écrit. L’objet est apparaît à (Fig. A, 6) pour lancer l’enregistrement de l’écran LCD. A l’aide de la molette (Fig. A, 8), la vidéo. Appuyez une nouvelle fois sur la réglez la netteté de l’image. touche d’enregistrement pour arrêter l’enre- 4. -
Página 37: Mode Diaporama
4. Lecture enregistrée ou la première image fixe de la dernière vidéo enregistrée. 4.1 Affichage des différentes images Appuyez plusieurs fois sur la touche Menu et des vidéos (Fig. A, 3) jusqu’à ce que le symbole Appuyez sur la touche permettant d’accé- apparaisse à... -
Página 38: Réglage De L'éclairage
A l’aide des touches , sélection- dernière vidéo enregistrée. nez l’image ou la vidéo que vous souhaitez 3. Appuyez plusieurs fois sur la touche Menu supprimer. (Fig. A, 3) jusqu’à ce que le symbole Appuyez plusieurs fois sur la touche Menu apparaisse à... - Página 39 haut à gauche de l’écran LCD. 4. Appuyez sur la touche d’enregistrement 2. Appuyez plusieurs fois sur la touche Menu (Fig. A, 6) pour confirmer votre paramé- (Fig. A, 3) jusqu’à ce que le symbole s‘af- trage. fiche au centre de l’écran. 3.
- Página 40 6.4 Formatage 7. Copier les données sur un PC Attention : Attention! Le formatage entraîne la suppression défi- Ne pas débrancher le câble USB pendant le nitive de toutes les données enregistrées ! transfert des données. Ceci peut entraîner Nous vous conseillons de copier vos don- la perte des données.
- Página 41 8. Nettoyage tion de ce type des produits, veuillez vous adresser aux services communaux en char- Caution! ge de la gestion des déchets ou de l’envi- Avant de nettoyer l’appareil, veuillez le couper ronnement. de son alimentation électrique (tirez le câble d’alimentation ou enlevez les batteries) ! Ne nettoyez l’appareil que de l’extérieur en Ne jamais éliminer les appareils élec-...
- Página 42 tail (une élimination de ces produits avec les différents ports USB à chaque fois une en- déchets domestiques constituerait une viola- trée dans les paramètres systèmes. A cha- tion des directives sur les piles et batteries). que démarrage, Windows recherche alors également ces appareils.
- Página 43 devmgr_show_nonpresent_devices Retirez les piles du microscope à main USB, attendez quelques instants puis réintroduisez- les. Vérifiez bien que les piles sont placées Pour la VALEUR DE LA VARIABLE, saisissez le nombre « 1 ». correctement et réessayez. Confirmez la saisie en cliquant sur OK et re- démarrez votre ordinateur ! Service et Garantie Après avoir redémarré...
- Página 44 Service en ligne*: 00 800 – 63 43 7000 Déclaration de retour N° de dossier**: ........Réparation des vices de fabrication et retours Désignation du produit : ......Durant la période de garantie, nous répa- rons gratuitement tous les défauts éventuels Courte description du problème : de matériaux ou de fabrication.
- Página 45 Caractéristiques techniques Résolution des VGA (640 x 480 vidéos pixels), 30 fps Capteur 2.0 MP capteur QVGA (320 x 240 CMOS (couleur), pixels), 30 fps (5.0 MP interpolés) Compression JPEG / MJPEG Eclairage LED (non rempla- (AVI) çable) Zoom numérique 1x - 4x zoom Systèmes Microsoft Windows...
-
Página 46: Nebezpečí Úrazu Elektrickým Proudem
Všeobecné informace Všeobecné výstražné pokyny Informace k tomuto návodu NEBEZPEČÍ ÚRAZU ELEKTRICKÝM Prostudujte si prosím pozorně bezpečnostní PROUDEM! pokyny v tomto návodu. Používejte tento vý- Tento přístroj obsahuje elektronické robek pouze tak, jak je popsáno v návodu, součásti, které jsou provozovány po- aby se zabránilo poškození... - Página 47 Nepo- mami zhotovila společnost Bresser GmbH. užívejte baterie různých značek, typů nebo Na vyžádání jej lze kdykoliv předložit k na- rozdílně velké kapacity. Pokud se přístroj hlédnutí.
- Página 48 Součásti balení Seznam součástí mikroskopu (Fig. A-C) 1. příruční mikroskop 1. LCD monitor 2. 4 ks baterií (typ AAA) 2. Tlačítko POWER (zap/vyp) 3. návod k obsluze 3. Tlačítko menu 4. USB kabel 4. Funkční tlačítko (play) 5. Tlačítko (digitální zoom +) 6.
- Página 49 22. Celkový počet uložených záznamů kartu za jinou nebo všechna data zkopírujte 23. Vložení paměťové karty SD do svého počítače. Následně můžete všech- 24. Kapacita baterií na data z paměťové karty vymazat a kartu 25. Úroveň zoomu znovu použít. Do mikroskopu lze vkládat pouze paměťové...
- Página 50 Při vypínání držte tlačítko POWER stisknuté bude „zrnitější“, neboť se jedná o digitální tak dlouho, dokud se na LCD monitoru nezob- zoom. Nejedná se o chybu! razí „Good Bye“! Tento nápis po krátké chvíli zmizí a přístroj je vypnutý. 3.3 Natáčení videa Zapněte mikroskop.
- Página 51 3.5 Použití optického zoomu pro přehrání videa. Znovu stiskněte zázna- Pohybujte nastavovacím kolečkem (Fig. A, 8) mové tlačítko pro zastavení přehrávání. doleva nebo doprava pro postupné optické zvětšování objektu (rozsah zvětšení 3.5x až 4.2 Diaprojekce 35x). Stiskněte funkční tlačítko (Fig. A, 4), aby se vlevo nahoře na LCD monitoru zobrazil Upozornění: symbol...
- Página 52 nebo úvodní snímek videonahrávky. pro potvrzení smazání všech souborů z pa- Pomocí tlačítek nebo zvolte snímek měti. Všechny soubory budou nenávratně nebo video, které má být smazáno. smazány! Stiskněte několikrát tlačítko menu (Fig. A, Pro opuštění menu bez smazání souborů zvolte pomocí...
- Página 53 6.2 Nastavení rozlišení obrazu Pomocí tlačítek nebo můžete zvolit Zvolte tuto položku menu, chcete-li nastavit kvalitu VGA (640x480 pixelů) nebo QVGA rozlišení pořizovaných snímků. (320x240 pixelů). Stiskněte několikrát funkční tlačítko (Fig. 4. Stiskněte záznamové tlačítko (Fig. A, 6) A, 4), aby se vlevo nahoře na LCD monitoru pro potvrzení...
- Página 54 pomocí tlačítek nebo symbol a ná- 8. Čištění sledně stiskněte záznamové tlačítko. Pozor! 7. Kopírování souborů do PC Před prováděním čištění odpojte přístroj od zdroje proudu (vytáhněte síťovou zástrčku Pozor! nebo vyjměte baterie)! Během přenosu dat nevytahujte kabel USB, aby nedošlo ke ztrátě dat. Před přerušením Čištění...
- Página 55 Nejedná se o závadu na zařízení! Ve většině případů lze tento problém vyřešit aktualizací Nevyhazujte elektrické přístroje do ovladače USB v notebooku nebo stolním domovního odpadu! počítači! Podle evropské směrnice 2002/96/EG o starých elektrických a elektronických přístro- 2 .Není-li dosaženo uspokojivého výsledku jích a její...
-
Página 56: Servis A Záruka
a otevřete položku VLASTNOSTI v přísluš- 10.1. Přístroj nereaguje ném menu. Poté klikněte v okně na záložku USB příruční mikroskop nereaguje na stisk- UPŘESNIT a poté na PROMĚNNÉ PRO- nutí tlačítek, často „spadává“ nebo zůstává STŘEDÍ. Ve spodní části pod PROMĚNNÝMI „viset“. - Página 57 Servisní horká linka*: Hlášení o vrácení 00 800 – 63 43 7000 Č. případu**: .......... Odstranění závad a vrácení dodávky Označení produktu:......... V záruční době bezplatně odstraníme Stručný popis závady: všechny případné materiálové nebo výrobní vady. Záruka se nevztahuje na vady, které ............
- Página 58 Technické údaje Rozlišení videa VGA (640x480 pixelů), 30 fps Senzor 2.0MP CMOS- QVGA (320x240 Sensor (barva), pixelů), 30 fps (5.0MP s inter- polací) Komprimace JPEG / MJPEG (AVI) Osvětlení LED (není vyměnitelná) Digitální zoom 1x – 4x digitální zoom Podporované Microsoft Windows operační...
-
Página 59: Peligro De Descarga Eléctrica
Informaciones de carácter general una fuente de electricidad (equipo de ali- mentación y/o pilas). No deje nunca que los Sobre este manual niños utilicen el aparato sin supervisión. El Lea atentamente las indicaciones de seguri- uso se deberá realizar de la forma descrita dad recogidas en este manual. - Página 60 No utilice pilas de marcas o modelos distintos ni de distinto Bresser GmbH ha emitido una „De- nivel de capacidad. ¡Hay que retirar las pilas claración de conformidad“ de acuerdo con del aparato si no se va a usar durante un pe- las directrices y normas correspondientes.
- Página 61 Volumen de suministro Todas las piezas de su microscopio 1. Microscopio manual (Fig. A-C) 2. 4 pilas (modelo AAA) 1. Monitor LCD 3. manual de instrucciones 2. Tecla POWER (On/Off) 4. cable USB 3. Tecla Menú 4. Tecla de función (Play) 5.
- Página 62 22. Número total de grabaciones memo- Nota: rizadas Si aparece el aviso «FULL» en el monitor 23. Tarjeta de memoria SD introducida LCD, la tarjeta de memoria está llena. Sus- 24. Capacidad de las pilas tituya la tarjeta de memoria o copie todos 25.
-
Página 63: Conectar/Desconectar El Microscopio
3. Manejo Sujete del microscopio por la carcasa y accione la tecla de grabación (Fig. A, 6). 3.1 Conectar/desconectar el microscopio: Mantenga pulsada la tecla POWER (Fig. A, Nota: 2) hasta que se muestre la imagen de inicio Puede ampliar o reducir la imagen con las en el monitor LCD (Fig. -
Página 64: Utilizar Zoom Óptico
te imagen o vídeo, o para mostrar la pre- (Fig. A, 5+7). La función zoom digital cedente. le permite un aumento de simple a cuádruple Pulse la tecla de grabación (Fig. A, 6) para de su objeto. reproducir un vídeo. Pulse de nuevo la tecla de grabación para detener la reproducción. -
Página 65: Borrar Archivos Individuales
5. Borrar archivos 5.2 Borrar todos los archivos Pulse la tecla de función (Fig. A, 4) hasta que se muestre el símbolo en la parte su- 5.1 Borrar archivos individuales perior izquierda del monitor LCD. 1. Pulse la tecla de función (Fig. A, 4) hasta que En el display se muestra la última imagen en la parte superior se muestre el símbolo... -
Página 66: Ajustar Resolución De Imagen
veces hasta que se muestre el símbolo píxeles) y 5M (2560 x 1920 píxeles). en la parte superior izquierda del monitor 4. Pulse la tecla de grabación (Fig. A, 6) para LCD. confirmar sus entradas. Pulse la tecla de Menú (Fig. A, 3) varias veces hasta que se muestre en el centro del 6.3 Ajustar formato/resolución de vídeo display el símbolo... - Página 67 Pulse la tecla de función (Fig. A, 4) varias ayuda del asistente de hardware. veces hasta que se muestre el símbolo Si no se desactiva el dispositivo extraíble, se en la parte superior izquierda del mo- puede producir un «fallo general» del PC o nitor LCD.
- Página 68 ¡Proteja el aparato del polvo y la humedad! De acuerdo con la normativa en materia de Consérvelo en la bolsa suministrada o en el pilas y baterías recargables, está explicita- embalaje de transporte. Se deben retirar las mente prohibido depositarlas en la basura pilas del aparato si no se va a usar durante normal.
- Página 69 cante no asume ninguna responsabilidad luego en VARIABLES DEL ENTORNO. En la por ello! parte inferior, en el punto VARIABLES DEL ENTORNO, elija la opción NUEVO. ¡Elimine los llamados dispositivos fantasma! En NOMBRE DE LA VARIABLE introduzca el Éstos son unos dispositivos que en estos siguiente texto: momentos no están conectados a su orde- nador.
-
Página 70: El Dispositivo No Reacciona
10.1 El dispositivo no reacciona ayudarle. La línea de atención telefónica del servicio técnico se enumera a continuación. El microscopio de mano no reacciona al Si fuera necesaria una prestación de garan- presionar las teclas, se bloquea o se queda tía (reparación o cambio), nuestro personal “colgado”. - Página 71 En caso de una devolución, tenga en Nota de devolución cuenta lo siguiente: N.º de expediente**:........ • Procure enviar el artículo debidamente embalado. Si es posible, utilice para ello Denominación del producto: ..... el embalaje original. • Cumplimente la siguiente nota de devo- Descripción breve del error: lución y adjúntela al envío junto con una ............
-
Página 72: Monitor Lcd
Datos técnicos Resolución de VGA (640 x 480 vídeo píxeles), 30 fps Sensor 2.0MP Sensor QVGA (320 x 240 CMOS (color), píxeles), 30 fps (5.0MP interpo- lado) Compresión JPEG / MJPEG (AVI) Iluminación LED (no recambi- able) Zoom digital 1x - 4x Zoom digital Sistemas operati- Microsoft Windows... - Página 73 Informazioni generali Avvertenze di sicurezza generali Informazioni sul presente manuale RISCHIO DI FOLGORAZIONE! Leggere con attenzione le avvertenze di si- Questo apparecchio contiene com- curezza riportate nel manuale. Per evitare ponenti elettronici azionati da una danni all‘apparecchio o possibili lesioni, uti- sorgente di corrente (alimentatore e/o batte- lizzare questo prodotto soltanto come de- rie).
- Página 74 Dichiarazione di conformità CE lizzo non conforme può provocare cortocir- cuiti, incendi e persino esplosioni! Bresser GmbH ha redatto una “di- Utilizzare esclusivamente le batterie consi- chiarazione di conformità” in linea con le di- gliate. Sostituire le batterie scariche o usate sposizioni applicabili e le rispettive norme.
- Página 75 Componenti in dotazione Parti del microscopio (fig. A-C) 1. Microscopio manuale 1. Monitor LCD 2. 4 pile (tipo AAA) 2. Tasto POWER (accensione/spegnimento) 3. istruzioni per l’uso 3. Tasto menu 4. cavo USB 4. Tasto di funzione (play) 5.Tasto (zoom digitale +) 6.
- Página 76 22. Numero complessivo di riprese memorizzate è piena. A questo punto si può sostituire la 23. Scheda di memoria SD inserita scheda di memoria con una nuova oppure 24. Livello di carica della batteria copiare i dati della scheda piena sul PC. 25.
-
Página 77: Accensione/Spegnimento Del Microscopio
3. Uso es. un foglio stampato. L’oggetto appare vi- sualizzato sul monitor LCD. Mettere a fuoco 3.1 Accensione/spegnimento del l’immagine per mezzo della ghiera di regola- microscopio zione (Fig. A, 8). Tenere premuto il tasto POWER (Fig. A, 2) Con una mano reggere il microscopio, te- finché... - Página 78 4. Premere il tasto di registrazione (Fig. A, 6) 4.1 Visualizzazione di singole foto o video per avviare la ripresa. Premere ancora una Tenere premuto il tasto di funzione (Fig. volta il tasto di registrazione per terminare la A, 4) finché non appare visualizzato il simbo- ripresa.
- Página 79 Premere il tasto di registrazione (Fig. A, 6) del video. Il file verrà definitivamente cancel- per avviare la presentazione di diapositive. lato! Tutte le immagini memorizzate verranno vi- Per uscire dal menu senza cancellare al- sualizzate l’una dopo l’altra senza interruzio- cun file, con il tasto oppure selezionare...
- Página 80 6. Impostazioni personalizzate dell’utente del monitor LCD, non appare visualizzato il simbolo 6.2 Impostazione dell’illuminazione Premere ripetutamente il tasto menu (Fig. Selezionare questa voce di menu per impo- A, 3) finché al centro del display non appare stare la luminosità dell’illuminazione a LED. visualizzato il simbolo Premere ripetutamente il tasto di funzione Con il tasto...
- Página 81 4. Premere il tasto di registrazione (Fig. A, 6) 7. Copiatura dei file sul PC per confermare la scelta effettuata. Attenzione! 6.5 Formattazione Non scollegare il cavo USB durante la tra- smissione dei dati, altrimenti andranno persi. Attenzione! Prima di interrompere la connessione USB o Se si esegue la formattazione, tutti i dati spegnere il modulo LCD, con l’aiuto dell’assi- verranno definitivamente cancellati! Si rac-...
- Página 82 (staccare il connettore oppure rimuovere le riguardante gli apparecchi elettrici ed elet- batterie)! tronici usati e la sua applicazione nel diritto nazionale, gli apparecchi elettronici usati de- Pulire l’apparecchio soltanto con un panno vono essere raccolti in maniera differenziata asciutto. Non utilizzare liquidi detergenti per e destinati al riciclaggio ecologico.
- Página 83 seguente: (Il produttore non si assume alcu- BIENTE. Nella parte inferiore alla voce VA- RIABILE DI AMBIENTE selezionare l’opzione na responsabilità! NUOVO. In NOME VARIABILE inserire il seguente testo: Si raccomanda di cancellare tutte le peri- feriche fantasma! Si tratta di apparecchi at- tualmente non collegati al computer.
- Página 84 10.1. L’apparecchio non reagisce rendesse necessaria una prestazione in ga- Se il microscopio manuale USB non reagisce ranzia (riparazione o sostituzione), l’indirizzo premendo i tasti, va in crash o si “inceppa”, per il rinvio Vi verrà comunicato dagli addetti si prega di rimuovere dallo stesso le batterie, del servizio di assistenza.
- Página 85 Per i rinvii si prega di osservare quanto Notifica di rinvio segue: Numero pratica**: ........• Assicurarsi che l’articolo venga spedito accuratamente imballato. Laddove possi- Descrizione del prodotto: ......bile si raccomanda di usare l’imballaggio originale. Descrizione sintetica dell‘anomalia: • Compilare la seguente notifica di rinvio e ............
- Página 86 Dati tecnici Risoluzione video VGA (640 x 480 pixel), 30 fps Sensore 2.0MP CMOS QVGA (320 x 240 (colore), (5.0MP pixel), 30 fps interpolata) Compressione JPEG / MJPEG Illuminazione LED (non sosti- (AVI) tuibili) Zoom digitale 1x - 4x Sistemi operativi Microsoft Windows supportati XP/ Vista / 7...
- Página 88 Bresser GmbH Gutenbergstr. 2 DE-46414 Rhede Germany www.bresser.de...