Tabla de contenido
Publicidad
Idiomas disponibles
Idiomas disponibles
Enlaces rápidos
Publicidad
Tabla de contenido

Manuales relacionados para Bowers & Wilkins Signature 8NT


Resumen de contenidos para Bowers & Wilkins Signature 8NT
- Página 1 Installation Instructions...
-
Página 2: Tabla De Contenido
Contents English Français Deutsch Español Italiano Nederlands Wall frame and grille Baffle Русский Cut-off diagrams Back box... -
Página 3: Wall Frame And Grille
In particular, the position The Signature 8NT can be installed in drywall or of wall studs in drywall construction may Multi-channel left/right front INTRODUCTION solid construction in either vertical or horizontal... -
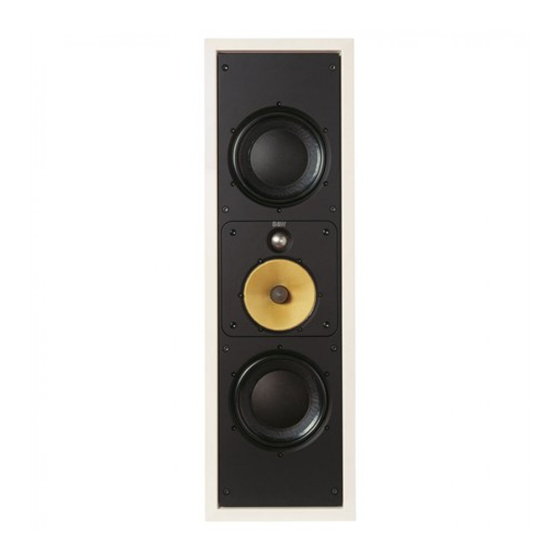
Página 4: Check The Contents
CHECK THE CONTENTS Wall frame and grille pack Baffle assembly pack PMK pack Back box pack Wall frame Baffle with drivers and crossover Back box Front panel PMK frame Metal grille with scrim attached 8x M6 x 25mm screws (baffle to frame) 6x brackets Foam pad 4x brackets... - Página 5 When the brickwork is complete, remove the Remove the nut at the short end of the entry Feed the speaker cable (single or bi-wire) to the With retrofit applications, the brackets and front panel from the back box. Run the cable into gland and insert from the outside so the long end nearest end of the PMK frame to avoid having to screws provided in the PMK pack are not...
-
Página 6: Français
INTRODUCTION En particulier, la position des supports verticaux Reproduction multicanal, enceintes avant La Signature 8NT peut être installée dans un mur des parois creuses peut nécessiter quelques gauche et droite plein ou un mur creux, en position verticale ou Description ajustements par rapport à... - Página 7 parleurs pendant les opérations de décoration. position verticale de l’enceinte. Si l’enceinte est Dans tous les autres cas, orientez l’enceinte arrière Back box, dans des applications montée avec son centre positionné au-dessus horizontalement et placez-la directement au- particulières. Vous aurez peut-être besoin de l’un La boîte arrière Back box des oreilles des auditeurs, tournez la platine dessus ou au-dessous de l’écran.
-
Página 8: Procédures D'installation
PROCÉDURES D’INSTALLATION Construction avec murs creux existants, Construction nouvelle avec murs pleins, Construction nouvelle avec murs creux, Construction nouvelle avec murs creux, sans Back box sans Back box avec Back box avec Back box Étape 1 – coupe de la cloison (panneau style Étape 1 –... - Página 9 Passez le cadre du kit PMK à travers l’ouverture les cloisons. Laissez sortir environ 30 cm de puis fixez-la temporairement avec deux vis auto- vis auto-serrantes tout autour du cadre, dont pratiquée dans la cloison, et plaquez-le en câble pour faciliter le branchement final. serrantes.
-
Página 10: Deutsch
Abstand zu wählen. Mehrkanalanwendung Zur Optimierung der horizontalen Schallverteilung Die Signature 8NT ist ein 3-Wege- Wird eine akustisch transparente Leinwand Die Signature 8NT kann vertikal oder horizontal im oberen Frequenzweichenbereich kann der Wandeinbaulautsprecher mit erstklassigen eingesetzt, positionieren Sie den Lautsprecher eingebaut werden. - Página 11 Hörer liegt hier normalerweise unter dem für 2- Achtung: einige grundsätzliche Hinweise, die jedoch den Kanal-Audio. In der Regel bedeutet dies, dass Die Lautsprechersysteme der Signature 8NT jeweiligen Bedingungen vor Ort angepasst erzeugen ein statisches Magnetfeld, das sich der Abstand zur Bildschirmseite 0,5 m beträgt.
- Página 12 VORGEHENSWEISE BEIM EINBAU Bestehende Wandkonstruktion aus Neukonstruktion mit Einbaubox Neue Wandkonstruktion aus Neue Wandkonstruktion aus Trockenbauplatten ohne Einbaubox Trockenbauplatten ohne Einbaubox Trockenbauplatten mit Einbaubox (feste Wand) Stufe 1 – Ausschneiden der Gipsbauplatte Ein einfacher nachträglicher Einbau ist nur Stufe 1 – Anbringen des PMK Stufe 1 –...
- Página 13 denden Schrauben in der gewünschten Weise an Führen Sie den PMK-Rahmen durch die Öffnung Schaumstoffkissens grau dargestellt). Schrauben Stufe 2 – Anbringen der Gipsbauplatte (Abb. 16). der Gipsbauplatte und bringen Sie ihn in Position Sie die Einbaubox mit 16 selbstschneidenden (Abb.
-
Página 14: Español
10º con respecto a la altura del oído. La Signature 8NT es un sistema de altavoces acústica. la orientación vertical. Sin embargo, la orientación empotrable de tres vías capaz de proporcionar horizontal exigirá... -
Página 15: Planificación De La Posición De La Caja Acústica
En orientación horizontal, por lo general la caja la caja frontal central. (Figura 3) Para sistemas de la Signature 8NT es importante que la instale de acústica se cruzará con refuerzos de la pared de 6.1 canales (EX), las dos cajas acústicas laterales El PMK la manera adecuada. -
Página 16: Procedimientos De Instalación
40 centímetros. La caja la posición de los refuerzos de la estructura de la frontal de la Signature 8NT puede colocarse bien tornillos de sujeción ni el casquillo de entrada del acústica necesita un volumen mínimo de 40 litros pared. - Página 17 (Figura 16) despejada y fije firmemente y en la orientación cuidado con los bordes de las tuercas deseada el panel frontal de la Signature 8NT. deslizantes. Le recomendamos que utilice unos Paso 2 – Colocación de la placa de pladur Alinee la caja posterior y fije o clave las (Figura 16 con la posición de la lana...
-
Página 18: Italiano
Il Signature 8NT è un diffusore a 3 vie da muro in applicazioni del canale centrale in modo da costruzioni della normale modifica. -
Página 19: Controllo Del Contenuto
tra le stanze adiacenti ed una barriera di parte inferiore del panello in modo che il tweeter dare un suono più diffuso di quello proveniente I diffusori possono essere bi-wired o bi amplificati dai diffusori anteriori. Per i canali a 5.1 canali, i sicurezza contro l’espansione del fuoco tra la si trovi sopra il midrange. -
Página 20: Procedure D'installazione
PROCEDURE D’INSTALLAZIONE Nuove costruzioni muro solido Nuove costruzioni muro a secco Nuove costruzioni muro a secco Costruzioni muro a secco esistenti (retrofit) senza scatola posteriore con scatola posteriore con scatola posteriore senza scatola posteriore Fase 1 – tagliare l’intonaco Fase1 – fissare il PMK Fase 1 –... - Página 21 Fase 2 – fissare il panello di gesso (figura 11) Inserire la cornice PMK attraverso l’apertura nel Allineate la scatola posteriore ed avvitate o Posizionare il cuscinetto in schiuma nella scatola Avvicinate il panello di gesso al muro e tagliare muro e spingetela verso la posizione finale fissate i supporti al muro.
-
Página 22: Nederlands
Spraymount 3M. (figura 1). Nederlands De Signature 8NT kan worden gemonteerd in De luidspreker kan zowel verticaal als horizontaal De hoogte wordt zo gekozen dat het centrum een scheidingswand of een muur, zowel verticaal... - Página 23 Achterzijde geplaatst te worden (afb. 3). Bij 6.1 EX systemen voor een optimaal resultaat. Buiten die 10° treedt Desgewenst kan de luidspreker in bi-wiring of In een scheidingswand zorgt de achterzijde voor dienen de twee zijluidsprekers meer naar voren een lichte dip op het crossover punt op wat het bi-amping worden gebruikt.
-
Página 24: Installatie
INSTALLATIE Nieuwe constructie Nieuwe constructie Nieuwe massieve muur Bestaande scheidingswand. Later zonder achterzijde met achterzijde met achterzijde aanbrengen zonder achterzijde Stap 1 – maken van de uitsnede in de Stap 1 – het PMK aanbrengen Stap 1 – aanbrengen achterzijde Stap 1 –... - Página 25 Vul de ruimte buiten het PMK frame met Steek het PMK frame door de opening in de wand waterpas om te zien of het frame recht zit en Leg de bijgeleverde schuim band rond de rand geschikte dempende materialen. Glaswol of en trek het weer naar voren in positie (afb.
-
Página 26: Русский
условий может потребоваться адаптация. В такова, чтобы центр панели находился в частности, положение вертикальных пределах 10° по отношению к уровню ушей. Signature 8NT может быть установлена в элементов каркаса (стоек) гипсокартонной ВВЕДЕНИЕ гипсокартонной или сплошной стене в стены может заставить сместить АС... - Página 27 Монтажный короб ушей слушателя, поверните центральную АС могут быть подсоединены способами Во всех других случаях, ориентируйте АС би-ваеринг или би-ампинг. При отгрузке В гипсокартонной конструкции монтажный секцию так, чтобы ВЧ динамик был над СЧ горизонтально и разместите ее короб обеспечивает дополнительную динамиком.
- Página 28 ПРОЦЕДУРА ИНСТАЛЛЯЦИИ В новую сплошную стену, В готовую гипсокартонную конструкцию, В новую гипсокартонную конструкцию, В новую гипсокартонную конструкцию, без короба без короба с коробом с коробом Этап 1 – вырез в гипсокартоне Этап 1 – установка ПМК Этап 1 – установка монтажного короба Этап...
- Página 29 Вставьте раму ПМК в отверстие и Для облегчения соединения свободный 16 прокладка показана серым цветом) Приложите короб и привинтите или установите на место. (рисунок 7) конец кабеля должен иметь длину около прибейте гвоздями скобы к элементам Используйте 16 винтов-саморезов по Одной...
- Página 30 Во всех случаях Этап 5 – прикрепление передней панели Прикрепите 4 пластинки в нижних углах немного аэрозольного клеящего вещества, и решетки настенной рамы для выравнивания по например, 3M Spraymount. Этап 4 – окончательная отделка Магниты басовиков и среднечастотного вертикали и горизонтали. Поместите Для...
- Página 32 Figure 1 Figure 2 Figure 3 1.5m ≈ ~60º ≈ ≈ 120º ~120º 120º ~120º 120º ~120º 5º 10º 5º Figure 4 Figure 5 ≥15in 120º ~120º ≥4ft 1.5m ~40º ~40º ≈ ≥15in ~60º ≈ ≈ Figure 7 Figure 8 Figure 9 Figure 6 ≥4ft...
- Página 33 156cm Figure 13 Figure 14 (61.4in) 40.5cm (16 in) 156cm (61.4in) Figure 15 Figure 16 Figure 17 Figure 18 Figure 19 156cm (61.4in) Figure 20...
- Página 34 LL08818 Issue 3 B&W Group Ltd B&W Group (UK Sales) Kevlar is a registered trademark of DuPont. Dale Road T +44 1903 221 500 Nautilus is trademark of B&W Group Ltd. Worthing West Sussex E uksales@bwgroup.com Copyright © B&W Group Ltd. E&OE BN11 2BH England Printed in UK.