Publicidad
Idiomas disponibles
Idiomas disponibles
Publicidad
Tabla de contenido

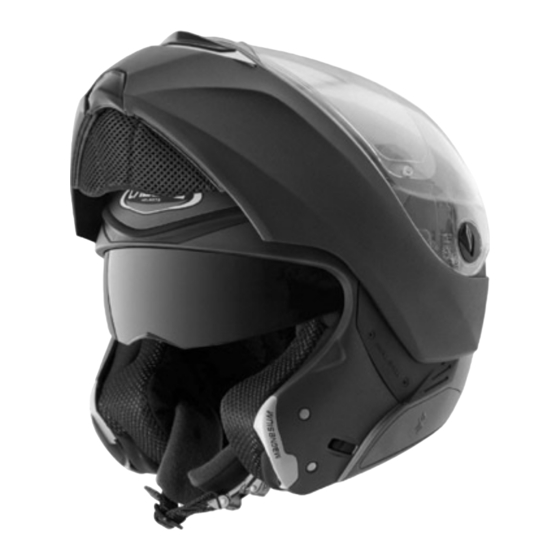
Resumen de contenidos para Caberg MODUS
- Página 2 Italiano ................pag. English................pag. Français................pag. 8-10 Español.................pag, 11-13 Deutschland ..............pag, 14-17 PULL BEFORE CLOSING THE CHIN GUARD.
- Página 3 ISTRUZIONI SMONTAGGIO/MONTAGGIO VISIERA TRASPARENTE 1.1 Aprire la visiera fino a far coincidere la freccia presente sul meccanismo con la tacca della visiera. Spingere il bottone A di sgancio verso la parte posteriore del casco e svincolare la visiera (Fig. 1) 1.2 Ripetere l’operazione sul lato opposto e rimuovere la visiera.
-
Página 4: Estrarre Completamente La Fodera
ISTRUZIONI SMONTAGGIO CUFFIA INTERNA LAVABILE. 4.1 Rimuovere il guanciale sganciando i bottoni di fissaggio posti sul retro, quindi ripetere l’operazione anche sull’altro guanciale. Potete iniziare indifferentemente dal guanciale destro o sinistro. 4.2 Estrarre il guanciale sfilandolo dal cinturino sottogola attraverso l’asola, quindi ripetere l’operazione anche sull’altro guanciale. - Página 5 ISTRUZIONI MONTAGGIO CUFFIA INTERNA LAVABILE 5.1 Posizionare la cuffia all’interno del casco. 5.2 Inserire e agganciare il telaietto di fissaggio frontale C al supporto fissato al polistirolo (Fig. 8). 5.3 Agganciare il telaietto D nello spazio tra polistirolo e calotta partendo dalla parte anteriore (Fig.
- Página 6 1. INSTRUCTION TO REMOVE/ASSEMBLE THE CLEAR VISOR 1.1 Open the visor until the small arrow printed on the mechanism matches with the notch on the clear visor. Press the release button A by driving it towards the back side of the helmet. Release the visor ( as shown in Pic.1).
- Página 7 INSTRUCTION TO REMOVE THE WASHABLE INNER LINING. 4.1 To Remove the inner lining you can start either form the right or left side. 4.2 Starting from the neck, remove the inner lining slightly pulling it towards the inside of the helmet (pic. 7) and sliding the retention system strap through the eyelet on the cheek pad.
- Página 8 INSTRUCTION TO ASSEMBLE THE INNER LINING 5.1 Place the main liner padding inside the helmet. 5.2 Insert the plastic frame C in the front and fasten it to the seating attached to the EPS (Pic. 8). 5.3 Attach the side frame starting from the front (Pic. 9) towards the back (Pic.
- Página 9 INSTRUCTIONS POUR DEMONTAGE/MONTAGE DE L’ECRAN TRANSPARENT 1.1 Soulever l’écran transparent de manière à faire coincider le repère visible sur le mécanisme central de fixation avec celui situé sur l’écran. Pousser le bouton A vers la partie arrière du casque et dégager l’écran (Fig. 1). 1.2 Faire la même opération sur le côté...
- Página 10 4. INSTRUCTIONS POUR LE DEMONTAGE DE LA GARNITURE INTERIEURE LAVABLE 4.1 Enlever le coussin de joue en détachant les buttons en arrière, répéter l’opération aussi sur l’autre coussin de joue. 4.2 Enlever le coussin de joue en le faisant passer par la petite ceinture jugulaire à...
- Página 11 5. INSTRUCTIONS POUR LE MONTAGE DE LA GARNITURE INTERIEURE 5.1 Présenter la garniture à l’intérieur du casque. 5.2 Positionner et fixer la petite armature de fixation C sur le support qui se trouve sur le polystyrène (Fig. 9). 5.3 Placer et accrocher la languette de fixation zone para-nuque entre le polystyrène et la calotte (fig.
-
Página 12: Instrucciones Para Montaje/Desmontaje De La Pantalla Transparente
1. INSTRUCCIONES PARA MONTAJE/DESMONTAJE DE LA PANTALLA TRANSPARENTE 1.1 Abrir la pantalla hasta hacer coincidir la marca existente sobre el mecanismo con la marca de la pantalla. Empujar el botòn A de enganche hacia la parte posterior del casco y desencajar la pantalla (Fig. -
Página 13: Desmontaje
INSTRUCCIONES DESMONTAJE INTERIOR LAVABLE. 4.1 Para desmontar el forro interior, se puede comenzar indiferentemente por el lado derecho o izquierdo. 4.2 Comenzando por el cuello, retire el forro interior tirando .2 Comenzando por el cuello, retire el forro interior tirando ligeramente hacia dentro del casco (Fig. - Página 14 INSTRUCCIONES PARA MONTAJE TEJIDO INTERIOR 5.1 Coloque la almohadilla interior dentro del casco. 5.2 Inserte la parte de plástico C en la parte frontal y engánchela en el alojamiento presente en el revestimiento de poliestireno (Fig. 8). 5.3 Enganche la parte lateral, comenzando por la parte frontal (Fig.
- Página 15 ANLEITUNG ZUM AUSTAUSCH DES KLAREN VISIERS 1.1 Das Visier so weit öffnen, bis der Pfeil an der Visiermechanik auf die Markierung am Visier zeigt. Den Auslösungsknopf A nach hinten schieben und das Visier auf dieser Seite abnehmen (Abb. 1) 1.2 Den Vorgang auf der gegenüberliegenden Seite wiederholen. 1.3 Um das Visier wieder anzubringen, die oben aufgeführten Schritte in umgekehrter Reihenfolge wiederholen.
- Página 16 ANLEITUNG ZUR HERAUSNEHMEN DES WASCHBAREN INNENFUTTERS 4.1 Die Wangenpolster herausnehmen indem Sie die hinteren Druckknöpfe lösen, dasselbe nun auf der Gegenseite wiederholen. Sie können mit der linken oder rechten Seite beginnen. a) Das Wangenpolster herausnehmen und vom Gurtsystem durch das Knopfloch ziehen, dasselbe auf der Gegenseite wiederholen.
- Página 17 • die Entstehung von unangenehmen Gerüchen wird bekämpft. • der Helm bleibt länger hygienisch. • Die Pilzvermehrung wird gehemmt und dadurch die Gefahr von Hautpilzerkrankungen verringert. Nur mit der Hand und einer neutralen Seife bei maximal 30° waschen. Mit kaltem Wasser ausspülen, nicht auswringen und bei Zimmertemperatur trocknen lassen ACHTUNG! Das Innenfutter nie in der Waschmaschine waschen.
- Página 18 WINDABWEISER Der Windabweiser beschränkt den Windeintritt von unten. 6.1 ANLEITUNG ZUR MONTAGE DES WINDABWEISER Den Rahmen des Windabweisers mittig zwischen Schale und Kinnschutz einführen. 6.2 ANLEITUNG ZUR HERAUSNAHME DES WINDABWEISER Durch leichtem Herausziehen des Windabweisers diesen abnehmen (Abb. 14).
- Página 19 Pic. 1 Pic. 2 Pic. 3 Pic. 4 Pic. 5...
- Página 20 Pic. 6 Pic. 7 Pic. 8 Pic. 9 Pic. 10...
- Página 21 Pic. 11 Pic. 12 Pic. 13 Pic. 14...


