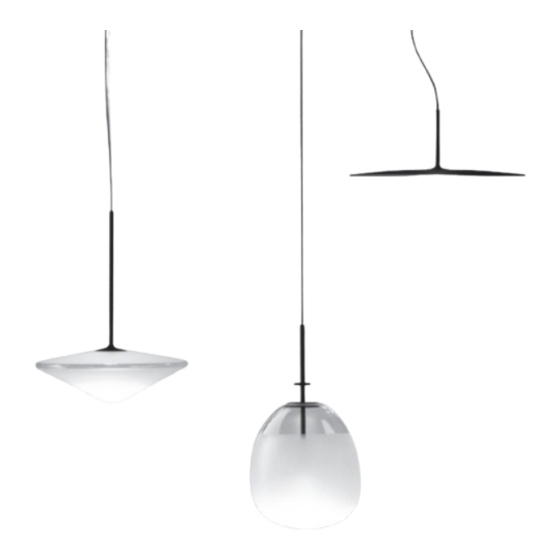
Resumen de contenidos para VIBIA Tempo
- Página 1 Assembly instructions / Instrucciones de montaje / Montageanleitung Istruzioni di montaggio / Instructions de montage Tempo Design by Lievore, Altherr Version E01...
- Página 2 Supplied material / Material suministrado / Geliefertes Material Materiale incluso / Matériel fourni 5776 1. Gloves / Guantes / Handschube / Guanti / Gants 1 un. 2. Components Bag / Bolsa componentes / Tütchen mit Teilen / Sacchetto componenti / 1 un.
- Página 3 Class I. Product with an additional protec- Product protected against solid object as Alternating current. tion cable (grounds). big as or bigger than 12 mm. No protection Corriente alterna. against water. Clase I. Aparato con un cable protector Wechselstrom. adicional (toma de tierra). Producto protegido contra la penetración de cuerpos sólidos de tamaño igual o su- Corrente alternata...
- Página 4 Anleitung für etwaige dell'apparecchio. Salva l'installation du VIBIA. Any change or la luminaria. Guardar zukünftige Fragen auf. queste istruzioni per luminaire. Sauvegardez modification to the estas instrucciones - Die Leuchte nicht future consultazioni.
- Página 5 IMPORTANT: IMPORTANTE: WICHTIG: IMPORTANTE: IMPORTANT: Switch of the mains before Desconectar el suministro Schalten Sie den Strom ab. Spegnere la rete prima di Débrancher l'alimentation installing the lamp. eléctrico antes de realizar bevor Sie die Leuchten- installare la lampada. avant pour effectuer l'ins- la instalación de la lumi- montage realisieren.
- Página 6 -VERY IMPORTANT: Make sure before making the connection that the power supply to your installation is disconnected. -MUY IMPORTANTE: Asegurarse antes de efectuar la conexión que este cortado el suministro electrico de su instalación. -SEHR WICHTIG: Stellen Sie sicher, dass vor Anschluss die elektris- che Spannungsversorgung getrennt wurde.
- Página 7 Diagram / Diagrama / Anschlussschema / Diagramma / Diagramme Diagram / Diagrama / Anschlussschema / Diagramma / Diagramme -1-10V System -Switch Dimming Dimming -Regulación me- -Regulación diante pulsador mediante sistema -Dimmer mit Tas- 1-10V ten-Regulierung -Dimmbar -Regolazione me- 1-10V-System diante pulsante -Dimmer switch -Dimmer switch -Regolazione me-...
- Página 8 78 mm. DETAIL / DETALLE / DETAILSKIZZE DETAIL / DETALLE / DETAILSKIZZE DETTAGLIO / DÉTAIL DETTAGLIO / DÉTAIL 5. Adjust the structure’s 5. Ajustar la altura H de la 5. Passen Sie die Höhe H 5. Regolare l’altezza H 5. Ajustez la hauteur H de height H by pulling on the estructura estirando del der Struktur an, indem Sie...
- Página 9 6. For adjust the length of 6. Para ajustar la longitud 6. Stellen Sie die Länge des 6. Regolare la lunghezza 6. Pour ajuster la longueur the electrical cable that del cable eléctrico que une Kabels, das den Baldachin del cavo elettrico che unis- du câble électrique qui unit joins the ceiling rose with el florón con la estructura...
- Página 10 7. Connect the ends of the 7. Conectar los extremos 7. Verbinden Sie die Enden 7. Collegare le estremità 7. Connectez les extré- cable using the compo- de los tramos de cable der Kabelführung mit dei tratti di cavo utilizzan- mités des câbles à...
- Página 11 8. Fit the decorative cover 8. Montar el embellecedor 8. Montieren Sie die 8. Montare il coperchio 8. Remontez l'enjoliveur (A) (A), with the three pins (F) (A), con las tres torretas (F) mitgelieferte Blende (A), decorativo (A) con i tre en insérant les 3 embouts inserted into their housings.
- Página 12 10. Screw the shade till fully 10. Roscar la pantalla has- 10. Drehen Sie den Schirm 10. Avvitare lo schermo 10. Vissez l'abat-jour en attached without applying ta hacer tope, sin apretar bis zum Anschlag, ohne fino a battuta senza strin- le tenant à...
-
Página 13: Mantenimiento
Verbindung stata acquistata. l’avez acheté. se adquirió. bei dem Sie die Leuchte bezogen haben. Vibia Lighting, S.L.U. Spain & Portugal T. +34 934 796 970 International T. +34 934 796 971 vibialighting@vibialighting.com www.vibia.com...


