
Manuales relacionados para Shark Press & Refresh GS500Q


Resumen de contenidos para Shark Press & Refresh GS500Q
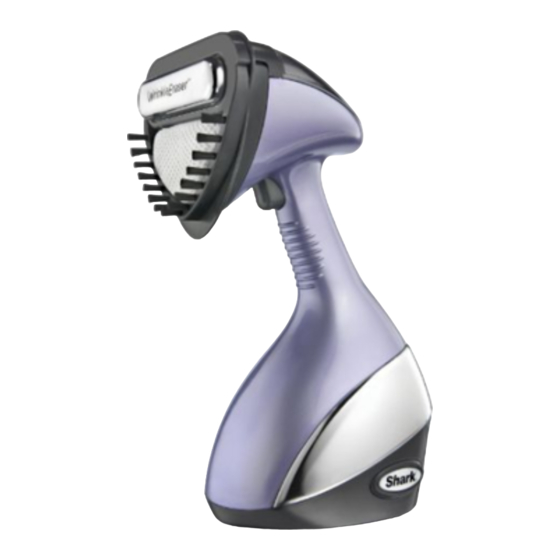
- Página 1 s i s t e m a d e c u i d a d o p a r a p r e n d a s g a r m e n t c a r e s y s t e m User’s Guide GS500Q Manual del usario...
-
Página 2: Important Safety Instructions
IMPORTANT SAFETY INSTRUCTIONS For Household Use Only WHEN USING YOUR SHARK 1. U SE THE SYSTEM ONLY FOR ITS INTENDED ® USE AS DESCRIBED IN THIS MANUAL. PRESS & REFRESH GARMENT CARE ™ 2. O NLY USE WATER. To extend the life of your SYSTEM, BASIC SAFETY PRECAUTIONS Press &... - Página 3 English 13. W hen cleaning the garment steamer, unplug the h. D O NOT pull or carry by power cord, use power cord and clean with a dry or damp cloth. power cord as a handle, close a door on the DO NOT pour water on the unit or use alcohol, power cord, or pull the power cord around benzene or paint thinner on the unit. sharp corners or edges. 14. N EVER attempt to steam clothing while it is i. D O NOT allow power cord to touch hot being worn. surfaces. 15. T o protect against a risk of fire, electric shock, j. A LWAYS disconnect system from electrical or injury: outlet when filling the water tank or emptying and when not in use. a. T o avoid circuit overload, DO NOT operate another appliance on the same socket k. N EVER attempt to fill this unit under a (circuit) as the fabric steamer.
- Página 4 Welcome to the next wave of garment care! The Press & Refresh Garment Care System brings your fabrics back to life with fewer trips to the ™ dry cleaners! For the first time ever professional steam power in a portable unit. The professional steam deeply penetrates fibers, renews and freshens fabric. The exclusive heated Wrinkle Eraser presses for a crisp finish and dries fibers to prevent re-wrinkling. ™ Extend the life of your garments and go from not quite ready-to-wear to ready-to-wear in one easy step. The Look Your Best Guide provides step-by-step tips for all of your garment care needs. Attaching the appropriate into the notch. Next, secure accessory: the pointed end of the frame around the bottom of the unit The unit comes assembled with a and snap into place (Fig. 1). small steam bonnet attached. The The seam of the frame must bonnet must be attached at all line up against the seam of the times when the unit is being used. unit for proper use. Fig. 1 1 A ttach the desired frame 3 T o remove the frame, gently T IP: Wipe away condensation...
- Página 5 English Fig. 2 Helpful Tips on using the the garment for quick steaming Vertical Press Pad and VELCRO ® with better results to complete Clips: the garment care system (Fig. 2). 1 F or the first time ever, the 2 T o make pressing easier, the vertical press pad eliminates the need for an ironing board. It is vertical press pad has two hooks designed to fit on any size door, on either end to hang your and can remain setup for your garment from for larger pressing convenience. The VELCRO clips surface. ® are used to position & stretch USE FOR BENEFITS The bonnet should always be attached...
-
Página 6: Technical Specifications
This manual covers model number: GS500Q TECHNICAL SPECIFICATIONS Voltage: 120V., 60Hz. Power: 1580 W Water Capacity: 200 mL (6.5 fl. oz.) GS500Q_IB_ES_101123.indd 6 10-11-24 10:11 AM... - Página 7 English Contents Thank you Getting Started for purchasing Assembly of the Vertical Press Pad the Shark ® Using your Press & Refresh ™ Press & Refresh ™ Care of your Press & Refresh ™ Garment Care System. Troubleshooting Guide Replacement Parts Warranty and Registration GS500Q_IB_ES_101123.indd 7...
-
Página 8: Getting Started
8 Heat Protection Panels steamer, there may be a little c Bristle Brush Frame (assembled in vertical press water in the water tank. This d U pholstery/Delicate Fabric pad) is because we test all our Frame l 3 VELCRO Clips garment steamers 100% ® e Lint Brush Frame before you buy them, so you m Filling Flask get a quality Shark ® Steam f U pholstery Steam Bonnet VELCRO ® is a registered trademark of product. Velcro Industries B.V. GS500Q_IB_ES_101123.indd 8 10-11-24 10:11 AM... -
Página 9: Assembly Of The Vertical Press Pad
English Assembly of the Vertical Press Pad The straps can be adjusted to fit any door using the buckle to adjust the strap lengths. Fig. 1 Fig. 2 Fig. 3 Assembly & use instructions: Assembling the vertical A ttach the vertical press pad to press pad: any door. With the door open, 1 R emove contents of the Press & loop the straps at the top of the Refresh ™ Garment Care System I nsert the garment hook into vertical press pad around the and lay them out on a flat the opening at the top of the corner of the door and repeat... -
Página 10: Using Your Press & Refresh
Using Your Press & Refresh ™ Practice makes perfect! For best results, tilt the It takes time to master steamer forward slightly the garment steaming and press the wrinkle techniques. eraser directly on the garment. Fig. 3 Fig. 4 Fig. 1 Fig. 2 T he seam on the frame must line up with the seam on the unit for proper use and safety. The frame will snap into place, double check to make sure the seams are aligned. Filling and refilling the water Attaching the accessories: unit above the Wrinkle Eraser ™ reservoir: into the notch. Next, secure IMPORTANT: Use caution the pointed end of the frame... - Página 11 English Hold the steam trigger for continuous steam. The steam will stop emiting once you let go of the button. Wipe away condensation from the frame with extended use. Using the Press & Refresh 3 O nce the selected attachment ™ directly to the pad. vertical press pad: is placed on the garment 7 W hen finished using the steamer, turn the On/Off switch C AUTION: The Wrinkle Eraser garment steamer, turn the...
- Página 12 Using Your Press & Refresh - cont. ™ When to use the different accessories: Small Steam Bonnet – must 6 V ELCRO Upholstery/Delicate Fabric Clips – ® be in place over steam nozzle Frame & Delicate Steam Easy detachable clips can during all usage. Bonnet – provides extra be used to hold lightweight protection for delicate fabrics garments directly on to the pad TIP: Provides evenly distribution when the Wrinkle Eraser is...
-
Página 13: Care Of Your Press & Refresh
English Care of Your Press & Refresh ™ 6 B undle up the power cord and 9 H and wash the bonnet in cold Cleaning & storing secure it with the VELCRO water with a mild detergent and ® 1 T urn the garment steamer off strap that is attached to the let air dry completely before “O”. power cord. Always store your using again. Do not dry in 2 U nplug the appliance from the appliance in a cool, dry area. clothes dryer. electrical outlet. Care & use of the small steam 10 T o re-attach the bonnet, pull 3 L et the appliance cool bonnet frame... -
Página 14: Troubleshooting Guide
Troubleshooting Guide PROBLEM POSSIBLE REASONS SOLUTIONS Verify that the blue light on the unit is lit. If not, The steamer is not turned on. check that the unit is plugged in and the on/off There is no button is raised and in the on “I” position. steam. There is not enough Verify that the water tank is at least half way full water in the unit. or fill to the max fill line. The small steam bonnet must be in place You are not using the steam bonnet. at all times during usage. The bonnet prevents water drops being left on the garment and to removes impurities from your The nozzle leaves The steam bonnet is water. water drops on the too wet. garment. Let the unit cool for 30 minutes, remove the steam bonnet and let it dry out before using again or replace with a new bonnet frame. The frame has condensation. Let the appliance cool and wipe the frame off. GS500Q_IB_ES_101123.indd 14 10-11-24 10:11 AM... - Página 15 English Euro-Pro One (1) Year Limited Warranty EURO-PRO Operating LLC warrants this product to be free from defects in material and workmanship for a period of one (1) year from the date of the original purchase, when utilized for normal household use, subject to the following conditions, exclusions and exceptions. If your appliance fails to operate properly while in use under normal household conditions within the warranty period, return the complete appliance and accessories, freight prepaid to: • U.S.: EURO-PRO Operating LLC For customer service support call 1-800-798-7398 If the appliance is found to be defective in material or workmanship, EURO-PRO Operating LLC will repair or replace it free of charge. Proof of purchase date and a check made payable to EURO-PRO Operating LLC in the amount of $14.95 to cover the cost of return shipping and handling must be included.* Non-durable parts including, without limitation, filters, brushes and electrical parts which normally require replacement are specifically excluded from warranty. The liability of EURO-PRO Operating LLC is limited solely to the cost of the repair or replacement of the unit at our option. This warranty does not cover normal wear of parts and does not apply to any unit that has been tampered with or used for commercial purposes. This limited warranty does not cover damage caused by misuse, abuse, negligent handling or damage due to faulty packaging or mishandling in transit. This warranty does not cover damage or defects caused by or resulting from damages from shipping or repairs, service or alterations to the product or any of its parts, which have been performed by a repair person not authorized by EURO-PRO Operating LLC. This warranty is extended to the original purchaser of the unit and excludes all other legal and/or conventional warranties. The responsibility of EURO-PRO Operating LLC if any, is limited to the specific obligations expressly assumed by it under the terms of the limited warranty. In no event is EURO-PRO Operating LLC liable for incidental or consequential damages of any nature whatsoever. Some states do not permit the exclusion or limitation of...
- Página 16 Notes: GS500Q_IB_ES_101123.indd 16 10-11-24 10:11 AM...
- Página 17 Notes: GS500Q_IB_ES_101123.indd 17 10-11-24 10:11 AM...
-
Página 18: Instrucciones Importantes De Seguridad
Para uso doméstico solamente AL USAR SU SISTEMA DE CUIDADO PARA 1. U SE EL SISTEMA ÚNICAMENTE PARA LO QUE FUE DISEÑADO, COMO SE INDICA EN PRENDAS PRESS & REFRESH DE SHARK ™ ® ESTE MANUAL. SIEMPRE DEBE SEGUIR PRECAUCIONES 2. U SE ÚNICAMENTE AGUA. Para prolongar la... - Página 19 Español h. N O lo arrastre o transporte del cable, no lo 12. E l vaporizador de prendas se puede usar en posición vertical u horizontal. NUNCA sostenga utilice como manija, no lo apriete con una el vaporizador boca abajo cuando esté en reposo puerta, o tire del cable a través de esquinas ni lo incline hacia atrás ya que podría provocar o bordes filosos. una descarga. i. N O deje que el cable de alimentación entre 13. A l limpiar el vaporizador de prendas, desenchufe en contacto con superficies calientes. el cable de alimentación y límpielo con un trapo j. S IEMPRE desenchufe el sistema del seco o húmedo. NO vierta agua o use alcohol, tomacorriente al llenar el tanque de agua o bencina o diluyente de pintura en la unidad. al vaciarlo, y cuando no se use. 14. N UNCA intente vaporizar prendas de vestir k. NUNCA intente llenar la unidad debajo de mientras se estén usando.
-
Página 20: Colocando El Accesorio Adecuado
¡Bienvenido a la nueva onda en el cuidado de prendas! ¡El sistema de cuidado de prendas Press & Refresh ™ le devuelve la vida a sus telas con menos viajes a la tintorería! El poder del vapor profesional en una unidad portátil por primera vez. El vapor profesional penetra profundamente en las fibras, renovando y refrescando la tela. El exclusivo Wrinkle Eraser™ plancha y deja un acabado consistente, y seca las fibras para evitar que se vuelvan a arrugar. Extienda la vida de sus prendas y pase de “no listo para usar” a “listo para usar” en un solo paso. La guía ‘Su mejor apariencia’ le brinda consejos paso a paso para el cuidado de todas sus prendas. Colocando el accesorio encima del Wrinkle Eraser 3 P ara sacar el bastidor, tire con ™ adecuado: y dentro de la ranura. Luego cuidado de la parte con punta asegure la parte con punta y levante el bastidor fuera de la La unidad viene armada con un del bastidor alrededor de la unidad. - Página 21 Español Fig. 1 Fig. 2 Consejos útiles para usar la 2 P ara facilitar el planchado, de puerta y se puede dejar almohadilla de planchado instalado para su comodidad. la almohadilla de planchado vertical y los ganchos de Los ganchos de VELCRO se vertical tiene dos ganchos a cada ® VELCRO usan para posicionar y estirar lado para colgar su prenda de la ® la prenda, para vaporizarla superficie grande de planchado. 1 P or primera vez, la almohadilla rápidamente con mejores de planchado vertical elimina resultados para el sistema la necesidad de una tabla de...
-
Página 22: Este Manual Cubre El Modelos
Este manual cubre el modelos: GS500Q ESPECIFICACIONES TÉCNICAS Voltaje: 120V., 60Hz. Potencia: 1580 W Capacidad de agua: 200 mL (6,5 oz. líquidas) GS500Q_IB_ES_101123.indd 22 10-11-24 10:11 AM... -
Página 23: Tabla De Contenido
Armado de la almohadilla de planchado vertical sistema de Usando su Press & Refresh ™ cuidado para Cuidado de su Press & Refresh ™ prendas Press & Refresh ™ Guía de diagnóstico de problemas de Shark ® Partes de reemplazo Garantía y registro GS500Q_IB_ES_101123.indd 23 10-11-24 10:11 AM... -
Página 24: Procedimientos Iniciales
8 paneles protectores de calor de agua dentro del tanque. c Bastidor para cepillo de cerdas (colocados en la almohadilla de Esto pasa porque nosotros planchado vertical) d B astidor para tapizados/telas probamos el 100% de nuestros l 3 ganchos de VELCRO delicadas ® vaporizadores de prendas antes e Bastidor para cepillo de pelusa m Frasco de llenado de ponerlos a la venta, de ese f G orra de vapor para tapizados modo usted recibe un producto VELCRO es una marca registrada de ® g Gorra de vapor delicada de alta calidad Shark ® Velcro Industries B.V. GS500Q_IB_ES_101123.indd 24 10-11-24 10:11 AM... -
Página 25: Cuidado Para
Español Armado de la almohadilla de planchado vertical Las bandas se pueden ajustar para colocarlas en cualquier puerta usando la hebilla para ajustar el largo de las bandas. Fig. 1 Fig. 2 Fig. 3 Instrucciones de armado y de Armado de la almohadilla de enganche las correas de la parte uso: planchado vertical: de arriba de la almohadilla de planchado vertical en una 1 S aque el contenido del sistema I nserte el gancho para prendas esquina de la puerta y luego de cuidado de prendas Press &... -
Página 26: Usando Su Press & Refresh
Usando su Press & Refresh ™ ¡La práctica hace la Para obtener los mejores perfección! Lleva tiempo resultados, incline levemente dominar las técnicas de el vaporizador hacia delante y vaporización de prendas. presione el borrador de arrugas directamente contra la prenda. Fig. 3 Fig. 1 Fig. 2 Fig. 4 La costura del bastidor debe quedar alineada con la costura de la unidad para que funcione correctamente y de forma segura. El bastidor se trabará en su lugar, verifique que las costuras estén alineadas. ¡CLIC! Llenado y rellenado del tanque Instalación de accesorios: del bastidor en la unidad por de agua: encima del Wrinkle Eraser ™... -
Página 27: Usando El Press & Refresh ™ Y La Almohadilla De Planchado Vertical
Español Mantenga apretado el gatillo para un flujo constante de vapor. El vapor dejará de salir cuando suelte el botón. Seque la condensación del bastidor cuando lo use por mucho tiempo. vertical para obtener una superficie de planchado más grande. 6 A l vaporizar prendas livianas, puede usar los ganchos de VELCRO en lugar de una ® Usando el Press & Refresh 2 C uelgue la prenda en el gancho ™... - Página 28 Usando su Press & Refresh - continuación ™ Cuándo usar los diferentes accesorios: Gorra pequeña de vapor – 6 G anchos de VELCRO Bastidor para tapizados/ – ® debe estar colocada sobre la telas delicadas y gorra de Ganchos que se sacan boquilla de vapor cuando se vapor delicada – brinda fácilmente, se pueden usar use.
-
Página 29: Cuidado De Su Press & Refresh
Español Cuidado de su Press & Refresh ™ Cuidado y almacenamiento 6 E nrolle el cable de alimentación 9 L ave la gorra a mano con agua y engánchelo con la cinta de fría y un detergente suave y deje 1 A pague el vaporizador de VELCRO que viene con el que se seque completamente ® prendas. mismo. Siempre guarde su antes de volver a usarlo. No lo 2 D esenchufe la unidad del artefacto en un lugar fresco y seque en la secadora. tomacorriente. seco. 10 P ara volver a colocar el 3 D eje que el artefacto se enfríe Cuidado y uso del bastidor... -
Página 30: Guía De Diagnóstico De Problemas
Guía de diagnóstico de problemas PROBLEMA CAUSAS POSIBLES SOLUCIONES Verifique que la luz azul de la unidad esté El vaporizador no está encendida. Si no lo está, verifique que la unidad encendido. esté enchufada y que la llave de encendido esté en la posición “I”. No hay vapor. Verifique que el tanque de agua esté lleno hasta No hay suficiente agua en la la mitad por lo menos, o llénelo hasta la línea unidad. de Max. El bastidor para gorra pequeña de vapor debe No está usando la gorra estar colocado todo el tiempo mientras se usa. de vapor. La gorra evita que queden gotas de agua en la prenda y remueve las impurezas del agua. La boquilla deja La gorra de vapor está gotas de agua en Deje que la unidad se enfríe durante 30 minutos, demasiado mojada. la prenda. saque la gorra de vapor y deje que se seque antes de volver a usarla o reemplácela por un bastidor nuevo. -
Página 31: Garantía Limitada De Un (1) Año
Español Garantía limitada de un (1) año EURO-PRO Operating LLC garantiza este producto contra defectos de materiales y mano de obra por un término de un (1) año a partir de la fecha de compra original, siempre que sea utilizado para uso doméstico normal, sujeto a las siguientes condiciones, exclusiones y excepciones. Si su artefacto no funciona correctamente al utilizarlo bajo condiciones domésticas normales dentro del período de garantía, devuelva el artefacto completo y los accesorios, pagando el envío, a: • EE.UU.: EURO-PRO Operating LLC Por servicio al cliente, llame al 1-800 -798-7395 Si el artefacto presenta un defecto de materiales o mano de obra, EURO-PRO Operating LLC lo reparará o remplazará sin cargo. Debe incluir un comprobante de la fecha de compra y un cheque a favor de EURO-PRO Operating LLC por la suma de $14,95 para cubrir los gastos de envío.* Los insumos tales como, sin limitación, filtros, cepillos y partes eléctricas que normalmente necesitan ser reemplazados son explícitamente excluidos de la garantía. La responsabilidad de EURO-PRO Operating LLC se limita únicamente al costo de reparación o reemplazo de la unidad, a nuestro criterio. Esta garantía limitada no cubre el desgaste normal de las partes y no cubre ninguna unidad que haya sido alterada o utilizada con fines comerciales. Esta garantía limitada no cubre daños ocasionados por uso inadecuado, abuso, negligencia o daños causados por embalaje inapropiado o maltrato durante el transporte. Esta garantía limitada no cubre daños o defectos causados o resultantes durante el transporte para su reparación o alteraciones del producto o cualquiera de sus partes, realizadas por una persona no autorizada por EURO-PRO Operating LLC. Esta garantía limitada es válida para el comprador original del producto y excluye cualquier otra garantía legal, implícita y/o convencional. La responsabilidad de EURO-PRO Operating LLC, de existir, se limita a las obligaciones específicas asumidas expresamente bajo los términos de esta garantía limitada. Bajo ninguna circunstancia EURO- PRO Operating LLC será responsable por daños incidentales o indirectos a cualquiera, de ninguna clase. Algunos... - Página 32 Euro-Pro Operating LLC US: Newton, MA 02459 CAN: Ville St-Laurent, QC H4S 1A7 Copyright © 2010 Euro-Pro Operating LLC VELCRO ® is a registered trademark of Velcro Industries B. V. VELCRO ® es una marca registrada de Velcro Industries B. V. Printed in China / Impreso en China Illustrations may differ from actual product. El dibujo puede no ser igual al producto real. GS500Q.ES.101123 GS500Q_IB_ES_101123.indd 32 10-11-24 10:12 AM...