Tabla de contenido

Manuales relacionados para Sauder 423392


Resumen de contenidos para Sauder 423392
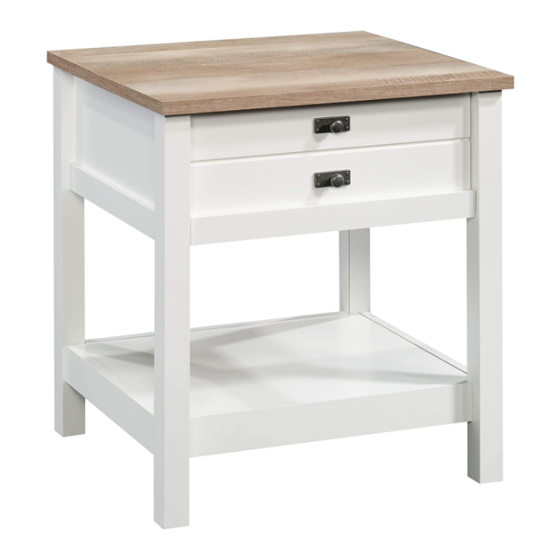
- Página 1 WARNING CHOKING HAZARD - Small Parts Not for children under 3 years. Adult assembly required. NOTE: THIS INSTRUCTION Night Stand BOOKLET CONTAINS IMPORTANT SAFETY INFORMATION. PLEASE READ AND KEEP FOR FUTURE REFERENCE. English pg 1-23 Français pg 24-26 Español pg 27-29...
- Página 2 Table of Contents Assembly Tools Required Part Identifi cation No. 2 Phillips Screwdriver Tip Shown Actual Size Hardware Identifi cation Assembly Steps 5-23 Hammer Not actual size Français 24-26 Español 27-29 Skip the power trip. Safety This time. Warranty Page 2...
-
Página 3: Part Identifi Cation
Part Identifi cation å While not all parts are labeled, some of the parts will have a label or an inked letter on the edge to help distinguish similar parts from each other. Use this part identifi cation to help identify similar parts. RIGHT END (1) DRAWER BACK (1) SHORT SKIRT (2) - Página 4 Hardware Identifi cation å Screws are shown actual size. You may receive extra hardware with your unit. 10A SLIDE CAM - 2 35AA UNIVERSAL CABINET RAIL - 2 35AC DRAWER RIGHT - 1 35AD DRAWER LEFT - 1 HIDDEN CAM - 34 CAM DOWEL - 6 CAM SCREW - 28 WOOD DOWEL - 6...
- Página 5 Step 1 Assemble your unit on a carpeted fl oor or on the empty å carton to avoid scratching your unit or the fl oor. Push six HIDDEN CAMS (1F) into the ENDS (A and B) å and BACK (D). Then, insert the metal end of a CAM DOWEL (2F) into each HIDDEN CAM.
- Página 6 Step 2 Push twenty-eight HIDDEN CAMS (1F) into the å BOTTOM (G), SKIRTS (H and J), and the remaining Just think. The sooner holes of the ENDS (A and B) and BACK (D). you do this, the sooner you do something else. Arrow (28 used) Arrow...
- Página 7 Step 3 NOTE: Position the LEGS (E and F) exactly as shown. å Turn twenty-eight CAM SCREWS (8F) into the exact holes å shown in the LEGS (E and F) and SKIRTS (H and J). NOTE: One set of LEGS (E and F) receives four CAM SCREWS å...
- Página 8 Step 4 Turn four BLACK 9/16" FLAT HEAD SCREWS (32S) into å the ENDS (A and B) until the shoulders of the SCREWS rest on the surfaces of the ENDS. NOTE: Do not overtighten the SCREWS. å Slide the END MOLDINGS (M) onto the ENDS (A and B). å...
- Página 9 Step 5 Insert one WOOD DOWEL (15F) into the RIGHT FRONT/LEFT å REAR LEG (E) with four CAM SCREWS. NOTE: Be sure to use the exact hole shown. å Fasten the RIGHT END (A) to the RIGHT FRONT/LEFT REAR å LEG (E).
- Página 10 Step 6 Insert one WOOD DOWEL (15F) into the LEFT FRONT/RIGHT å REAR LEG (F) with six CAM SCREWS. NOTE: Be sure to use the exact hole shown. å Fasten the LEFT FRONT/RIGHT REAR LEG (F) to the RIGHT å END (A) and SHORT SKIRT (J).
- Página 11 Step 7 Insert one WOOD DOWEL (15F) into the LEFT FRONT/RIGHT å REAR LEG (F) with four CAM SCREWS. NOTE: Be sure to use the exact hole shown. å Fasten the LEFT END (B) to the LEFT FRONT/RIGHT REAR å LEG (F).
- Página 12 Step 8 Insert one WOOD DOWEL (15F) into the RIGHT FRONT/LEFT å REAR LEG (E) with six CAM SCREWS. NOTE: Be sure to use the exact hole shown. å Fasten the RIGHT FRONT/LEFT REAR LEG (E) to the LEFT å END (B) and SHORT SKIRT (J).
- Página 13 Step 9 Fasten the UNIVERSAL CABINET RAILS* (35AA) å to the ENDS (A and B). Use four GOLD 5/16" FLAT HEAD SCREWS (3S) through holes #1 and #3. *patent pending glide system å Glide end GOLD 5/16" FLAT HEAD SCREW (4 used in this step) Glide end Page 13...
- Página 14 Step 10 Fasten the LONG SKIRTS (H) to the long edges of the å BOTTOM (G). Tighten four HIDDEN CAMS. Now might be a good time to refresh NOTE: The LONG SKIRTS are slightly shorter than the å your drink. long edges of the BOTTOM so the edges of the parts will not be even.
- Página 15 Step 11 Insert one WOOD DOWEL (15F) into the LEFT FRONT/RIGHT REAR å LEG (F) that is fastened to the RIGHT END (A). Fasten the BACK (D) to the LEFT FRONT/RIGHT REAR LEG (F). å Tighten two HIDDEN CAMS. NOTE: Be sure the WOOD DOWEL in the LEG inserts into the BACK. å...
- Página 16 Step 12 Fasten the BOTTOM (G) and LONG SKIRTS (H) to å the LEGS (E and F) and SIDE SKIRT (J). Tighten four HIDDEN CAMS. S u r f a c H I D D E N i t h Page 16...
- Página 17 Step 13 Insert one WOOD DOWEL (15F) into the RIGHT FRONT/ å LEFT REAR LEG (E) that is fastened to the LEFT END (B). Fasten the LEGS (E and F) and SHORT SKIRT (J) to the å BACK (D), BOTTOM (G), and LONG SKIRTS (H). Tighten six HIDDEN CAMS.
- Página 18 Step 14 Fasten the ENDS (A and B) and BACK (D) to the TOP (C). å Tighten six HIDDEN CAMS. Caution Start Tighten Risk of damage or Arrow injury. HIDDEN CAMS must be completely Arrow Maximum tightened. HIDDEN 210 degrees CAMS that are not completely tightened may loosen, and parts...
- Página 19 Step 15 Carefully stand your unit upright. å Peel APPLIQUES from the APPLIQUE CARD (35P) and stick å them onto each unused hole in the FRONT LEGS (E and F). (6 used) To cover the unused holes in the LEGS. Page 19...
- Página 20 Step 16 The tabs should insert freely into the slots. Gently tilt the DRAWER SIDES side to side BROWN 1" FLAT HEAD SCREW until the tabs slip into the slots. (2 used in this step) å Fasten the DRAWER FRONT (L) to the DRAWER FRONT MOLDING (K).
- Página 21 Step 17 Insert a SLIDE CAM (10A) into the DRAWER SIDES (D12 and D13). å Fasten the DRAWER RIGHT (35AC) to the RIGHT DRAWER SIDE (D12) å Almost time to and the DRAWER LEFT (35AD) to the LEFT DRAWER SIDE (D13). Use celebrate! With a nap.
- Página 22 Step 18 To insert the drawer into your unit, tip the front of the å WARNING drawer down and drop the glides on the drawer behind Children have died from the glides on the unit. Lift the front of the drawer up and furniture tipover.
- Página 23 Step 19 To make adjustments to the drawer, loosen SCREW #2 in the SLIDES a 1/4 turn, then turn the CAM clockwise or å counter-clockwise. Notice how the drawer raises or lowers as you turn the CAM. The higher the screw in the oblong hole, the higher your drawer front will be.
-
Página 24: Liste De Pièces
LISTE DE PIÈCES LISTE DE PIÈCES REFERENCE DESCRIPTION QUANTITÉ REFERENCE DESCRIPTION QUANTITÉ EXTRÉMITÉ DROITE ..........1 35AA GLISSIÈRE D'ÉLÉMENT UNIVERSELLE..2 EXTRÉMITÉ GAUCHE ..........1 35AC TIROIR DROIT ..............1 DESSUS ................1 35AD TIROIR GAUCHE ............1 ARRIÈRE ................1 10A EXCENTRIQUE DE COULISSE ......2 D12 CÔTÉ DROIT DE TIROIR ........1 EXCENTRIQUE ESCAMOTABLE .... - Página 25 ÉTAPE 1 ÉTAPE 5 (SUITE) Ne pas serrer les EXCENTRIQUES ESCAMOTABLES dans REMARQUE : S’ a ssurer de bien insérer la CHEVILLE EN BOIS du cette étape. PIED dans l’EXTRÉMITÉ DROITE. Assembler l'élément sur un sol à moquette ou sur le carton vide Fixer l’une des PLINTHES COURTES (J) au PIED AVANT DROIT/ pour éviter d'endommager l'élément ou le sol.
- Página 26 ÉTAPE 10 ÉTAPE 16 1 Fixer le DEVANT DE TIROIR (L) à la MOULURE DE DEVANT DE Fixer les LONGUES PLINTHES (H) sur les bords longs du TIROIR (K). Utiliser deux VIS TÊTE PLATE 25 mm MARRON (12S). DESSOUS (G). Serrer quatre EXCENTRIQUES ESCAMOTABLES. REMARQUE : Ne pas trop serrer les VIS dans la MOULURE DE REMARQUE : Les LONGUES PLINTHES sont légèrement plus DEVANT DE TIROIR.
-
Página 27: Lista De Partes
LISTA DE PARTES LISTA DE PARTES ITEM DESCRIPCIÓN CANTIDAD ITEM DESCRIPCIÓN CANTIDAD EXTREMO DERECHO ..........1 35AA RIEL UNIVERSAL DE GABINETE ....2 EXTREMO IZQUIERDO ..........1 35AC CAJÓN DERECHO ............1 PANEL SUPERIOR ............1 35AD CAJÓN IZQUIERDO ...........1 DORSO .................1 10A EXCÉNTRICO DE CORREDERA .......2 D12 LADO DERECHO DE CAJÓN ......1 EXCÉNTRICO ESCONDIDO ...... - Página 28 PASO 1 PASO 5 (CONTINUACIÓN) No apriete los EXCÉNTRICOS ESCONDIDOS en este paso. Fije uno de los FALDONES CORTOS (J) a la PATA DERECHA DELANTERA / PATA IZQUIERDA POSTERIOR (E). Apriete un Ensamble la unidad sobre un piso alfombrado o sobre el cartón EXCÉNTRICO ESCONDIDO.
- Página 29 PASO 10 PASO 16 (CONTINUACIÓN) NOTA: No apriete en exceso los TORNILLOS en la MOLDURA DE Fije los FALDONES LARGOS (H) sobre los bordes largos del CARA DE CAJÓN. FONDO (G). Apriete cuatro EXCÉNTRICOS ESCONDIDOS. 2 Inserte los LADOS DE CAJÓN (D12 y D13) en ángulo dentro del NOTA: Los FALDONES LARGOS son ligeramente más cortos que encaje en cada extremo de la CARA DE CAJÓN (L).
- Página 30 WARNING Please use your furniture correctly and safely. Improper use can cause safety hazards, or damage to your furniture or household items. Carefully read the following chart. Look out for: What can happen: How to avoid the problem: • Overloaded drawers or shelves. •...
-
Página 31: Garantie Limitée De 5 Ans
5-YEAR LIMITED WARRANTY 1. We provides limited warranty coverage to the original purchaser of this product for 4. This Warranty applies only to warranted defects that first arise and are reported to manufacturer within the warranty coverage period. The Warranty cannot be a period of fi...