Publicidad
Publicidad
Tabla de contenido

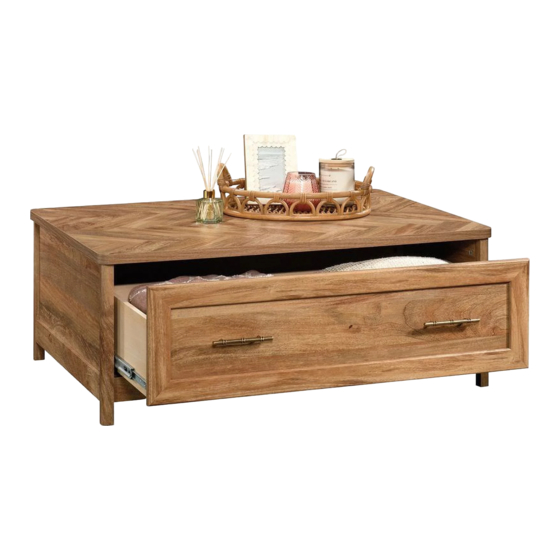
Manuales relacionados para Sauder 423809


Resumen de contenidos para Sauder 423809
- Página 2 Table of Contents Assembly Tools Required Part Identifi cation No. 2 Phillips Screwdriver Tip Shown Actual Size Hardware Identifi cation Assembly Steps 5-22 Hammer Not actual size Français 23-25 Español 26-29 Skip the power trip. Safety This time. Warranty Page 2...
-
Página 3: Part Identifi Cation
Now you know Part Identifi cation our ABCs. å While not all parts are labeled, some of the parts will have a label or an inked letter on the edge to help distinguish similar parts from each other. Use this part identifi cation to help identify similar parts. RIGHT END (1) D139 LEFT DRAWER SIDE (1) RIGHT FRONT/LEFT REAR LEG (2) - Página 4 Hardware Identifi cation å Screws are shown actual size. You may receive extra hardware with your unit. (EXTENSION SET SHOWN SEPARATED) EXTENSION RAIL - 2 EXTENSION SLIDE - 2 35MA 35MC ADJUSTABLE FOOT - 1 TWIST-LOCK ® HIDDEN CAM - 23 CAM DOWEL - 8 CAM SCREW - 15 FASTENER - 6...
- Página 5 Step 1 Assemble your unit on a carpeted fl oor or on the empty å carton to avoid scratching your unit or the fl oor. To begin assembly, push six TWIST-LOCK® å FASTENERS (10F) into the large holes in the BOTTOM (C). Do not tighten the TWIST-LOCK®...
- Página 6 Step 2 Push eight HIDDEN CAMS (1F) into the ENDS (A and B) å and UPRIGHT (F). Then, insert the metal end of a CAM Just think. The sooner DOWEL (2F) into each HIDDEN CAM. you do this, the sooner you do something else.
- Página 7 Step 3 Push fi fteen HIDDEN CAMS (1F) into the ENDS (A and B), å BOTTOM (C), and DRAWER BRACE (M63). Arrow (15 used) Arrow Arrow Hole The arrow in the HIDDEN CAM must point toward the hole in the edge of the board. Page 7...
- Página 8 Step 4 Carefully fl ip the ENDS (A and B) over. å Turn six BLACK 9/16" FLAT HEAD SCREWS (32S) into å the ENDS (A and B) until the shoulders of the SCREWS rest on the surfaces of the ENDS. NOTE: Do not overtighten the SCREWS.
- Página 9 Step 5 Flip the ENDS (A and B) back over. å Turn fi fteen CAM SCREWS (8F) into the exact holes å shown in the ENDS (A and B), LEGS (G and H), and DRAWER FRONT (K). (15 used) Page 9...
- Página 10 Step 6 Insert two WOOD DOWELS (15F) into one of the LEGS (G). å Fasten the RIGHT END (A) to this LEG (H). Tighten two å HIDDEN CAMS. NOTE: Be sure the WOOD DOWELS in the LEG insert into å the RIGHT END.
- Página 11 Step 7 Insert two WOOD DOWELS (15F) into the remaining LEG (H). å Fasten the LEFT END (B) to this LEG (H). Tighten two å HIDDEN CAMS. NOTE: Be sure the WOOD DOWELS in the LEG insert into å the LEFT END. Insert two WOOD DOWELS (15F) into the LEFT END (B).
- Página 12 Step 8 Separate the EXTENSION SLIDES (35MC) from the EXTENSION RAILS (35MA) as å shown in the upper diagram below. Be prepared, the parts are greasy. Fasten the EXTENSION RAILS (35MA) to the ENDS (A and B). Use four GOLD 5/16" å...
- Página 13 Step 9 Fasten the LEFT END (B) to the TOP (J). Tighten three å HIDDEN CAMS. S u r Meet Part (J). This component has f a c H I D been engineered to be lighter, stronger, D E N i t h faster…...
- Página 14 Step 10 Fasten the UPRIGHT (F) to the LEFT END (B). Tighten one å HIDDEN CAM. Maximum Arrow 210 degrees Minimum 190 degrees Edge with holes D E N H I D i t h f a c S u r Page 14...
- Página 15 Step 11 Fasten the BOTTOM (C) to the LEFT END (B). Tighten å three HIDDEN CAMS. Don't worry. It isn't Rome. This can be built Fasten the BOTTOM (C) to the UPRIGHT (F). Use three å in a day. BLACK 1-15/16" FLAT HEAD SCREWS (113S). NOTE: You should start each SCREW a few turns before å...
- Página 16 Step 12 Fasten the SKIRTS (D) to the BOTTOM (C). Tighten six å How to use the TWIST-LOCK® FASTENER TWIST-LOCK® FASTENERS. 1. Insert the dowel end of the FASTENER into the hole of the adjoining part. NOTE: The dowel end of the FASTENER must remain fully inserted in the hole of the adjoining part while locking the FASTENER.
- Página 17 Step 13 Fasten the RIGHT END (A) to the BOTTOM (C), UPRIGHT (F), å and TOP (J). Tighten seven HIDDEN CAMS. Page 17...
- Página 18 Step 14 Fasten the ADJUSTABLE FOOT (34E) to the BOTTOM (C). å Use four BLACK 9/16" LARGE HEAD SCREWS (1S). NOTE: Adjustments to the ADJUSTABLE FOOT will be made å once your unit is standing upright. BLACK 9/16" LARGE HEAD SCREW (4 used in this step) Page 18...
- Página 19 Step 15 Carefully stand your unit upright in its fi nal location. å With your No. 2 Phillips Screwdriver, turn the ADJUSTABLE å FOOT (34E) downward until it touches the fl oor. IMPORTANT: The ADJUSTABLE FOOT should not extend å beyond the bottom edges of the LEGS (G and H).
- Página 20 Step 16 VIEW THE T-LOCK BOX VIDEO The tabs should insert freely With the palm of your hand, into the slots. Gently tilt the tap the DRAWER BOTTOM DRAWER SIDES side to side down into the groove. until the tabs slip into the slots. U n fi...
- Página 21 Step 17 Fasten the EXTENSION SLIDES (35MC) to the DRAWER å SIDES (D133 and D139). Use four GOLD 5/16" FLAT Almost time to HEAD SCREWS (3S) through holes #1 and #3. celebrate! With a nap. Fasten two PULLS (179K) to the DRAWER FRONT (K). å...
- Página 22 Step 18 To insert the drawer into your unit, line up the EXTENSION SLIDES on the drawer with the EXTENSION RAILS on the unit å and push the drawer into the unit until the drawer is fully inserted. The drawer will push in hard until it is all the way in, then it will slide in and out easier.
-
Página 23: Liste De Pièces
Table de salon Utilisez les instructions d’ a ssemblage en français avec les schémas étape par étape du manuel d’instruction en anglais. Chaque étape en français correspond à la même étape en anglais. La pièce devant être attachée à l’élément est représentée en gris sur les schémas de chaque étape pour plus de précision. - Página 24 ÉTAPE 1 ÉTAPE 6 Ne pas serrer les FIXATIONS TWIST-LOCK® à cette étape. Insérer deux CHEVILLES EN BOIS (15F) dans l'un des PIEDS (G). Assembler l'élément sur un sol à moquette ou sur le carton vide Fixer l'EXTRÉMITÉ DROITE (A) à ce PIED (H). Serrer deux pour éviter d'endommager l'élément ou le sol.
- Página 25 ÉTAPE 9 ÉTAPE 15 Fixer l’EXTRÉMITÉ GAUCHE (B) au DESSUS (J). Serrer trois Relever, avec précaution, l'élément dans sa position verticale et EXCENTRIQUES ESCAMOTABLES. placer l'élément dans son emplacement fi nal. Attention: Risque des dégâts ou blessures. Les Excentriques À l’ a ide d’un tournevis à tête cruciforme phillips nº 2, tourner le Escamotables doivent être serrés à...
-
Página 26: Lista De Partes
Mesa de sala Use estas instrucciones de ensamblaje en español junto con las fi guras paso-a-paso provistas en el folleto inglés. Cada paso en español corresponde al mismo paso en inglés. Se destacan las fi guras de cada paso con una tonalidad oscura para mostrar precisamente cual parte se debe montar a la unidad. - Página 27 PASO 1 PASO 5 No apriete los SUJETADORES TWIST-LOCK® en este paso. Cuidadosamente vuelva los EXTREMOS (A y B) al revés. Ensamble la unidad sobre un piso alfombrado o sobre el cartón Atornille quince BIELAS DE EXCÉNTRICO (8F) dentro de los vacío para evitar rayar la unidad o el piso.
- Página 28 PASO 8 PASO 11 Separe las CORREDERAS DE EXTENSIÓN (35MC) de los RIELES Fije el FONDO (C) al EXTREMO IZQUIERDO (B). Apriete tres DE EXTENSIÓN (35MA) como se muestra en el diagrama EXCÉNTRICOS ESCONDIDOS. superior más abajo. Prepárese, las piezas son grasientas. Fije el FONDO (C) al PARAL (F).
- Página 29 PASO 14 PASO 17 Fije la PATA AJUSTABLE (34E) al FONDO (C). Utilice cuatro Fije las CORREDERAS DE EXTENSIÓN (35MC) a los TORNILLOS NEGROS DE CABEZA GRANDE de 14 mm (1S). LADOS DE CAJÓN (D133 y D139). Utilice cuatro TORNILLOS DORADOS DE CABEZA PERDIDA de 8 mm (3S) a través de los NOTA: Los ajustes a las PATAS AJUSTABLES se realizarán una agujeros No.
- Página 30 WARNING Please use your furniture correctly and safely. Improper use can cause safety hazards, or damage to your furniture or household items. Carefully read the following chart. Look out for: What can happen: How to avoid the problem: • Overloaded drawers or shelves. •...
-
Página 31: Garantie Limitée De 5 Ans
5-YEAR LIMITED WARRANTY 1. We provides limited warranty coverage to the original purchaser of this product for a 4. This Warranty applies only to warranted defects that first arise and are period of five years from the date of purchase against defects in materials or reported within the warranty coverage period.