Publicidad
sauder.com
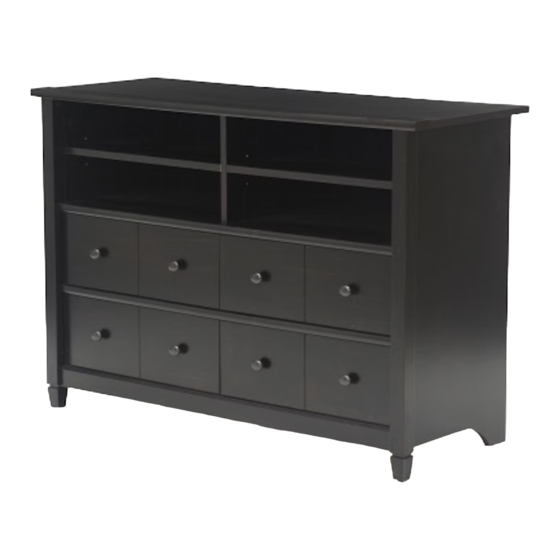
Highboy TV Stand
Edge Water Collection | Model 409242
Need help? Visit Sauder.com to view video assembly tips or chat with a live rep.
Prefer the phone? Call 1-800-523-3987.
Share your journey!
Your holder for all
things awesome.
NOTE: THIS INSTRUCTION
BOOKLET CONTAINS IMPORTANT
SAFETY INFORMATION.
PLEASE READ AND KEEP FOR
FUTURE REFERENCE.
English pg 1-22
Français pg 23-25
Español pg 26-28
Lot # 374229
06/02/15
Purchased: __________________
Be sure to give us a ring before
making any returns. 1-800-523-3987
Publicidad
Tabla de contenido

Manuales relacionados para Sauder Edge Water 409242


Resumen de contenidos para Sauder Edge Water 409242
- Página 1 Edge Water Collection | Model 409242 NOTE: THIS INSTRUCTION BOOKLET CONTAINS IMPORTANT SAFETY INFORMATION. Need help? Visit Sauder.com to view video assembly tips or chat with a live rep. PLEASE READ AND KEEP FOR FUTURE REFERENCE. Prefer the phone? Call 1-800-523-3987.
- Página 2 • Check the size and weight of your TV. Compare it to the diagram below – before you begin assembly! • This Sauder unit is designed for use with televisions weighing less than 70 pounds. Never use with a TV that weighs more.
-
Página 3: Part Identifi Cation
RIGHT DRAWER SIDE (4) FRONT BRACE (1) SHELF MOLDING (2) LEFT DRAWER SIDE (4) BOTTOM BRACE (1) FOOT (2) DRAWER BACK (4) EXTENSION BLOCK (1) STOP MOLDING (1) D968 DRAWER BOTTOM (4) ADJUSTABLE SHELF (2) D968 D968 www.sauder.com/services 409242 Page 3... - Página 4 BLACK 7/8" MACHINE SCREW - 8 BLACK 1-7/8" PAN HEAD SCREW - 2 BLACK 9/16" LARGE HEAD SCREW - 14 PP GOLD 5/16" FLAT HEAD SCREW - 32 30S BLACK 1-9/16" FLAT HEAD SCREW - 16 NAIL - 47 Page 4 409242 www.sauder.com/services...
- Página 5 Look for this icon. It means a Step 1 video assembly tip is available at www.sauder.com/services/tips Assemble your unit on a carpeted fl oor or on the empty carton to avoid å scratching your unit or the fl oor. Push forty-one HIDDEN CAMS (Z2) into the ENDS (A and B), å...
- Página 6 Fasten the FEET (V) to the LEGS (M3). Use two BLACK å 1-7/8" PAN HEAD SCREWS (MM). These surfaces should be even. These surfaces should be even. BLACK 1-7/8" PAN HEAD SCREW (2 used in this step) Page 6 409242 www.sauder.com/services...
- Página 7 Push the black lever in and pull the SLIDE from the RAIL. Hole Open end Finished edge Open end Surface without HIDDEN CAMS Open end Surface with Open end HIDDEN CAMS Finished edge GOLD 5/16" FLAT HEAD SCREW (16 used in this step) Open end www.sauder.com/services 409242 Page 7...
- Página 8 Tighten Risk of damage or Arrow injury. HIDDEN CAMS must be completely Arrow Maximum tightened. HIDDEN 210 degrees CAMS that are not completely tightened may loosen, and parts may separate. To Minimum completely tighten: 190 degrees Page 8 409242 www.sauder.com/services...
- Página 9 D E N H I D S u r f a c f a c i t h S u r H I D D E N w i t h D E N H I D www.sauder.com/services 409242 Page 9...
- Página 10 å two BLACK 1-7/8" FLAT HEAD SCREWS (LL). Minimum 190 degrees S u r f a c i t h H I D D E N BLACK 1-7/8" FLAT HEAD SCREW (2 used in this step) Page 10 409242 www.sauder.com/services...
- Página 11 Fasten a SHORT UPRIGHT (D) to the UPPER SHELF (F). å Tighten two HIDDEN CAMS. Maximum Arrow 210 degrees Minimum 190 degrees Finished edge f a c S u r w i t h D E N H I D www.sauder.com/services 409242 Page 11...
- Página 12 H I D D E N S u r f a c i t h H I D D E N BLACK 1-7/8" FLAT HEAD SCREW (2 used in this step) (4 used) Page 12 409242 www.sauder.com/services...
- Página 13 Don't worry. It isn't Rome. This can be built in a day. Finished edge f a c S u r w i t h D E N H I D Maximum Arrow 210 degrees Minimum 190 degrees www.sauder.com/services 409242 Page 13...
- Página 14 H I D D E N S u r f a c i t h H I D D E N BLACK 1-7/8" FLAT HEAD SCREW (2 used in this step) (4 used) Page 14 409242 www.sauder.com/services...
- Página 15 Fasten the SKIRT (N) to the BOTTOM BRACE (J). Use fi ve BLACK å 9/16" LARGE HEAD SCREWS (OO). BLACK 9/16" LARGE HEAD SCREW (14 used for the BRACKETS) Angled edge i t h o f a c S u r D E N H I D www.sauder.com/services 409242 Page 15...
- Página 16 Push the PLASTIC FOOT (Y) into the hole in the EXTENSION BLOCK (K). å (47 used for the BACK) These holes must line up over the SHELF and UPRIGHTS. Cut-out (used for lifting) BLACK 2-3/4" FLAT HEAD SCREW (2 used for the EXTENSION BLOCK) Page 16 409242 www.sauder.com/services...
- Página 17 DRAWER BACK groove. D968 Fasten the DRAWER BACK (D72) to the DRAWER SIDES (D12 å and D13). Use four BLACK 1-9/16" FLAT HEAD SCREWS (30S). Repeat this step for the remaining drawers. å www.sauder.com/services 409242 Page 17...
- Página 18 Repeat this step for the other drawers. å Screw head - turn CAM to line up holes in Open end the SLIDES with holes in DRAWER SIDES (8 used) Open end GOLD 5/16" FLAT HEAD SCREW (16 used in this step) Page 18 409242 www.sauder.com/services...
- Página 19 Use two BLACK 7/8" MACHINE SCREWS (NN). If you're doing this to help a friend, don't Repeat this step for the other drawers. å leave without a bite. BLACK 7/8" MACHINE SCREW (8 used in this step) www.sauder.com/services 409242 Page 19...
- Página 20 The drawer will push in hard until it is all the way in, then it will slide in and out easier. Click the inner cartridge into place against the black tab. Front Extension Rail Inner cartridge Black tab (8 used) Page 20 409242 www.sauder.com/services...
- Página 21 - The base of the TV must be able to sit completely on this shelf. 25 lbs. 70 lbs. 40 lbs. 15 lbs. 40 lbs. 15 lbs. 15 lbs. 15 lbs. (8 used) To cover HIDDEN CAMS www.sauder.com/services 409242 Page 21...
- Página 22 #3. The higher the screw in the oblong hole, the higher your drawer front will be. The lower the screw, the lower the drawer front. Page 22 409242 www.sauder.com/services...
-
Página 23: Liste De Pièces
EXTRÉMITÉ DROITE ..........1 GLISSIÈRE D’EXTENSION ........8 pour future référence. EXTRÉMITÉ GAUCHE ..........1 COULISSE D’EXTENSION ........8 Pour contacter Sauder en ce qui concerne cet MONTANT................1 PIED EN PLASTIQUE ..........1 élément, faire référence COURT MONTANT ............2 EXCENTRIQUE ESCAMOTABLE ....41 au numéro de lot et... - Página 24 REMARQUE : S’ a ssurer que les chants des CONSOLES À ÉQUERRE sont à fl eur du chant de lENTRETOISE. Fixer la PLINTHE (N) à l’ENTRETOISE INFÉRIEURE (J). Utiliser cinq VIS NOIRES TÊTE LARGE 14 mm (OO). Page 24 409242 www.sauder.com/services...
- Página 25 REMARQUE : Prière de lire attentivement les importantes informations concernant la sécurité qui fi gurent sur les pages arrière du manuel d’instructions. Ceci complète l’ a ssemblage. Pour nettoyer, utiliser l’encaustique pour meubles préférée ou un chiff on humide. Essuyer. www.sauder.com/services 409242 Page 25...
-
Página 26: Mueble De Televisión Alto
RIEL DE EXTENSIÓN ..........8 et conserver le livret CORREDERA DE EXTENSIÓN ......8 EXTREMO IZQUIERDO ..........1 pour future référence. PATA EN PLÁSTICO ...........1 Pour contacter Sauder PARAL ...................1 en ce qui concerne cet EXCÉNTRICO ESCONDIDO ......41 PARAL CORTO..............2 élément, faire référence AA2 PASADOR DE EXCÉNTRICO ......30... - Página 27 Apriete cuatro EXCÉNTRICOS ESCONDIDOS. PASO 6 Fije el ESTANTE SUPERIOR (F) al EXTREMO IZQUIERDO (B). Apriete dos EXCÉNTRICOS ESCONDIDOS. Fije el ESTANTE SUPERIOR (F) al PARAL (C). Utilice dos TORNILLOS NEGROS DE CABEZA PERDIDA de 48 mm (LL). www.sauder.com/services 409242 Page 27...
- Página 28 Seque con un paño. PASO 15 Fije dos TIRADORES (FF) a la CARA IZQUIERDA DE CAJÓN (O2). Utilice dos TORNILLOS NEGROS PARA METAL de 22 mm (NN). Repita este paso para los otros cajones. Page 28 409242 www.sauder.com/services...
- Página 29 TOUJOURS décharger les tablettes et les tiroirs, en commençant par les surface supérieures, avant de déplacer le meuble. NE JAMAIS pousser ou tirer un meuble sur de la moquette. Demander à une autre personne de le soulever correctement pour le déplacer et/ou le repositionner. www.sauder.com/services 409242 Page 29...
- Página 30 SIEMPRE descargue los estantes y cajones, empezando con las superfi cies superiores, antes de moverlo. NUNCA empuje ni tire de los muebles sobre una alfombra. Obtenga que un amigo le ayude a levantarlo correctamente para moverlo y/o reposicionarlo. Page 30 409242 www.sauder.com/services...
-
Página 31: Garantie Limitée De 5 Ans
à compter de la date d'achat la première fois et qui sont signalés à Sauder dans les limites de couverture de la contre tout défaut de matériaux ou de fabrication des composantes de mobilier Sauder. - Página 32 Dear Valued Customer: So, how did it go? Thanks so much for choosing Sauder® furniture. I hope the Set a world record for speed? purchase and assembly process was a positive experience Feeling good about yourself? and you feel good about the furniture you just built. If you Nice.